Category: Decor Ideas

  • 10 Afrohemian Home Decor Ideas (Bold, Warm & Soulful) ✨

    10 Afrohemian Home Decor Ideas (Bold, Warm & Soulful) ✨

    Afrohemian decor blends the warmth and richness of African cultural aesthetics with the free-spirited, eclectic vibe of bohemian design. This unique fusion creates a space that feels both grounded and adventurous, filled with vibrant colors, natural textures, and meaningful artifacts. Whether you’re looking to revamp your entire home or just add a few statement pieces, Afrohemian decor offers endless possibilities for creating a cozy, stylish, and spiritually uplifting environment.

    In this article, we’ll explore 10 Afrohemian home decor ideas that will help you transform your living space into a sanctuary of cultural expression and artistic flair. From bold textiles to handcrafted furniture, these ideas will inspire you to embrace the beauty of Afrocentric design while maintaining the relaxed, layered essence of boho style.

    1. Vibrant African Print Throw Pillows
    1
    One of the easiest ways to introduce Afrohemian decor into your home is through vibrant African print throw pillows. These pillows, often featuring bold geometric patterns, tribal motifs, or Ankara fabrics, instantly add a pop of color and cultural depth to sofas, beds, or floor seating areas. Choose a mix of patterns in complementary hues—such as deep reds, golden yellows, earthy browns, and emerald greens—to create a dynamic yet harmonious look.

    For a truly bohemian touch, layer these pillows in different sizes and textures. Pair them with neutral-toned cushions to balance the visual intensity. You can also opt for handmade pillows from African artisans, which not only support fair trade but also bring an authentic, story-rich element to your space. This simple addition can tie together an entire room, making it feel both inviting and artistically curated.

    2. Woven raffia and jute area rugs
    2
    A woven raffia or jute area rug is a staple in Afrohemian decor, offering a natural, earthy foundation for your space. These rugs bring texture and warmth to any room while maintaining the organic, handcrafted aesthetic that defines the style. They work particularly well in living rooms, bedrooms, or even as a statement piece in a hallway.

    Raffia and jute rugs are not only visually appealing but also durable and sustainable, aligning with the eco-conscious values often associated with bohemian living. To enhance the Afrohemian vibe, layer your woven rug with a smaller, patterned rug—such as a Moroccan or West African design—to create depth and visual interest. This combination adds richness to your flooring while keeping the space grounded and cozy.

    3. Hand-Carved Wooden Furniture
    3
    Hand-carved wooden furniture is a hallmark of Afrohemian interiors, bringing both functionality and artistry into your home. Think of intricately designed coffee tables, stools, or bookshelves made from reclaimed or sustainably sourced wood. These pieces often feature traditional African motifs, such as Adinkra symbols or tribal carvings, which add a layer of cultural significance to your decor.

    Incorporating hand-carved furniture into your space creates a sense of authenticity and craftsmanship. For a balanced look, pair these statement pieces with simpler, bohemian-inspired items like macramé wall hangings or woven baskets. This contrast allows the furniture to stand out while maintaining the overall relaxed and eclectic atmosphere of Afrohemian design.

    4. Beaded and Macramé Wall Hangings
    4
    Wall decor plays a crucial role in Afrohemian style, and beaded or macramé wall hangings are perfect for adding texture and visual intrigue. Beaded wall art, often inspired by African beadwork traditions, can feature intricate patterns and vibrant colors that tell a story or represent cultural heritage. Macramé, on the other hand, brings a boho-chic softness with its knotted, fibrous designs.

    Hang these pieces above a sofa, bed, or fireplace to create a focal point that draws the eye. For a layered effect, combine a beaded wall hanging with a macramé piece or a woven tapestry. This mix of materials and techniques embodies the fusion of African and bohemian aesthetics, making your walls a canvas for creative expression.

    5. Earthy Terracotta and Clay Pottery
    5
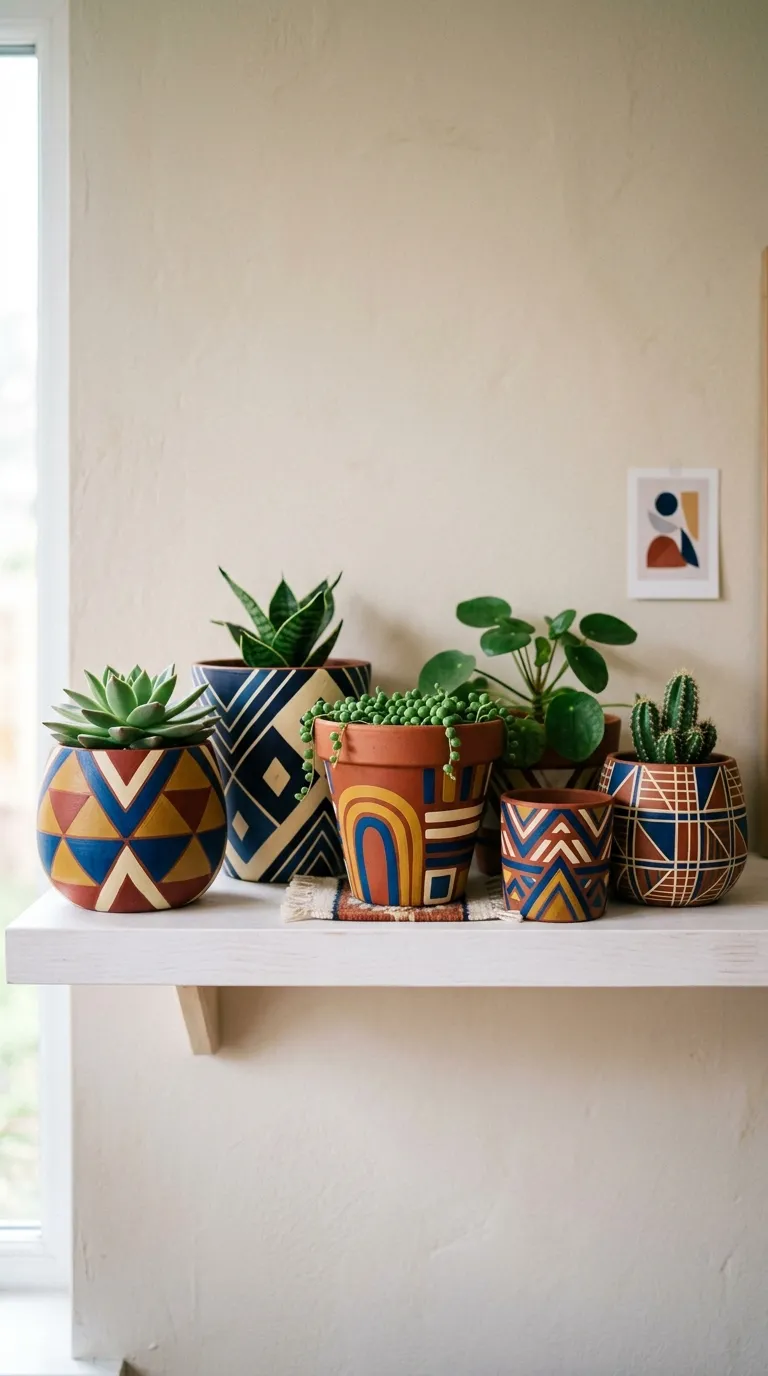
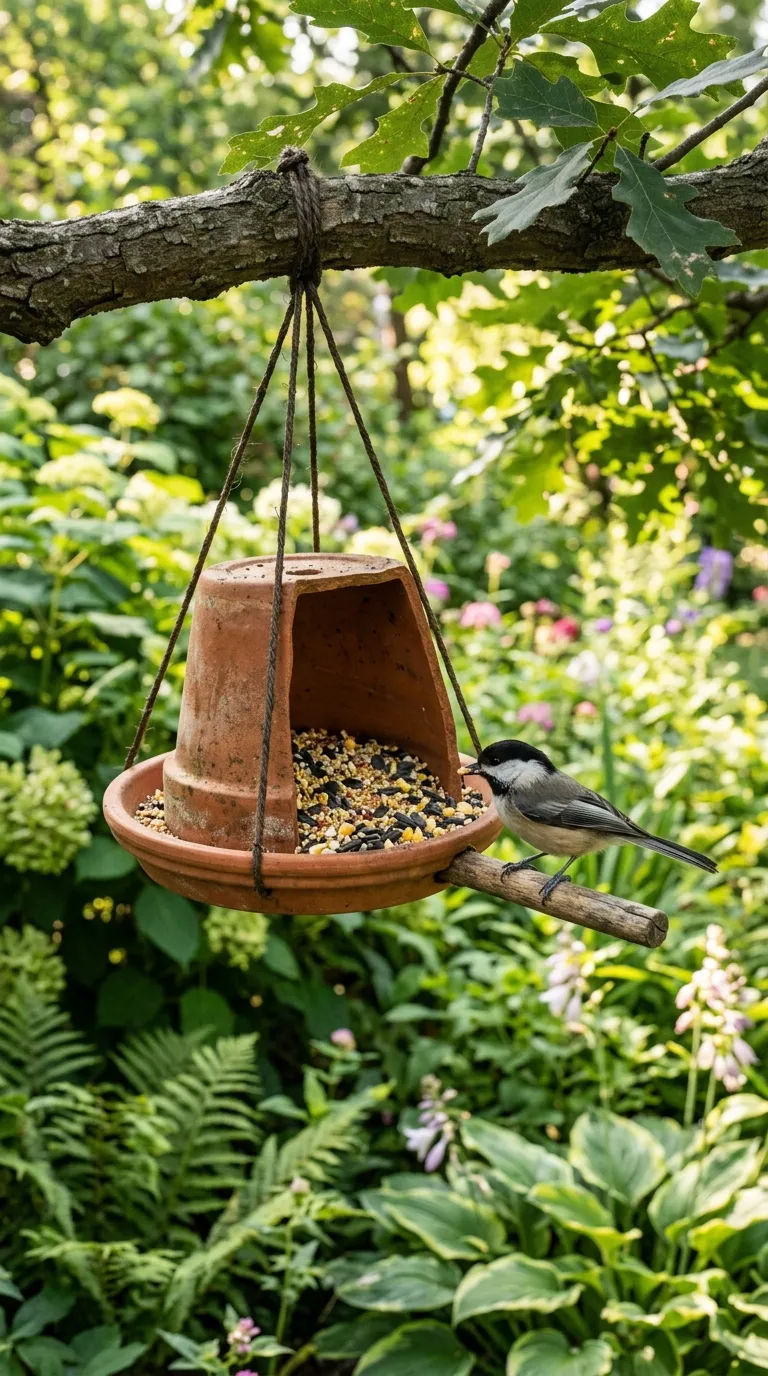
    Terracotta and clay pottery are essential elements in Afrohemian decor, offering a raw, organic touch that connects your space to the earth. These pieces can range from large floor vases to small decorative bowls, all showcasing the natural beauty of handcrafted ceramics. Their warm, earthy tones complement the bold colors and patterns found in Afrohemian interiors.

    Display your pottery on shelves, mantels, or as centerpieces on coffee tables. For an added bohemian flair, mix in other natural elements like dried grasses, feathers, or small succulents. This combination not only enhances the aesthetic but also brings a sense of tranquility and connection to nature, which is central to Afrohemian design.

    6. Bold, Patterned Curtains

    6
    Bold, patterned curtains are a fantastic way to infuse Afrohemian energy into your home. Opt for fabrics like Ankara, Kente, or Bogolan (mud cloth) to introduce rich textures and vibrant designs. These curtains can serve as a backdrop for neutral furniture or act as a bold statement in an otherwise minimalist room.

    To achieve a balanced look, pair patterned curtains with simpler, solid-colored drapes or sheers. This layering technique softens the intensity of the patterns while still allowing them to shine. Additionally, consider hanging your curtains from ceiling to floor to create the illusion of height and grandeur, a common trick in bohemian interiors to make spaces feel larger and more open.

    7. Natural Fiber Lighting Fixtures
    7
    Lighting is a key component in setting the mood for any space, and in Afrohemian decor, natural fiber lighting fixtures add both function and style. Think of pendant lights made from woven rattan, jute, or bamboo, which cast a warm, diffused glow that enhances the cozy atmosphere of your home.

    These fixtures work well in living rooms, bedrooms, or even as a statement piece in a dining area. For a layered lighting effect, combine a woven pendant light with string lights or lanterns made from metal or wood. This mix of materials and light sources creates a warm, inviting ambiance that is quintessentially Afrohemian.

    8. African Mud Cloth Upholstery
    8
    African mud cloth, or Bogolan, is a traditional Malian fabric known for its earthy tones and intricate, hand-painted patterns. Incorporating mud cloth into your upholstery—whether on chairs, ottomans, or headboards—is a bold way to embrace Afrohemian decor. The fabric’s natural, organic feel pairs beautifully with the layered, textured look of bohemian style.

    If you’re not ready to commit to large upholstered pieces, start with smaller items like throw blankets or cushion covers. The deep browns, blacks, and whites of mud cloth provide a neutral yet striking base that can be accessorized with brighter colors and patterns. This approach allows you to experiment with the look without overwhelming your space.

    9. Eclectic Gallery Wall with African Art
    9
    An eclectic gallery wall is a perfect way to showcase your love for Afrohemian decor. Mix and match African masks, paintings, photographs, and other art pieces to create a visually dynamic display. The key to a successful gallery wall is balance—combine different sizes, shapes, and textures while maintaining a cohesive color palette or theme.

    Include a variety of frames, from rustic wood to sleek black, to add depth and interest. You can also incorporate other bohemian elements like dreamcatchers, small shelves with trinkets, or woven tapestries. This layered approach not only highlights your African art but also creates a personalized, story-filled wall that reflects your unique style.

    10. Indoor Plants with Woven Baskets
    10
    Bringing nature indoors is a cornerstone of both African and bohemian design, and indoor plants paired with woven baskets are a simple yet impactful way to achieve this. Choose lush, green plants like snake plants, fiddle leaf figs, or monstera to add life and freshness to your space. Place them in handwoven baskets made from natural fibers to enhance the organic, earthy feel.

    In addition to their aesthetic appeal, indoor plants improve air quality and create a calming atmosphere. Group several plants together in a corner or place them strategically around the room to create a sense of balance and harmony. This touch of greenery, combined with woven textures, completes the Afrohemian look, making your home feel like a serene, nature-inspired retreat.

    Conclusion

    Afrohemian home decor is all about celebrating the richness of African culture while embracing the free-spirited, layered aesthetic of bohemian design. By incorporating elements like vibrant textiles, handcrafted furniture, natural fibers, and earthy tones, you can create a space that feels both grounded and adventurous. Whether you start small with throw pillows and wall hangings or go all out with statement furniture and bold patterns, the key is to let your personality shine through.

    These 10 Afrohemian home decor ideas offer a starting point for transforming your living space into a warm, inviting, and culturally rich sanctuary. Experiment with different combinations, layer textures and patterns, and most importantly, have fun with the process. Your home should tell your story, and Afrohemian decor provides the perfect canvas for that expression.
  • 10 DIY Egg Carton Craft Ideas for Toddlers

    10 DIY Egg Carton Craft Ideas for Toddlers

    Looking for fun, budget-friendly, and eco-conscious craft activities to keep your toddler engaged? Egg cartons are a versatile and often overlooked material that can be transformed into a variety of creative projects. These DIY egg carton crafts for toddlers not only encourage imaginative play but also help develop fine motor skills, hand-eye coordination, and cognitive abilities. Whether you’re a parent, teacher, or caregiver, these simple egg carton crafts are perfect for rainy days, playdates, or educational activities at home or in the classroom.

    From adorable animals to interactive toys, the possibilities are endless. Best of all, these projects require minimal supplies—most of which you likely already have at home. In this guide, we’ll explore 10 easy egg carton crafts for kids that are safe, engaging, and tailored for little hands. Each idea includes step-by-step instructions and tips to make the process smooth and enjoyable for both you and your child.

    1. Egg Carton Caterpillars

    1
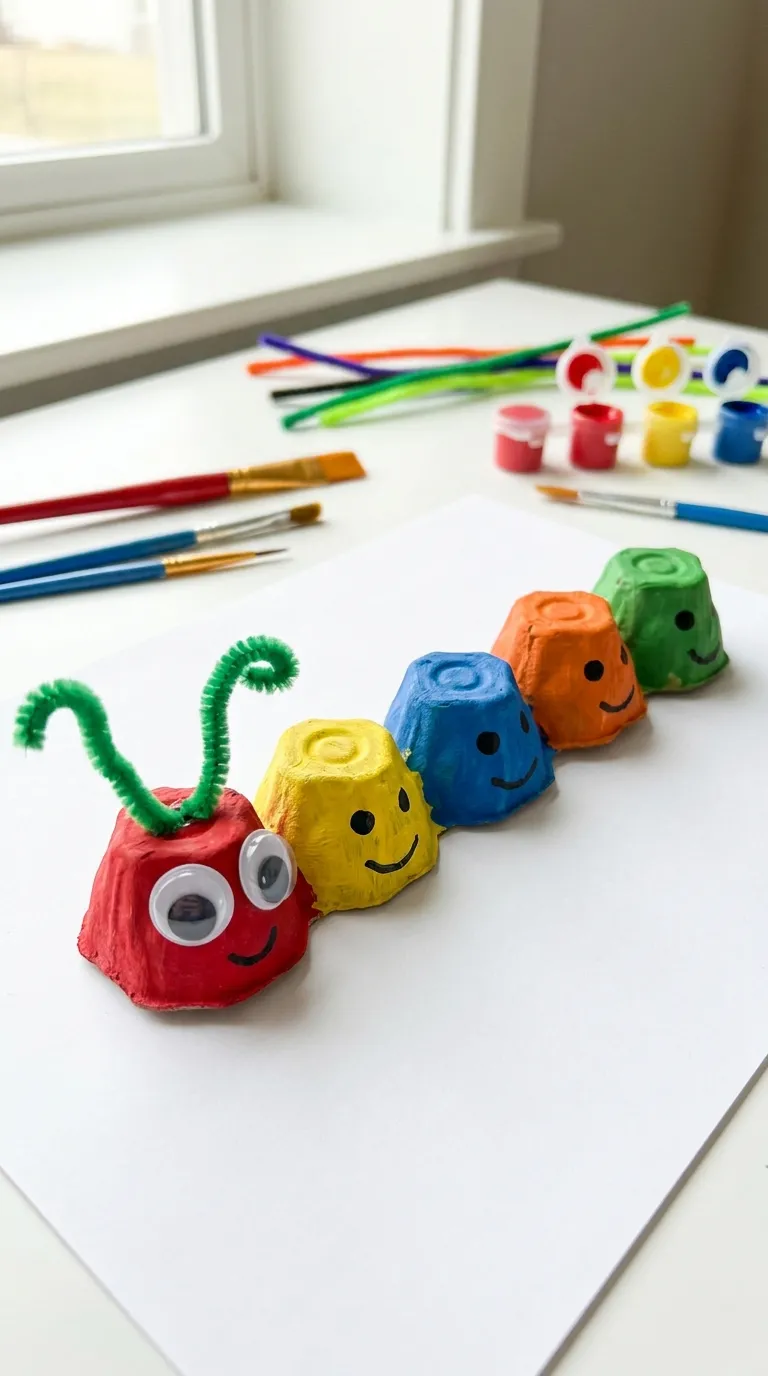
    Transform an egg carton into a cute and colorful caterpillar that your toddler will love to play with. This project is excellent for teaching colors, counting, and sequencing. To get started, cut the egg carton into a strip of connected cups—usually five or six for the body. Let your child paint each section in bright, vibrant colors. Once dry, add googly eyes to the first cup to create the head. Use pipe cleaners for antennae and small pom-poms or stickers for decorative details.

    This toddler-friendly egg carton craft can be extended by turning it into a learning activity. Ask your child to count the segments or name the colors they used. For added fun, create a simple story where the caterpillar transforms into a butterfly, incorporating educational elements about life cycles.

    2. Egg Carton Flower Bouquet

    2
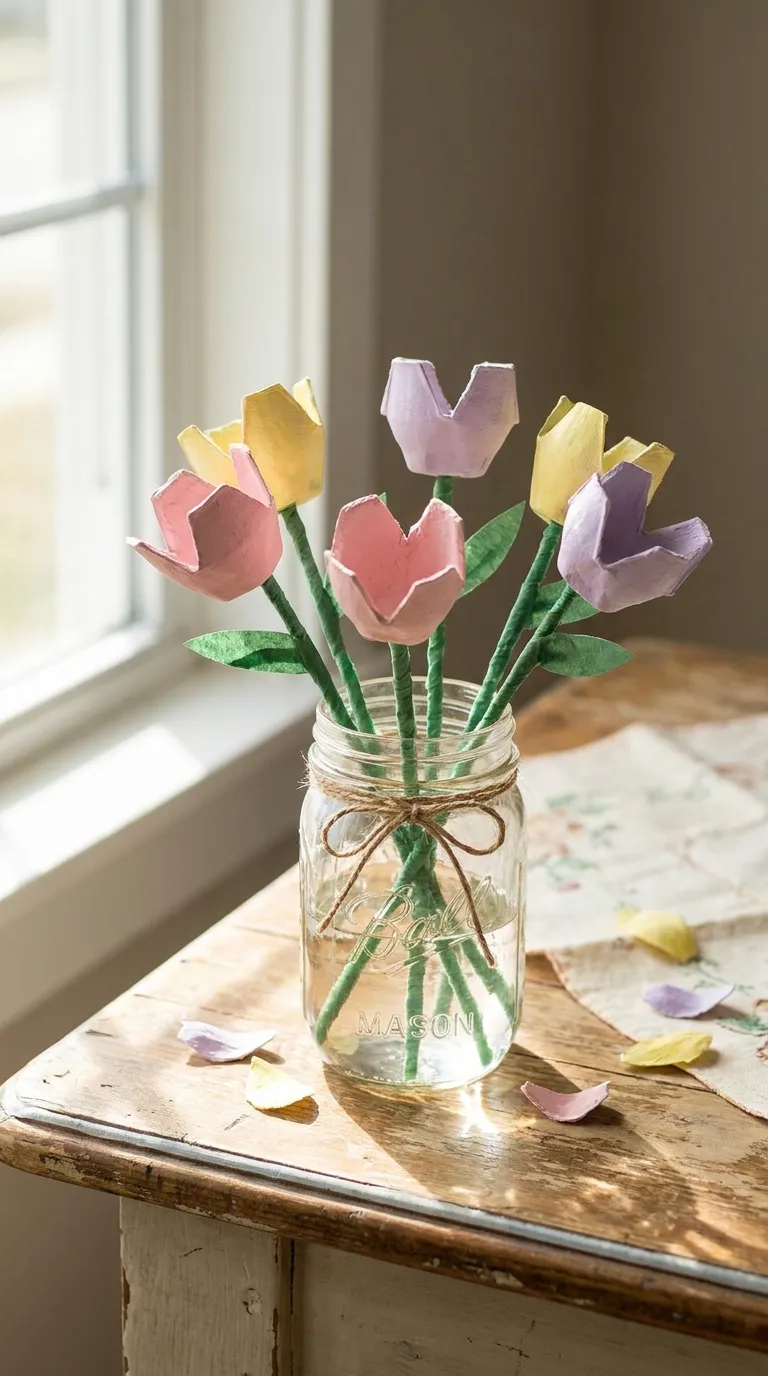
    Bring a touch of nature indoors with a beautiful egg carton flower bouquet. This craft is perfect for spring or Mother’s Day gifts. Begin by cutting individual cups from the egg carton. Trim the edges to shape them into petals. Let your toddler paint the cups in various colors—pink, yellow, purple, or any shade they love. Once dry, poke a small hole in the bottom of each cup and thread a pipe cleaner through to create the stem. Bend the end of the pipe cleaner to secure it.

    Arrange the flowers in a small vase or tie them together with a ribbon. This easy egg carton craft for kids teaches fine motor skills as they paint and assemble the flowers. You can also discuss the parts of a flower, such as petals, stems, and leaves, to add a layer of learning.

    3. Egg Carton Ladybugs

    3
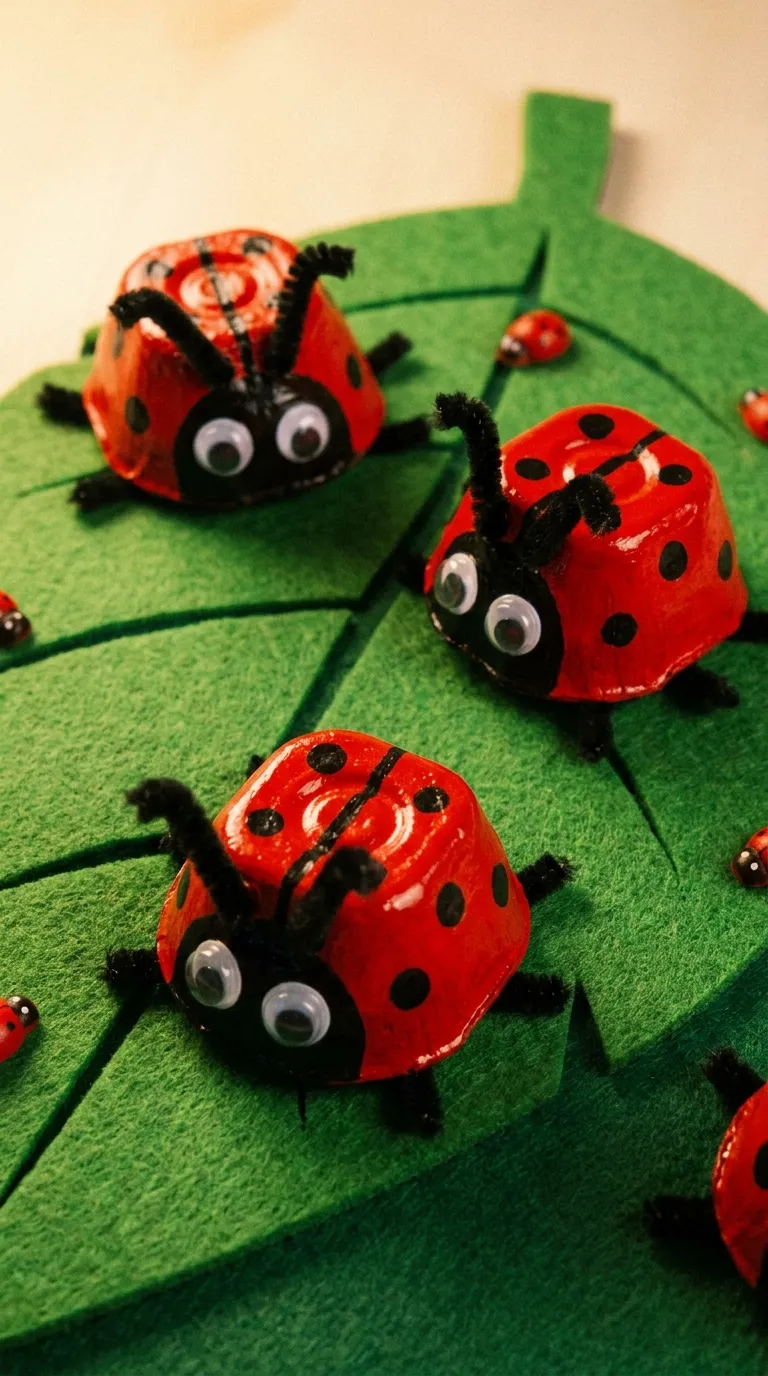
    Ladybugs are a favorite among toddlers, and creating them from egg cartons is both simple and delightful. Cut the egg carton into individual cups, and let your child paint them red. Once dry, use black paint or markers to add spots. For the head, cut a small circle from the remaining carton material or use black construction paper. Glue on googly eyes and attach the head to the red body with glue or tape. Pipe cleaners can be used for antennae.

    This DIY egg carton insect can be part of a larger garden-themed craft session. Encourage your toddler to create a small garden scene using green paper for leaves and blue for the sky. This activity promotes creativity and storytelling as they play with their new ladybug friends.

    4. Egg Carton Train

    4
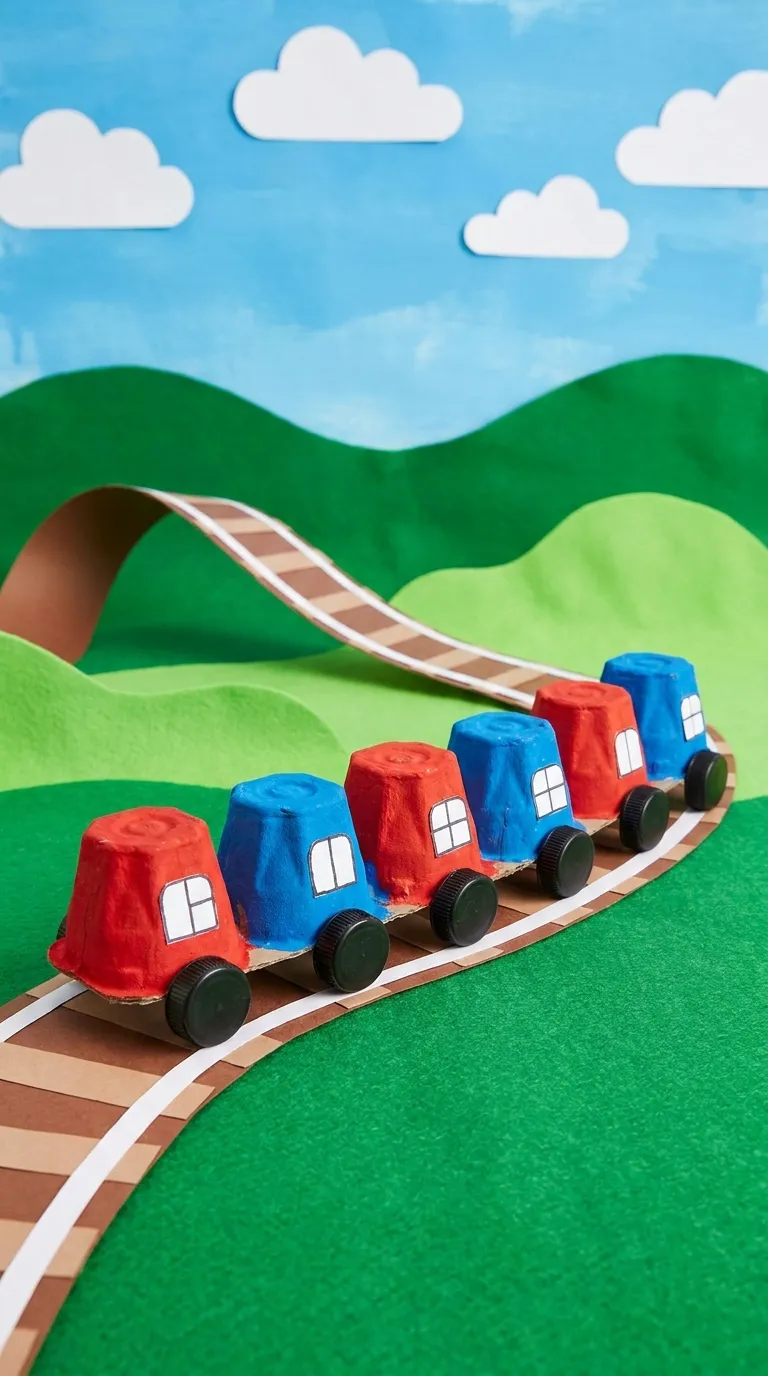
    All aboard the creativity express! An egg carton train is a fantastic way to upcycle materials into a fun toy. For this project, cut the egg carton into a long strip of connected cups—enough to form the train cars. Paint the entire strip in a single color or let your toddler choose different colors for each car. Once dry, add details like windows and wheels using markers or small circular stickers. Connect the cars with pipe cleaners or string.

    This interactive egg carton craft encourages imaginative play as your child pretends to drive the train, load cargo, or create a train station. You can also incorporate learning by counting the cars or discussing colors and shapes used in the design.

    5. Egg Carton Treasure Box

    5
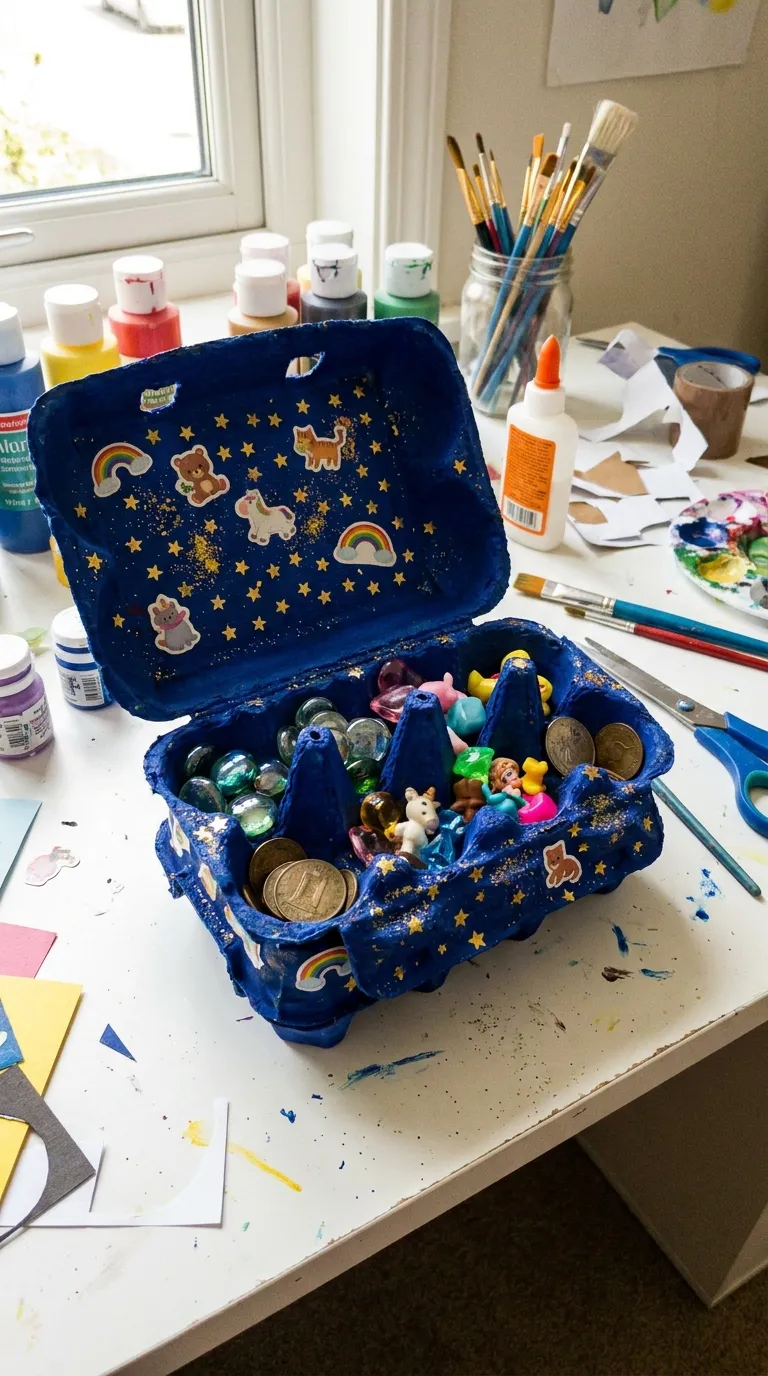
    Every toddler loves a special place to keep their tiny treasures. An egg carton treasure box is both practical and fun to make. Start by cutting the lid off the egg carton and painting the entire box in your child’s favorite color. Let them decorate it with stickers, glitter, or drawings. Once dry, the box can be used to store small toys, beads, or other trinkets.

    This practical egg carton craft for toddlers teaches organization and responsibility as they learn to care for their belongings. You can also turn it into a sorting activity by having them group items by color, size, or type.

    6. Egg Carton Animals: Turtles and Frogs

    6
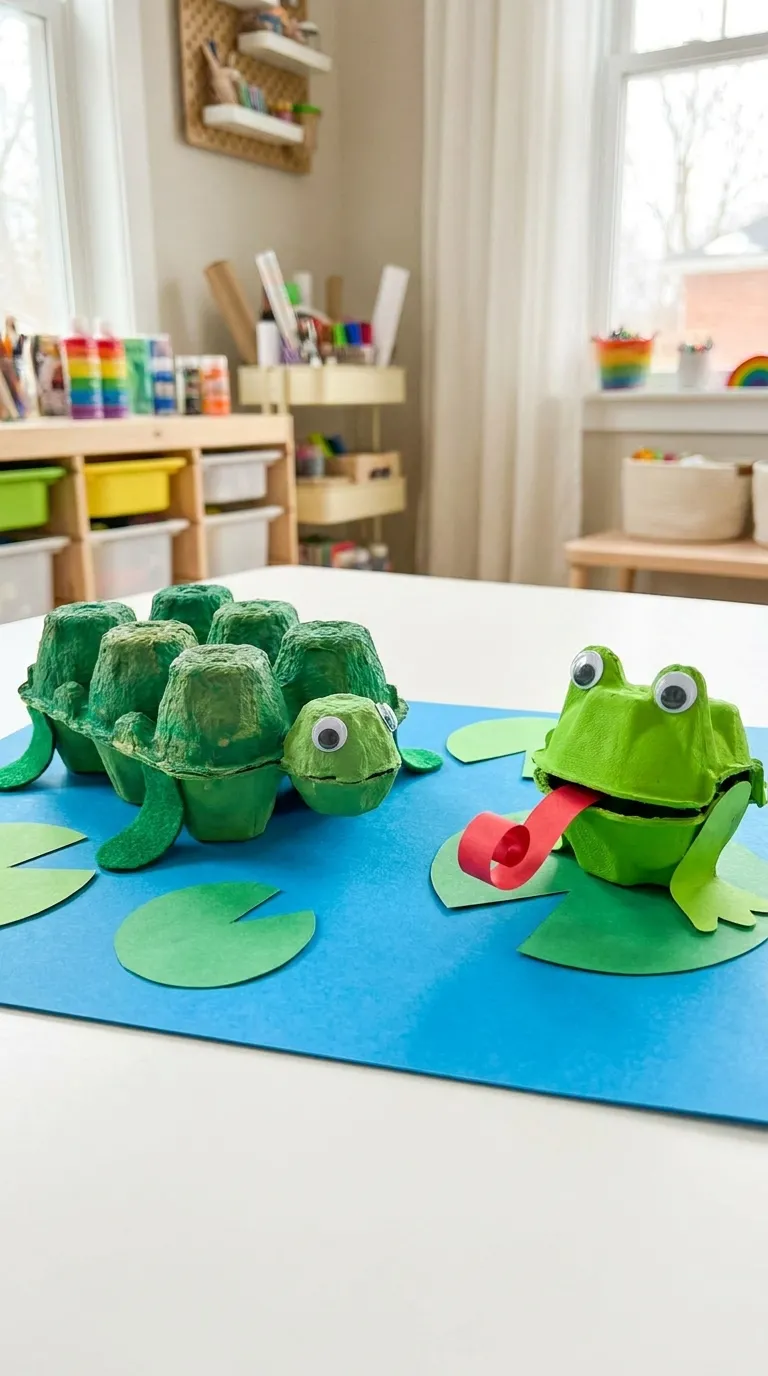
    Egg cartons can easily be transformed into a variety of animals, with turtles and frogs being two of the simplest and most engaging options. For a turtle, cut the egg carton into a single cup and paint it green. Add a head and legs using small pieces of green construction paper or felt. Use googly eyes to bring the turtle to life. For a frog, follow a similar process but paint the cup green and add a long red tongue using paper.

    These egg carton animal crafts are perfect for storytelling and pretend play. Create a small pond or forest scene using blue and green paper, and let your toddler act out stories with their new animal friends. This activity also provides an opportunity to teach them about different animals and their habitats.

    7. Egg Carton Christmas Tree

    7
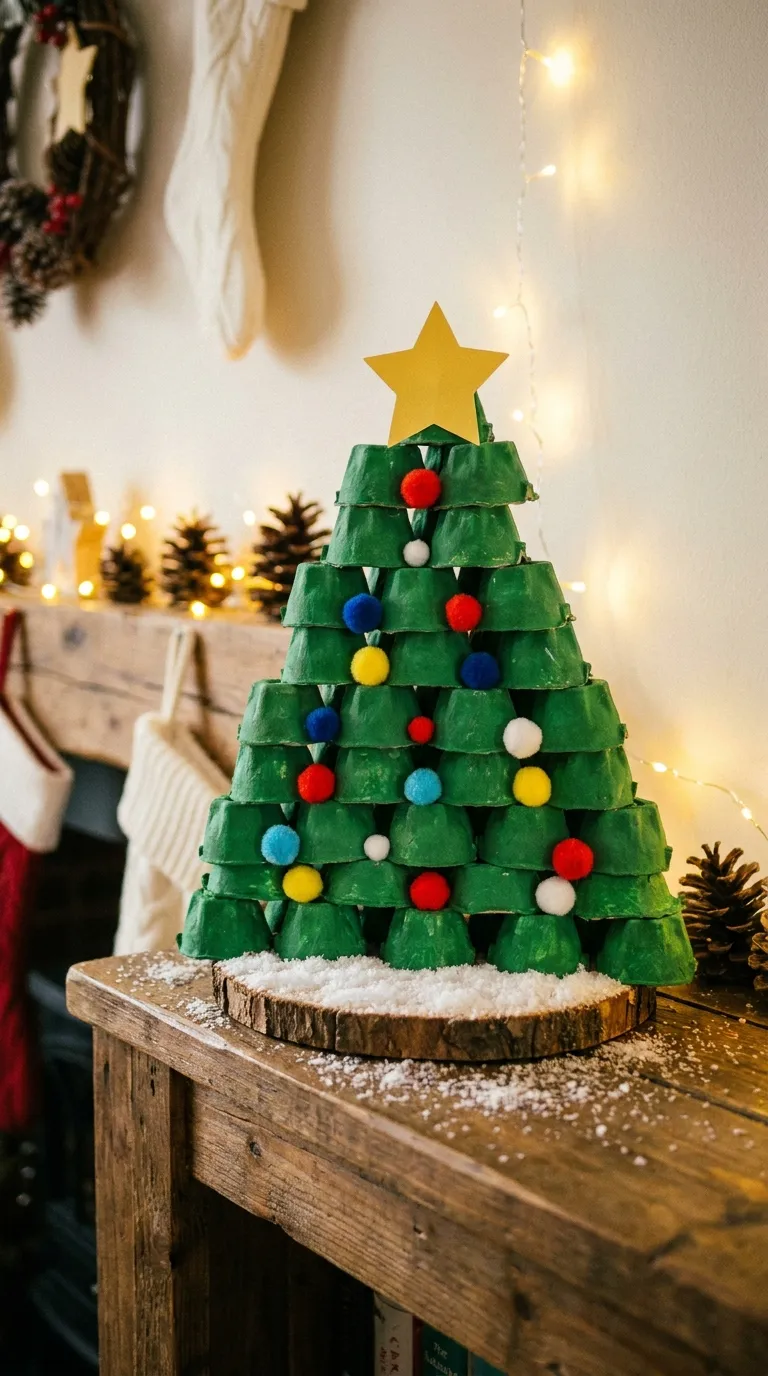
    Bring some holiday cheer into your home with an egg carton Christmas tree. This craft is ideal for the festive season and can be a fun way to decorate your space. Cut the egg carton into a triangular shape by arranging the cups in a pyramid. Paint the tree green and let it dry. Once dry, let your toddler decorate it with pom-poms, sequins, or small stickers for ornaments. Add a star or a small yellow pom-pom at the top for the tree topper.

    This holiday-themed egg carton craft can be a great way to introduce your child to holiday traditions. You can also use it as an opportunity to discuss shapes, as they recognize and create the triangular form of the tree.

    8. Egg Carton School Bus

    8
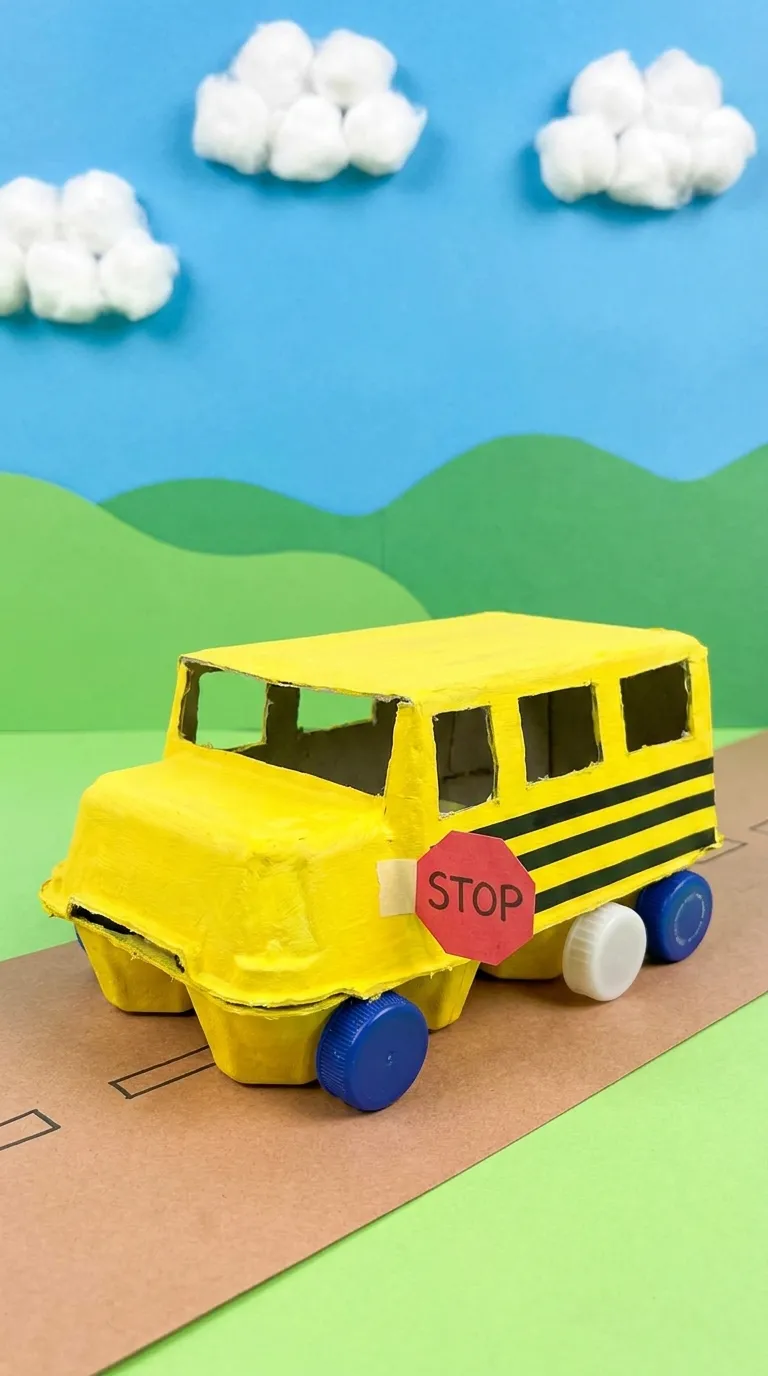
    Rev up the fun with an egg carton school bus that your toddler can use for imaginative play. Cut the egg carton lengthwise to form the body of the bus. Paint it yellow and add black stripes using paint or markers. Use bottle caps or circular stickers for the wheels, and add windows with markers or small pieces of paper. Don’t forget the red stop sign, which can be made from a small piece of red paper.

    This transportation-themed egg carton craft is perfect for teaching your child about vehicles and their functions. Encourage them to create a small road or city scene using paper, and let them drive their bus around, picking up and dropping off passengers (which can be small toys or drawings).

    9. Egg Carton Binoculars

    9
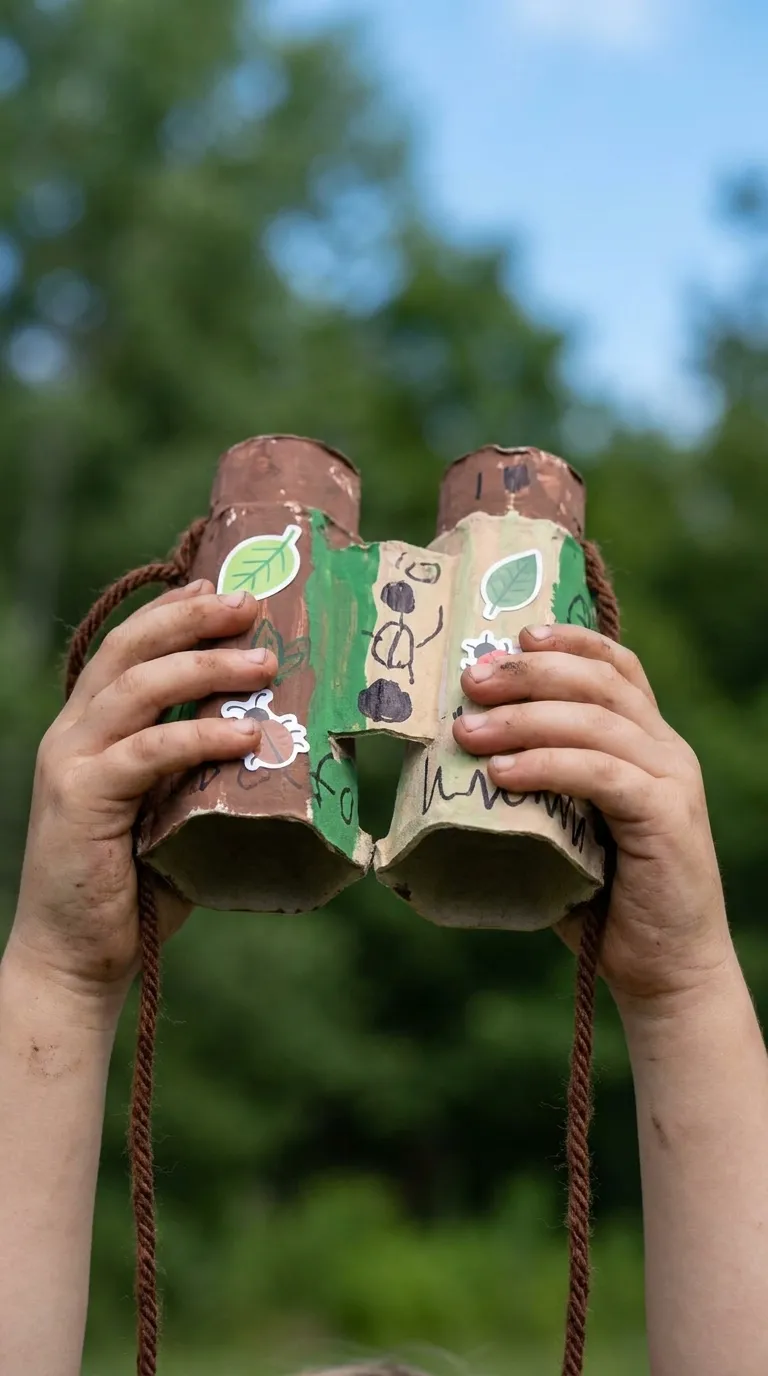
    Encourage outdoor exploration with a pair of DIY egg carton binoculars. Cut two cups from the egg carton and tape them together side by side. Let your toddler paint and decorate the binoculars with stickers or markers. Once dry, poke a hole on the outer side of each cup and attach a string or yarn to create a strap. Your child can wear the binoculars around their neck and use them to explore the backyard, park, or even their own home.

    This outdoor-themed egg carton craft promotes curiosity and observation skills. Go on a nature scavenger hunt and ask your child to find items like leaves, birds, or flowers using their binoculars. This activity is a great way to combine crafting with outdoor play.

    10. Egg Carton Musical Shakers

    10
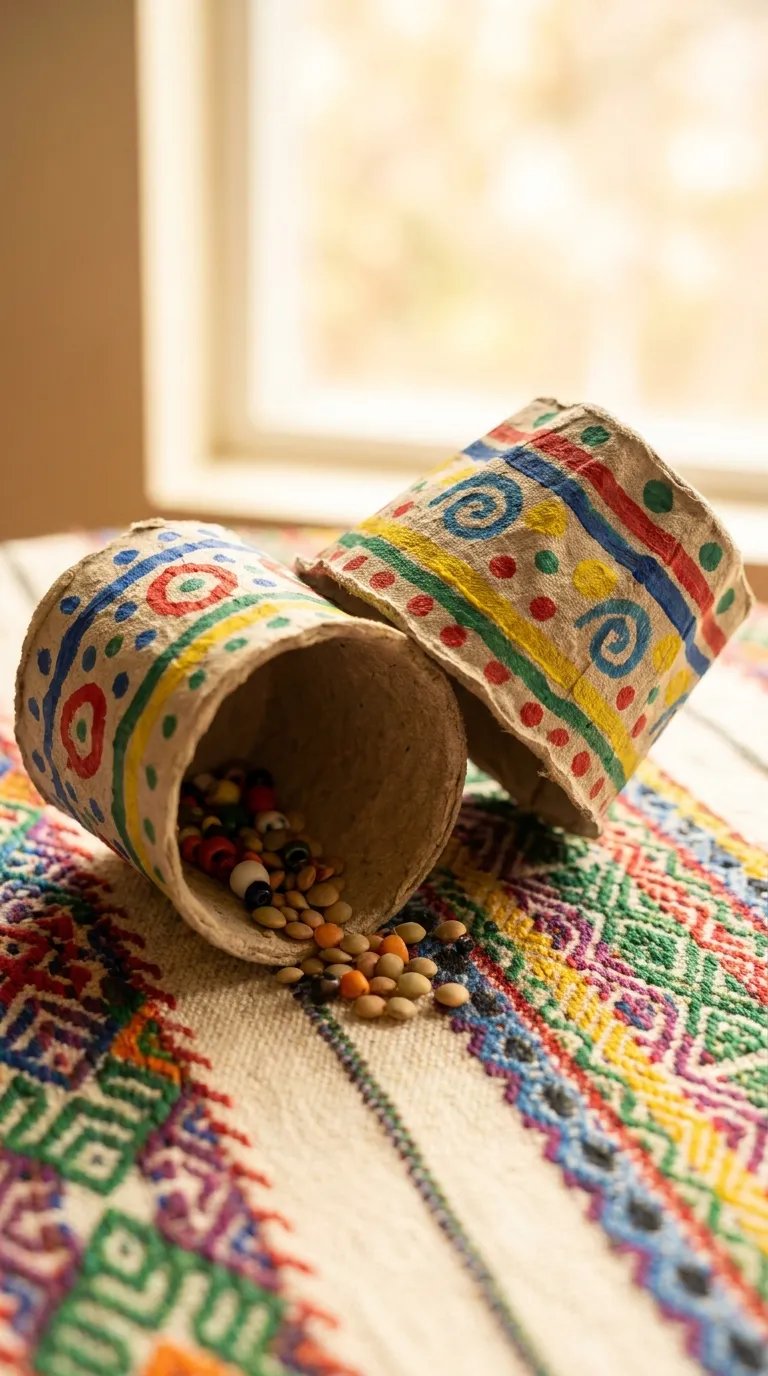
    Turn egg cartons into musical instruments with this fun and interactive craft. Cut the egg carton into individual cups and fill each with small items like rice, beans, or beads to create different sounds. Seal the open end with tape or glue a piece of cardboard to close it. Let your toddler decorate the outside of the shakers with paint, stickers, or markers. Once dry, they can shake the instruments to create their own music.

    This musical egg carton craft for kids introduces your child to the world of sound and rhythm. Play along with them by creating simple songs or beats, and encourage them to experiment with different sounds by shaking the shakers at various speeds. This activity is perfect for developing auditory skills and a love for music.

    Conclusion

    Egg cartons are a treasure trove of crafting potential, offering endless opportunities for creativity and learning. These 10 DIY egg carton crafts for toddlers are not only fun and engaging but also promote the development of essential skills such as fine motor control, problem-solving, and imaginative thinking. Whether you’re looking for a quiet indoor activity or a hands-on learning experience, these projects are sure to provide hours of entertainment.

    What’s more, these crafts are eco-friendly, making them a great way to teach your child about recycling and reusing materials. So, the next time you finish a dozen eggs, don’t toss the carton—turn it into a masterpiece! Share these ideas with friends, family, or fellow parents, and spread the joy of crafting with everyday materials.

  • 10 Homecoming Pose Ideas with Friends

    10 Homecoming Pose Ideas with Friends

    Homecoming is one of the most memorable events of the school year, and capturing the perfect photos with your friends is a must. Whether you’re posing before the dance, during the game, or at an after-party, the right poses can make your pictures stand out. From classic group shots to creative and fun arrangements, these homecoming pose ideas with friends will help you create stunning, share-worthy memories.

    In this guide, we’ll explore 10 unique and creative homecoming poses that work for groups of all sizes. Whether you’re going for elegant, playful, or candid vibes, these ideas will ensure your photos look polished and authentic. Plus, we’ll provide tips on lighting, angles, and expressions to elevate your shots even further. Get ready to strike a pose and make this homecoming unforgettable!

    1. The Classic Group Hug

    1
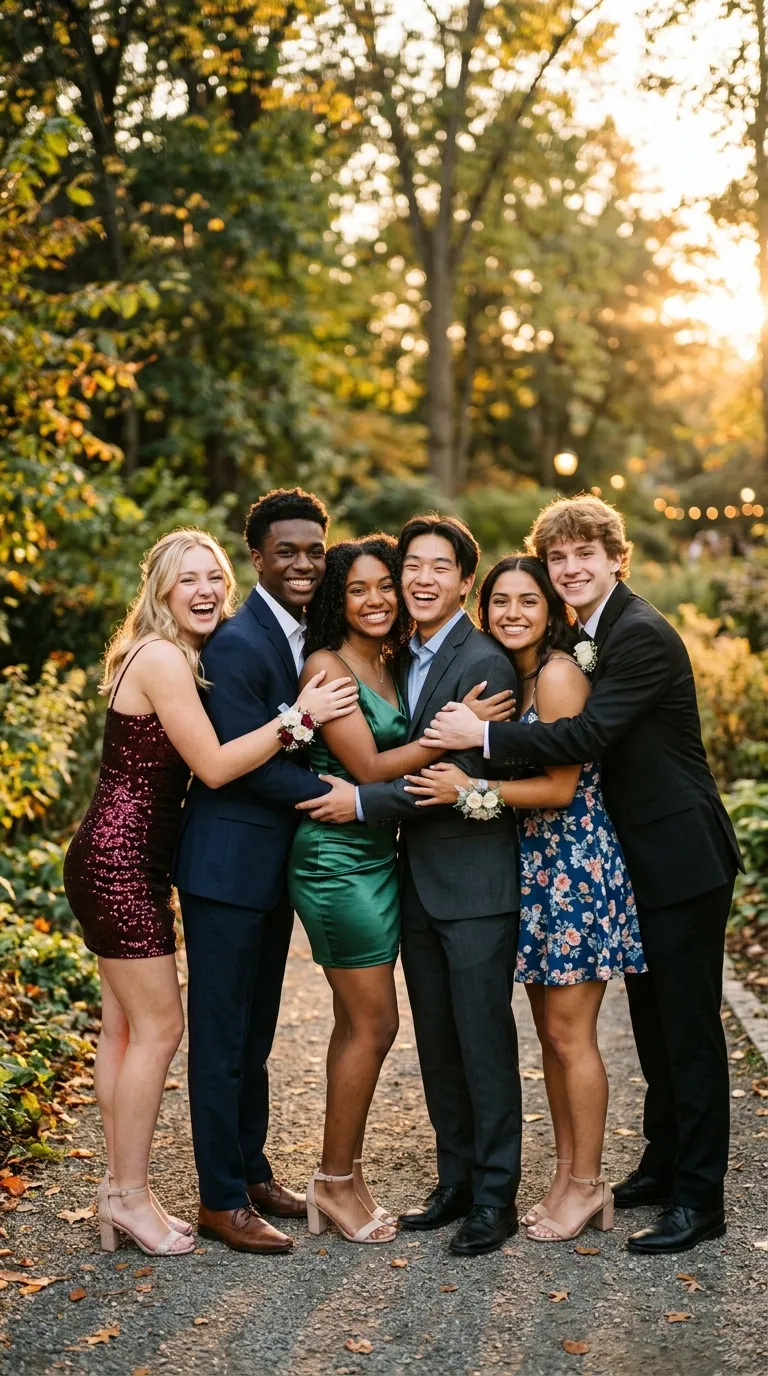
    The classic group hug is a timeless homecoming pose that radiates warmth and friendship. This pose works perfectly for both small and large groups, making everyone feel included. To execute it, have everyone stand close together, with arms wrapped around each other’s shoulders or waists. Lean in slightly toward the center to create a cohesive, tightly-knit look.

    For the best results, ensure that everyone’s faces are visible. Avoid having anyone’s head blocked by another person. A slight tilt of the head or a big smile can add energy to the shot. This pose is ideal for pre-dance photos or casual snapshots with your closest friends. The simplicity of the group hug makes it a go-to for capturing genuine connections.
    Pro tip: Ask the photographer to take the shot from a slightly elevated angle to avoid unflattering perspectives. Natural lighting, such as during golden hour, will enhance the warmth of the moment.

    2. The Back-to-Back Circle

    2
    If you want a fun and dynamic pose for homecoming pictures with friends, try the back-to-back circle. This pose involves everyone standing in a circle with their backs to the center, looking over their shoulders toward the camera. It creates a sense of unity while keeping each person’s face visible.

    To make it more interesting, have everyone strike a similar pose, such as crossing their arms or placing their hands on their hips. This pose works especially well for larger groups and adds a playful, coordinated vibe to your photos. It’s also a great way to show off the back details of your outfits, such as unique dresses or suits.

    For an extra touch, have a few people in the circle turn slightly to the side to break up the symmetry. This small adjustment can make the pose feel more natural and less staged. A wide-angle lens can help capture the entire group without distortion.

    3. The Jump Shot

    3
    Nothing says fun and excitement like a jump shot! This energetic homecoming pose is perfect for capturing the joy and anticipation of the event. To get the timing right, have everyone crouch down first and then jump on the count of three. The photographer should take a burst of shots to ensure at least one perfect capture.

    The key to a great jump shot is synchronization. Make sure everyone jumps at the same time and keeps their legs and arms in similar positions. Encourage big smiles and maybe even a few peace signs or other hand gestures. This pose works best outdoors where there’s plenty of space to move freely.

    Keep in mind that jump shots require good lighting and a fast shutter speed to avoid blurriness. If you’re indoors, ensure the lighting is bright enough to freeze the motion. This pose is a fantastic way to showcase your group’s energy and spirit.

    4. The V-Formation

    4
    For a polished and symmetrical look, the V-formation is an excellent choice among homecoming photo poses with friends. This pose involves arranging your group in a V shape, with one person at the front and the others fanning out behind them. It’s a great way to highlight a leader or simply create a balanced composition.

    The person at the front of the V can stand confidently with their hands on their hips or arms crossed, while the people behind can mirror their pose or add their own flair. This formation works particularly well for groups of 5-10 people and can be adapted for both formal and casual settings.

    To enhance the V-formation, consider using props like homecoming mums, corsages, or signs. A low angle shot can make the group look even more impressive, emphasizing the shape and depth of the formation. This pose is ideal for pre-dance photos or school spirit shots.

    5. The Piggyback Ride

    5
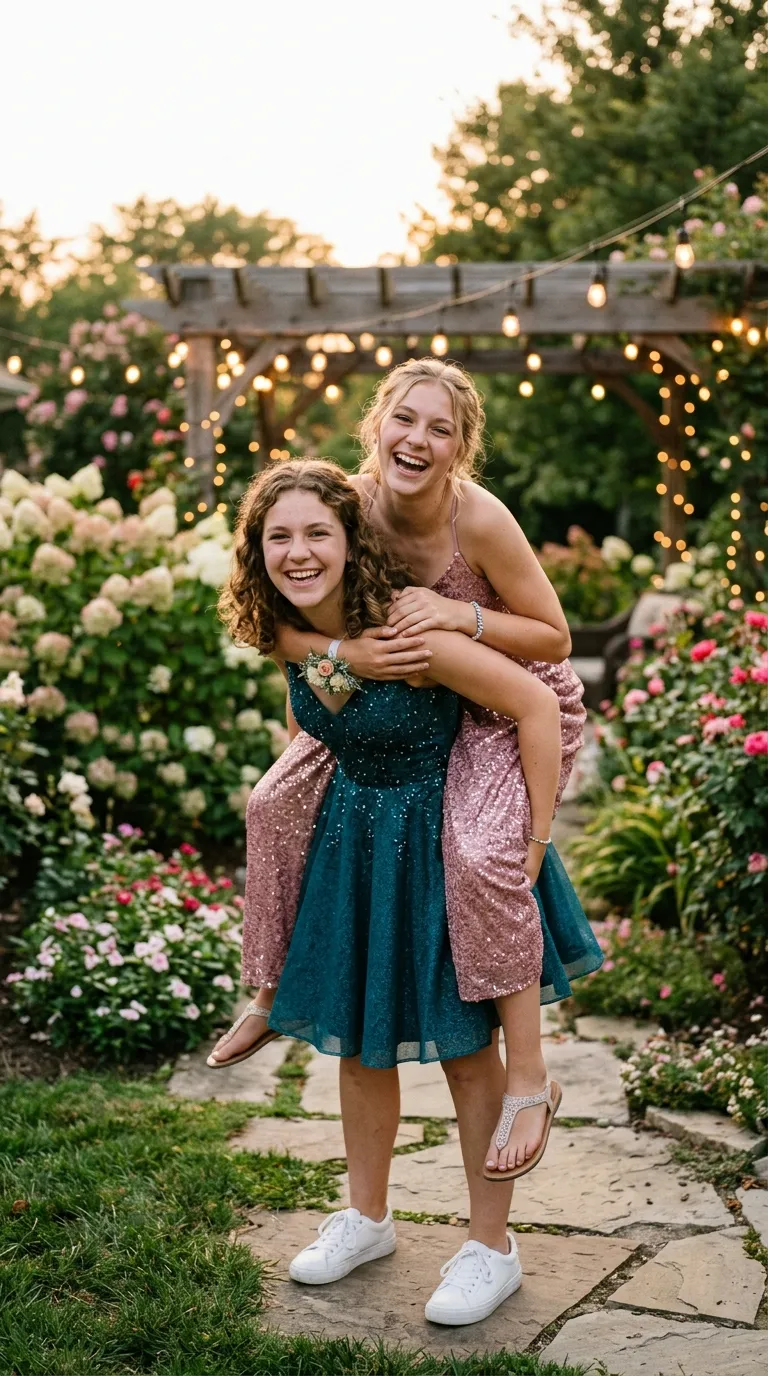
    Add a playful and personal touch to your photos with the piggyback ride pose. This cute homecoming pose is perfect for pairs or small groups and adds a sense of fun and closeness. One person can give another a piggyback ride while both look at the camera with big smiles. For groups, you can have multiple pairs doing the same thing side by side.

    This pose works especially well for couples or best friends, but it can also be a fun way to mix up a larger group shot. Just make sure everyone is comfortable and safe—no one wants a tumble right before the dance! The piggyback pose is a great way to show off your personalities and create a lighthearted, memorable image.

    For the best results, have the person giving the ride stand slightly to the side so that both faces are clearly visible. The photographer can capture this from a low angle to emphasize the height and playfulness of the pose.

    6. The Candlelight Gather

    6
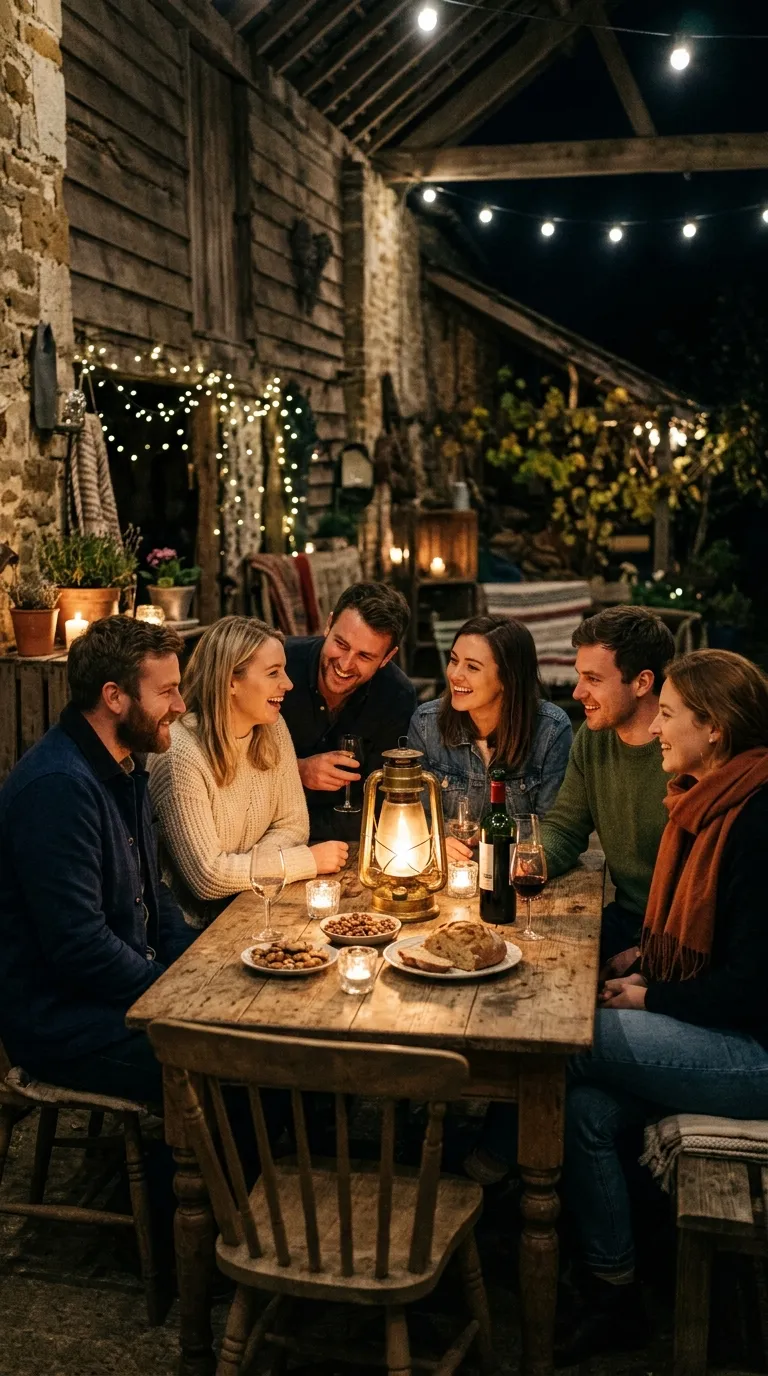
    For a more romantic or dramatic effect, try the candlelight gather pose. This elegant homecoming pose is perfect for evening photos, especially if you’re at an outdoor event or a dimly lit venue. Have your group gather closely around a central point, such as a candle, lantern, or even a bonfire if you’re at a post-dance gathering.

    Everyone can hold their own candles or simply lean in toward the center as if sharing a secret. The soft, warm glow of the candles will create a magical atmosphere in your photos. This pose works well for both small and medium-sized groups and adds a touch of sophistication to your images.

    To enhance the effect, use a camera with good low-light capabilities or a slow shutter speed to capture the candlelight beautifully. Encourage everyone to keep their expressions soft and serene to match the mood of the pose.

    7. The Sit and Stand Combo

    7
    Create depth and variety in your group photos with the sit and stand combo. This versatile homecoming pose involves some people sitting on the ground or a bench while others stand behind them. It’s a great way to ensure everyone is visible, regardless of height differences.

    For example, the front row can sit with their legs crossed or stretched out, while the back row stands with their hands on the shoulders of the people in front. This pose allows for a lot of creativity—you can mix and match sitting and standing positions to create an interesting composition.

    The sit and stand combo works well for both indoor and outdoor settings. If you’re outside, consider using a park bench or steps as a natural prop. This pose is also a great opportunity to show off your shoes, so make sure everyone’s footwear is on point!

    8. The Mirror Pose

    8
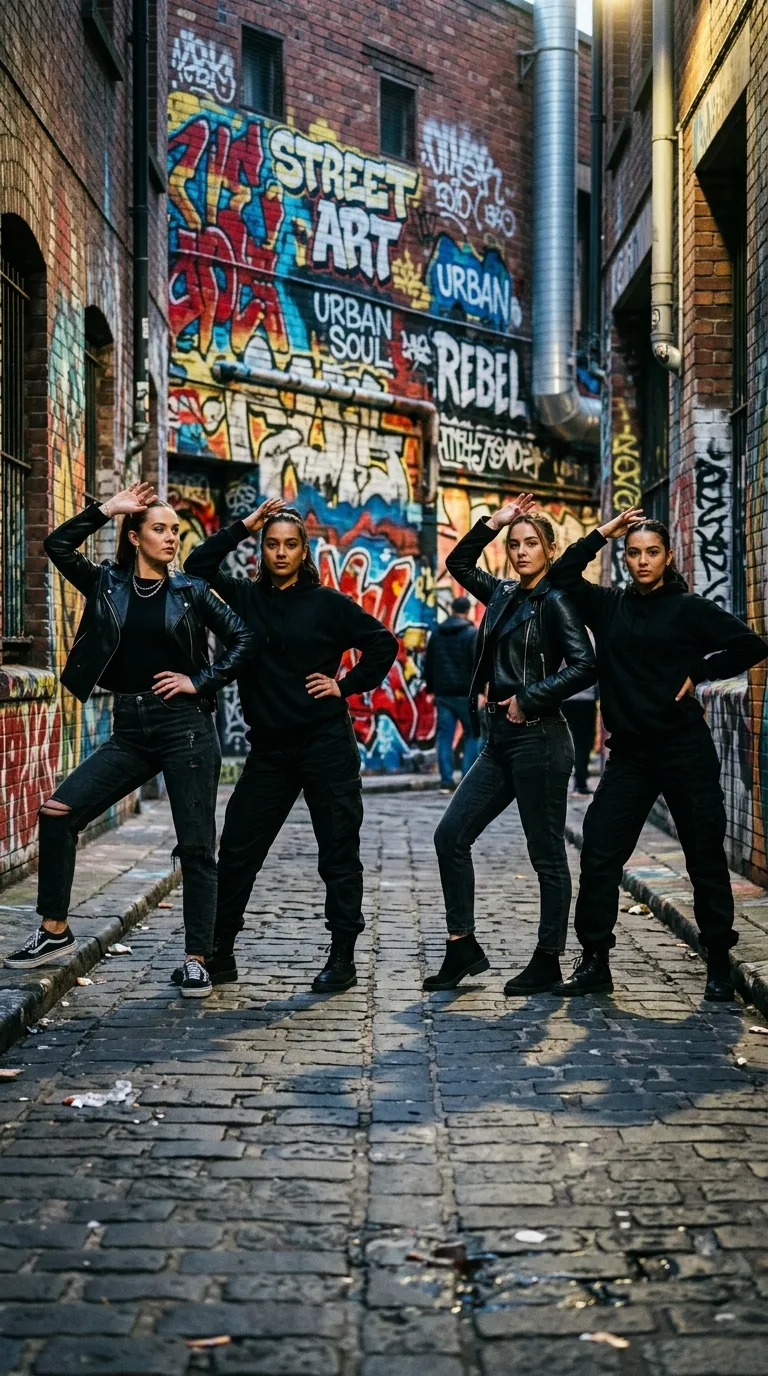
    For a stylish and symmetrical look, try the mirror pose. This creative homecoming pose involves two or more people mirroring each other’s poses on either side of the frame. For example, if one person has their hand on their hip, the person beside them does the same on the opposite side. This creates a balanced and visually appealing image.

    The mirror pose works well for pairs or larger groups, as long as everyone is in sync. It’s a great way to highlight matching or complementary outfits, such as coordinated dresses or suits. This pose also adds a sense of harmony and intentionality to your photos.

    To make the mirror pose even more striking, use a symmetrical background, such as a hallway, staircase, or architectural feature. The photographer can center the shot perfectly to emphasize the symmetry of the pose.

    9. The Action Shot

    9
    Capture the energy and movement of homecoming with an action shot. This dynamic pose idea involves everyone in the group doing something active, such as walking, twirling, or throwing confetti. Action shots are a fantastic way to create candid and lively photos that feel spontaneous and fun.

    For example, your group could walk toward the camera in a line, holding hands or swinging their arms. Alternatively, you could have everyone twirl in their dresses or suits for a playful, spinning effect. If you have props like pom-poms or signs, incorporate them into the action for added flair.

    To get the best action shots, use a fast shutter speed to freeze the motion. The photographer should take multiple shots in quick succession to capture the perfect moment. This pose is ideal for outdoor settings where there’s plenty of space to move around.

    10. The Confetti Toss

    10
    End your homecoming photo session on a high note with the confetti toss. This festive pose is perfect for celebrating the occasion and adding a pop of color and excitement to your images. Have everyone gather closely together and toss a handful of confetti into the air at the same time.

    For the best results, use biodegradable confetti to avoid harming the environment. You can also use alternatives like flower petals or colorful paper shreds. Make sure everyone looks up at the confetti as they toss it to capture their reactions naturally.

    The confetti toss works well as a final shot of the day, symbolizing the joy and memories you’ve created. A wide-angle lens can help capture the full extent of the confetti and the group’s expressions. This pose is sure to be a hit on social media and in your photo albums!

    Conclusion

    Homecoming is all about celebrating friendship, school spirit, and unforgettable moments. With these 10 homecoming pose ideas with friends, you’ll have plenty of inspiration to create stunning photos that capture the essence of the event. From classic group hugs to dynamic action shots, each pose offers a unique way to showcase your group’s personality and connection.

    Remember, the key to great photos is to have fun and be yourselves. Don’t be afraid to experiment with different poses, angles, and expressions. The more natural and relaxed you feel, the better your photos will turn out. And don’t forget to consider lighting, background, and props to enhance the overall look of your images.

    Whether you’re preparing for the dance, cheering at the game, or celebrating afterward, these poses will help you create memories that last a lifetime. So grab your friends, strike a pose, and make this homecoming one to remember!

  • 10 Rustic Fall Wreath Making Ideas For Front Door

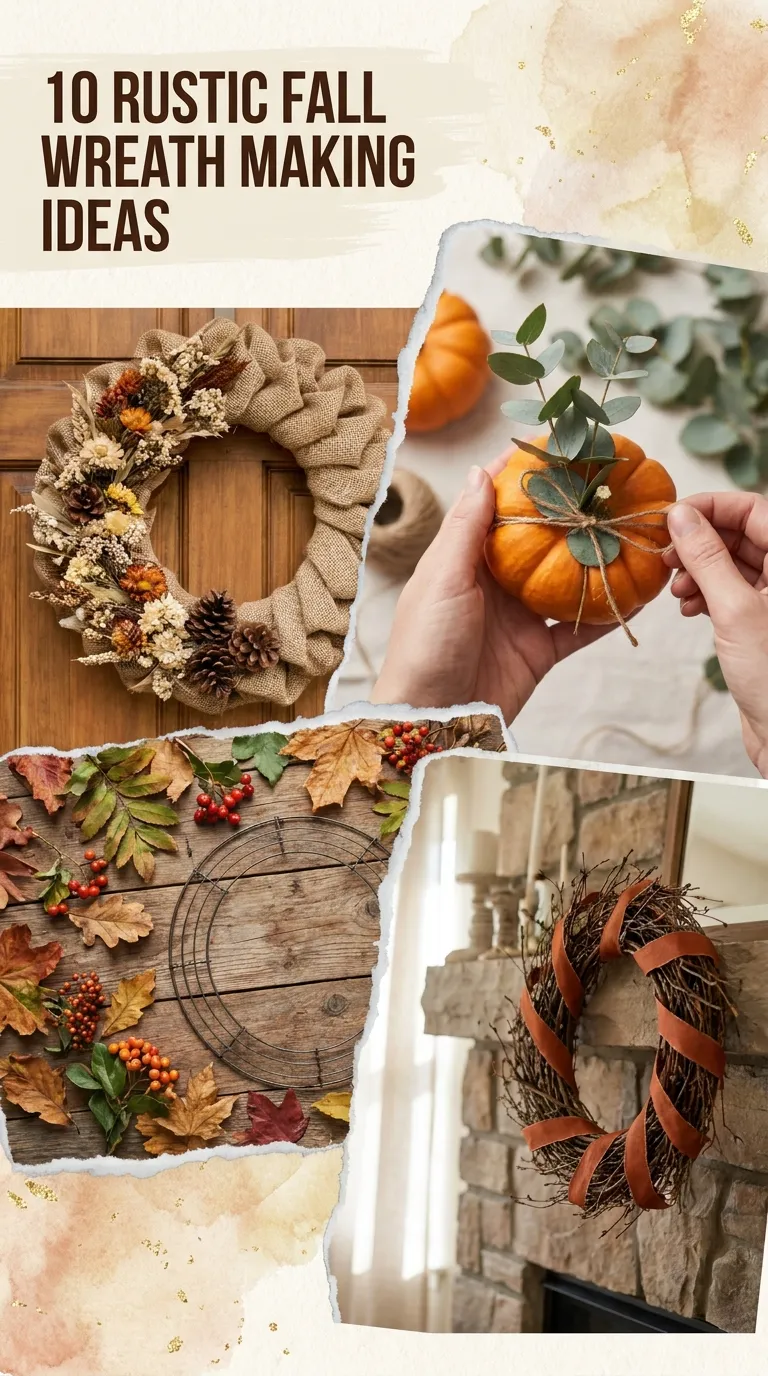
    10 Rustic Fall Wreath Making Ideas For Front Door

    As the crisp autumn air settles in and leaves shift into shades of burnt amber and gold, your front entryway sets the stage for the season. A rustic fall wreath provides an instant sense of warmth, texture, and organic charm to your home’s exterior. Handcrafting your own seasonal door decor allows you to combine natural textures like dried wheat, burlap, fragrant botanicals, and wood tones in ways that store-bought options rarely match.

    Here are ten rustic fall wreath ideas to inspire your seasonal DIY crafting, along with the materials, construction methods, and design styling to bring each piece together.

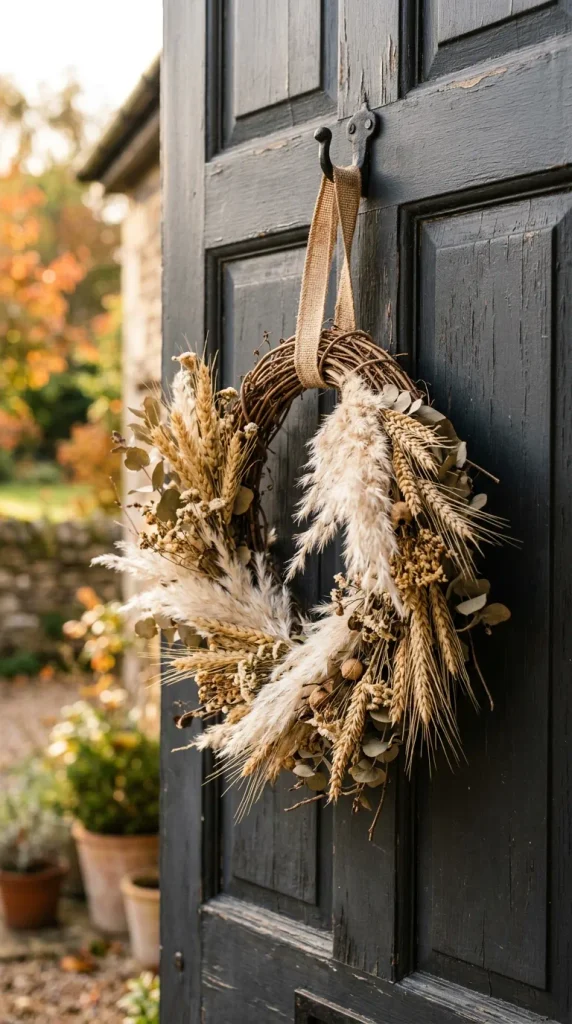
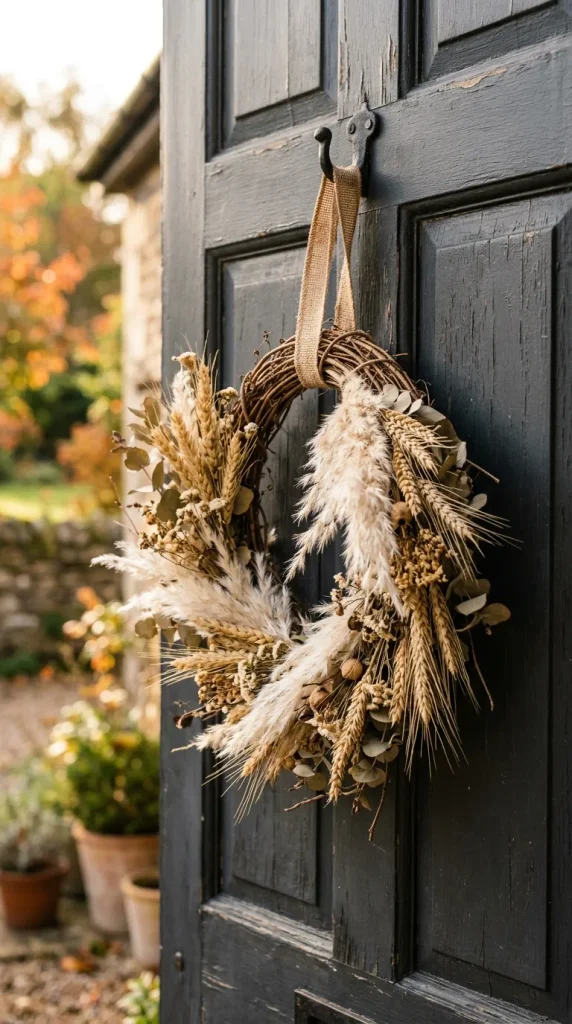
    1. The Natural Harvest Dried Wheat & Pampas Wreath

    A monochromatic, neutral harvest wreath leans into the understated elegance of rustic farmhouse style. Dried wheat stalks paired with soft pampas grass create an airy, textured halo that celebrates late summer grain fields and harvest season without overwhelming the doorway with saturated color.

    • Base: 14-inch to 18-inch flat wire wreath frame or straw base.
    • Materials: Dried natural wheat bundles, miniature bleached pampas plumes, floral tape, hot glue, and natural jute twine.
    • How to Assemble: Group wheat stalks into small bundles of five to six stems, wrapping each cluster with floral tape. Layer the bundles along the wire form in a single, overlapping direction to conceal the stems. Tuck miniature pampas grass tufts evenly between the wheat stems to add soft volume. Secure the back with wire, leaving the silhouette wild and feathery along the outer perimeter.
    • Styling Note: Hang with a wide, frayed-edge ivory linen ribbon against dark wood or charcoal front doors.

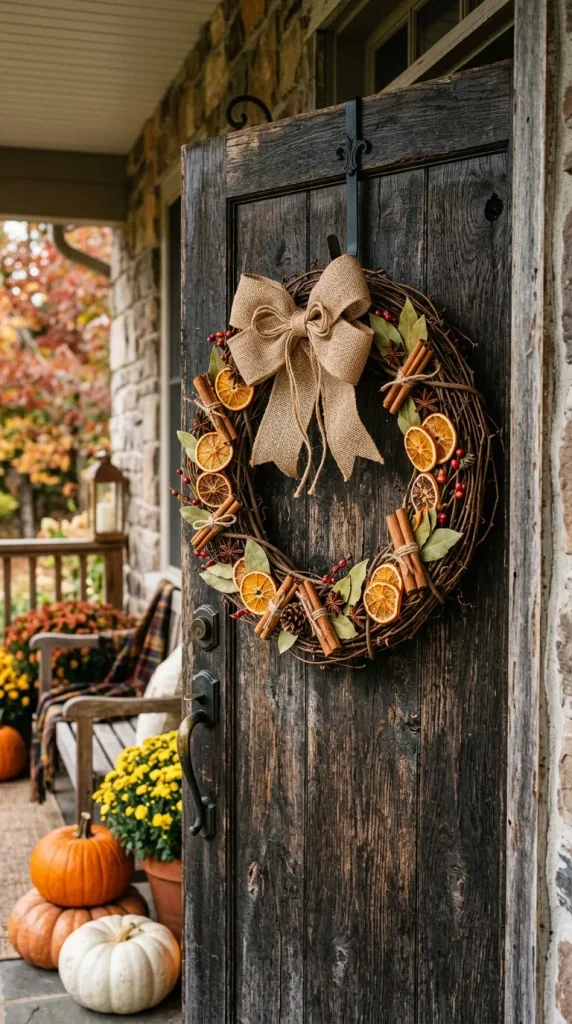
    2. Dried Citrus, Cinnamon, and Burlap Ring

    Warm spice tones and dehydrated botanicals lend both visual richness and a subtle, cozy aroma to your front porch. The contrast between translucent orange slices, rough cinnamon sticks, and star anise pods brings an artisan, apothecary-inspired texture to standard fall foliage.

    • Base: Natural grapevine wreath form.
    • Materials: Dehydrated orange and blood orange wheels, whole cinnamon stick bundles, whole star anise pods, dried bay leaves, wired burlap ribbon, and a hot glue gun.
    • How to Assemble: Thread small groupings of cinnamon sticks together with thin wire or twine. Glue clustered bay leaves along one crescent side of the grapevine form. Layer the dried citrus slices directly over the leaf foliage, anchoring them with hot glue. Dot star anise stars into the crevices to conceal glue spots and complete the spice market aesthetic. Tie a rustic burlap bow at the base of the crescent.
    • Styling Note: This wreath performs best on covered porches shielded from direct rain to preserve the dried botanicals.

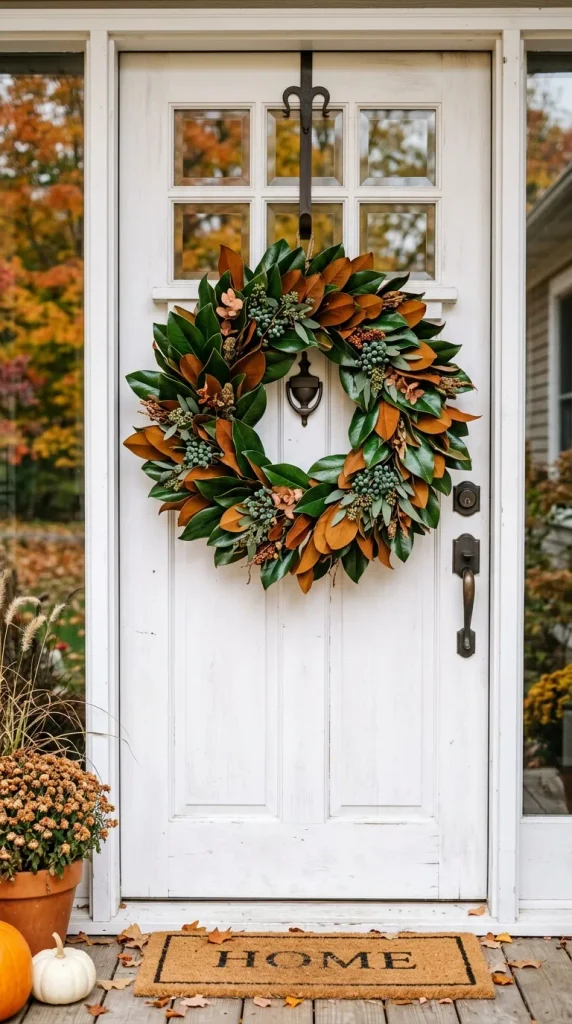
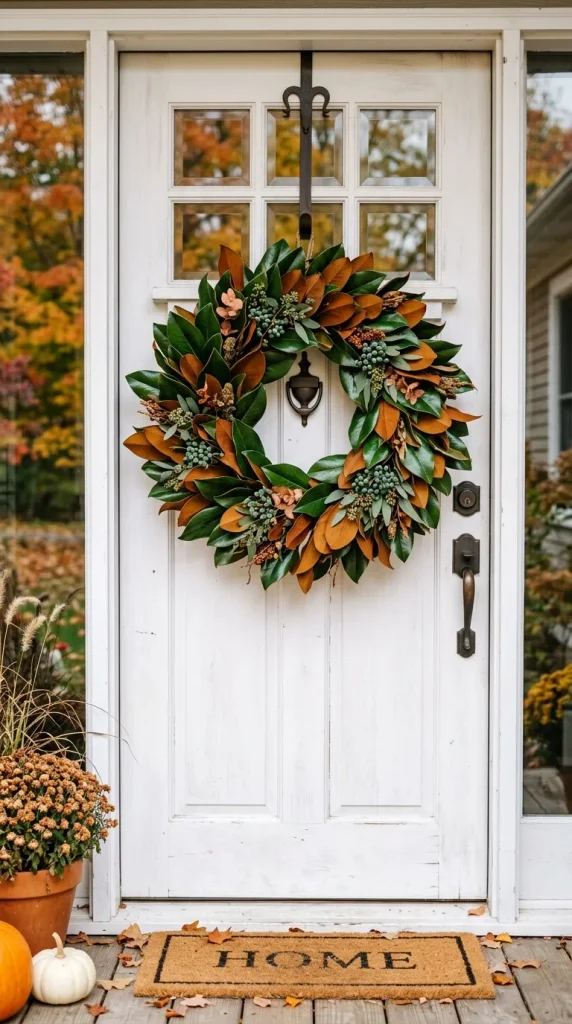
    3. The Antiqued Copper & Magnolia Leaf Loop

    Magnolia leaves are a classic rustic staple due to their dual-sided beauty: deep glossy green on top and a velvety, copper-suede underside. Mixing fresh or preserved magnolia leaves with accents of metallic copper and seeded eucalyptus creates an elevated countryside look.

    • Base: Double-wire frame or sturdy twig base.
    • Materials: Preserved magnolia leaves, preserved seeded eucalyptus, copper-painted faux berries or leaves, floral wire, and wire cutters.
    • How to Assemble: Sort magnolia leaves by size. Layer the leaves in small bunches, purposefully alternating between the glossy green side and the suede brown side to create depth. Wire each cluster firmly to the base in a clockwise direction. Weave sprigs of seeded eucalyptus and touches of copper foliage between the leaves for movement and subtle sheen.
    • Styling Note: The organic brown undertones pair well with warm brick facades or cream-colored entryway siding.

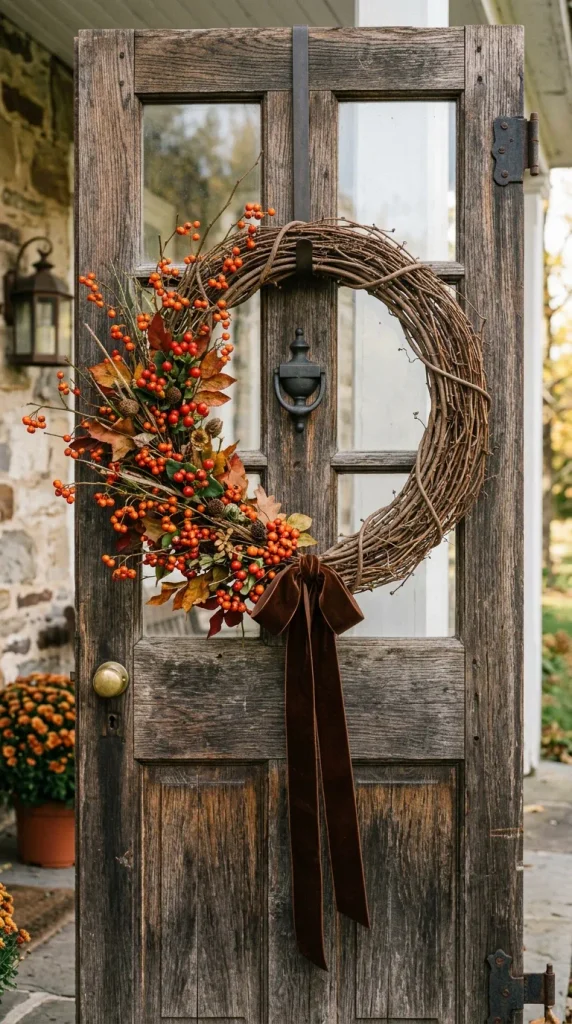
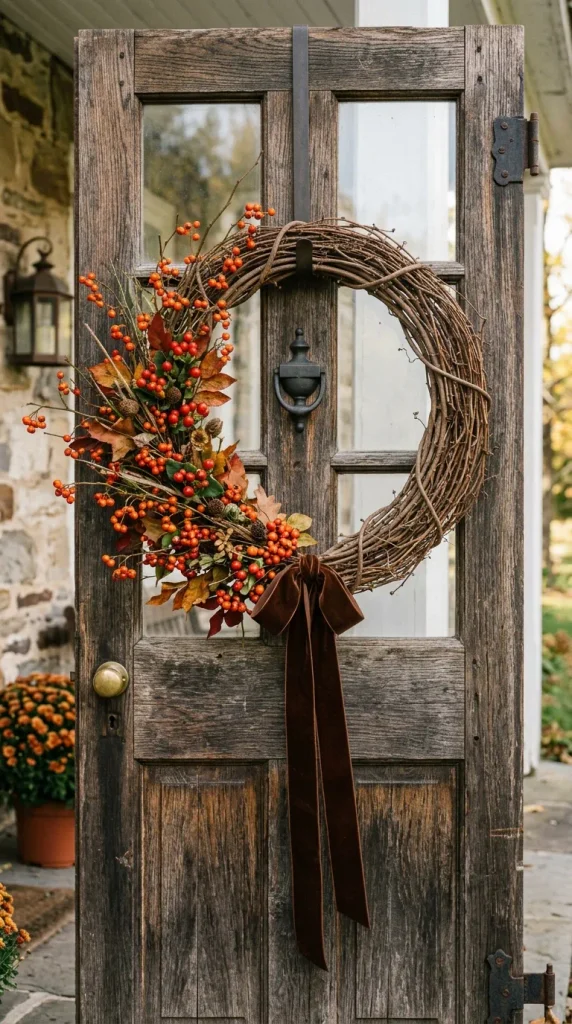
    4. Half-Moon Wild Berry & Asymmetrical Grapevine

    Asymmetrical wreaths highlight the natural, knotty beauty of bare wood while concentrating rich color on one side. A half-moon arrangement of mixed fall berries, wild branches, and dried grass feels gathered straight from the woodland edge.

    • Base: Thick, natural grapevine ring with visible twisting vines.
    • Materials: Faux or dried bittersweet berries, hypericum berries, miniature rose hips, wild twig sprays, wire, and a dark brown velvet ribbon.
    • How to Assemble: Leave half to two-thirds of the grapevine form exposed. On the remaining lower-left or lower-right curve, attach twig branches curving naturally with the frame. Layer deep red, burgundy, and burnt orange berry picks densely over the branch stems, anchoring them with floral wire. Finish by knotting a long, flowing velvet ribbon at the base of the cluster.
    • Styling Note: Ideal for modern farmhouse entryways that appreciate clean lines balanced with raw natural textures.

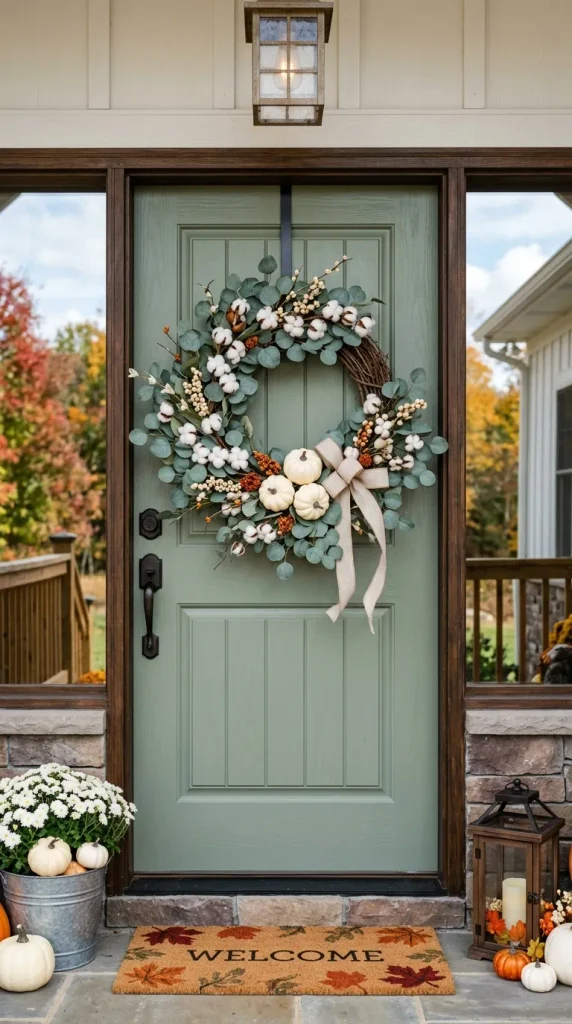
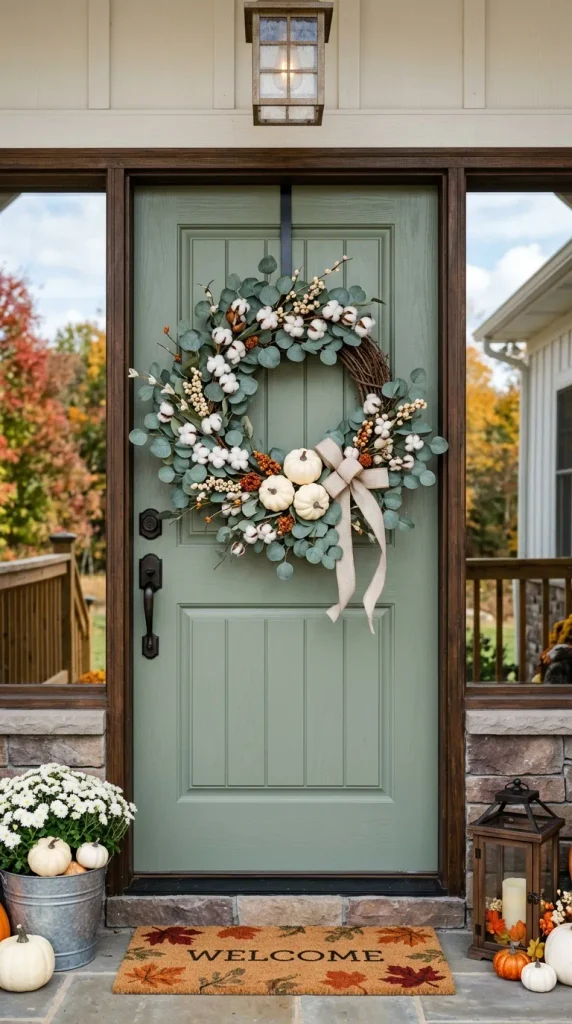
    5. Modern Farmhouse Eucalyptus, Cotton & White Pumpkin Wreath

    For an airy, muted aesthetic, swap heavy oranges and reds for muted sage greens, creamy white cotton bolls, and miniature ghost pumpkins. This design provides rustic character while keeping the palette clean and neutral.

    • Base: 16-inch grapevine or braided twig wreath.
    • Materials: Preserved silver dollar eucalyptus, dried baby blue eucalyptus, raw cotton boll stems, lightweight faux white mini pumpkins, floral picks, and florist wire.
    • How to Assemble: Wire eucalyptus stems symmetrically around the entire wreath form, keeping the foliage loose and organic. Insert floral picks into the bases of 3 to 5 miniature white pumpkins, applying hot glue to secure them, then wire the pumpkins directly into the lower center of the wreath. Fill the surrounding spaces with raw cotton bolls to soften the transitions.
    • Styling Note: This soft, sage-and-cream piece complements light gray, white, or navy front doors seamlessly.

    6. Wood Slice & Burlap Rosette Wreath

    This structured, heavy-textured wreath uses overlapping natural wood slices with live bark edges, accented with handmade burlap and frayed muslin fabric flowers. It offers long-lasting durability and works well season after season.

    • Base: Flat MDF or wooden craft wreath ring (14-inch).
    • Materials: 2-inch to 3-inch circular birch or cedar wood slices (pre-drilled or plain), hot glue gun and high-temp glue sticks, burlap ribbon, raw linen scraps, and dried moss.
    • How to Assemble: Shingle the wood slices in overlapping circular rows over the wooden ring, starting from the inner edge and working outwards. Once the base is covered, fill small gaps with natural dried moss. Create simple rosette flowers by rolling folded strips of burlap and frayed linen into spirals. Cluster three to five fabric rosettes onto one side of the wood slice base.
    • Styling Note: Because this wreath has a flat back, it sits flush against doors without shifting in autumn breezes.

    7. Chunky Knit Wool & Pinecone Cozy Wreath

    Combining plush textiles with woodland foraging, this wreath uses chunky roving yarn wrapped around a foam core, anchored by clusters of pinecones, acorns, and sweetgum seed pods. It brings an instantly cozy, cabin-inspired warmth to fall porches.

    • Base: Smooth extruded foam wreath ring.
    • Materials: Chunky chenille or roving yarn in oatmeal, camel, or rust; assorted pinecones; acorn caps; wooden beads; hot glue.
    • How to Assemble: Secure the yarn tail to the back of the foam ring with hot glue, then tightly wrap the yarn around the entire form until the foam is completely hidden. Secure the final end. On the lower quadrant, hot-glue a dense arrangement of varying-sized pinecones, dried seed pods, and acorn caps, letting a few wooden beads nestle into the cluster.
    • Styling Note: The soft knit texture provides high contrast against metal hardware and painted timber doors.

    8. Foraged Pine, Acorn & Sweetgum Pod Crescent

    A budget-friendly and grounding project, this design uses items gathered from woodland trails or your own backyard. Grouping nuts, acorns, and assorted forest pods into an orderly, textured cluster creates a tactile showcase of late-autumn nature.

    • Base: Flat wooden ring or sturdy willow wreath.
    • Materials: Assorted pinecones, acorns, sweetgum seed pods, walnut shells, preserved forest moss, floral wire, and hot glue.
    • How to Assemble: Cover the wooden wreath frame with flat forest moss using a light layer of hot glue. Arrange the largest pinecones first along one half of the ring, gluing them securely. Fill in all surrounding spaces with smaller acorns, sweetgum pods, and walnut halves, layering them tightly to create a mosaic effect. Leave the opposing side lightly dusted with moss for balance.
    • Styling Note: Spray with a clear matte sealant to protect the natural materials and bring out their rich earthy tones.

    9. Plaid Flannel Rag Wreath with Miniature Gourds

    A classic country-rustic design, a rag wreath upcycles flannel fabric strips in warm autumn tartans, buffalo checks, and burnt-sienna solids. It delivers high texture and vibrant color with minimal tools needed.

    • Base: 4-tier wire wreath frame (12-inch or 14-inch).
    • Materials: Autumn-toned flannel fabrics (plaid, herringbone, solid mustard, forest green, and rust), fabric shears, mini foam gourds, and florist wire.
    • How to Assemble: Cut fabric into strips approximately 1 inch wide by 6 to 7 inches long. Tie each strip onto the wire rings using simple overhand knots, alternating colors and patterns. Pack the strips tightly together until the metal frame is entirely concealed by full fabric fringe. Wire a cluster of 3 miniature speckled gourds or pumpkins into the center base.
    • Styling Note: The soft, rustling flannel adds movement and tactile warmth to covered entryways.

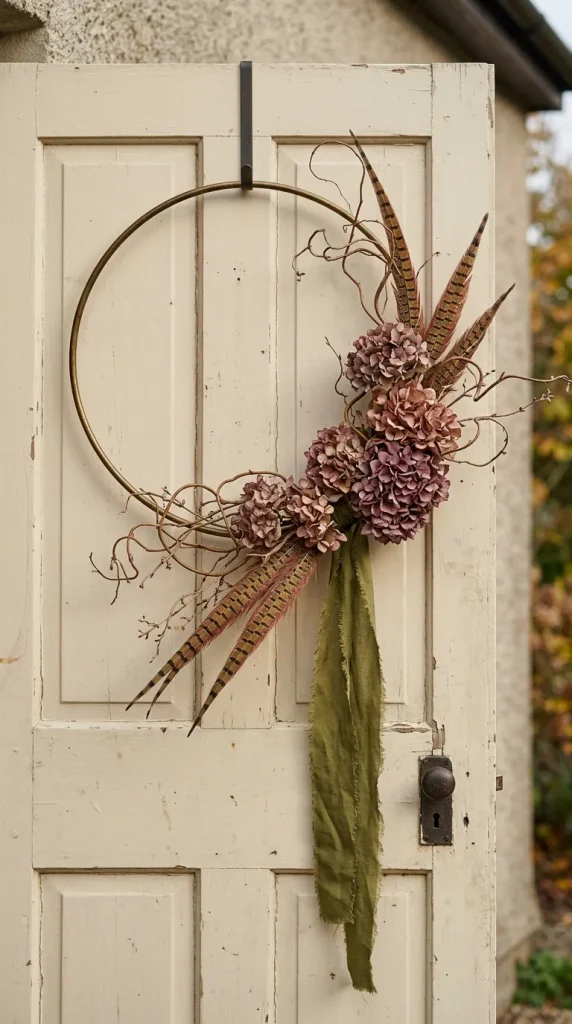
    10. Antiqued Brass Hoop with Dried Hydrangeas & Pheasant Feathers

    For a slim, modern-rustic profile, an asymmetrical metal hoop wreath blends vintage country charm with clean lines. Antiqued hydrangeas dried straight from the garden pair naturally with patterned pheasant feathers and curly willow twigs.

    • Base: 18-inch matte brass or antiqued gold floral hoop.
    • Materials: Dried antique autumn hydrangeas (showing tones of dusty rose, olive, and mauve), pheasant tail feathers, curly willow stems, fine paddle wire, and raw silk ribbon.
    • How to Assemble: Wire curly willow branches along the lower third curve of the metal hoop, allowing the delicate curly tips to extend outward. Secure two to three large heads of dried hydrangea over the twig stems using paddle wire. Insert several long pheasant feathers angled along the curve of the hoop behind the blooms. Finish with a trailing raw-edge ribbon in dusty cedar or olive.
    • Styling Note: The open, airy design highlights the front door’s paint color while adding an artisan botanical accent.
  • 10 Cute Chunky Yarn Pumpkin Crochet Ideas For Fall Decor

    10 Cute Chunky Yarn Pumpkin Crochet Ideas For Fall Decor

    Handcrafted crochet pumpkins made with ultra-thick, plush fibers instantly transform a living space into a warm autumn haven. Working with chunky or jumbo yarn (weight categories 6 and 7) makes these projects exceptionally fast to complete, yielding rich textural depth and cozy volume that delicate yarns simply cannot match. Whether styled across a rustic mantel, clustered on an entryway console, or stacked inside a woven basket, these ten creative chunky yarn crochet pumpkin ideas bring handmade charm to modern fall decor.

    1. Jumbo Chenille Ribbed Pumpkin with Cinnamon Stick Stems

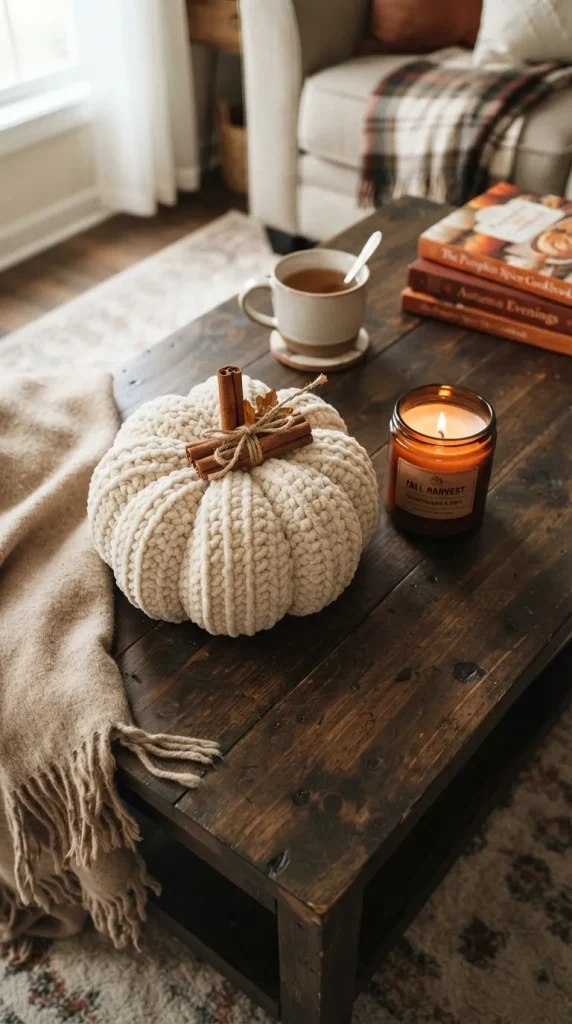
    Chenille yarn produces an irresistibly soft, velvet-like surface that catches light beautifully. By working simple single or half-double crochet stitches into the back loops only, you create deep, accordion-style ridges that mimic natural pumpkin segments. Once the rectangle is seamed and cinched, top the center with three bundled real cinnamon sticks tied with natural jute twine. The aromatic cinnamon introduces a subtle autumnal fragrance to your tabletop, while the plush ridges add tactile luxury to open shelving or coffee tables.

    2. Minimalist Ivory Bouclé Mini Pumpkins

    Bouclé yarn, characterized by its looped, curly texture, gives standard crochet pumpkins a modern organic look reminiscent of shearling. Worked in compact rounds using single crochet, these palm-sized pumpkins require no aggressive ribbing; the inherent texture of the yarn creates an artisanal, cloud-like silhouette. Finish them with slim, dried birch twigs for stems and display them in groups of five across a low wooden dough bowl alongside dried eucalyptus sprigs.

    3. Rustic Moss Green Cable-Stitch Gourds

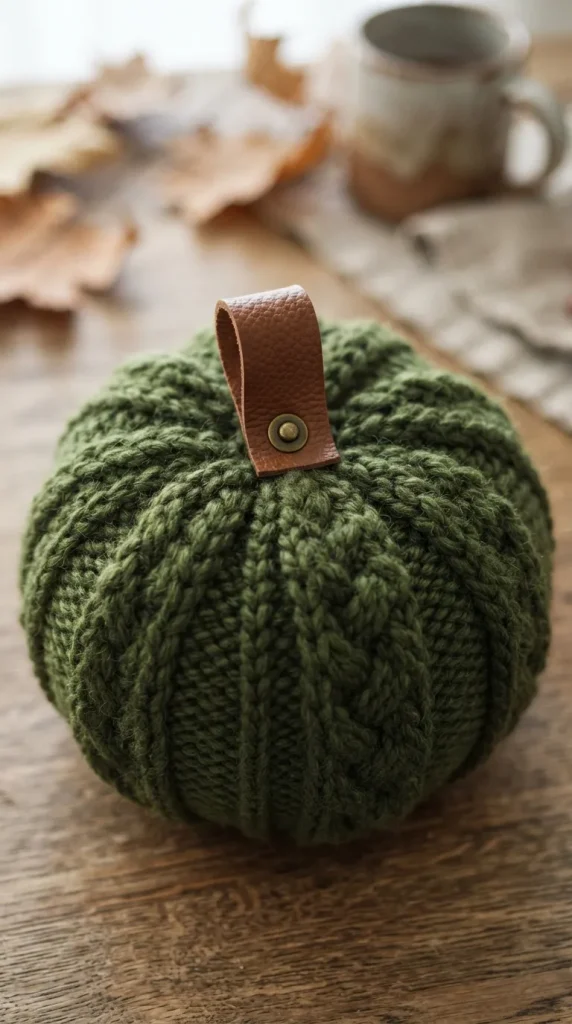
    Break away from standard orange palettes by using a deep moss or olive green super-bulky wool blend. Incorporating front-post and back-post crochet stitches creates raised braided cables winding vertically up the pumpkin. This intricate stitch pattern adds heritage farmhouse elegance. Finish the piece with a dark faux-leather strap folded into a loop as a modern stem, securing it with an antique brass rivet. These look striking paired alongside white ceramic pottery and brass candleholders.

    4. Modern Velvet Pumpkin with Gilded Metallic Stems

    For an upscale, moody autumnal interior, opt for a micro-velvet chunky yarn in deep charcoal, midnight navy, or rich aubergine. Crochet a tight, firm sphere to ensure the polyfill stuffing remains completely hidden. Instead of rustic wooden elements, hot-glue a cast-metal or resin stem finished in brushed antique gold to the crown. The contrast between deep matte velvet and gleaming metallic hardware adds an instant touch of modern luxury to a dining room tablescape.

    5. Sunset Ombré Chunky Wool Stack

    Capture the full gradient of fall foliage by crocheting a graduated three-tier pumpkin stack. Create three distinct sizes—small, medium, and large—using chunky wool roving in mustard gold, burnt sienna, and rich terracotta. After cinching each pumpkin with strong contrasting embroidery floss to define pronounced lobes, stack them vertically, securing the cores with a central dowel. Position this substantial piece on a covered porch bench or beside an indoor fireplace hearth.

    6. Boho Fringe and Tassel Pumpkin

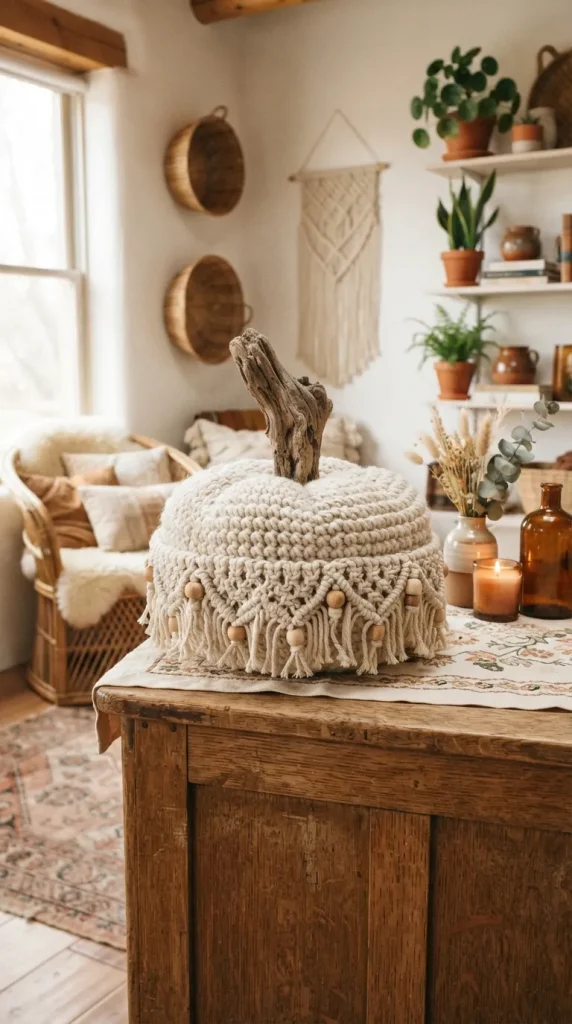
    Bring a playful bohemian touch to your harvest decor by incorporating natural cotton rope or thick unspun roving yarn in an unbleached linen tone. Work the body in a relaxed moss stitch for light surface texture. Along the lower hem or gathered around a driftwood stem, integrate short strands of raw fringe and macramé-style wooden beads. This relaxed aesthetic fits seamlessly into neutral, coastal, or eclectic bohemian interiors.

    7. Deep Terracotta Waffle-Stitch Floor Cushion Pumpkin

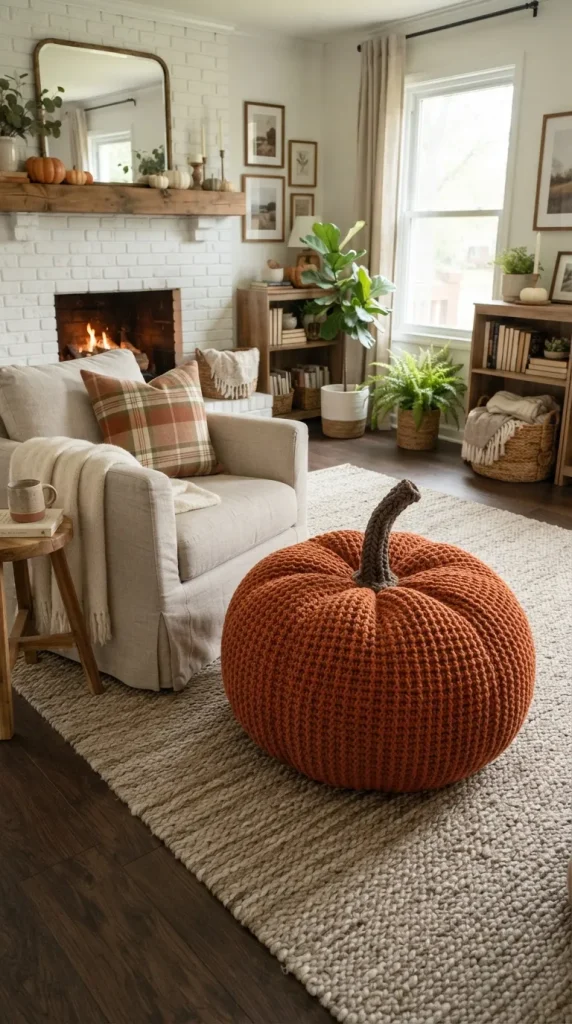
    Chunky yarn scales up effortlessly into functional statement furniture. Using a 25mm crochet hook and jumbo tubular yarn, crochet an oversized cylinder using the waffle stitch to create deep, geometric pockets across the surface. Stuff firmly with dense upholstery-grade foam chips or fiberfill before cinching tightly into a wide, flattened gourd shape. Add a thick, braided macramé stem to complete a cozy floor pouf ideal for reading nooks or fireside lounging.

    8. Color-Blocked Heather Grey and Rust Farmhouse Pumpkin

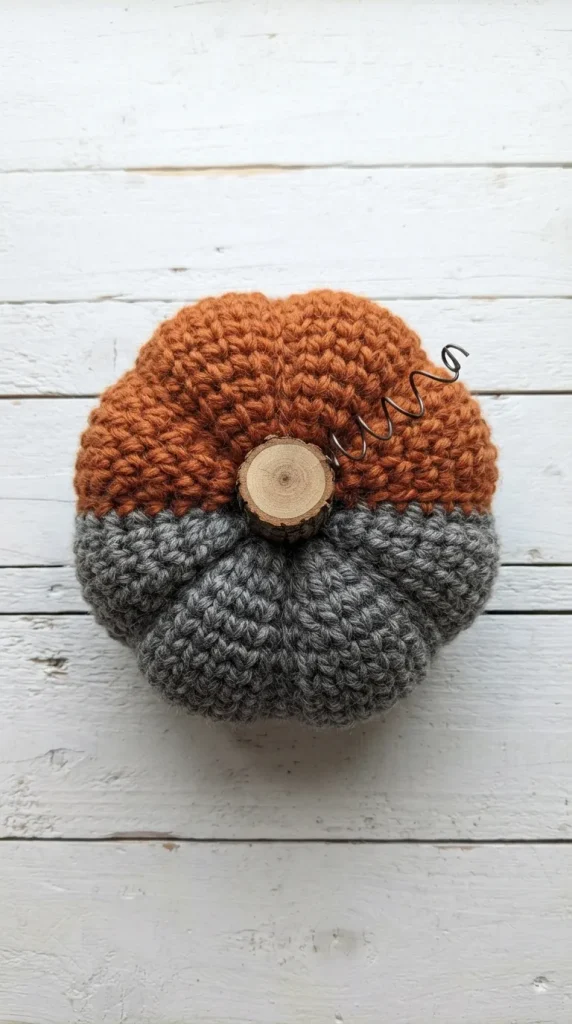
    Color-blocking offers a fresh geometric twist on classic seasonal palettes. Split your crochet foundation into clean horizontal or vertical halves, pairing a soft heather-grey wool with a vibrant pumpkin-spice rust. Use standard half-double crochet stitches to keep the transition lines crisp and clean. Top with a slice of natural wood branch and a curled wire tendril to bridge the gap between contemporary colorwork and traditional rustic charm.

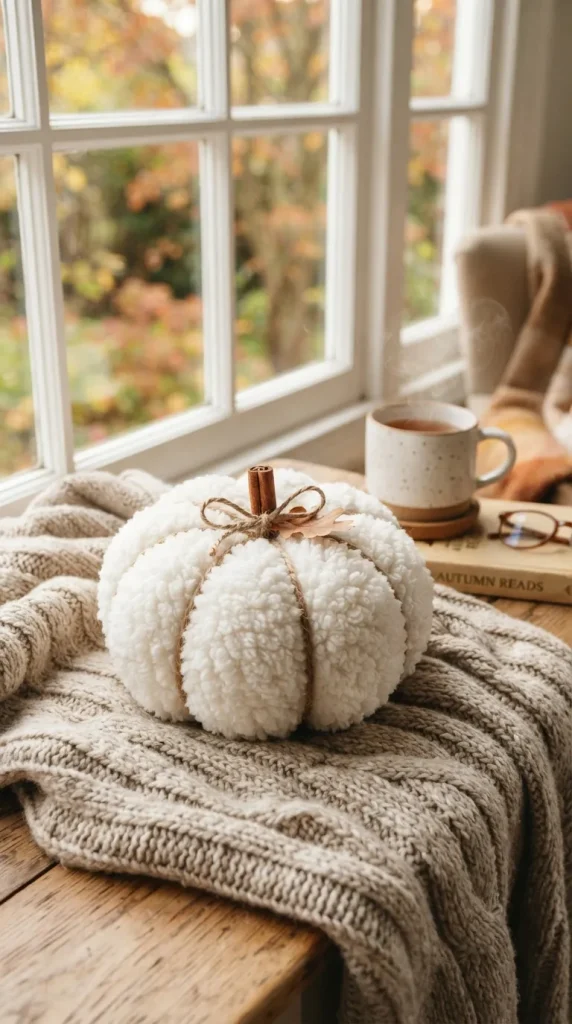
    9. Fluffy Sherpa Faux-Fur Pumpkin with Twine Accents

    Faux-fur jumbo yarn hides stitch definition entirely, resulting in an ultra-plush piece that looks like a high-end designer boutique find. Because the fluffy pile obscures complex stitchwork, simple single crochet in the round is all that is required. Once stuffed into a plump sphere, wrap thick brown jute twine tightly around the outside four to six times, pulling inward to shape deep, organic clefts. The rough, earthy twine cuts through the ultra-soft fluff to create an eye-catching interplay of textures.

    10. Pastel Blush and Sage Chunky Trio

    Pastel fall palettes offer a softer alternative to high-contrast autumn tones. Using bulky blanket yarn in soft blush pink, muted sage green, and warm oat cream, crochet a coordinated trio in varying heights and diameters. Shape the segments gently with invisible nylon thread to maintain clean lines, and finish each with a pale, bleached driftwood stem. This soft color story coordinates gracefully with contemporary Scandinavian or modern cottage interior schemes.

    Selecting the right stuffing and structural tension is essential for long-lasting display pieces. Pack your polyfill firmly toward the outer walls to maintain a round profile, leaving slight give in the center if you plan to press the top and bottom together for a flatter, traditional gourd silhouette. Natural elements like dried star anise, real wood stems, and leather accents elevate these handmade textiles into timeless autumn focal points.