Category: DIY

  • 10 Easy Toddler Boo Basket Ideas

    10 Easy Toddler Boo Basket Ideas

    Halloween is a magical time for toddlers, filled with costumes, candy, and creative fun. One of the best ways to make the holiday special for little ones is by putting together a toddler Boo Basket. These baskets are a delightful alternative to traditional trick-or-treating, offering a safe and curated selection of treats, toys, and activities tailored to young children. Whether you’re a parent, grandparent, or caregiver, a Boo Basket can bring joy and excitement to your toddler’s Halloween experience.

    In this article, we’ll explore 10 creative and engaging Boo Basket ideas that are perfect for toddlers. From sensory-friendly toys to educational activities, these baskets are designed to be both fun and functional. Each idea is carefully crafted to suit the developmental stage of toddlers, ensuring they have a memorable and enjoyable Halloween. Let’s dive into these toddler-friendly Boo Basket ideas and make this Halloween one to remember!

    1. Sensory-Friendly Halloween Basket
    1
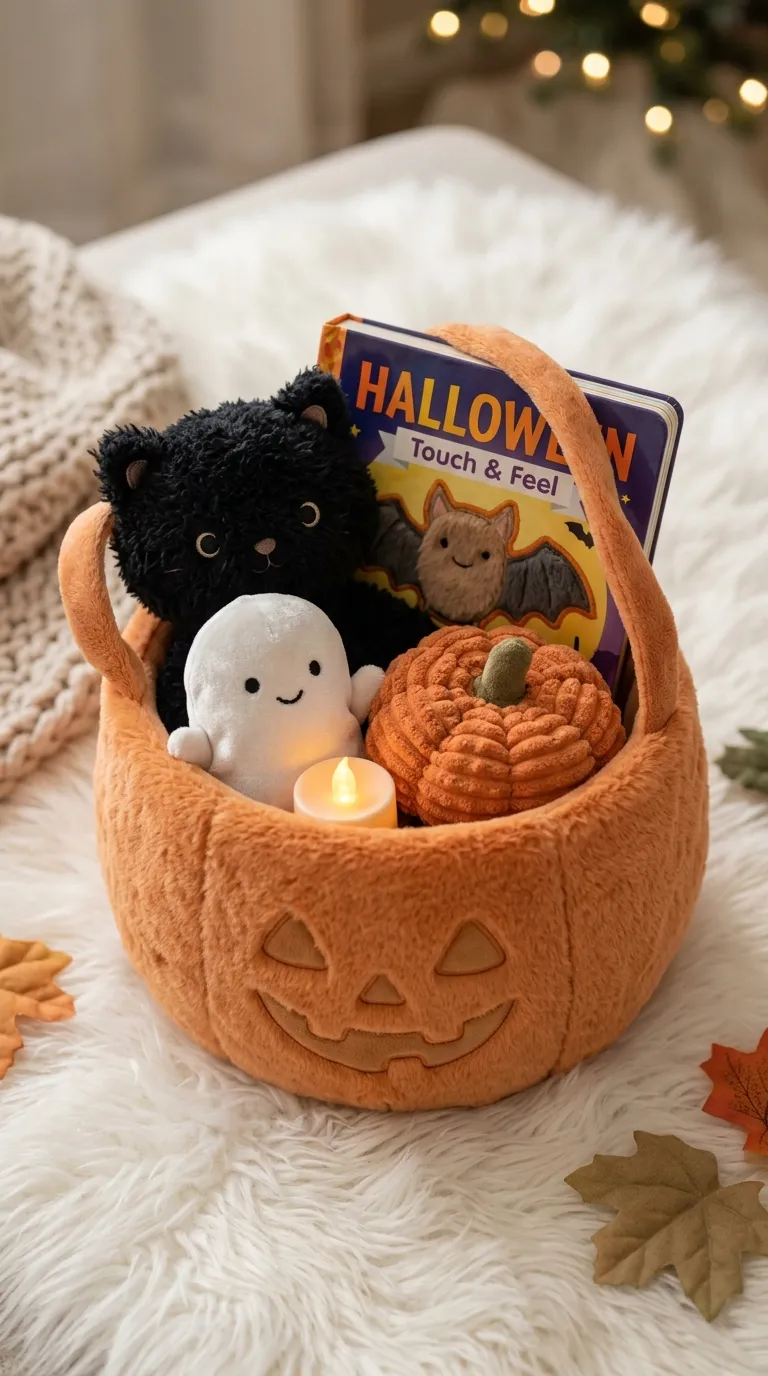
    A sensory-friendly Boo Basket is ideal for toddlers who are sensitive to textures, sounds, or bright lights. This basket can include soft, plush Halloween-themed toys, such as a fuzzy black cat or a gentle ghost plushie. Add in some sensory tools like a textured pumpkin squishy or a Halloween-themed fidget spinner to keep little hands busy. To make it extra special, include a small LED tea light for a calming glow and a Halloween board book with touch-and-feel elements.

    This type of basket is perfect for creating a soothing and enjoyable Halloween experience. It encourages exploration and play without overwhelming your toddler. You can also include a soft Halloween-themed blanket for cozy comfort during storytime or quiet play.

    2. Outdoor Adventure Boo Basket
    2
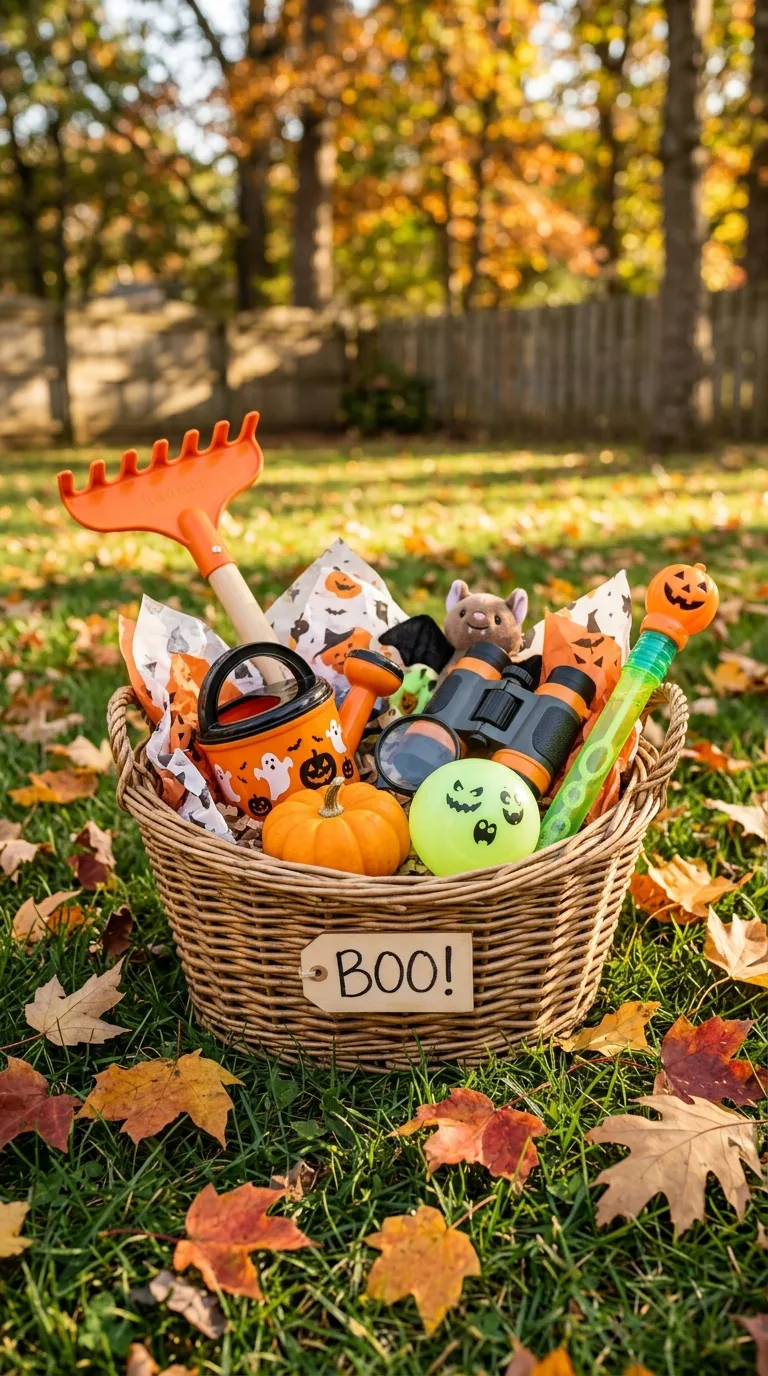
    If your toddler loves exploring the outdoors, an Outdoor Adventure Boo Basket is a fantastic choice. Fill it with items that encourage outdoor play and discovery. Include a miniature pumpkin that your toddler can decorate with stickers or washable markers. Add a kid-sized rake for helping with fall leaf cleanup, turning chores into a fun activity. A Halloween-themed watering can can also be a hit for little gardeners.

    For extra fun, include a glow-in-the-dark ball for evening play and a Halloween-themed bubble wand to blow spooky bubbles. This basket is perfect for active toddlers who enjoy spending time outside, and it provides plenty of opportunities for physical activity and imaginative play.

    3. Arts and Crafts Boo Basket
    3
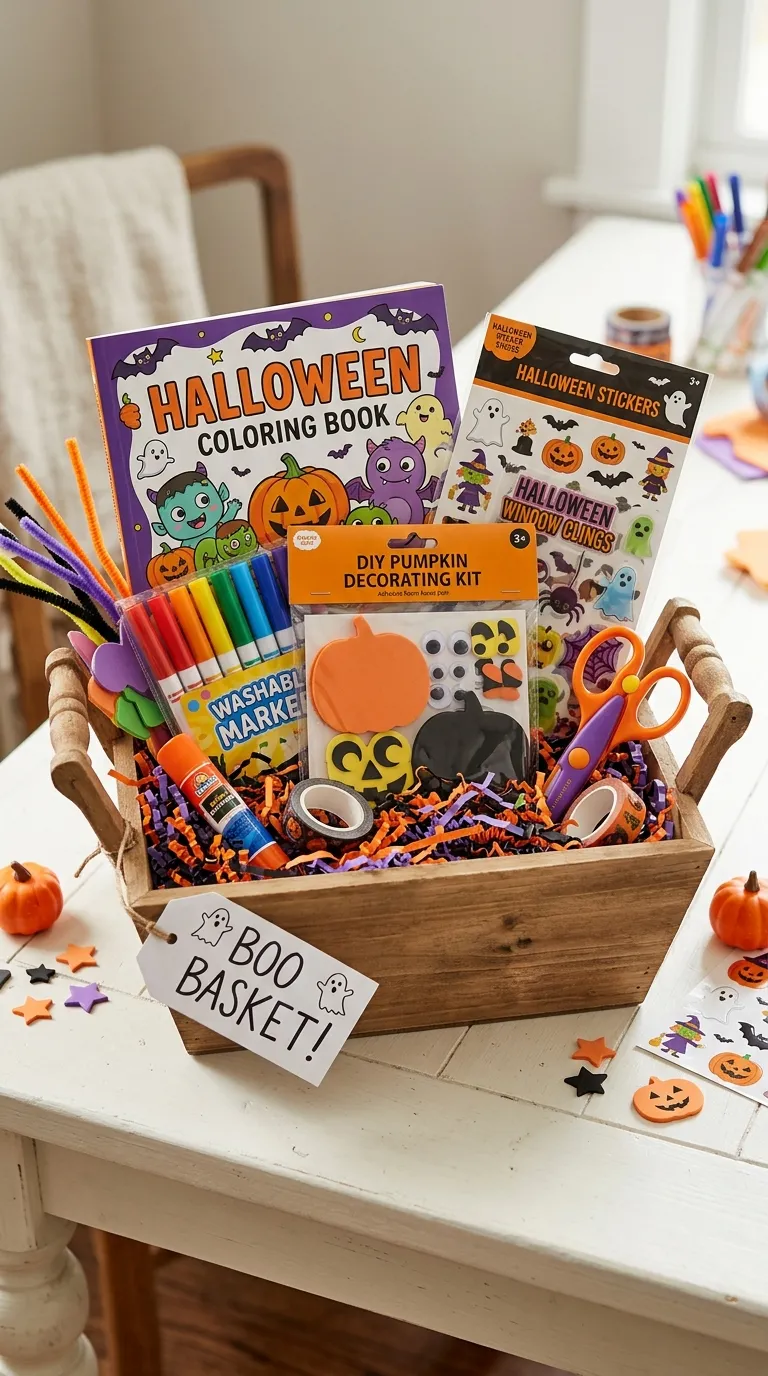
    Encourage your toddler’s creativity with an Arts and Crafts Boo Basket. This basket can be packed with Halloween-themed craft supplies, such as washable markers, stickers, and colored construction paper. Include a DIY pumpkin decorating kit with foam shapes and glue, or a Halloween coloring book with large, easy-to-color images.

    Add a set of child-safe scissors and a glue stick to help your toddler create their own Halloween masterpieces. For a mess-free option, include window clings that can be reused year after year. This basket is perfect for indoor fun and can keep your toddler engaged for hours while fostering fine motor skills and artistic expression.

    4. Storytime Boo Basket
    4
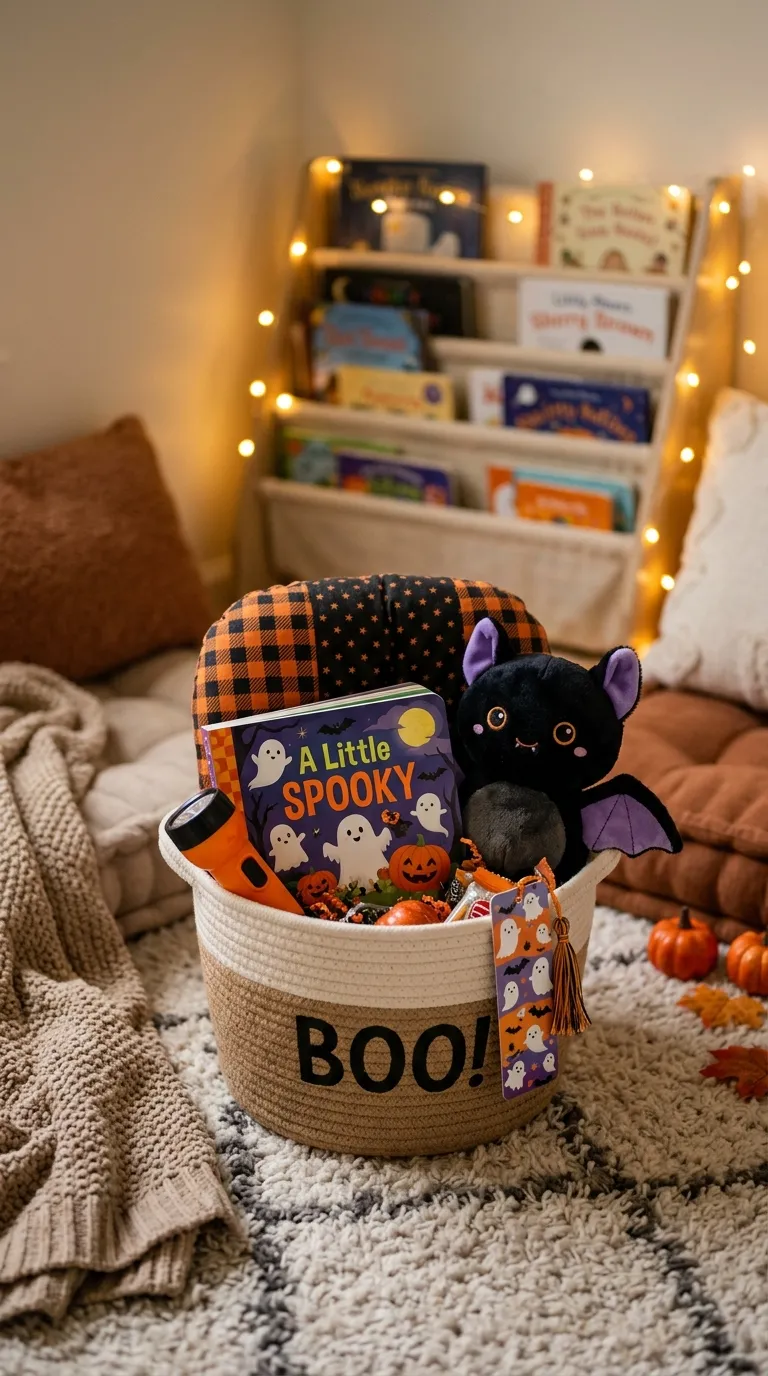
    Foster a love for reading with a Storytime Boo Basket. This basket is perfect for toddlers who enjoy being read to or flipping through books on their own. Include a selection of Halloween-themed board books with bright illustrations and simple text. Some popular choices include “Room on the Broom” by Julia Donaldson or “Little Blue Truck’s Halloween” by Alice Schertle.

    To make storytime even more special, add a soft, cozy reading pillow and a Halloween-themed stuffed animal to snuggle with. You can also include a small flashlight for reading under the covers or a Halloween-themed bookmark to keep track of their favorite pages. This basket is a wonderful way to create lasting memories and promote early literacy skills.

    5. Music and Movement Boo Basket
    5
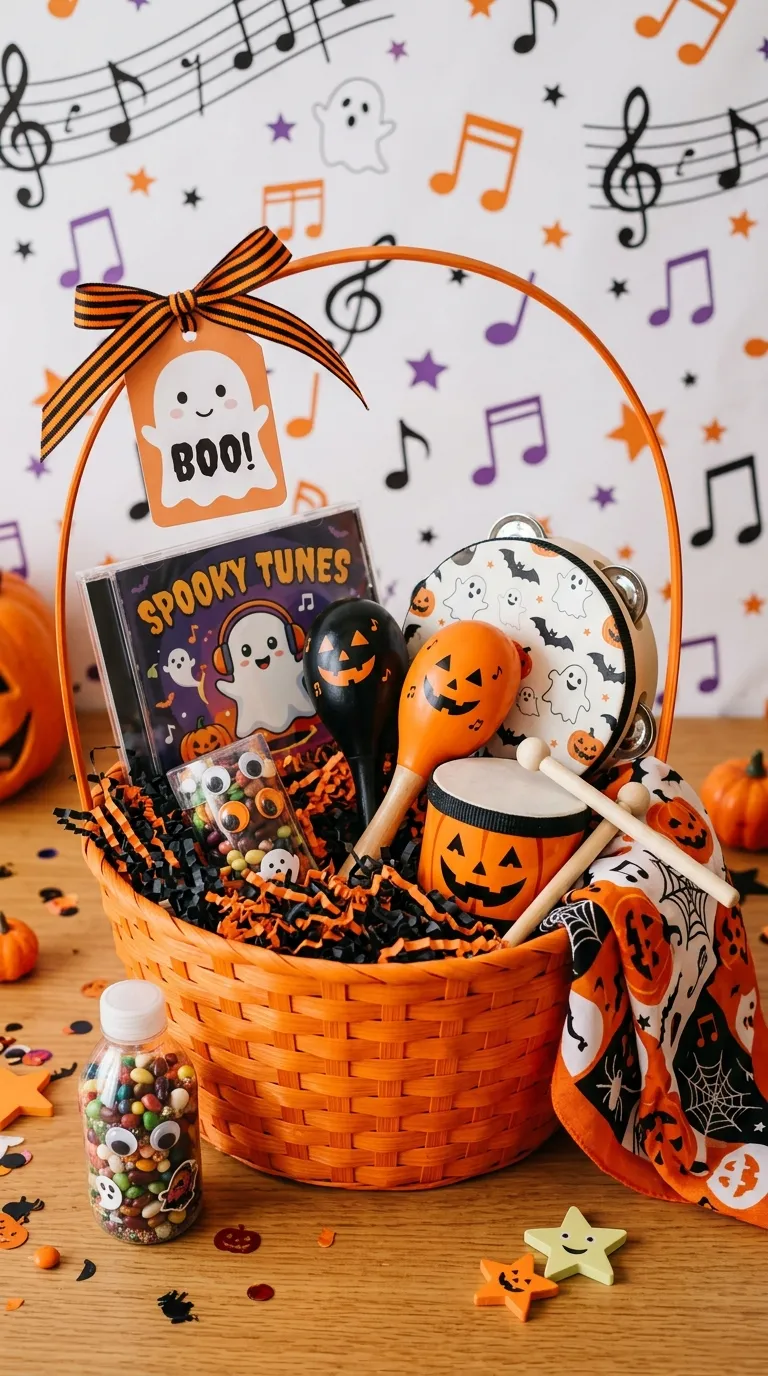
    Toddlers love to dance and move, and a Music and Movement Boo Basket can provide hours of active fun. Include a Halloween-themed CD or playlist with kid-friendly songs like “Monster Mash” or “Five Little Pumpkins”. Add a set of maracas or a tambourine for making music, and a Halloween-themed scarf for dancing and twirling.

    For extra fun, include a miniature pumpkin drum or a DIY shaker made from a small plastic container filled with beads or rice. This basket is perfect for encouraging physical activity, rhythm, and coordination. It’s also a great way to get the whole family involved in a Halloween dance party!

    6. Snack Attack Boo Basket
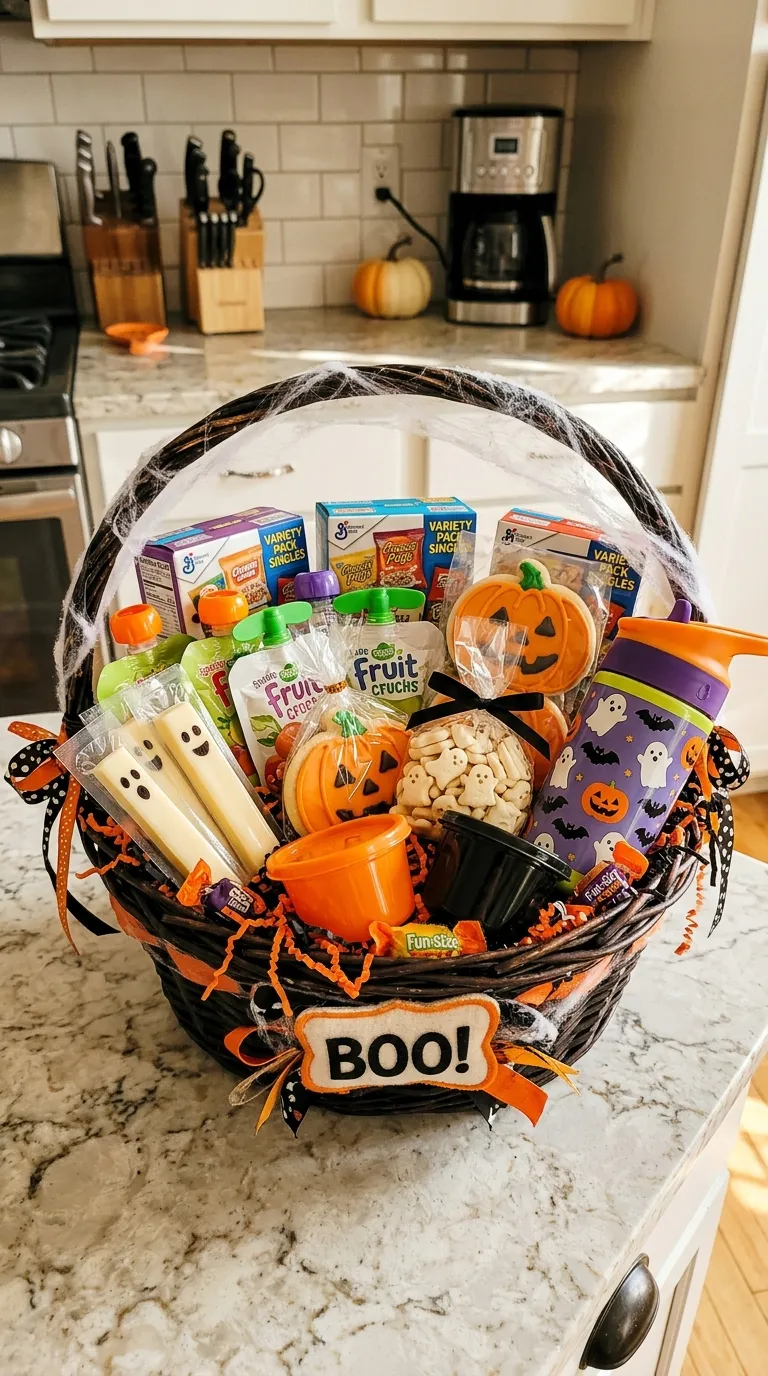
    6
    No Halloween is complete without some tasty treats, and a Snack Attack Boo Basket is a fun way to include them. Fill the basket with a variety of toddler-friendly snacks, such as mini boxes of cereal, fruit pouches, and cheese sticks. For a Halloween twist, include pumpkin-shaped cookies or ghost-shaped crackers.

    Add a small water bottle with a Halloween-themed label and a set of reusable snack cups to keep treats organized. For a healthier option, include dried fruit or yogurt-covered raisins. This basket is perfect for on-the-go snacking or a fun Halloween picnic. Just be sure to check for any allergies or dietary restrictions before including specific snacks.

    7. Dress-Up Boo Basket
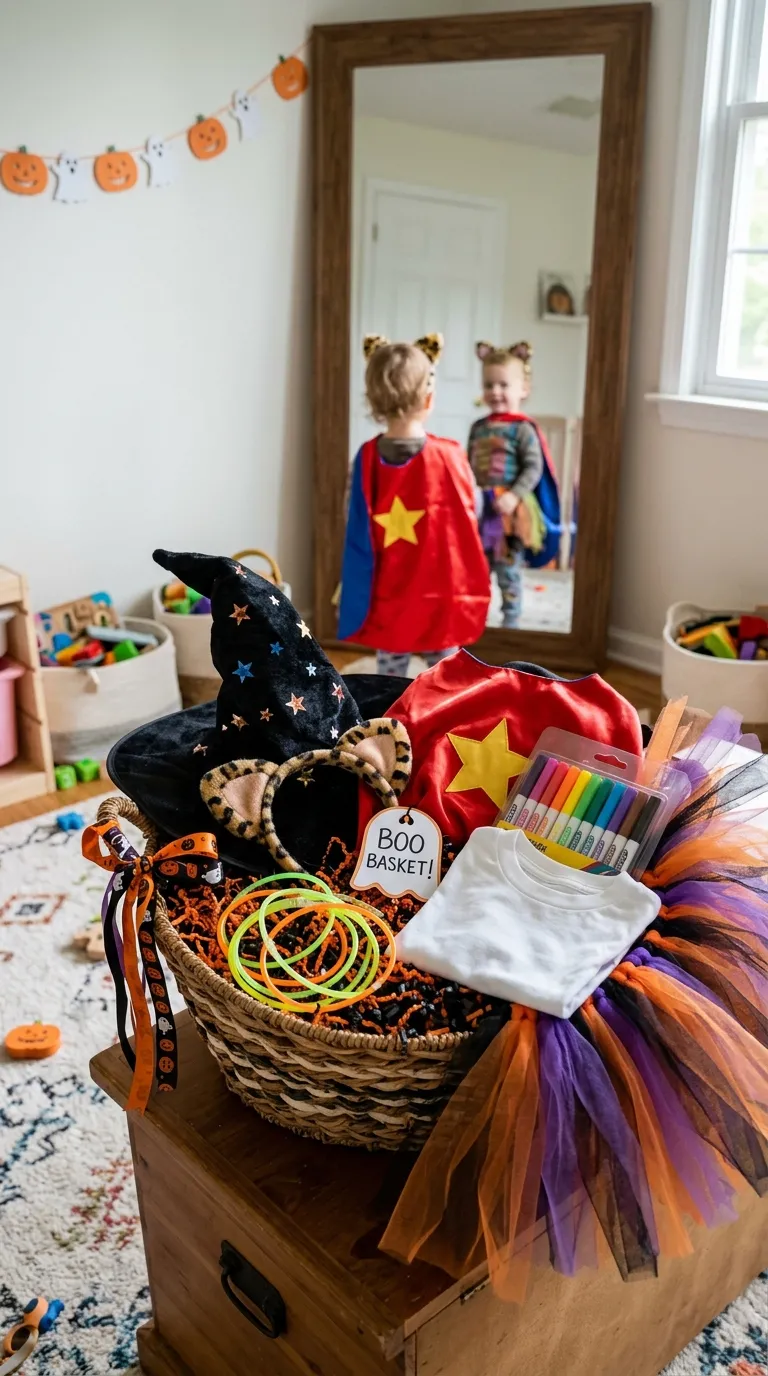
    7
    Toddlers love to play dress-up, and a Dress-Up Boo Basket can provide endless imaginative play. Include a selection of Halloween-themed costumes and accessories, such as a witch hat, a superhero cape, or a set of animal ears. Add a Halloween-themed tutu or a glow-in-the-dark necklace for extra fun.

    For a DIY touch, include a plain white T-shirt and a set of fabric markers so your toddler can design their own Halloween shirt. This basket encourages role-playing and creativity, and it can be used for Halloween parties, playdates, or just everyday fun at home.

    8. STEM Learning Boo Basket
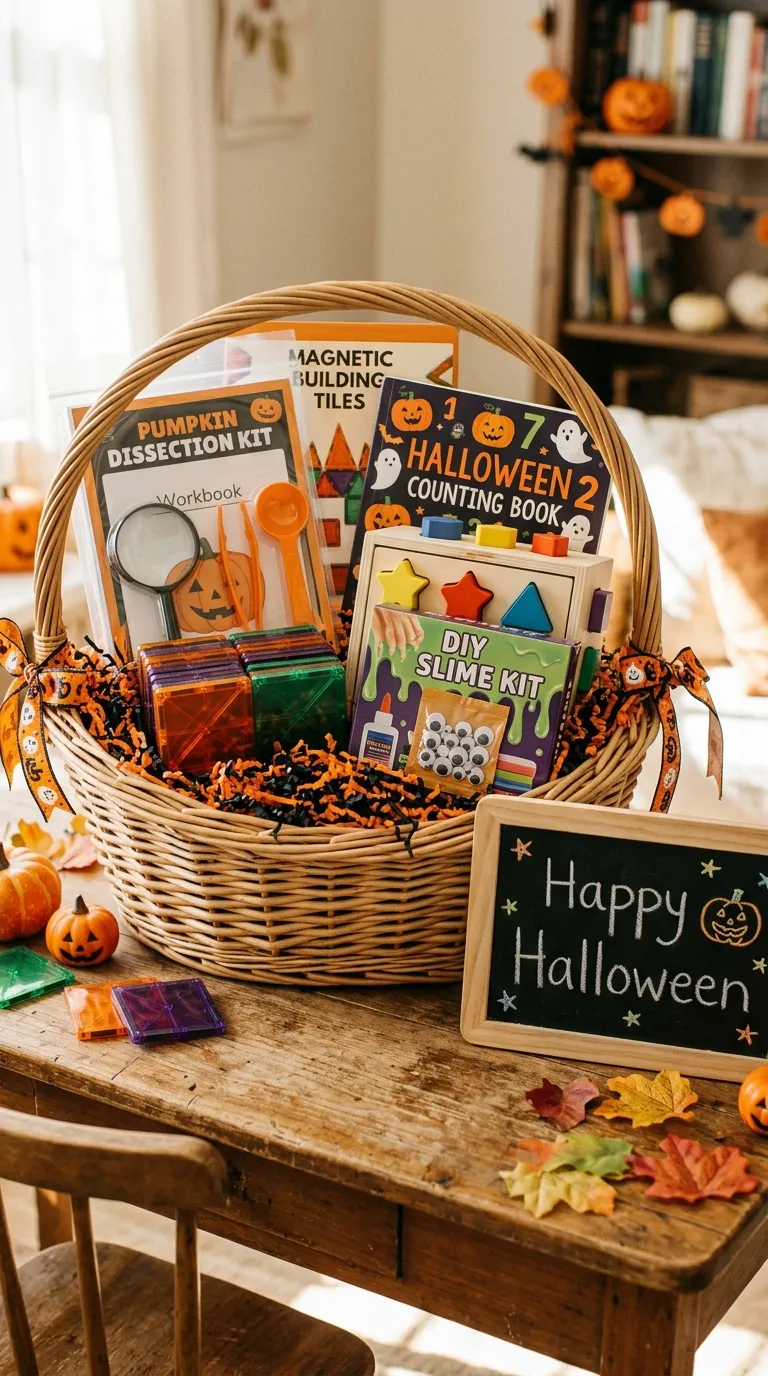
    8
    Introduce your toddler to the world of science, technology, engineering, and math with a STEM Learning Boo Basket. This basket can include Halloween-themed STEM activities, such as a pumpkin dissection kit for exploring the inside of a pumpkin or a set of magnetic building tiles for constructing spooky structures.

    Add a Halloween-themed counting book or a set of shape sorters to help your toddler develop early math skills. For a hands-on activity, include a DIY slime kit with Halloween-themed add-ins like googly eyes or orange glitter. This basket is perfect for fostering curiosity and a love for learning.

    9. Cozy Movie Night Boo Basket
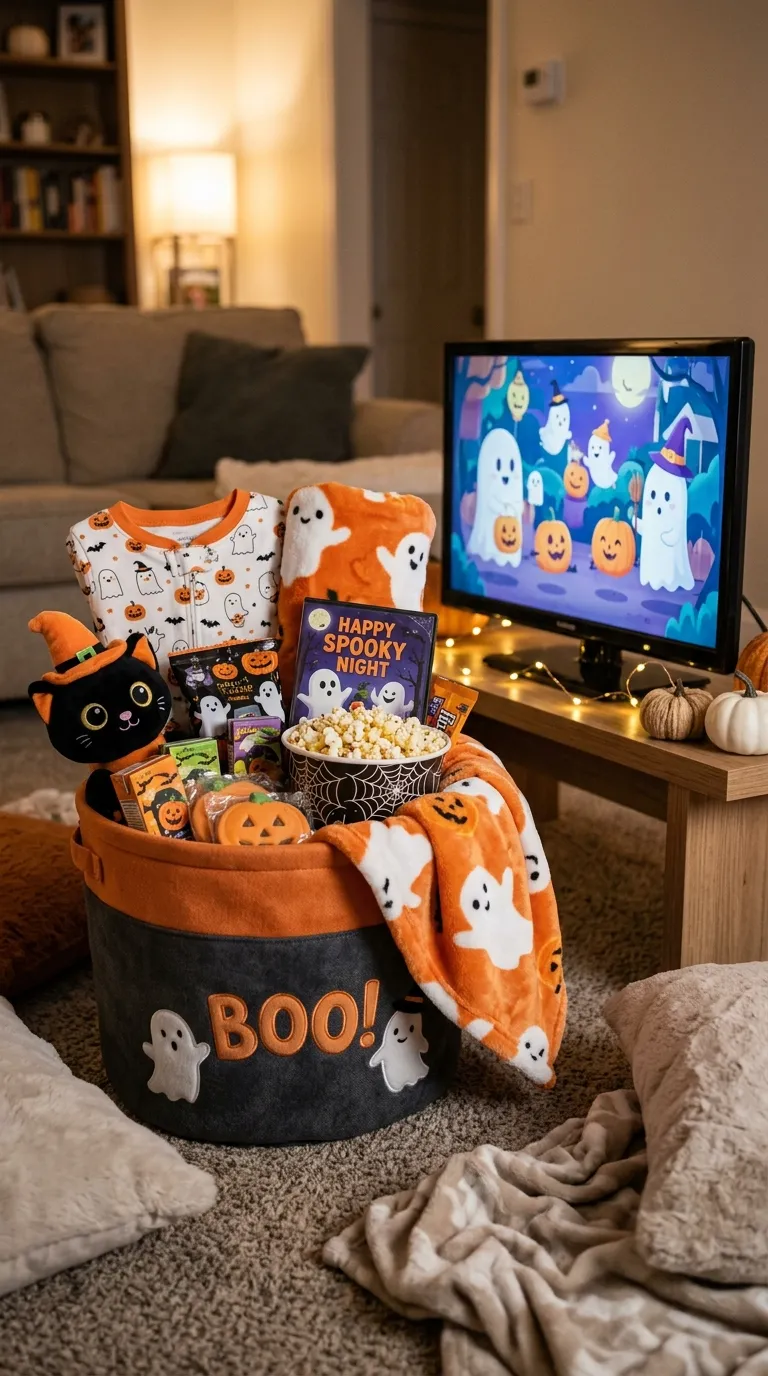
    9
    Create a memorable Halloween experience with a Cozy Movie Night Boo Basket. This basket is perfect for a relaxing evening at home with your toddler. Include a Halloween-themed DVD or streaming code for a kid-friendly movie like “It’s the Great Pumpkin, Charlie Brown” or “Coco”. Add a soft, cozy blanket and a set of Halloween-themed pajamas for a snuggly movie night.

    For snacks, include popcorn in a fun Halloween-themed bowl and a selection of toddler-friendly treats. Add a Halloween-themed stuffie for extra comfort during the movie. This basket is a wonderful way to create a calming and enjoyable Halloween tradition that your toddler will look forward to each year.

    10. Community Helper Boo Basket
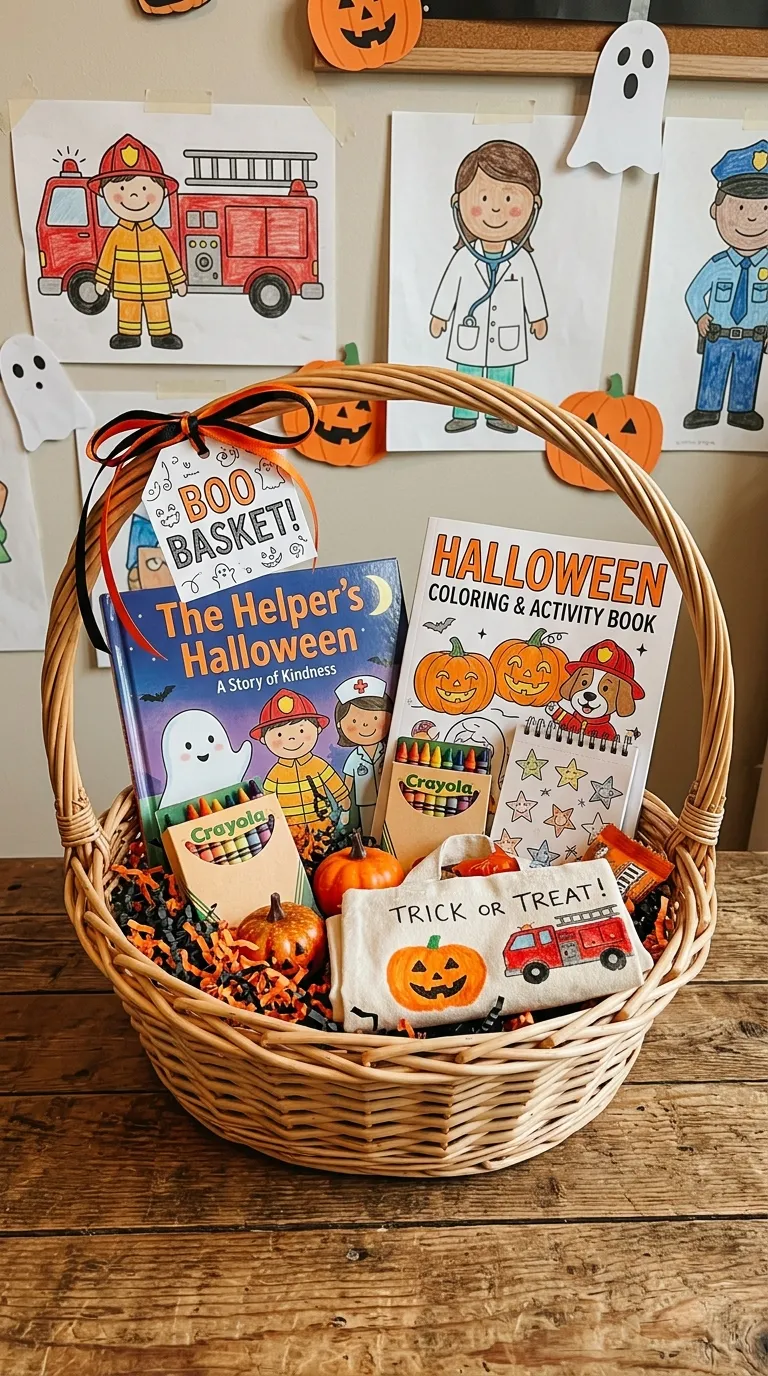
    10
    Teach your toddler about the importance of giving back with a Community Helper Boo Basket. This basket can include items that encourage kindness and community involvement. Start with a Halloween-themed coloring book with pages dedicated to community helpers like firefighters, police officers, and doctors. Add a set of crayons and a small notebook for drawing or writing thank-you notes.

    Include a DIY trick-or-treat bag that your toddler can decorate and use to collect candy for a local charity or food bank. Add a Halloween-themed book about kindness, such as “The Little Ghost Who Wanted to Be Scary” by Marie-Louise Gay. This basket is perfect for instilling values of empathy and generosity while still celebrating the fun of Halloween.

    Conclusion

    Creating a toddler Boo Basket is a wonderful way to make Halloween special for your little one. Whether you choose a sensory-friendly basket, an outdoor adventure basket, or any of the other creative ideas we’ve shared, each option is designed to bring joy, engagement, and a touch of Halloween magic to your toddler’s day. These baskets offer a safe and curated way to celebrate the holiday while tailoring the experience to your child’s interests and developmental stage.

    Remember, the key to a great Boo Basket is personalization. Think about what your toddler loves most and build the basket around their unique preferences. Whether it’s crafts, snacks, dress-up, or learning, there’s a Boo Basket idea here that will make this Halloween unforgettable. So grab a basket, fill it with love and creativity, and get ready to see your toddler’s face light up with excitement!
  • 10 DIY Egg Carton Craft Ideas for Toddlers

    10 DIY Egg Carton Craft Ideas for Toddlers

    Looking for fun, budget-friendly, and eco-conscious craft activities to keep your toddler engaged? Egg cartons are a versatile and often overlooked material that can be transformed into a variety of creative projects. These DIY egg carton crafts for toddlers not only encourage imaginative play but also help develop fine motor skills, hand-eye coordination, and cognitive abilities. Whether you’re a parent, teacher, or caregiver, these simple egg carton crafts are perfect for rainy days, playdates, or educational activities at home or in the classroom.

    From adorable animals to interactive toys, the possibilities are endless. Best of all, these projects require minimal supplies—most of which you likely already have at home. In this guide, we’ll explore 10 easy egg carton crafts for kids that are safe, engaging, and tailored for little hands. Each idea includes step-by-step instructions and tips to make the process smooth and enjoyable for both you and your child.

    1. Egg Carton Caterpillars

    1
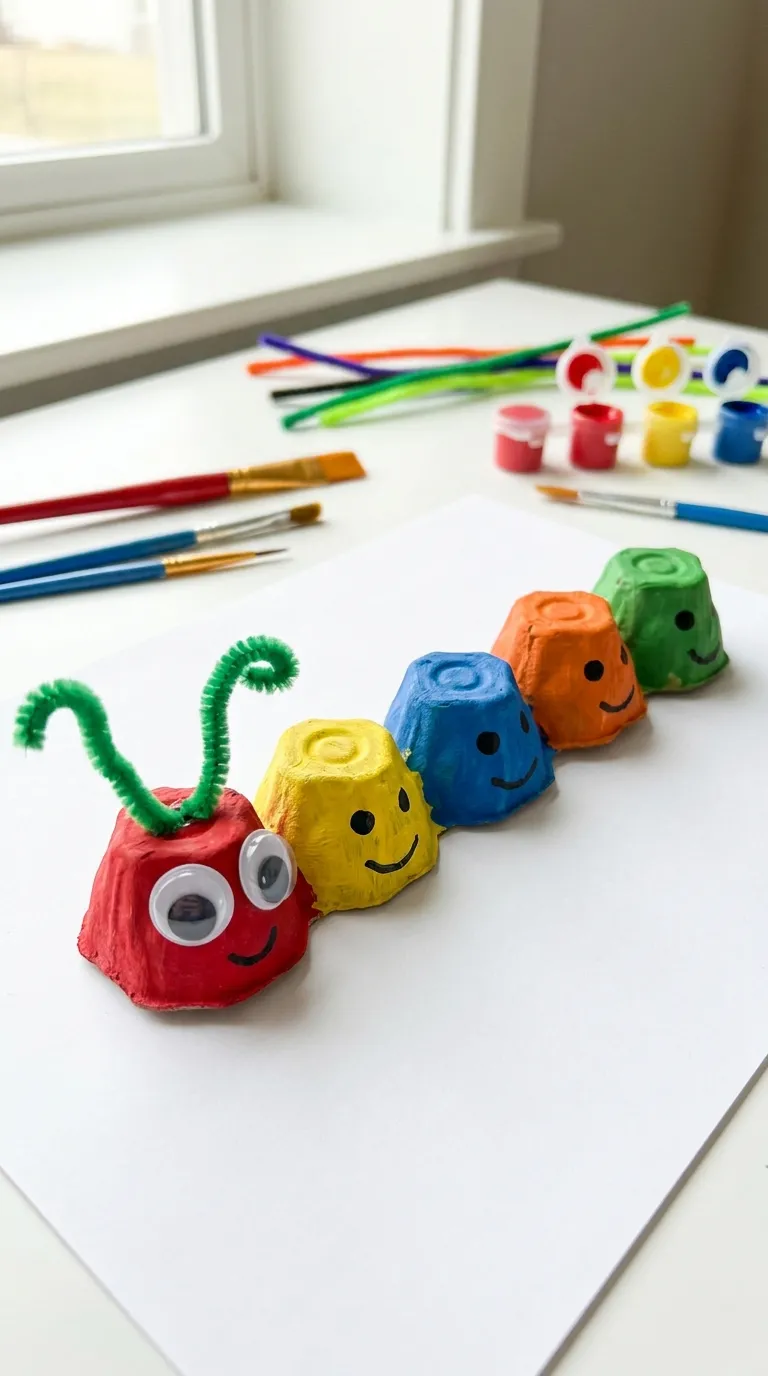
    Transform an egg carton into a cute and colorful caterpillar that your toddler will love to play with. This project is excellent for teaching colors, counting, and sequencing. To get started, cut the egg carton into a strip of connected cups—usually five or six for the body. Let your child paint each section in bright, vibrant colors. Once dry, add googly eyes to the first cup to create the head. Use pipe cleaners for antennae and small pom-poms or stickers for decorative details.

    This toddler-friendly egg carton craft can be extended by turning it into a learning activity. Ask your child to count the segments or name the colors they used. For added fun, create a simple story where the caterpillar transforms into a butterfly, incorporating educational elements about life cycles.

    2. Egg Carton Flower Bouquet

    2
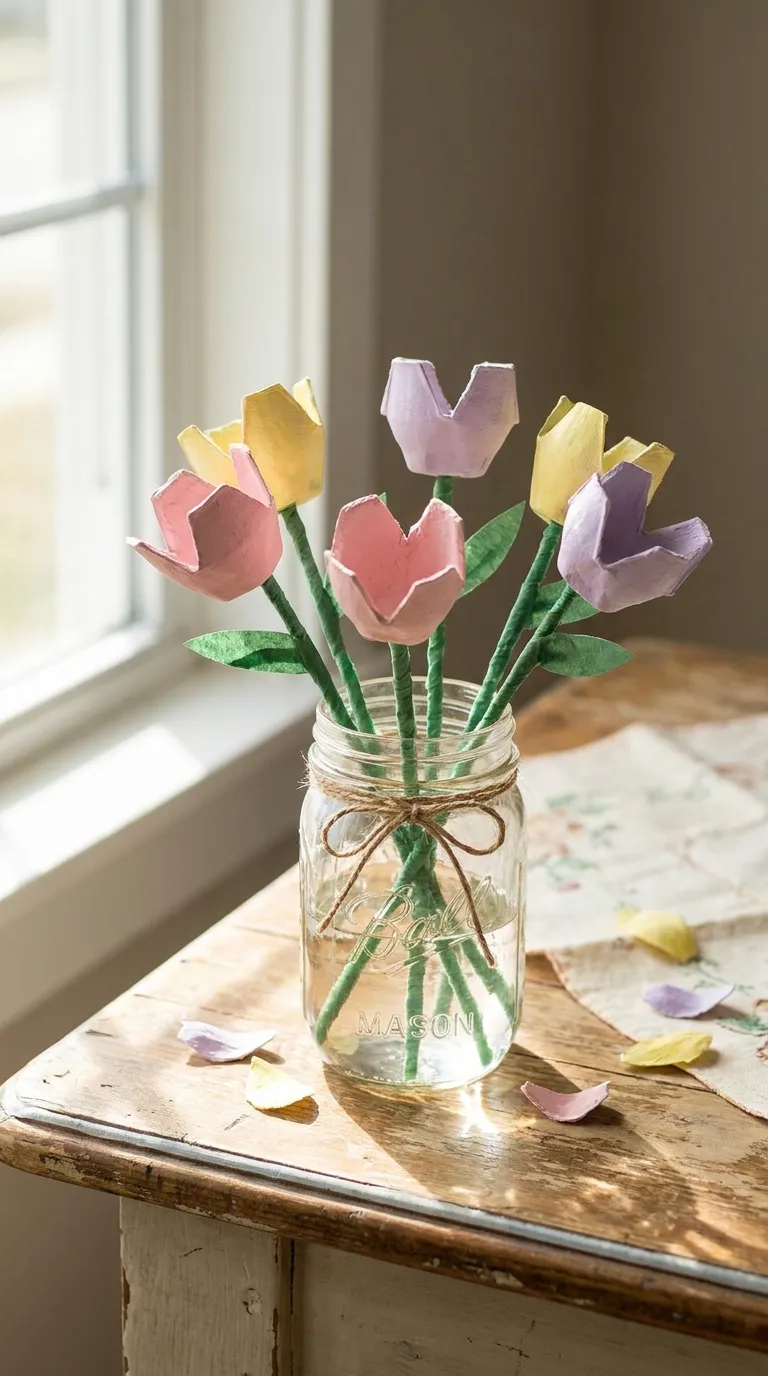
    Bring a touch of nature indoors with a beautiful egg carton flower bouquet. This craft is perfect for spring or Mother’s Day gifts. Begin by cutting individual cups from the egg carton. Trim the edges to shape them into petals. Let your toddler paint the cups in various colors—pink, yellow, purple, or any shade they love. Once dry, poke a small hole in the bottom of each cup and thread a pipe cleaner through to create the stem. Bend the end of the pipe cleaner to secure it.

    Arrange the flowers in a small vase or tie them together with a ribbon. This easy egg carton craft for kids teaches fine motor skills as they paint and assemble the flowers. You can also discuss the parts of a flower, such as petals, stems, and leaves, to add a layer of learning.

    3. Egg Carton Ladybugs

    3
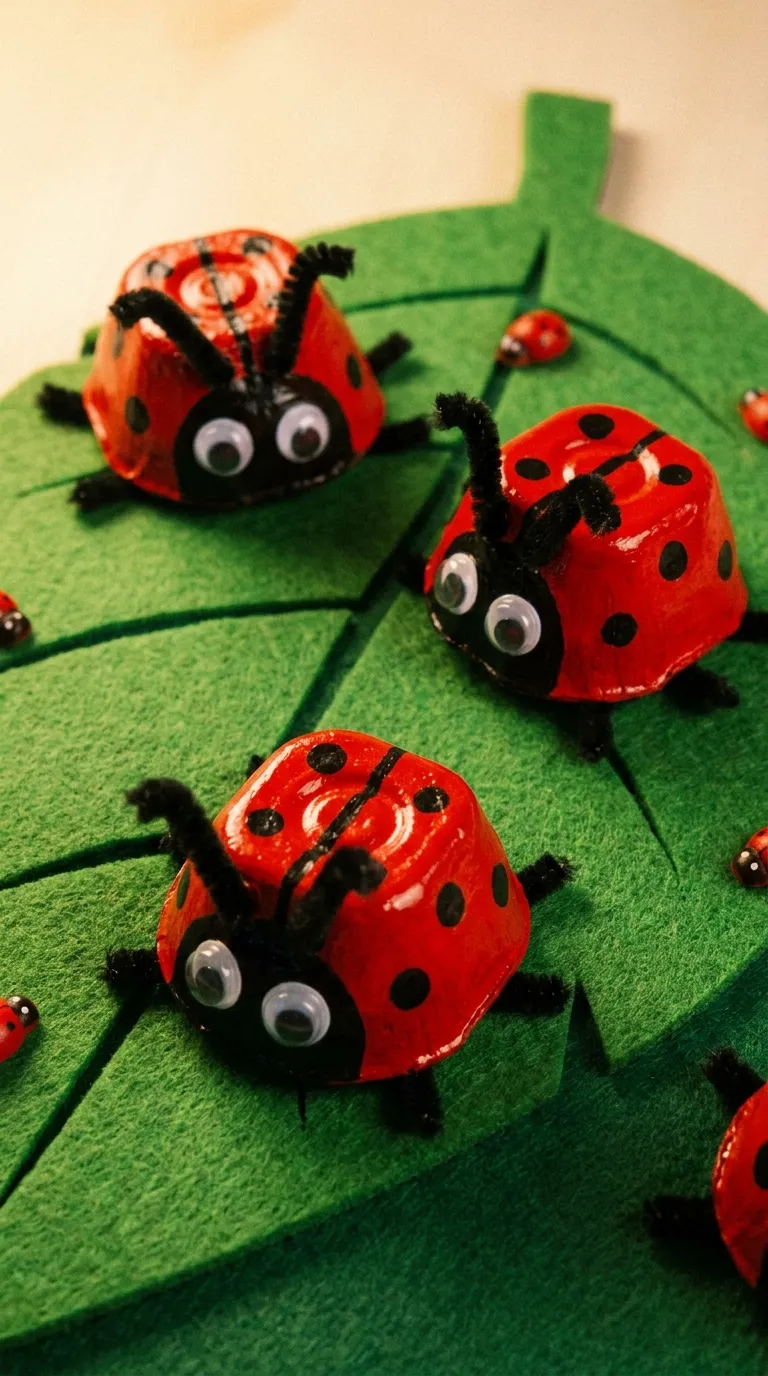
    Ladybugs are a favorite among toddlers, and creating them from egg cartons is both simple and delightful. Cut the egg carton into individual cups, and let your child paint them red. Once dry, use black paint or markers to add spots. For the head, cut a small circle from the remaining carton material or use black construction paper. Glue on googly eyes and attach the head to the red body with glue or tape. Pipe cleaners can be used for antennae.

    This DIY egg carton insect can be part of a larger garden-themed craft session. Encourage your toddler to create a small garden scene using green paper for leaves and blue for the sky. This activity promotes creativity and storytelling as they play with their new ladybug friends.

    4. Egg Carton Train

    4
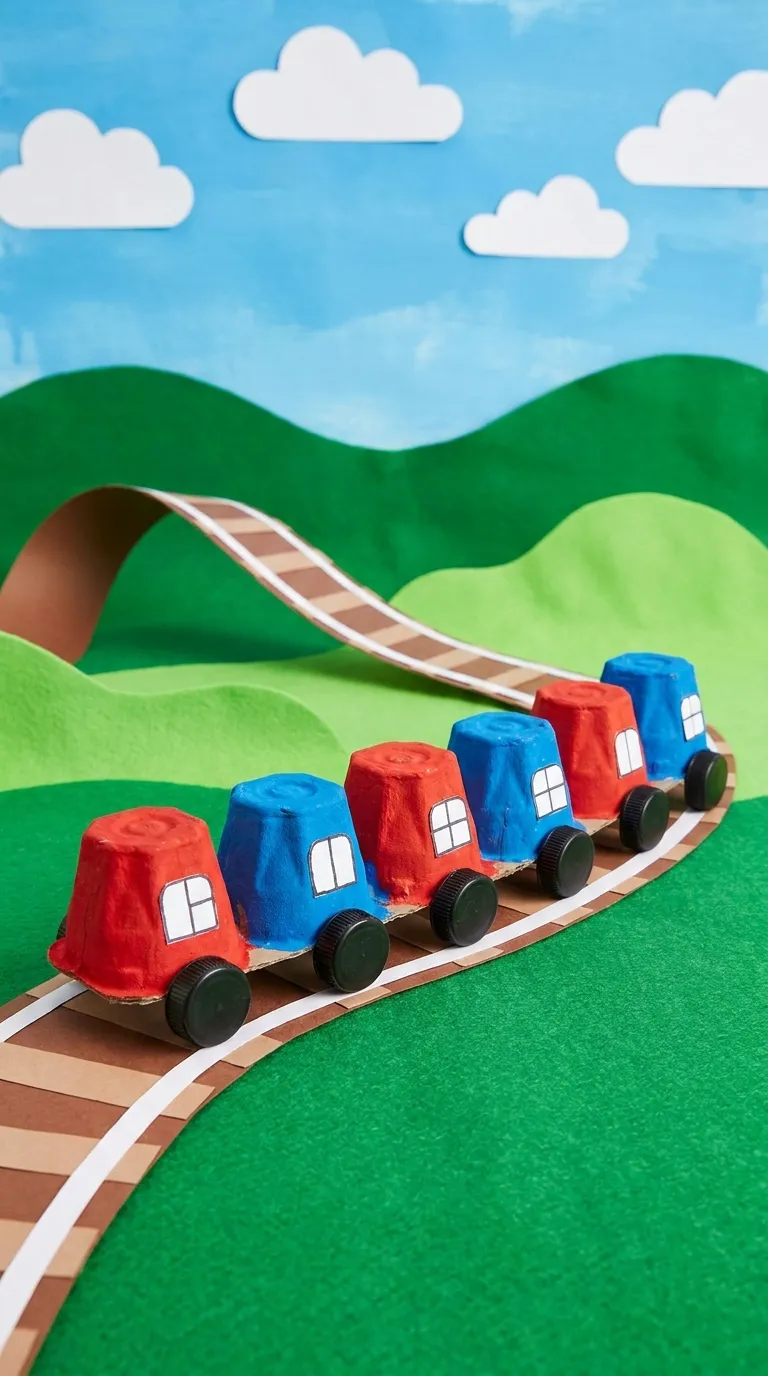
    All aboard the creativity express! An egg carton train is a fantastic way to upcycle materials into a fun toy. For this project, cut the egg carton into a long strip of connected cups—enough to form the train cars. Paint the entire strip in a single color or let your toddler choose different colors for each car. Once dry, add details like windows and wheels using markers or small circular stickers. Connect the cars with pipe cleaners or string.

    This interactive egg carton craft encourages imaginative play as your child pretends to drive the train, load cargo, or create a train station. You can also incorporate learning by counting the cars or discussing colors and shapes used in the design.

    5. Egg Carton Treasure Box

    5
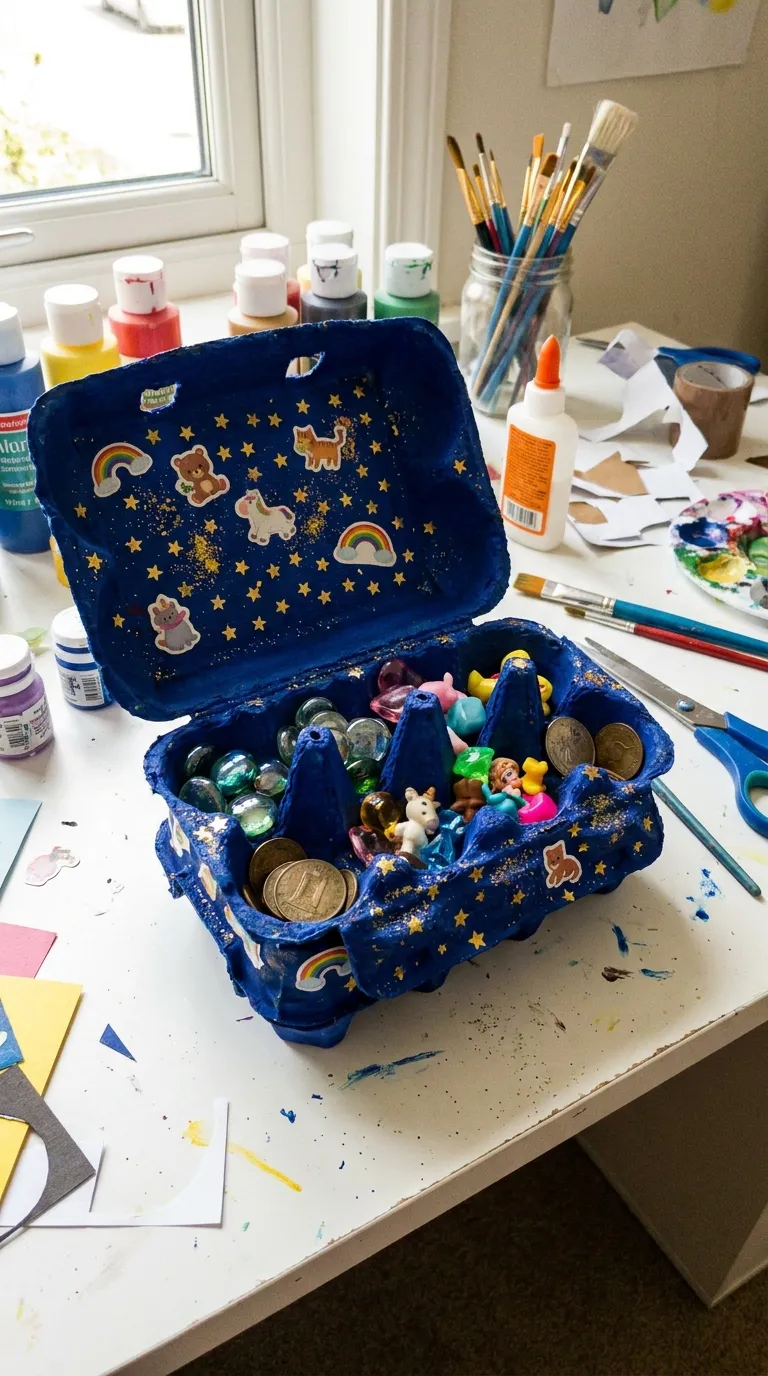
    Every toddler loves a special place to keep their tiny treasures. An egg carton treasure box is both practical and fun to make. Start by cutting the lid off the egg carton and painting the entire box in your child’s favorite color. Let them decorate it with stickers, glitter, or drawings. Once dry, the box can be used to store small toys, beads, or other trinkets.

    This practical egg carton craft for toddlers teaches organization and responsibility as they learn to care for their belongings. You can also turn it into a sorting activity by having them group items by color, size, or type.

    6. Egg Carton Animals: Turtles and Frogs

    6
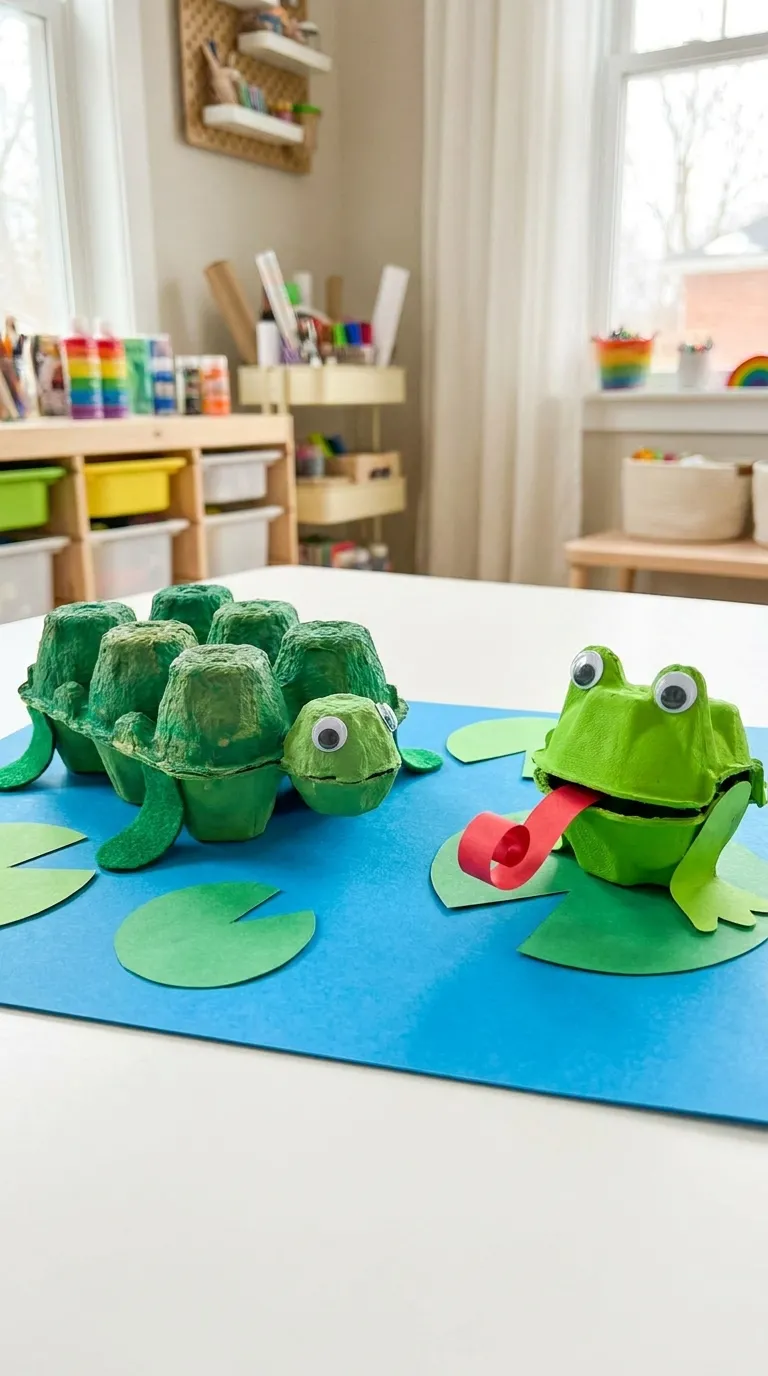
    Egg cartons can easily be transformed into a variety of animals, with turtles and frogs being two of the simplest and most engaging options. For a turtle, cut the egg carton into a single cup and paint it green. Add a head and legs using small pieces of green construction paper or felt. Use googly eyes to bring the turtle to life. For a frog, follow a similar process but paint the cup green and add a long red tongue using paper.

    These egg carton animal crafts are perfect for storytelling and pretend play. Create a small pond or forest scene using blue and green paper, and let your toddler act out stories with their new animal friends. This activity also provides an opportunity to teach them about different animals and their habitats.

    7. Egg Carton Christmas Tree

    7
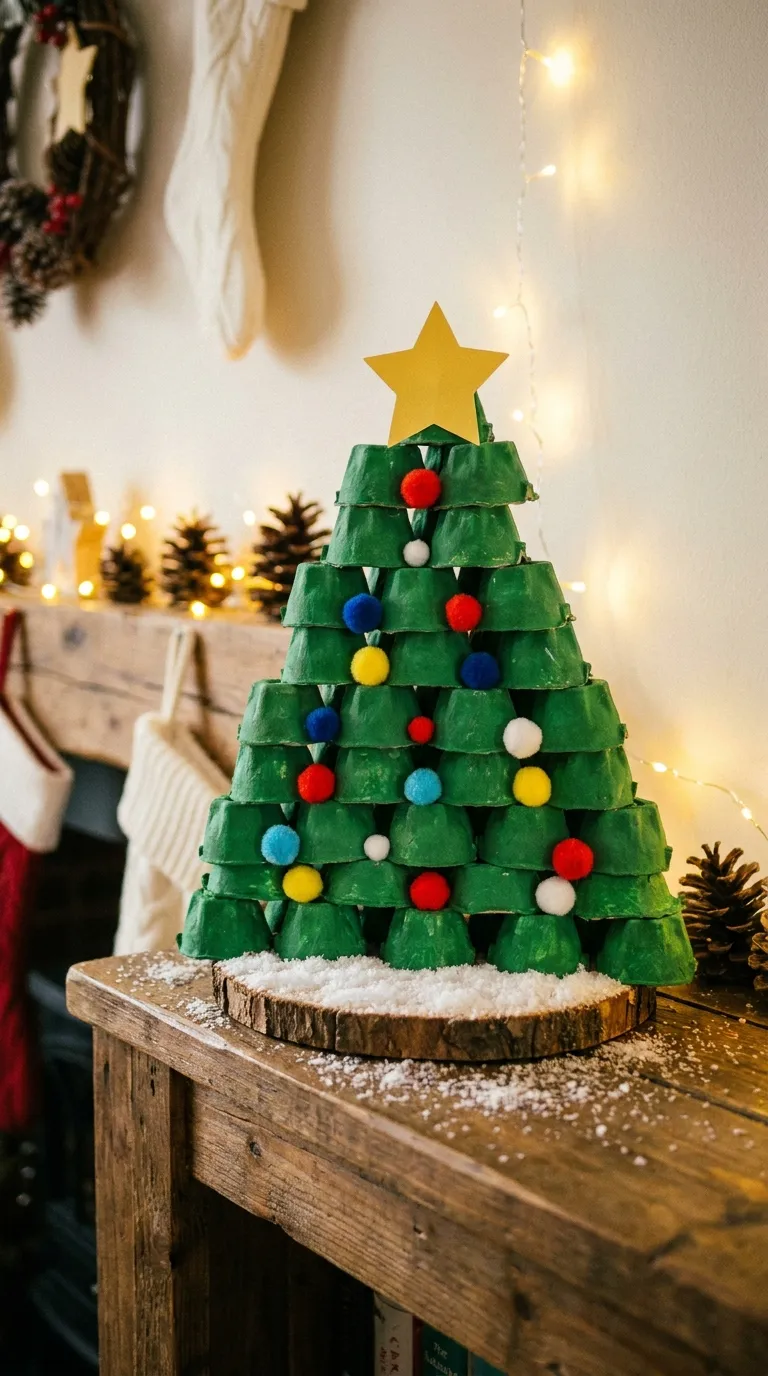
    Bring some holiday cheer into your home with an egg carton Christmas tree. This craft is ideal for the festive season and can be a fun way to decorate your space. Cut the egg carton into a triangular shape by arranging the cups in a pyramid. Paint the tree green and let it dry. Once dry, let your toddler decorate it with pom-poms, sequins, or small stickers for ornaments. Add a star or a small yellow pom-pom at the top for the tree topper.

    This holiday-themed egg carton craft can be a great way to introduce your child to holiday traditions. You can also use it as an opportunity to discuss shapes, as they recognize and create the triangular form of the tree.

    8. Egg Carton School Bus

    8
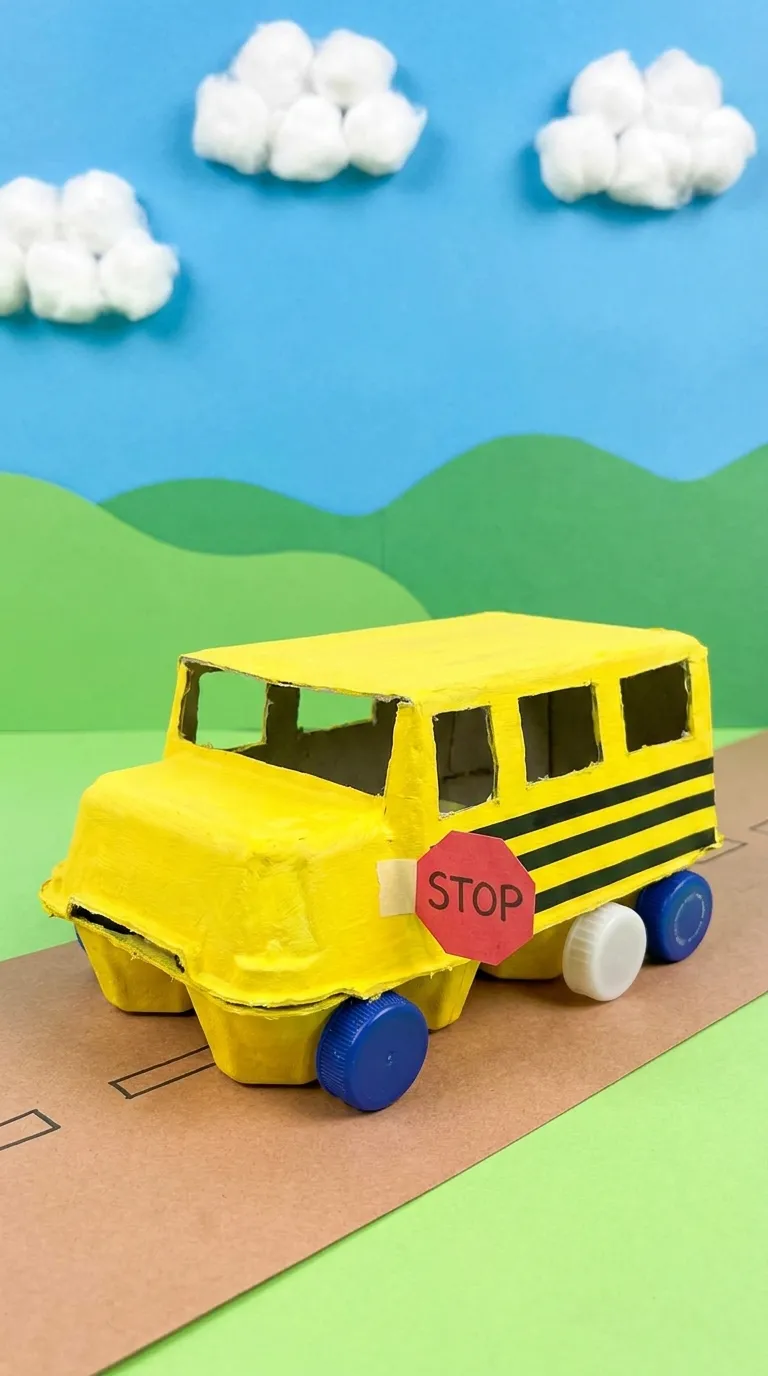
    Rev up the fun with an egg carton school bus that your toddler can use for imaginative play. Cut the egg carton lengthwise to form the body of the bus. Paint it yellow and add black stripes using paint or markers. Use bottle caps or circular stickers for the wheels, and add windows with markers or small pieces of paper. Don’t forget the red stop sign, which can be made from a small piece of red paper.

    This transportation-themed egg carton craft is perfect for teaching your child about vehicles and their functions. Encourage them to create a small road or city scene using paper, and let them drive their bus around, picking up and dropping off passengers (which can be small toys or drawings).

    9. Egg Carton Binoculars

    9
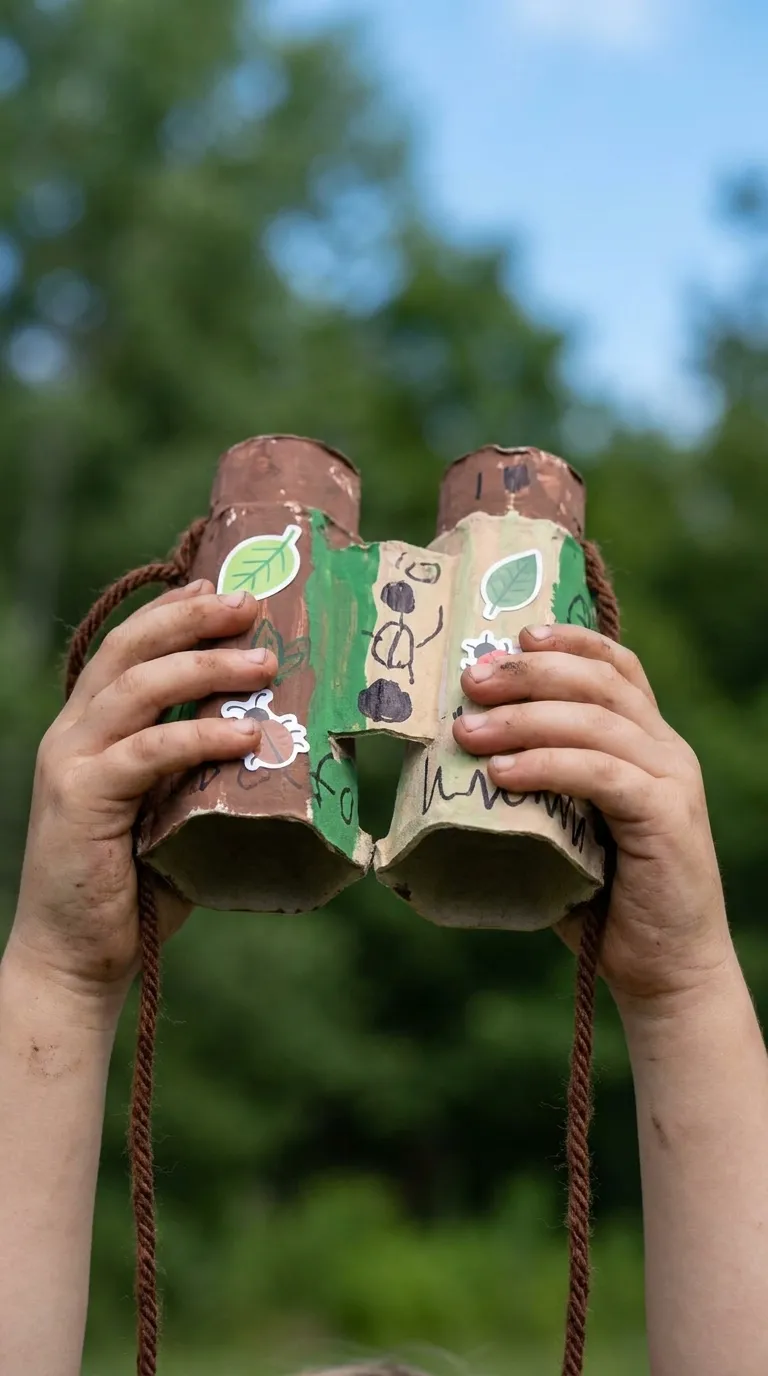
    Encourage outdoor exploration with a pair of DIY egg carton binoculars. Cut two cups from the egg carton and tape them together side by side. Let your toddler paint and decorate the binoculars with stickers or markers. Once dry, poke a hole on the outer side of each cup and attach a string or yarn to create a strap. Your child can wear the binoculars around their neck and use them to explore the backyard, park, or even their own home.

    This outdoor-themed egg carton craft promotes curiosity and observation skills. Go on a nature scavenger hunt and ask your child to find items like leaves, birds, or flowers using their binoculars. This activity is a great way to combine crafting with outdoor play.

    10. Egg Carton Musical Shakers

    10
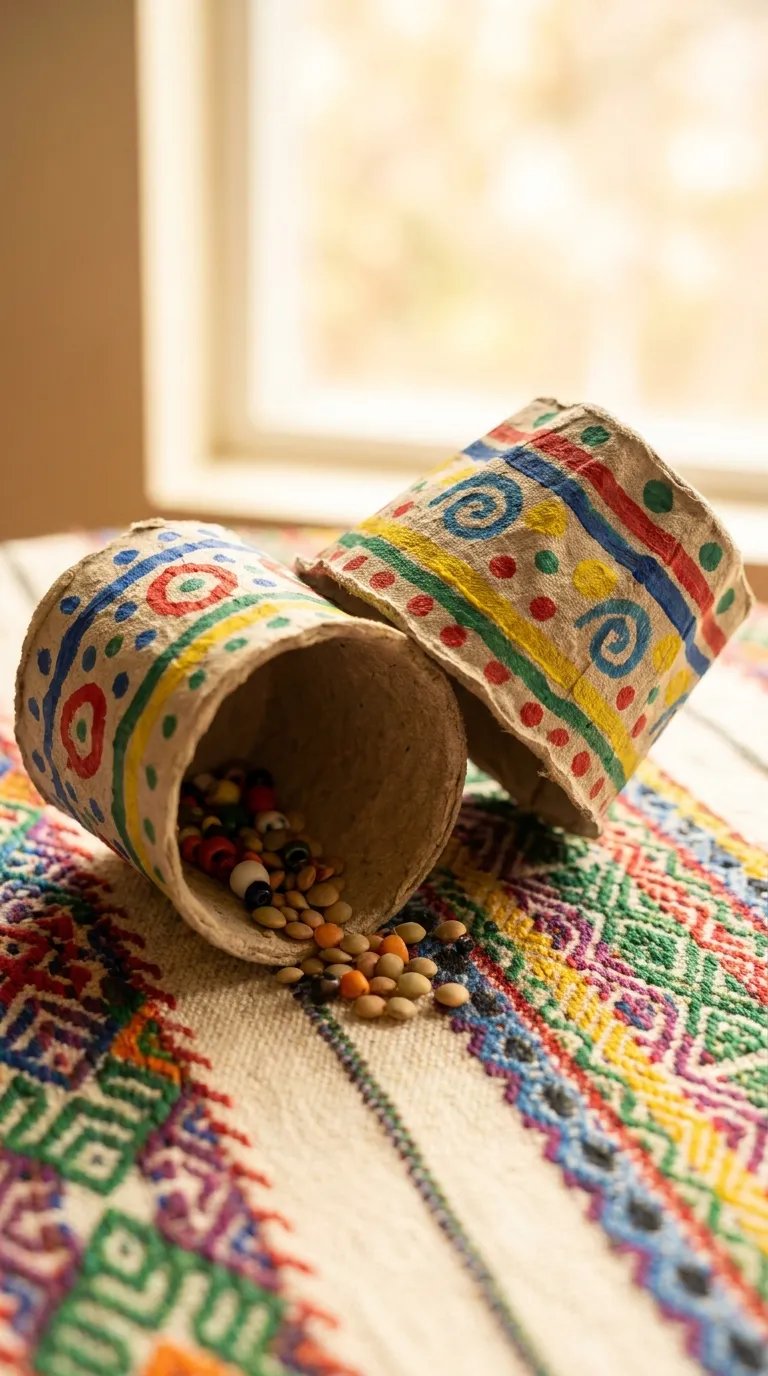
    Turn egg cartons into musical instruments with this fun and interactive craft. Cut the egg carton into individual cups and fill each with small items like rice, beans, or beads to create different sounds. Seal the open end with tape or glue a piece of cardboard to close it. Let your toddler decorate the outside of the shakers with paint, stickers, or markers. Once dry, they can shake the instruments to create their own music.

    This musical egg carton craft for kids introduces your child to the world of sound and rhythm. Play along with them by creating simple songs or beats, and encourage them to experiment with different sounds by shaking the shakers at various speeds. This activity is perfect for developing auditory skills and a love for music.

    Conclusion

    Egg cartons are a treasure trove of crafting potential, offering endless opportunities for creativity and learning. These 10 DIY egg carton crafts for toddlers are not only fun and engaging but also promote the development of essential skills such as fine motor control, problem-solving, and imaginative thinking. Whether you’re looking for a quiet indoor activity or a hands-on learning experience, these projects are sure to provide hours of entertainment.

    What’s more, these crafts are eco-friendly, making them a great way to teach your child about recycling and reusing materials. So, the next time you finish a dozen eggs, don’t toss the carton—turn it into a masterpiece! Share these ideas with friends, family, or fellow parents, and spread the joy of crafting with everyday materials.

  • 10 Homecoming Pose Ideas with Friends

    10 Homecoming Pose Ideas with Friends

    Homecoming is one of the most memorable events of the school year, and capturing the perfect photos with your friends is a must. Whether you’re posing before the dance, during the game, or at an after-party, the right poses can make your pictures stand out. From classic group shots to creative and fun arrangements, these homecoming pose ideas with friends will help you create stunning, share-worthy memories.

    In this guide, we’ll explore 10 unique and creative homecoming poses that work for groups of all sizes. Whether you’re going for elegant, playful, or candid vibes, these ideas will ensure your photos look polished and authentic. Plus, we’ll provide tips on lighting, angles, and expressions to elevate your shots even further. Get ready to strike a pose and make this homecoming unforgettable!

    1. The Classic Group Hug

    1
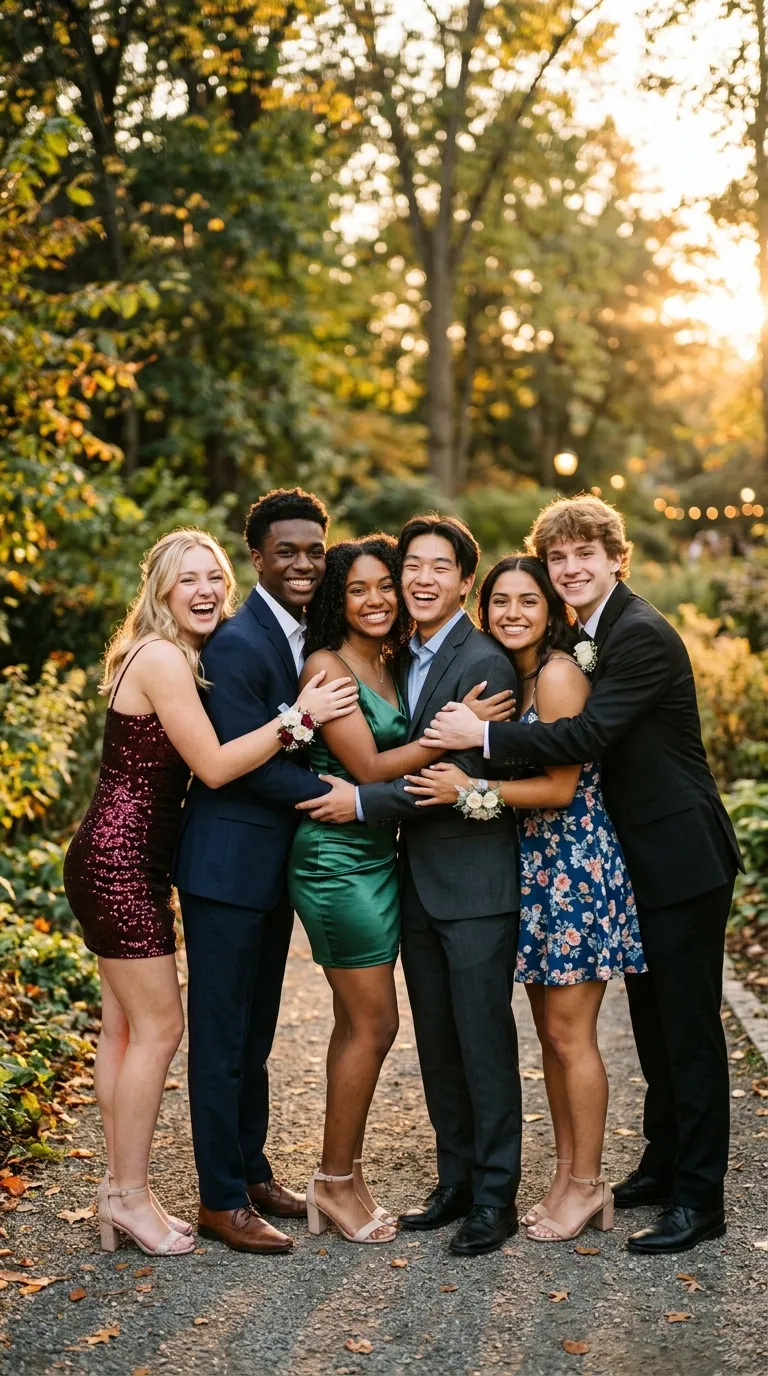
    The classic group hug is a timeless homecoming pose that radiates warmth and friendship. This pose works perfectly for both small and large groups, making everyone feel included. To execute it, have everyone stand close together, with arms wrapped around each other’s shoulders or waists. Lean in slightly toward the center to create a cohesive, tightly-knit look.

    For the best results, ensure that everyone’s faces are visible. Avoid having anyone’s head blocked by another person. A slight tilt of the head or a big smile can add energy to the shot. This pose is ideal for pre-dance photos or casual snapshots with your closest friends. The simplicity of the group hug makes it a go-to for capturing genuine connections.

    Pro tip: Ask the photographer to take the shot from a slightly elevated angle to avoid unflattering perspectives. Natural lighting, such as during golden hour, will enhance the warmth of the moment.

    2. The Back-to-Back Circle

    2
    If you want a fun and dynamic pose for homecoming pictures with friends, try the back-to-back circle. This pose involves everyone standing in a circle with their backs to the center, looking over their shoulders toward the camera. It creates a sense of unity while keeping each person’s face visible.

    To make it more interesting, have everyone strike a similar pose, such as crossing their arms or placing their hands on their hips. This pose works especially well for larger groups and adds a playful, coordinated vibe to your photos. It’s also a great way to show off the back details of your outfits, such as unique dresses or suits.

    For an extra touch, have a few people in the circle turn slightly to the side to break up the symmetry. This small adjustment can make the pose feel more natural and less staged. A wide-angle lens can help capture the entire group without distortion.

    3. The Jump Shot

    3
    Nothing says fun and excitement like a jump shot! This energetic homecoming pose is perfect for capturing the joy and anticipation of the event. To get the timing right, have everyone crouch down first and then jump on the count of three. The photographer should take a burst of shots to ensure at least one perfect capture.

    The key to a great jump shot is synchronization. Make sure everyone jumps at the same time and keeps their legs and arms in similar positions. Encourage big smiles and maybe even a few peace signs or other hand gestures. This pose works best outdoors where there’s plenty of space to move freely.

    Keep in mind that jump shots require good lighting and a fast shutter speed to avoid blurriness. If you’re indoors, ensure the lighting is bright enough to freeze the motion. This pose is a fantastic way to showcase your group’s energy and spirit.

    4. The V-Formation

    4
    For a polished and symmetrical look, the V-formation is an excellent choice among homecoming photo poses with friends. This pose involves arranging your group in a V shape, with one person at the front and the others fanning out behind them. It’s a great way to highlight a leader or simply create a balanced composition.

    The person at the front of the V can stand confidently with their hands on their hips or arms crossed, while the people behind can mirror their pose or add their own flair. This formation works particularly well for groups of 5-10 people and can be adapted for both formal and casual settings.

    To enhance the V-formation, consider using props like homecoming mums, corsages, or signs. A low angle shot can make the group look even more impressive, emphasizing the shape and depth of the formation. This pose is ideal for pre-dance photos or school spirit shots.

    5. The Piggyback Ride

    5
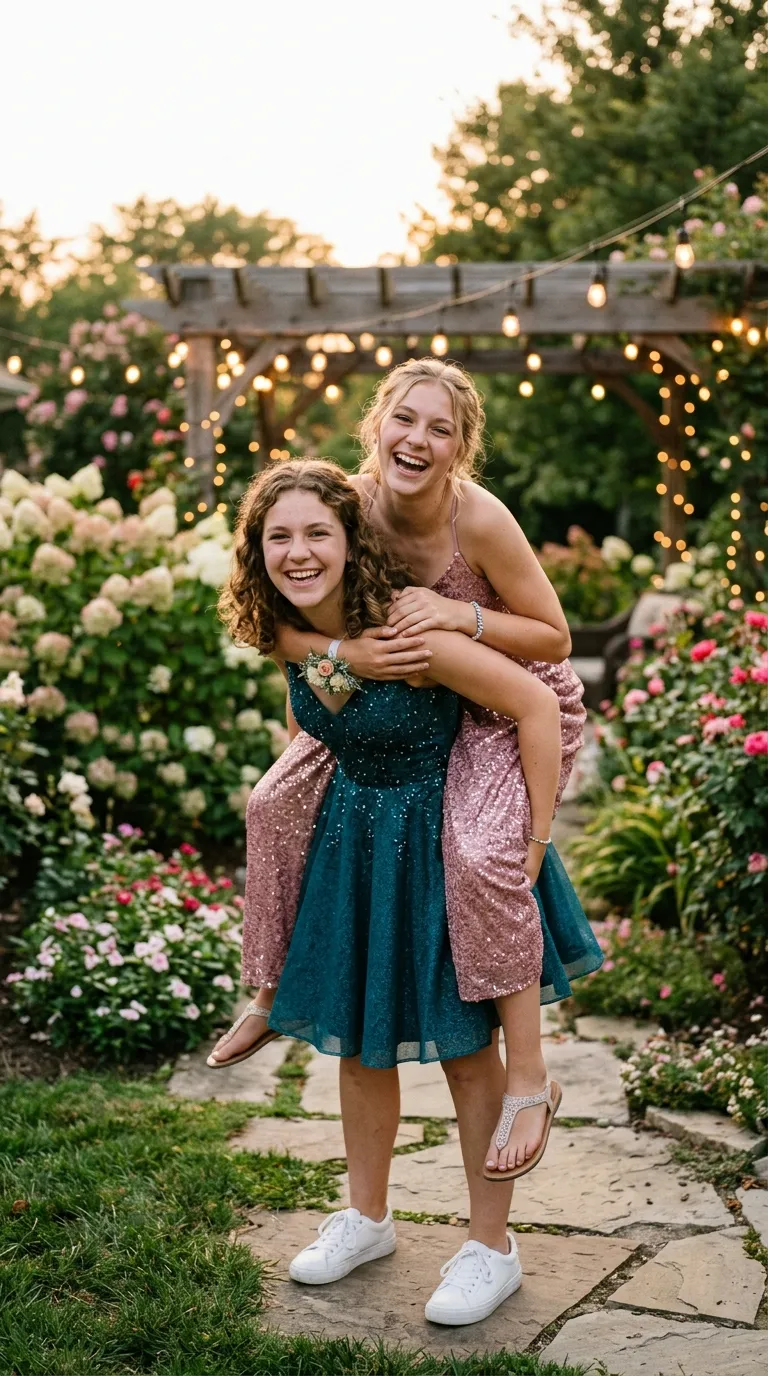
    Add a playful and personal touch to your photos with the piggyback ride pose. This cute homecoming pose is perfect for pairs or small groups and adds a sense of fun and closeness. One person can give another a piggyback ride while both look at the camera with big smiles. For groups, you can have multiple pairs doing the same thing side by side.

    This pose works especially well for couples or best friends, but it can also be a fun way to mix up a larger group shot. Just make sure everyone is comfortable and safe—no one wants a tumble right before the dance! The piggyback pose is a great way to show off your personalities and create a lighthearted, memorable image.

    For the best results, have the person giving the ride stand slightly to the side so that both faces are clearly visible. The photographer can capture this from a low angle to emphasize the height and playfulness of the pose.

    6. The Candlelight Gather

    6
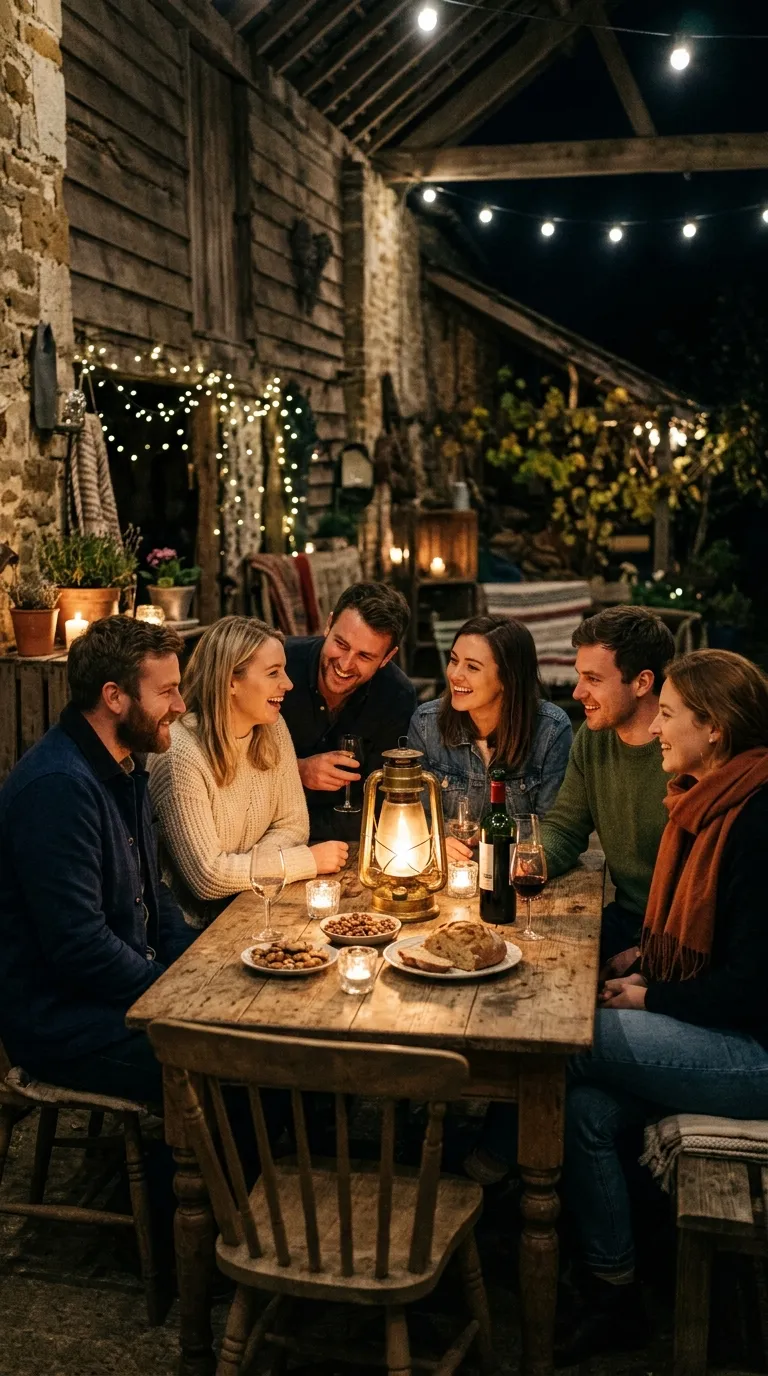
    For a more romantic or dramatic effect, try the candlelight gather pose. This elegant homecoming pose is perfect for evening photos, especially if you’re at an outdoor event or a dimly lit venue. Have your group gather closely around a central point, such as a candle, lantern, or even a bonfire if you’re at a post-dance gathering.

    Everyone can hold their own candles or simply lean in toward the center as if sharing a secret. The soft, warm glow of the candles will create a magical atmosphere in your photos. This pose works well for both small and medium-sized groups and adds a touch of sophistication to your images.

    To enhance the effect, use a camera with good low-light capabilities or a slow shutter speed to capture the candlelight beautifully. Encourage everyone to keep their expressions soft and serene to match the mood of the pose.

    7. The Sit and Stand Combo

    7
    Create depth and variety in your group photos with the sit and stand combo. This versatile homecoming pose involves some people sitting on the ground or a bench while others stand behind them. It’s a great way to ensure everyone is visible, regardless of height differences.

    For example, the front row can sit with their legs crossed or stretched out, while the back row stands with their hands on the shoulders of the people in front. This pose allows for a lot of creativity—you can mix and match sitting and standing positions to create an interesting composition.

    The sit and stand combo works well for both indoor and outdoor settings. If you’re outside, consider using a park bench or steps as a natural prop. This pose is also a great opportunity to show off your shoes, so make sure everyone’s footwear is on point!
    8. The Mirror Pose

    8
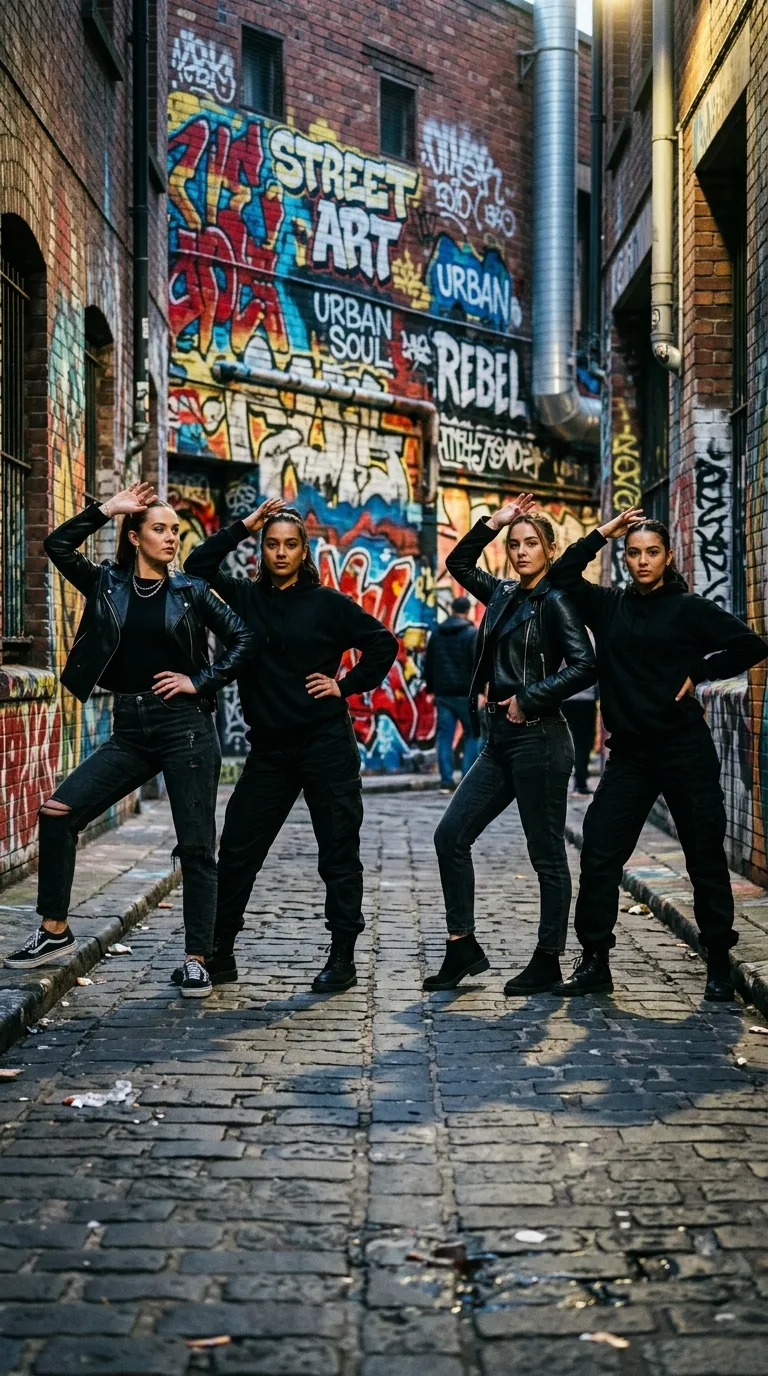
    For a stylish and symmetrical look, try the mirror pose. This creative homecoming pose involves two or more people mirroring each other’s poses on either side of the frame. For example, if one person has their hand on their hip, the person beside them does the same on the opposite side. This creates a balanced and visually appealing image.

    The mirror pose works well for pairs or larger groups, as long as everyone is in sync. It’s a great way to highlight matching or complementary outfits, such as coordinated dresses or suits. This pose also adds a sense of harmony and intentionality to your photos.

    To make the mirror pose even more striking, use a symmetrical background, such as a hallway, staircase, or architectural feature. The photographer can center the shot perfectly to emphasize the symmetry of the pose.

    9. The Action Shot

    9
    Capture the energy and movement of homecoming with an action shot. This dynamic pose idea involves everyone in the group doing something active, such as walking, twirling, or throwing confetti. Action shots are a fantastic way to create candid and lively photos that feel spontaneous and fun.

    For example, your group could walk toward the camera in a line, holding hands or swinging their arms. Alternatively, you could have everyone twirl in their dresses or suits for a playful, spinning effect. If you have props like pom-poms or signs, incorporate them into the action for added flair.

    To get the best action shots, use a fast shutter speed to freeze the motion. The photographer should take multiple shots in quick succession to capture the perfect moment. This pose is ideal for outdoor settings where there’s plenty of space to move around.

    10. The Confetti Toss

    10
    End your homecoming photo session on a high note with the confetti toss. This festive pose is perfect for celebrating the occasion and adding a pop of color and excitement to your images. Have everyone gather closely together and toss a handful of confetti into the air at the same time.

    For the best results, use biodegradable confetti to avoid harming the environment. You can also use alternatives like flower petals or colorful paper shreds. Make sure everyone looks up at the confetti as they toss it to capture their reactions naturally.

    The confetti toss works well as a final shot of the day, symbolizing the joy and memories you’ve created. A wide-angle lens can help capture the full extent of the confetti and the group’s expressions. This pose is sure to be a hit on social media and in your photo albums!
    Conclusion

    Homecoming is all about celebrating friendship, school spirit, and unforgettable moments. With these 10 homecoming pose ideas with friends, you’ll have plenty of inspiration to create stunning photos that capture the essence of the event. From classic group hugs to dynamic action shots, each pose offers a unique way to showcase your group’s personality and connection.

    Remember, the key to great photos is to have fun and be yourselves. Don’t be afraid to experiment with different poses, angles, and expressions. The more natural and relaxed you feel, the better your photos will turn out. And don’t forget to consider lighting, background, and props to enhance the overall look of your images.

    Whether you’re preparing for the dance, cheering at the game, or celebrating afterward, these poses will help you create memories that last a lifetime. So grab your friends, strike a pose, and make this homecoming one to remember!

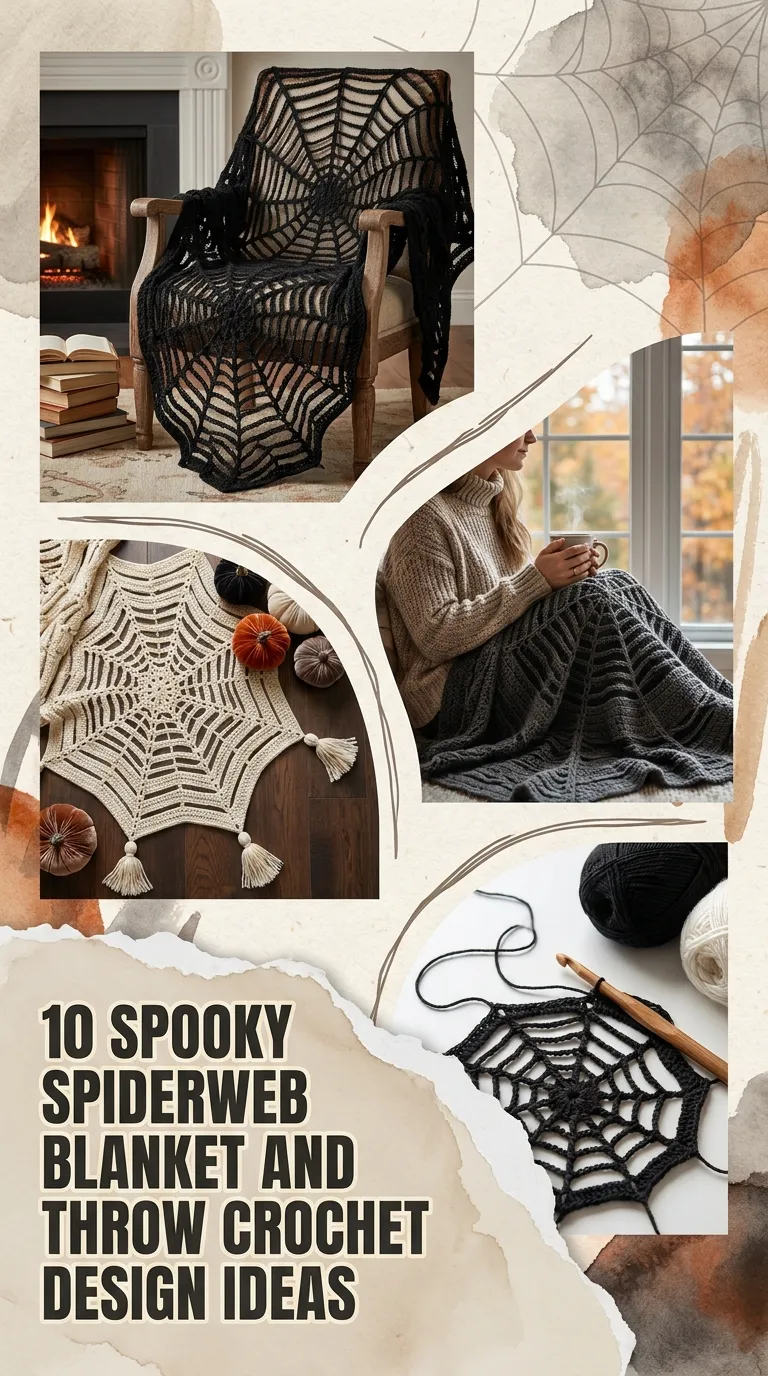
  • 10 Spooky Spiderweb Blanket And Throw Crochet Design Ideas

    10 Spooky Spiderweb Blanket And Throw Crochet Design Ideas

    When autumn arrives and the air turns crisp, bringing handmade comfort into your home becomes an essential seasonal ritual. Crochet blankets have a unique way of setting an ambiance, and nothing balances gothic intrigue with cozy warmth quite like a spiderweb motif. Whether you lean toward bold Halloween dramatics or prefer an understated, year-round witchy aesthetic, spiderweb throws offer versatile styling potential.

    From delicate lace filet patterns to chunky textured afghans, here are 10 captivating spiderweb crochet blanket and throw ideas to bring eerie elegance to your living space.

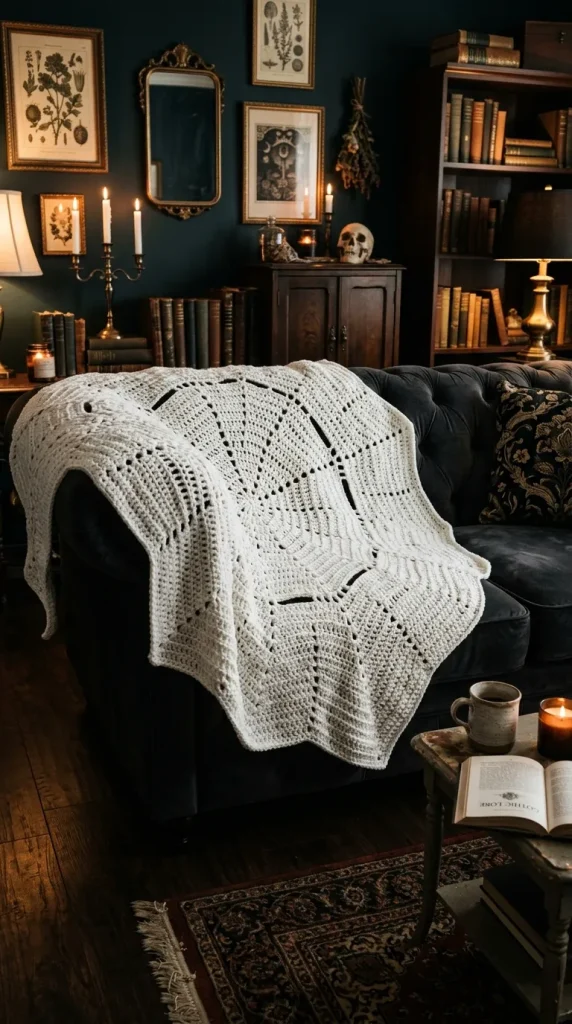
    1. The Classic Radial Hexagon Spiderweb Blanket

    The classic radial spiderweb is the gold standard of spooky crochet. Working in the round from the center outward, this design builds geometric spokes using chain spaces and tall stitches like double or treble crochet.

    • Yarn Recommendation: Worsted weight acrylic or wool blend in stark jet black, charcoal, or bone white.
    • Styling Concept: Drape it centrally across a charcoal velvet sofa or spread it flat over a dark duvet to showcase the symmetrical, webbed geometry.

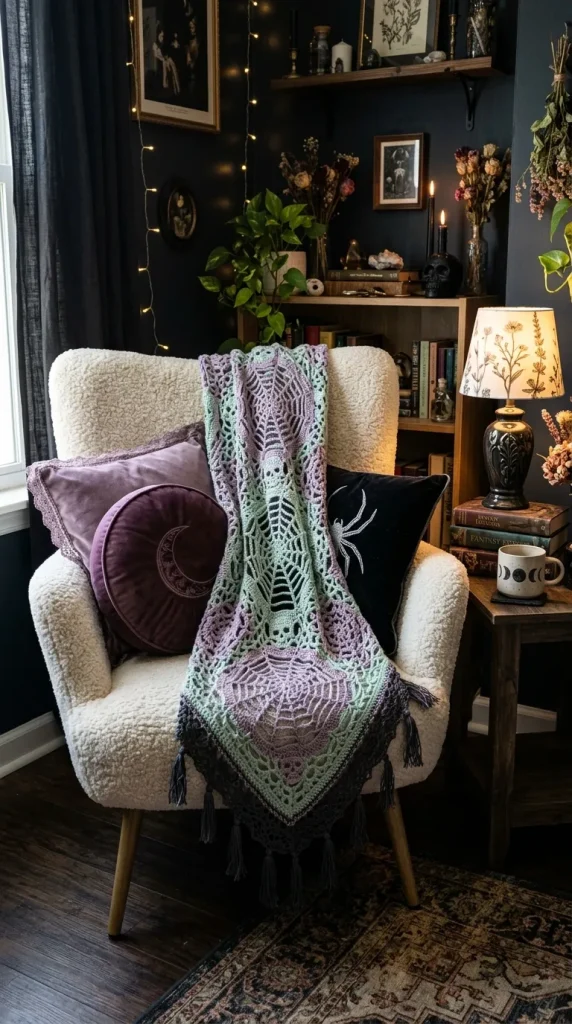
    2. Moody Pastel Goth Spiderweb Throw

    Lace-inspired spiderwebs do not have to remain strictly monochrome. A pastel goth approach uses dusty lavender, pale mint, muted blush, or misty lilac to soften the sharp architecture of the web.

    • Yarn Recommendation: Cotton-blend DK yarn for crisp stitch definition without heavy fuzziness.
    • Styling Concept: Layer over a cream boucle accent chair with plush velvet cushions to create a cozy, whimsical, yet slightly spectral reading nook.

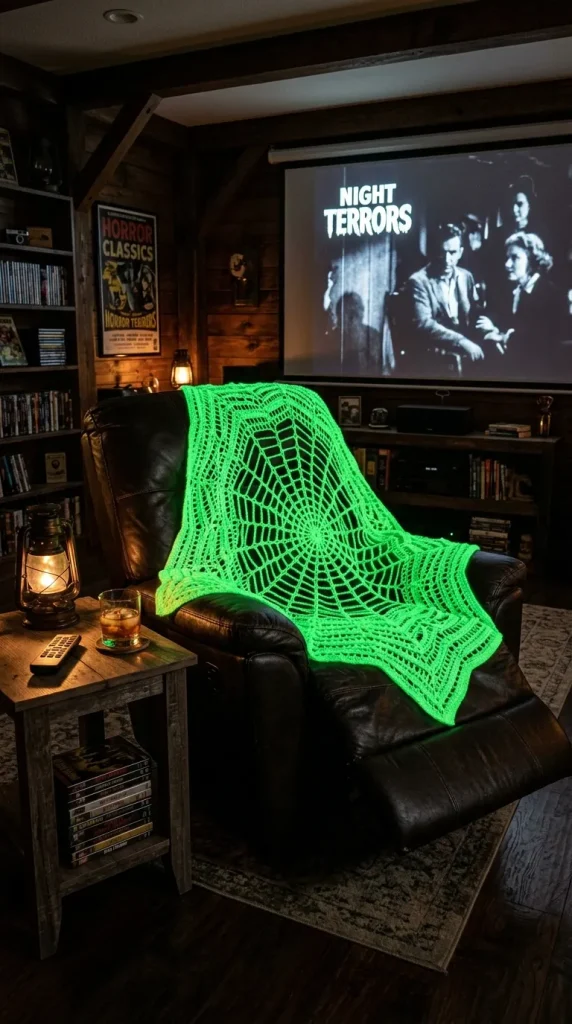
    3. Glow-in-the-Dark Spiderweb Lapghan

    Take spooky decor literally with specialized glow-in-the-dark yarn. Built either as a solid concentric web or a mesh overlay on a dark background, this piece acts as understated neutral decor by day and a glowing centerpiece by night.

    • Yarn Recommendation: Luminescent polyester specialty yarn paired with a dense matte black base.
    • Styling Concept: Perfect for home theater seating during horror movie marathons or laid across a porch rocking chair during Halloween evening.

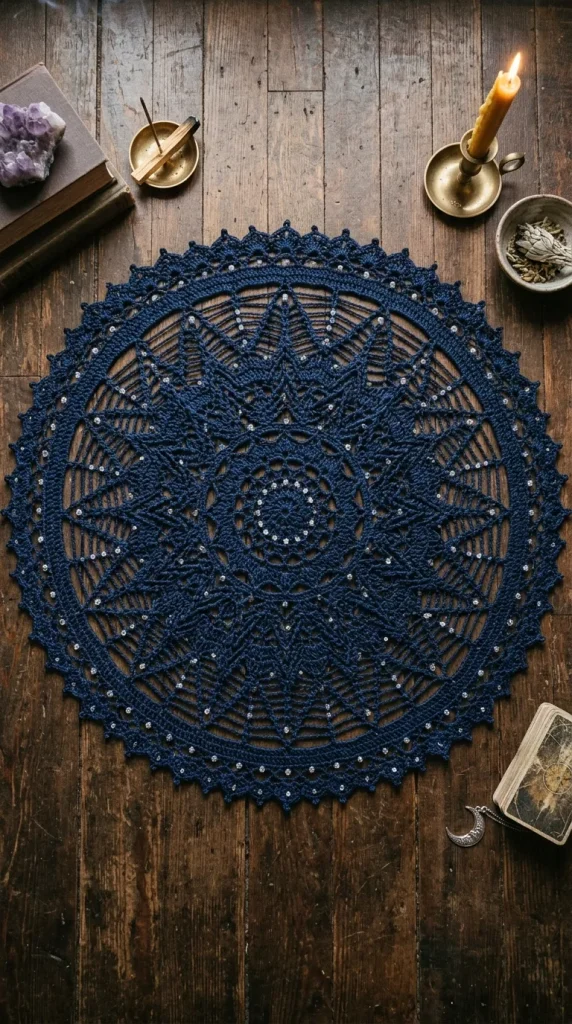
    4. Continuous Giant Spiderweb Mandala Throw

    Rather than finishing as a standard hexagon, a mandala-style web expands into elaborate scalloped edging and intricate lace points. This design incorporates complex picots, cluster stitches, and open mesh arcs that mirror an authentic, dew-covered orb-weaver web.

    • Yarn Recommendation: Sport or fingering weight yarn in deep emerald green or midnight navy.
    • Styling Concept: Hang it along a blank accent wall as a fiber art tapestry, or spread it loosely across an ottoman.

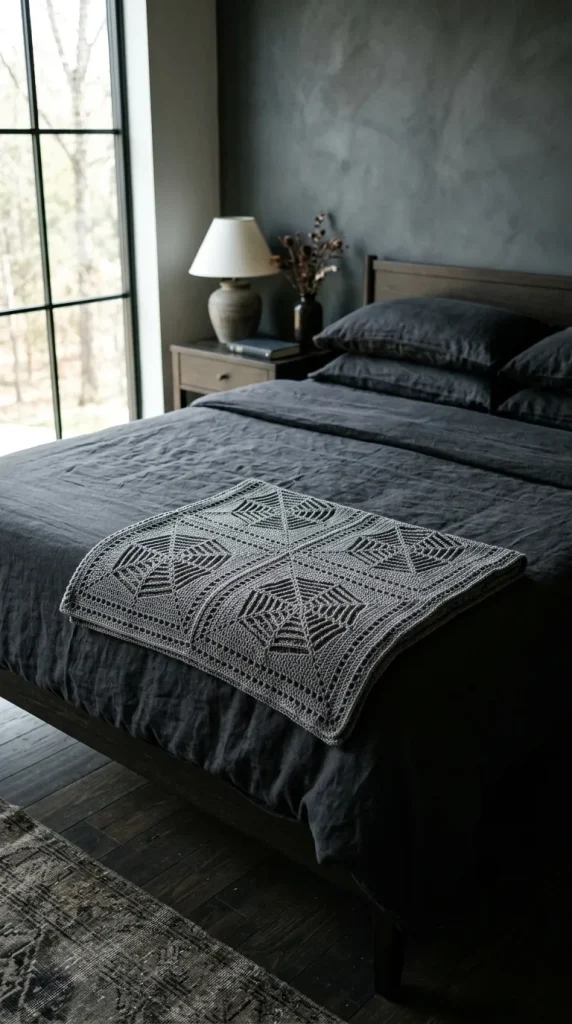
    5. Filet Crochet Silhouette Spiderweb Afghan

    Filet crochet uses simple solid blocks and open mesh grids to create pictorial silhouettes. This technique allows you to embed precise spiderweb motifs into the corners, borders, or center of a solid, rectangular blanket.

    • Yarn Recommendation: Lightweight mercerized cotton or smooth bamboo thread in rich plum or pewter gray.
    • Styling Concept: Fold lengthwise along the foot of a bed for an elegant, antique gothic look that feels refined rather than loud.

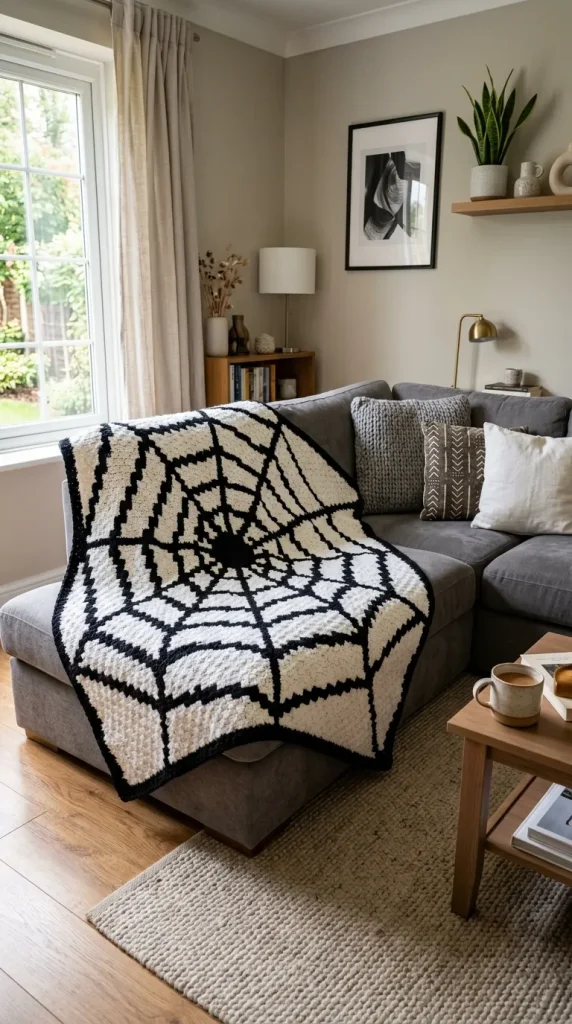
    6. Corner-to-Corner (C2C) Giant Spiderweb Afghan

    Corner-to-Corner (C2C) crochet builds a dense, pixelated fabric using mini yarn tiles. With a graphic chart, you can map out a high-contrast spiderweb stretching dynamically from one corner across the entire throw.

    • Yarn Recommendation: Chunky bulky-weight yarn (weight 5 or 6) in contrasting tones like stark white on deep obsidian.
    • Styling Concept: Spread across a wide sectional sofa; the heavy pixel texture makes it an ultra-warm winter layer.

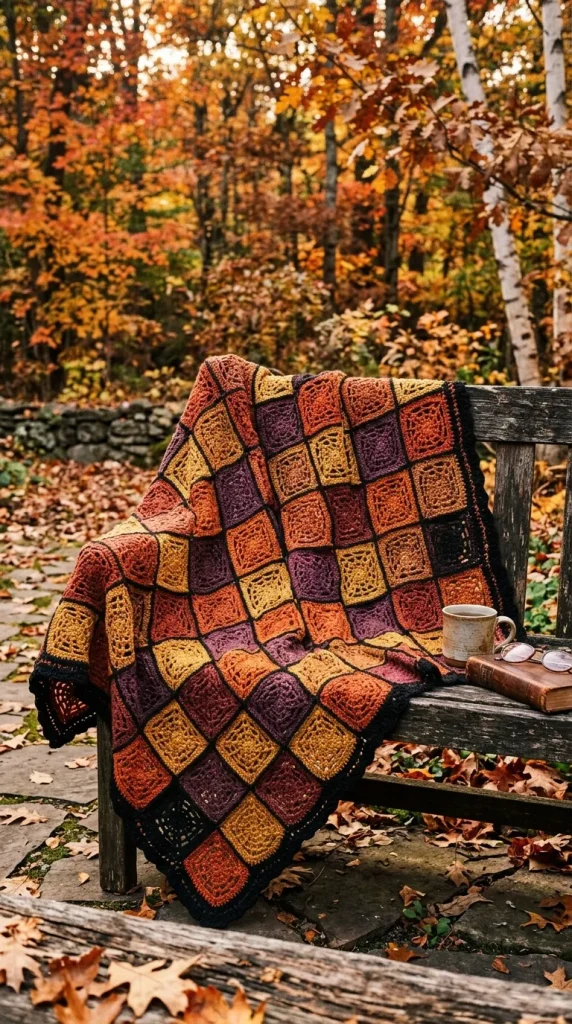
    7. Spiderweb Granny Square Patchwork Quilt

    Combine traditional granny square construction with spooky imagery. Each square features an intricate mini spiderweb at its heart, framed by solid border stitches. Once joined, the squares create a honeycomb-like network of webs across the blanket.

    • Yarn Recommendation: Medium-weight acrylic yarn combining rich autumnal hues—burnt orange, mustard yellow, and deep plum with black borders.
    • Styling Concept: Casual, layered vintage aesthetic draped over a rustic wooden bench or mid-century armchair.

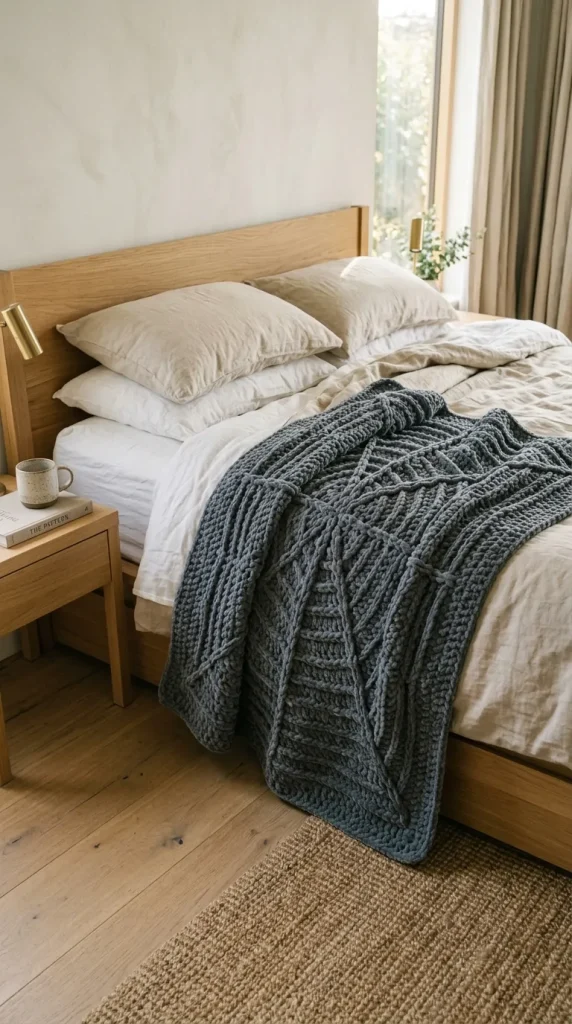
    8. Chunky Cable & Web Embossed Bed Spread

    For maximum warmth and tactile interest, this pattern uses raised post stitches and subtle cable techniques to form 3D raised web ridges across a thick, solid-stitch backdrop.

    • Yarn Recommendation: Super bulky chenille or roving-style wool in slate gray or oatmeal.
    • Styling Concept: Spread across the base of a modern minimalist bed setup to add rich physical texture without overwhelming the room’s color palette.

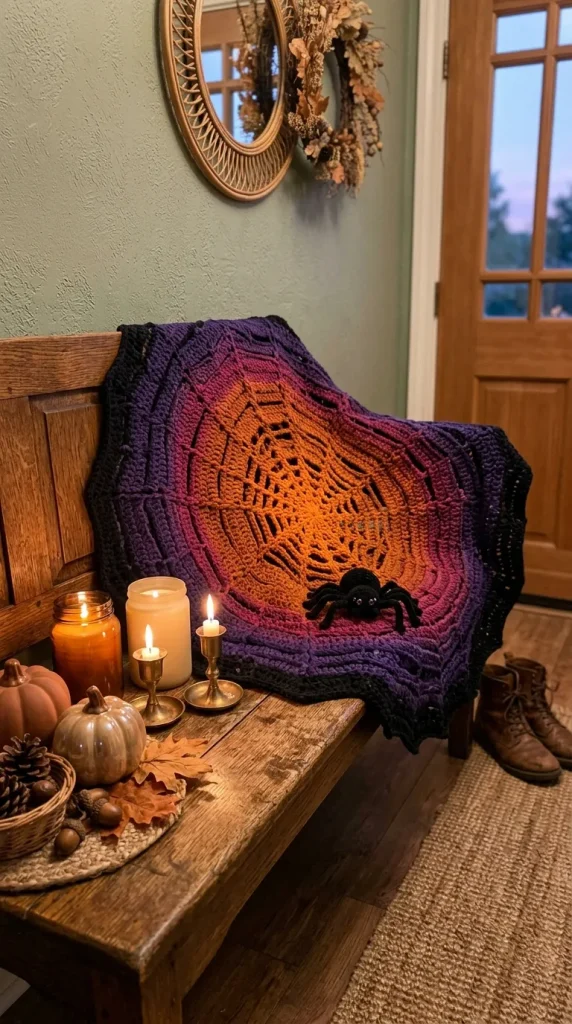
    9. Ombre Sunset Spiderweb Spider-Appliqué Throw

    Evoke a twilight sky with a continuous gradient yarn cake transitioning through crimson, amber, violet, and black. A contrasting crocheted spider appliqué stitched near the outer rim provides an eye-catching focal point.

    • Yarn Recommendation: Long-color-change gradient cake in fingering or DK weight.
    • Styling Concept: Drape over an entryway bench or accent stool near warm candlelight to amplify the fiery twilight tones.

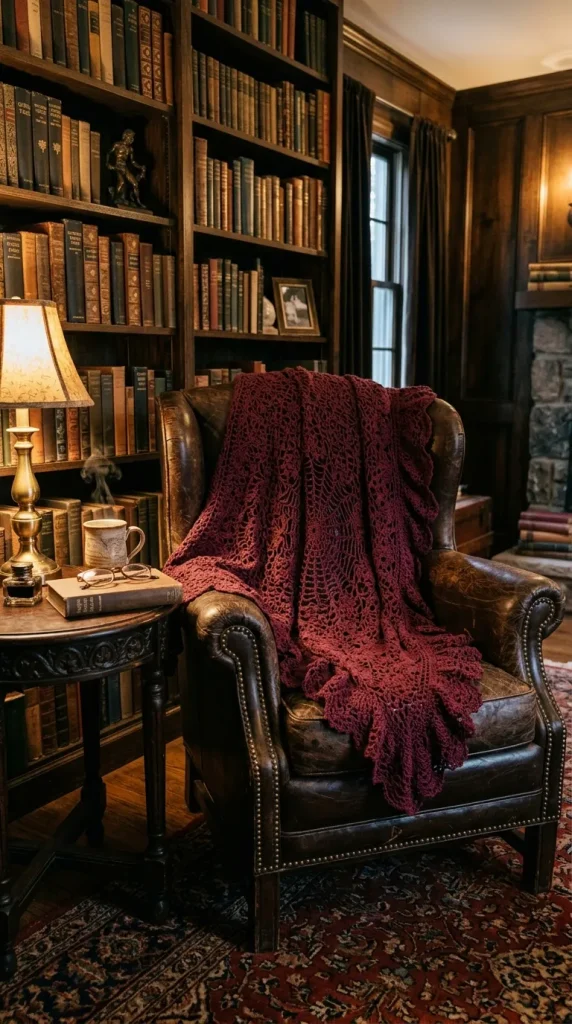
    10. Gothic Victorian Lace Doily Blanket

    Drawing inspiration from intricate 19th-century Victorian doilies, this heirloom-style piece combines fine openwork mesh, delicate spiderweb spokes, and dramatic gothic fan borders.

    • Yarn Recommendation: Fine lace or fingering weight yarn in deep blood-red, antique ivory, or onyx.
    • Styling Concept: Layer over a vintage leather chaise lounge or dark walnut rocking chair alongside antique books and bronze candelabras.
  • 10 Creative DIY Art Ideas

    10 Creative DIY Art Ideas

    In a world full of mass-produced decor, nothing makes a house feel more like a home than custom, handmade art. Creating your own wall decor and home accents isn’t just a budget-friendly alternative to expensive galleries—it’s also a therapeutic, deeply satisfying outlet for your personal creativity. Whether you are an experienced crafter or a complete beginner picking up a paintbrush for the first time, the world of DIY art offers endless possibilities.

    If you are ready to refresh your space, clear out some everyday materials, and dive into a new creative project, you are in the right place. In this comprehensive SEO guide, we explore 10 unique, budget-friendly DIY art ideas that will instantly elevate your interior design.

    1. Textured Canvas Painting with Joint Compound

    Textured wall art is dominating contemporary interior design trends. Instead of spending hundreds on gallery pieces, you can create your own structural masterpiece using a blank stretched canvas and a tub of basic joint compound or heavy-body acrylic gesso.

    Using a putty knife, a notched trowel, or even an old comb, apply the compound directly onto the canvas to form sweeping waves, minimalist geometric lines, or abstract ridges. Once it dries completely over 24 hours, you can leave it a clean, matte white for a Scandinavian look, or paint over it with earthy tones like terracotta, beige, or sage green.

    2. Upcycled Mosaic Art Using Recycled Bowls and Plates

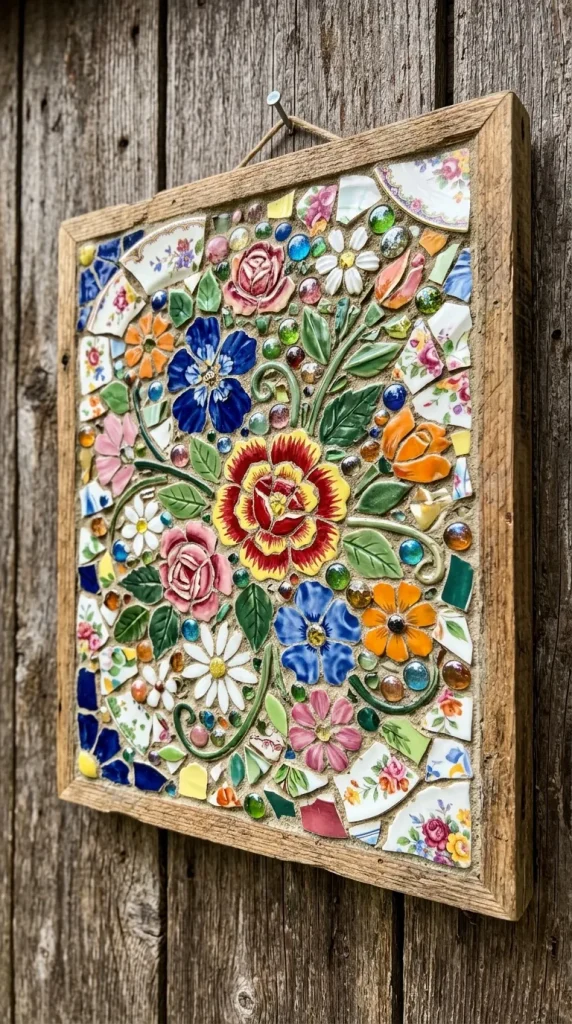
    Don’t throw away chipped ceramic bowls, broken porcelain plates, or leftover glass beads. Instead, turn them into an eye-catching piece of mosaic wall art. This eco-friendly project breathes new life into everyday materials.

    To create this look, safely break your colorful ceramic scraps into smaller pieces using a cloth and a hammer. Arrange the pieces in a mosaic pattern—such as a floral design or an abstract mandala—on a sturdy wooden panel. Secure them with heavy-duty craft glue, apply pre-mixed grout into the gaps, and wipe away the excess for a stunning, glossy finish that catches the light beautifully.

    3. Faux Ceramic Vases with Paint and Baking Soda

    If you love the rustic, matte look of expensive stoneware but only have cheap glass jars or plastic bottles lying around, this DIY hack is a game-changer. You can easily mimic the textured finish of high-end pottery using acrylic paint and a common kitchen staple: baking soda.

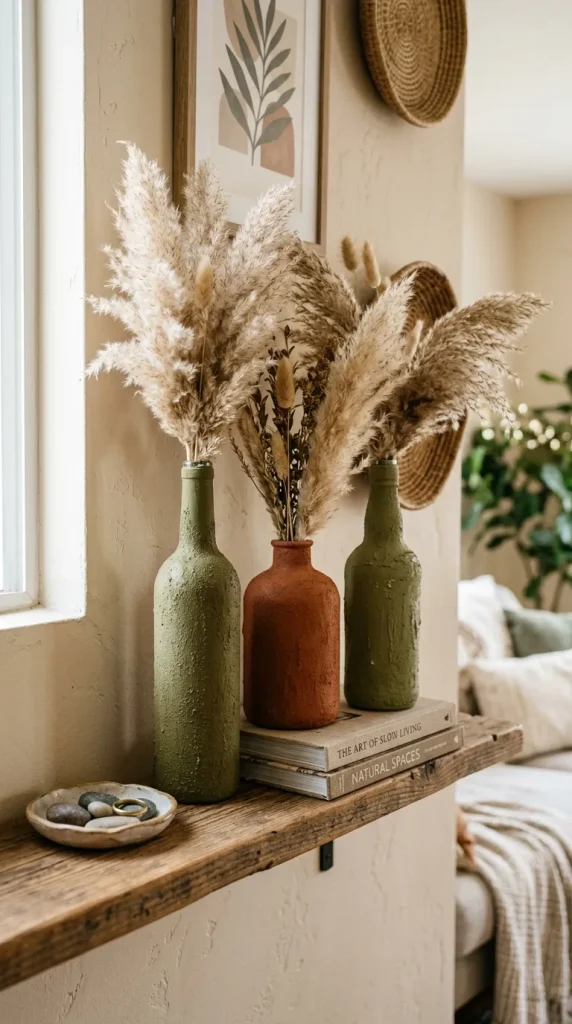
    Mix a teaspoon of baking soda into your choice of acrylic paint (muted tones like olive, cream, or charcoal work best). The mixture will puff up into a thick, gritty paste. Brush it onto your old glass jars or recycled bottles using broad, imperfect strokes. Once dry, the paint transforms the shiny surfaces into gorgeous, faux-ceramic vessels perfect for displaying dried pampas grass or faux florals.

    4. Pressed Botanical Floating Frames

    Bring the calming beauty of nature indoors by creating pressed botanical art. This project is incredibly cost-effective and adds a delicate, organic touch to any room.

    Gather unique leaves, ferns, or vibrant wildflowers from your garden. Press them inside a heavy book lined with parchment paper for one to two weeks until they are completely flat and dry. Once preserved, arrange the botanicals inside a glass floating frame (a frame with two glass panes and no backing). The wall color behind the frame will peek through, making the botanical specimens appear as if they are beautifully suspended in mid-air.

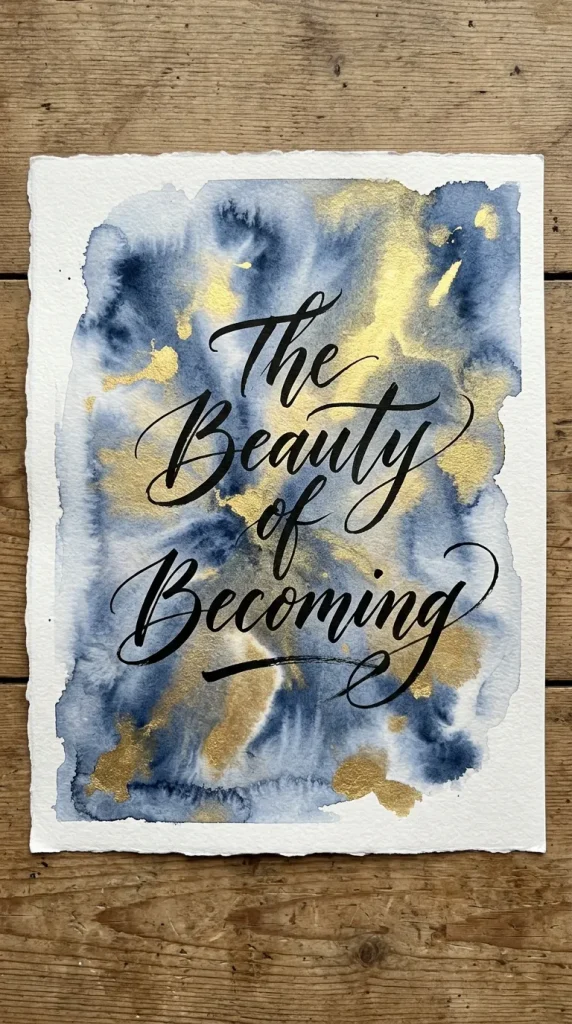
    5. Abstract Watercolor and Calligraphy Quotes

    Combining soft, fluid abstract backgrounds with sharp, crisp lettering creates a striking visual contrast. This idea allows you to customize your space with your favorite inspirational quotes, poems, or names.

    Start by wetting a piece of thick, high-quality watercolor paper. Wash diluted watercolor pigments (like soft blushes, deep indigos, or metallic golds) across the surface, letting the colors bleed naturally. Once the background is completely dry, use a fine-tip brush, an elegant calligraphy pen, or a digital stencil to overlay bold, black or metallic lettering across the center of the watercolor wash.

    6. Bohemian Yarn Wall Hangings

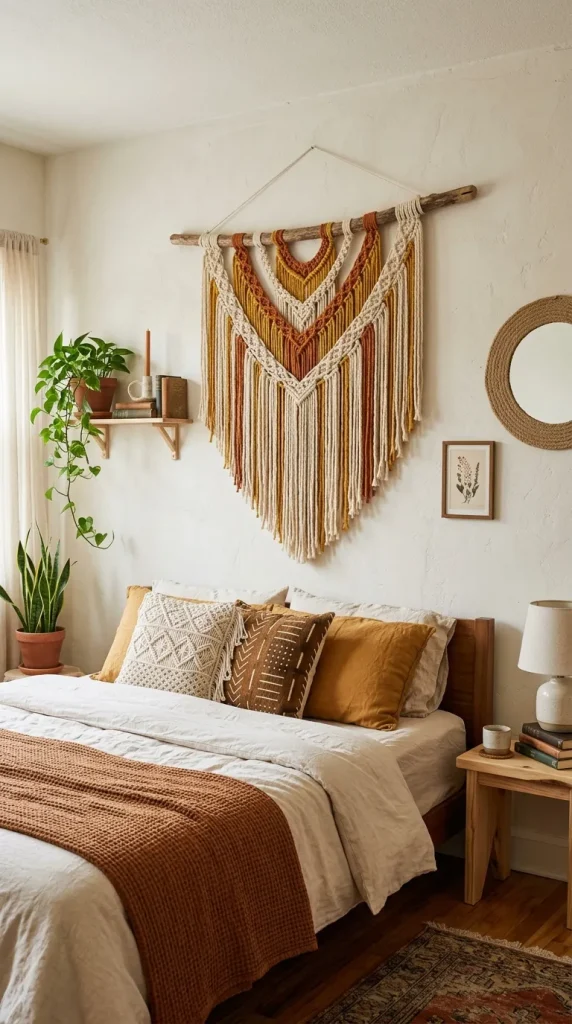
    If you want to add warmth, softness, and texture to a room, a bohemian-inspired yarn wall hanging is the perfect weekend project. It requires absolutely no knitting or weaving skills.

    Find a clean, rustic wooden dowel or a sturdy tree branch from outdoors. Cut multiple strands of thick, textured yarn—incorporating different colors like cream, mustard, and rust—to double your desired hanging length. Loop the yarn strands around the dowel using a simple lark’s head knot until the wood is covered. Trim the bottom edges into a clean V-shape, a straight blunt cut, or a soft asymmetrical angle for an instant cozy, boho accent.

    7. Geometric Cardboard Relief Art

    You don’t need a massive budget to create high-end, architectural art. You can build stunning 3D geometric art using discarded cardboard shipping boxes, scissors, and glue.

    Cut thick pieces of cardboard into sharp geometric shapes like triangles, semi-circles, rectangles, and arches. Layer and glue these shapes onto a sturdy cardboard backing to create a raised, multi-dimensional relief pattern. To hide the raw edges and give the piece a unified, professional look, spray the entire assembly with a matte textured spray paint or a coat of thick gesso. The resulting play of shadows across the geometric shapes looks incredibly sophisticated.

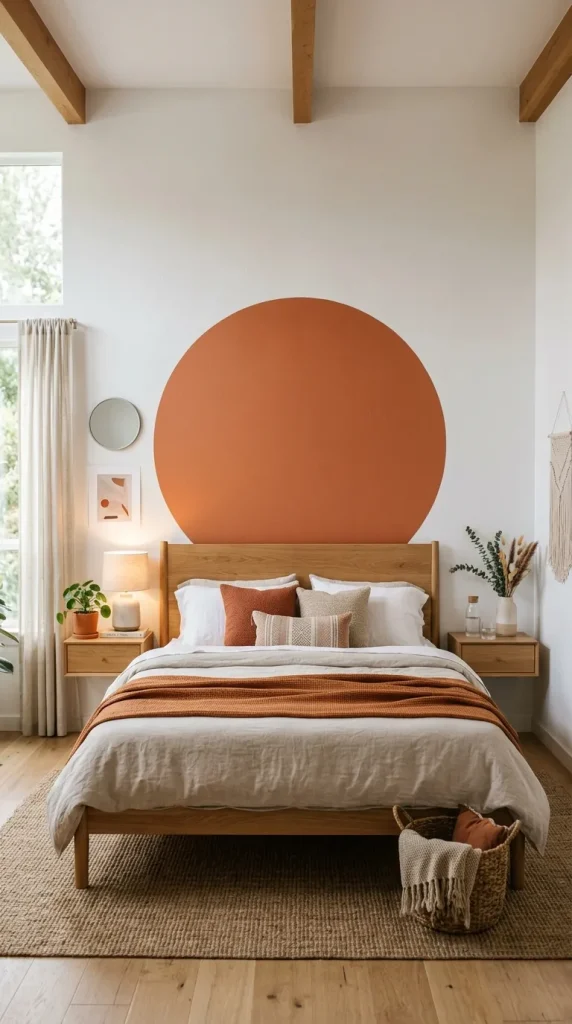
    8. Earthy Terracotta Circle Murals

    If you want to make a big impact without hanging a heavy frame, consider painting a simple geometric mural directly onto an accent wall. A perfect circle painted in a rich, warm terracotta or burnt orange tone can instantly anchor a room.

    To draw a flawless circle on your wall, tie a piece of string to a pencil, pin the other end of the string to the center point of your intended circle, and rotate the pencil around the center to sketch the outline. Fill in the shape using a rich matte wall paint. This minimalist, earthy focal point looks fantastic behind a bed headboard, a floating shelf, or a mid-century modern entryway table.

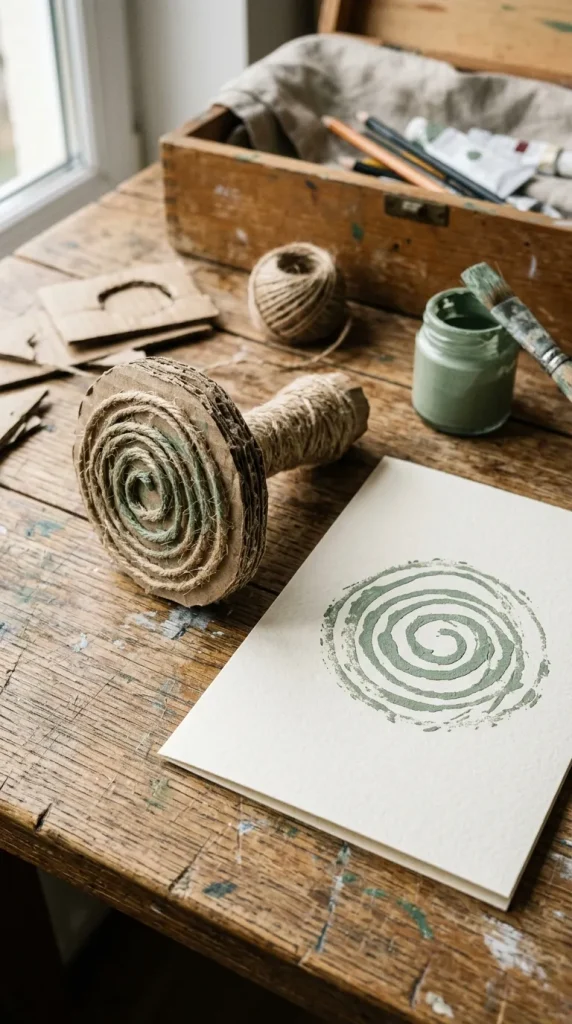
    9. Pressed Cardboard and Twine Stamps

    Block printing is an incredible way to create custom patterned art or handmade wrapping paper, and you can make your own stamps using everyday household trash.

    Cut out small squares of thick cardboard to act as your stamp bases. Glue pieces of twisted jute twine, thick yarn, or shapes cut from foam sheets onto the cardboard base to create patterns like spirals, abstract faces, or leaf veins. Once the glue is dry, dip your homemade stamp lightly into acrylic paint and press it firmly onto cardstock paper. Repeat the pattern to create a beautifully irregular, hand-printed art piece.

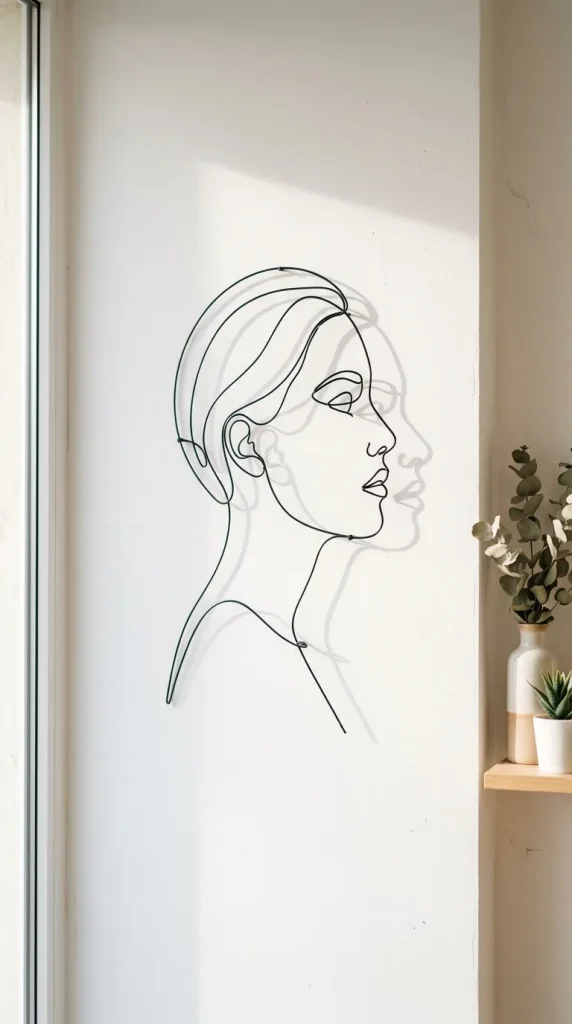
    10. Minimalist Line Art with Wire

    For an ultra-modern, industrial, or minimalist aesthetic, wire line art offers a unique alternative to traditional paper prints. It creates a subtle 3D shadow effect on your wall that changes throughout the day as the room’s lighting shifts.

    Print out a simple, continuous-line drawing template—such as a silhouette of a face, a botanical leaf, or an abstract body form. Using a pair of pliers, carefully bend flexible black craft wire or aluminum wire along the lines of the template. Once the shape is formed, secure the wire ends together and hang the piece using tiny, invisible finishing nails.

    Conclusion

    Decorating your home doesn’t have to mean spending a fortune at retail decor stores. With a bit of patience, some creativity, and everyday materials like canvas, cardboard, yarn, or old bottles, you can craft beautiful, gallery-worthy art pieces tailored to your personal taste. Pick one of these 10 DIY projects this weekend and enjoy the process of bringing your unique vision to life!

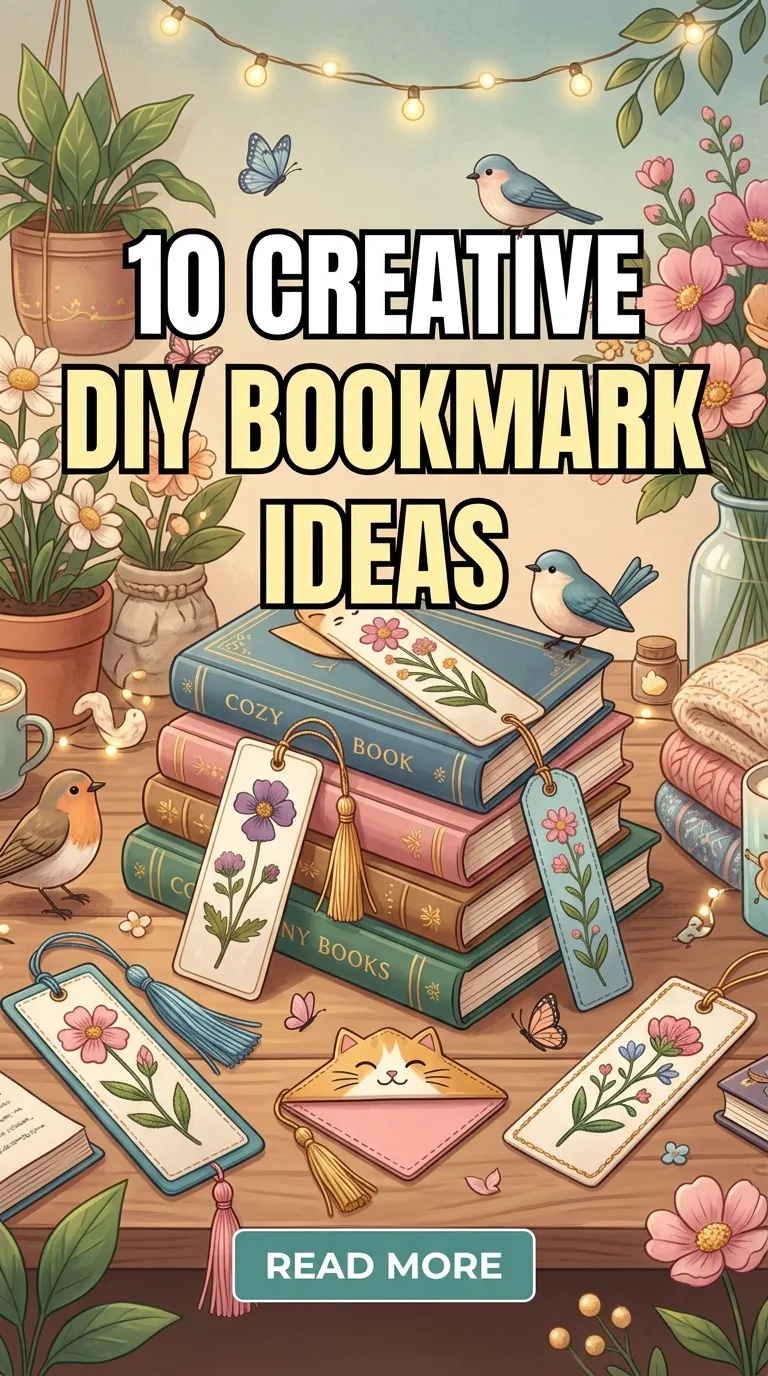
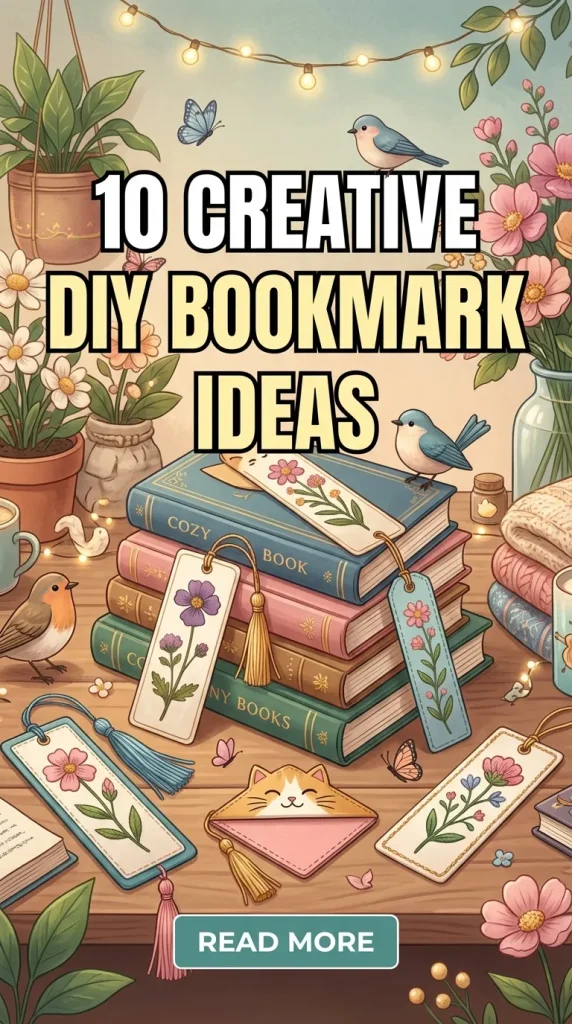
  • 10 Creative DIY Bookmark Ideas.

    10 Creative DIY Bookmark Ideas.

    For any true bibliophile, a book isn’t just a collection of pages—it’s an escape, a journey, and a prized possession. And a dog-eared page? That is a minor heartbreak. While any random scrap of paper, old receipt, or bus ticket can hold your place, a beautiful, handcrafted bookmark honors the reading experience.

    Creating your own bookmarks is an incredibly satisfying, low-cost craft project. It allows you to express your artistic side, recycle leftover craft materials, and create thoughtful, personalized gifts for the readers in your life. Whether you love sleek modern designs, cozy textures, or artistic paint strokes, here are 10 unique DIY bookmark ideas to elevate your next reading session.

    1. The Elegant Calligraphy and Watercolor Ribbon Bookmark

    There is nothing quite as elegant as the pairing of hand lettering and soft watercolor washes. For this craft, cut a thick strip of heavy, 300 GSM watercolor paper. Paint a soft, blending gradient using your favorite colors—like deep indigo melting into a blush pink. Once completely dry, use a fine-tip brush or brush pen to write an inspiring literary quote or a name in elegant calligraphy.

    • Finishing Touch: Punch a hole at the top and loop a matching silk or satin ribbon through it.
    • Best for: Lovers of classic literature and poetry.

    2. The Cozy Yarn Pom-Pom Tail Bookmark

    If you love a tactile, cozy aesthetic, a pom-pom bookmark is the perfect project. Using a fork or a cardboard template, wrap your favorite colorful yarn repeatedly to create a fluffy, dense pom-pom. When trimming the excess yarn to make it a perfect sphere, ensure you leave one long, uncut strand of yarn dangling from the center.

    • How it Works: The fluffy pom-pom sits playfully on top of the book, while the long yarn tail rests between the pages to mark your spot.
    • Best for: Cozy winter reads, fiction lovers, and children’s books.

    3. The Minimalist Pressed Botanical Laminate Bookmark

    Bring a piece of nature into your reading routine by preserving seasonal elements. Collect small, flat leaves, delicate ferns, or colorful flower petals from your garden. Press them inside a heavy encyclopedia for a few days until completely flat. Arrange them artistically on a strip of clear cardstock, and seal them using a laminating sheet or clear packing tape.

    • Aesthetic: Clean, minimalist, and beautifully organic.
    • Best for: Non-fiction readers, nature enthusiasts, and gardeners.

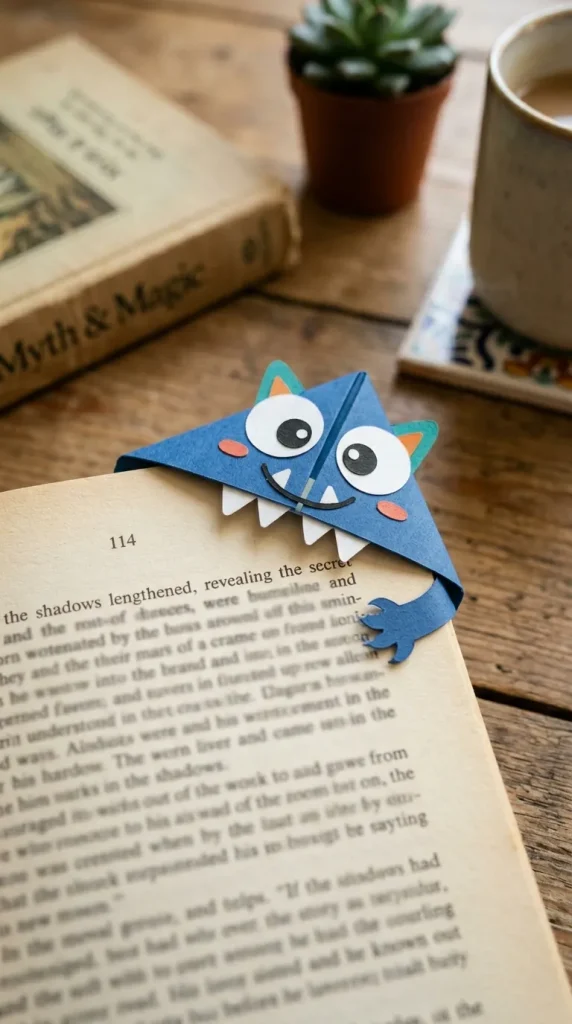
    4. The Upcycled Cardboard Corner Page-Corner Bookmark

    Instead of a traditional vertical strip, a corner bookmark slips right over the corner of your page like a little pocket. You can easily make these by folding a small square of recycled thin cardboard or heavy origami paper. Decorate the front of the corner triangular pocket to look like a cute monster, a slice of pizza, or a sleek geometric pattern.

    • Eco-Friendly Factor: Excellent way to upcycle old cereal boxes or product packaging.
    • Best for: Students, textbooks, and quick-paced thrillers.

    5. The Chic Elastic Ribbon and Decorative Bead Bookmark

    Tired of bookmarks slipping out of your book when it’s tossed into a backpack? This clever design wraps around the entire book to stay perfectly secure. Measure a piece of colorful decorative elastic ribbon so it fits snugly around a standard book vertically. Sew or securely glue the two ends together.

    • The Details: Thread a few large, premium decorative glass or wooden beads onto the front of the band to give it a jewelry-like finish.
    • Best for: Commuters, students, and anyone who reads on the go.

    6. The Abstract Acrylic Paint Swatch Bookmark

    You don’t need to be an expert painter to create a stunning piece of modern art. Take a strip of dark or black heavy cardstock. Using a palette knife or a piece of thick cardboard, scrape thick, intentional layers of acrylic paint across the strip. Use contrasting colors like metallic gold, teal, and crisp white. The result is a highly textured, abstract masterpiece.

    • Visual Appeal: The heavy, raised texture of the dried acrylic paint feels premium to the touch.
    • Best for: Art lovers and fans of contemporary fiction.

    7. The Retro Vintage Kraft Paper and Twine Bookmark

    For those who love the warm, nostalgic look of old libraries and antique shops, rustic kraft paper is the ultimate medium. Cut a strip of brown kraft paper and slightly scuff or ink the edges with a brown stamp pad to give it an aged, distressed look. Stamp it with vintage motifs—like old keys, vintage clocks, or typewriters—and finish it with a piece of rough jute twine.

    • Pro Tip: Write a favorite quote using a vintage typewriter font style or fine-liner pen.
    • Best for: Historical fiction fans and history buffs.

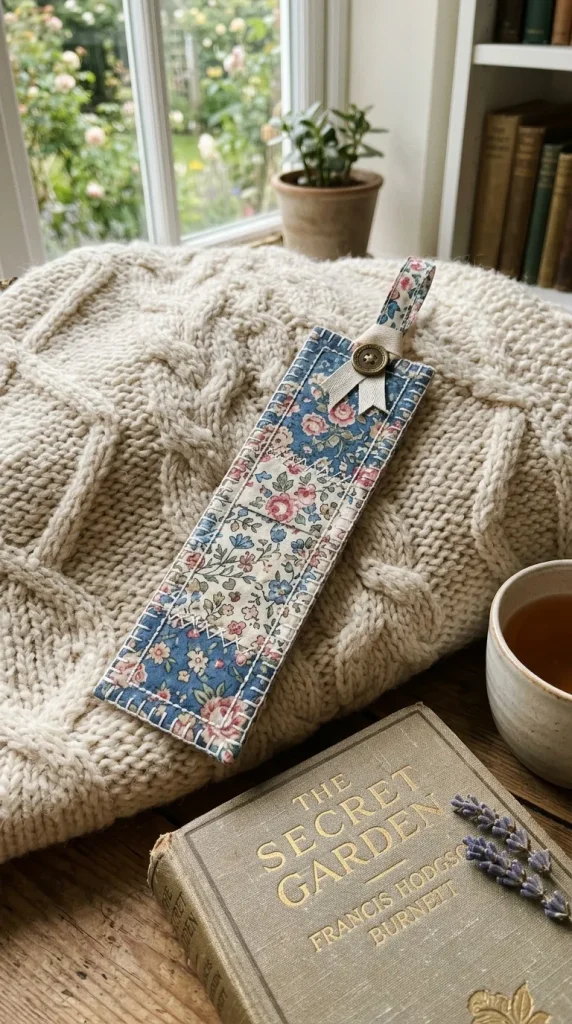
    8. The Whimsical Fabric Scrap Sewn Bookmark

    If you have a collection of beautiful fabric scraps leftover from sewing or clothing alterations, turn them into durable, soft bookmarks. Cut two identical strips of patterned cotton fabric and sandwich a piece of stiff interfacing or thin cardboard between them. Stitch around the border with a sewing machine or use a contrasting embroidery thread for a rustic, hand-sewn blanket stitch.

    • Durability: These are incredibly long-lasting and completely shatter-proof if dropped.
    • Best for: Crafters, quilters, and lovers of cozy cottagecore styles.

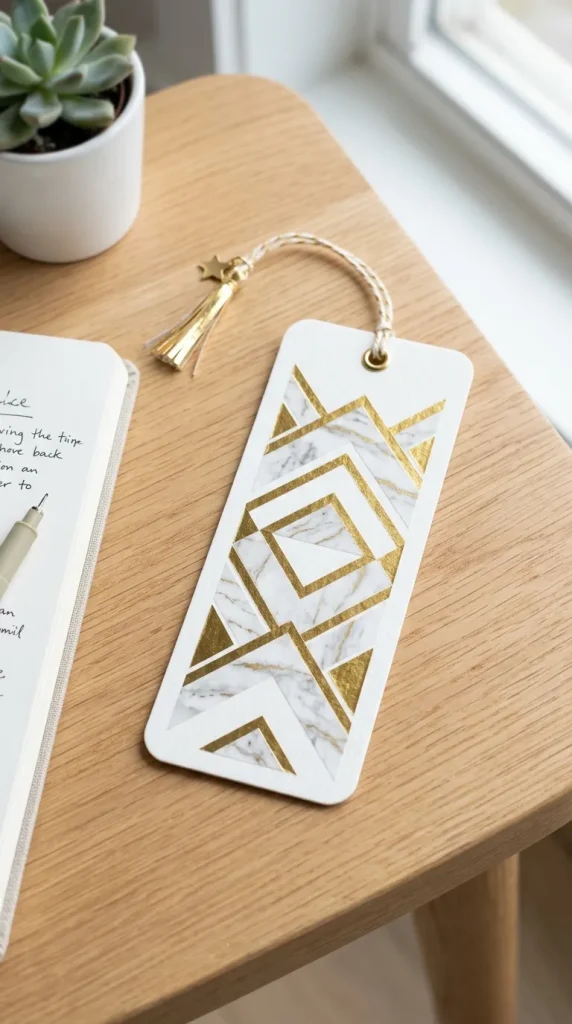
    9. The Modern Geometric Washi Tape Bookmark

    Washi tape is an effortless way to create perfectly neat, colorful patterns without dealing with messy paint or ink. Take a sturdy white cardstock base. Lay down various strips of patterned, metallic, or solid-colored washi tape in overlapping geometric angles. Use a craft knife to trim away the excess tape hanging over the edges for a perfectly sharp, crisp look.

    • Ease of Crafting: This is a fantastic, mess-free craft project to do with kids.
    • Best for: Graphic design lovers and bullet journal enthusiasts.

    10. The Intricate Textured Mandala Paper Cut-Out Bookmark

    For a high-contrast, hypnotic design, create a silhouette cut-out. Draw or print a symmetrical, circular mandala pattern onto a piece of stark black cardstock. Using a sharp precision craft knife, carefully cut out the negative spaces of the pattern. Glue this intricate black cut-out over a bright, solid metallic silver or holographic background paper.

    • Visual Effect: The metallic background shimmers beautifully through the intricate black paper windows.
    • Best for: Fantasy readers and fans of intricate puzzle books.

    Conclusion

    A handmade bookmark adds a layer of intentionality and joy to your reading habits. It celebrates your progress through a story and keeps your books looking pristine. With just a few basic household craft items like paper, yarn, ribbons, or paint, you can easily create an accessory that makes opening your book feel even more special.

  • 10 Stunning DIY Wall Hanging Craft Ideas.

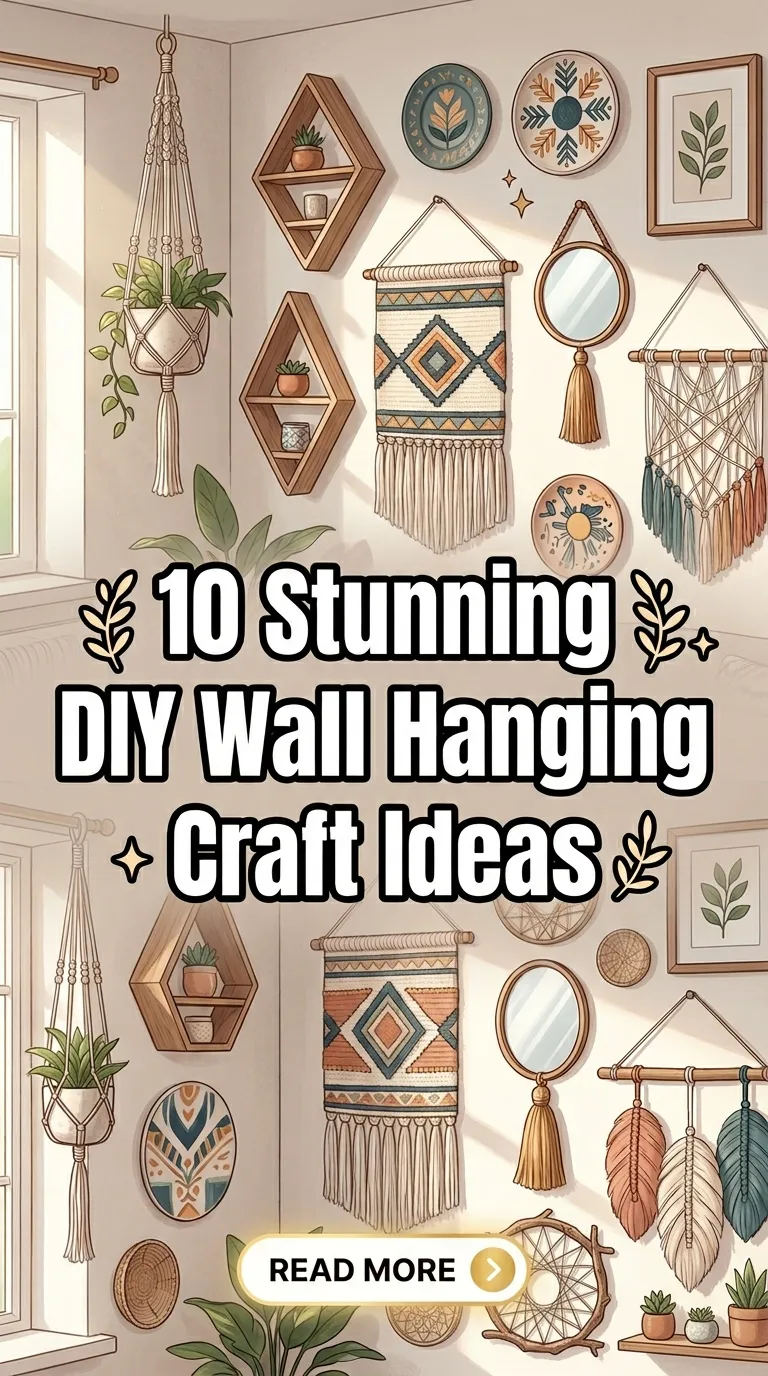
    10 Stunning DIY Wall Hanging Craft Ideas.

    Wall decor plays a massive role in interior design. It sets the tone of a room, reflects your personal personality, and ties the entire aesthetic of your home together. While buying ready-made art pieces is always an option, creating your own wall hangings adds an unmatched layer of charm, warmth, and character to your living space.

    Moreover, engaging in DIY crafts is an incredible way to de-stress, recycle household items, and explore your artistic side without breaking the bank. Whether you lean toward a cozy bohemian vibe, a sleek modern look, or a rustic country feel, here are 10 unique and stunning DIY wall hanging craft ideas to elevate your bare walls.

    1. The Elegant Calligraphy and Floral Canvas Hanging

    Combining text art with soft botanical elements creates a sophisticated focal point for any room. For this craft, stretch a piece of light-toned fabric or canvas between two wooden dowels. Use bold, elegant calligraphy ink to write an inspiring quote, a family name, or a single meaningful word in the center. Frame the text with delicate pressed flowers or painted leaf motifs.

    • Best for: Living rooms, entryways, or study rooms.
    • Aesthetic: Elegant, thoughtful, and personalized.

    2. Upcycled Eco-Friendly Tissue Roll Mandala

    You don’t need expensive materials to make premium-looking art. By saving cardboard toilet paper or paper towel rolls, you can create an intricate, symmetrical mandala. Cut the rolls into even, half-inch rings, pinch the edges to shape them like flower petals, and glue them together in a repeating geometric pattern. Paint the entire structure with a metallic gold, bronze, or matte black finish to instantly mimic expensive wrought-iron metal art.

    • Best for: Hallways, bedrooms, or accent walls.
    • Aesthetic: Geometric, eco-friendly, and surprisingly luxurious.

    3. The Bohemian Macrame Driftwood Hanging

    Macrame has taken the interior design world by storm, and it’s easy to see why. Using cotton macrame cord, you can practice basic knots like the square knot or lark’s head knot to create beautiful, flowing textures. Anchor your cords onto a sturdy piece of natural driftwood collected from a beach or forest walk to ground the piece in nature.

    • Best for: Bedrooms, cozy reading nooks, or nursery rooms.
    • Aesthetic: Cozy, earthy, and bohemian.

    4. Modern Minimalist Abstract Clay Discs

    For a sleek, contemporary vibe, polymer air-dry clay is your best friend. Roll out the clay and cut out various geometric shapes—circles, semi-circles, triangles, and arches. Poke small holes in the top and bottom of each piece before they dry. Once hardened, paint them in a warm earthy palette (terracotta, beige, sage green, and charcoal) and string them vertically using a thin leather cord or metallic wire.

    • Best for: Modern apartments, home offices, or minimalist spaces.
    • Aesthetic: Scandinavian, abstract, and contemporary.

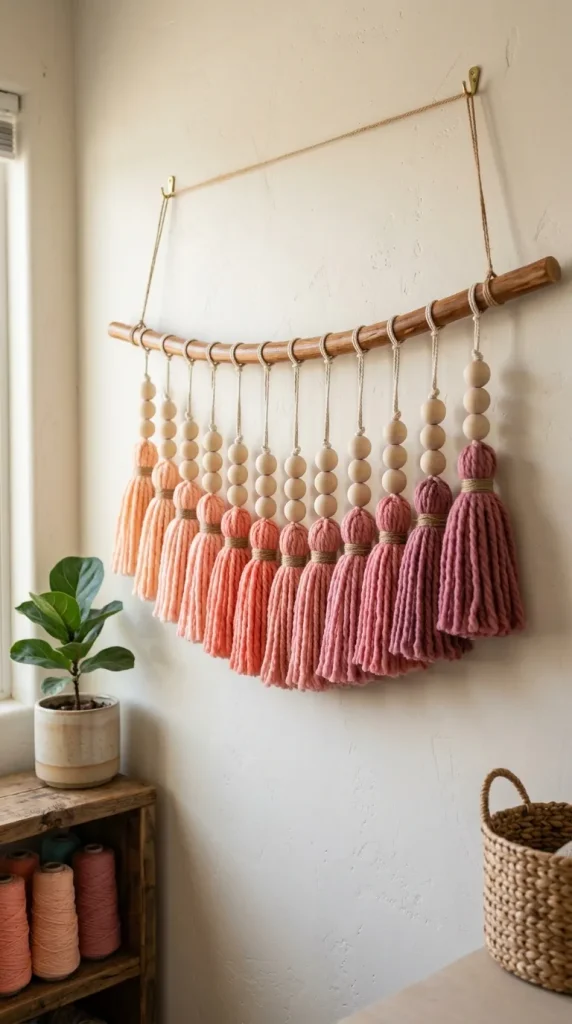
    5. Vibrant Yarn Tassel and Bead Garland

    If you want to inject a splash of color and fun into a room, a layered yarn tassel wall hanging is the way to go. Create numerous thick yarn tassels in a gradient or contrasting color scheme. Tie these tassels to a thick wooden branch or dowel at varying lengths. To give it a premium, handcrafted look, thread large, decorative wooden beads right above each tassel.

    • Best for: Kids’ rooms, creative studios, or plain white walls needing a pop of color.
    • Aesthetic: Playful, textured, and vibrant.

    6. Rustic Shabby-Chic Twig and Twine Photo Display

    Cherish your favorite memories by displaying them on a rustic, ladder-style hanging. Collect three to four straight, sturdy twigs from your garden and tie them together horizontally using thick jute twine, leaving space between each row. Use tiny wooden clothespins to clip Polaroid photos, postcards, or fairy lights onto the twine string lines.

    • Best for: Personal bedrooms, dorm rooms, or family rooms.
    • Aesthetic: Nostalgic, rustic, and warm.

    7. Textured Abstract Canvas Art with Joint Compound

    You don’t need to be a master painter to create a breathtaking canvas. Grab a blank canvas and use a putty knife to apply joint compound or heavy structural paste across the surface. Create deep, sweeping arcs, waves, or linear grooves to give it a heavy 3D texture. Once completely dry, paint it with a single monochrome color, like a rich off-white or deep navy, allowing the shadows of the texture to do all the talking.

    • Best for: Dining areas, modern living rooms, or fireplace mantels.
    • Aesthetic: High-end gallery style, minimalist, and tactile.

    8. Magical Pressed Botanical Glass Frame Hanging

    Bring the serenity of the outdoors inside by preserving seasonal leaves, ferns, and colorful petals. Press your gathered botanicals inside a heavy book for a week. Once flat and dry, arrange them artistically between two pieces of glass inside a floating metallic frame. Hang the frame using an elegant velvet or suede ribbon.

    • Best for: Sunrooms, bathrooms, or near large windows.
    • Aesthetic: Vintage, botanical, and delicate.

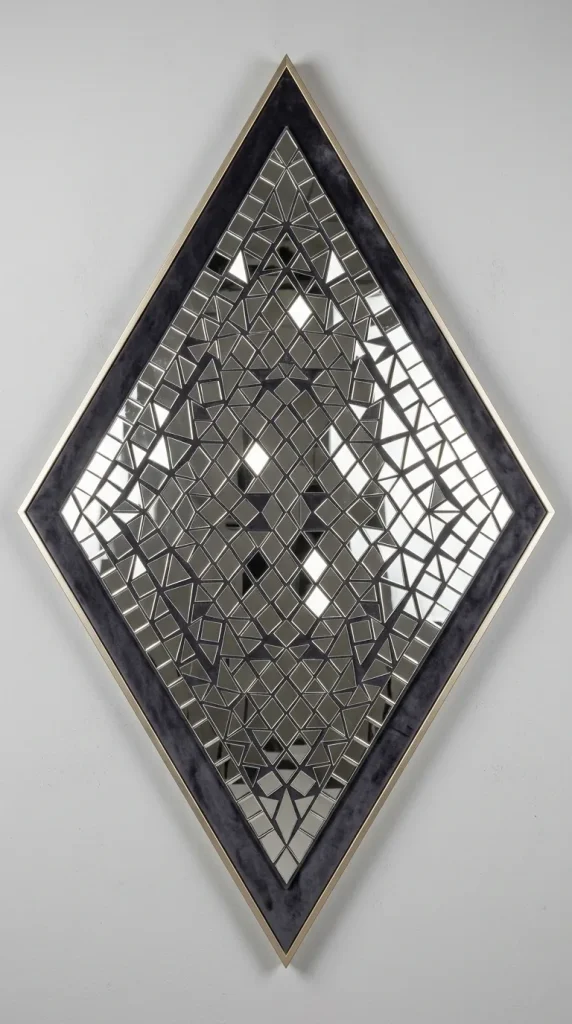
    9. Geometric Thermocol and Mirror Mosaic Art

    Thermocol sheets (styrofoam) provide a fantastic, lightweight base for large-scale wall installations. Cut a sheet of dense thermocol into a clean geometric shape, like a large hexagon or diamond. Cover the surface with a textured fabric or dark velvet paper, and glue small, diamond-shaped craft mirror pieces onto it in a mosaic pattern. It reflects light beautifully and brightens up darker corners of a room.

    • Best for: Dark hallways, entryways, or dining spaces.
    • Aesthetic: Glamorous, reflective, and artistic.

    10. The Enchanting Driftwood and Feather Mobile

    Capture a dreamlike, whimsical atmosphere with a hanging wall mobile. Suspend a beautiful piece of weathered wood horizontally. From it, hang thin, almost invisible fishing lines or fine silver chains loaded with soft, decorative feathers, small crystals, and tiny metallic stars. It sways gently with the natural airflow of the room, creating a calming visual rhythm.

    • Best for: Above a bed, meditation spaces, or nurseries.
    • Aesthetic: Whimsical, ethereal, and calming.

    Conclusion

    Decorating your home doesn’t require a massive budget—it just requires a spark of imagination. These 10 DIY wall hanging ideas show that with simple materials like yarn, paper rolls, clay, or a bit of nature, you can create breathtaking art that turns a house into a warm, personalized home. Pick the craft that speaks to your personal style, put on some music, and start creating!

  • 10 DIY NeeDoh Ideas

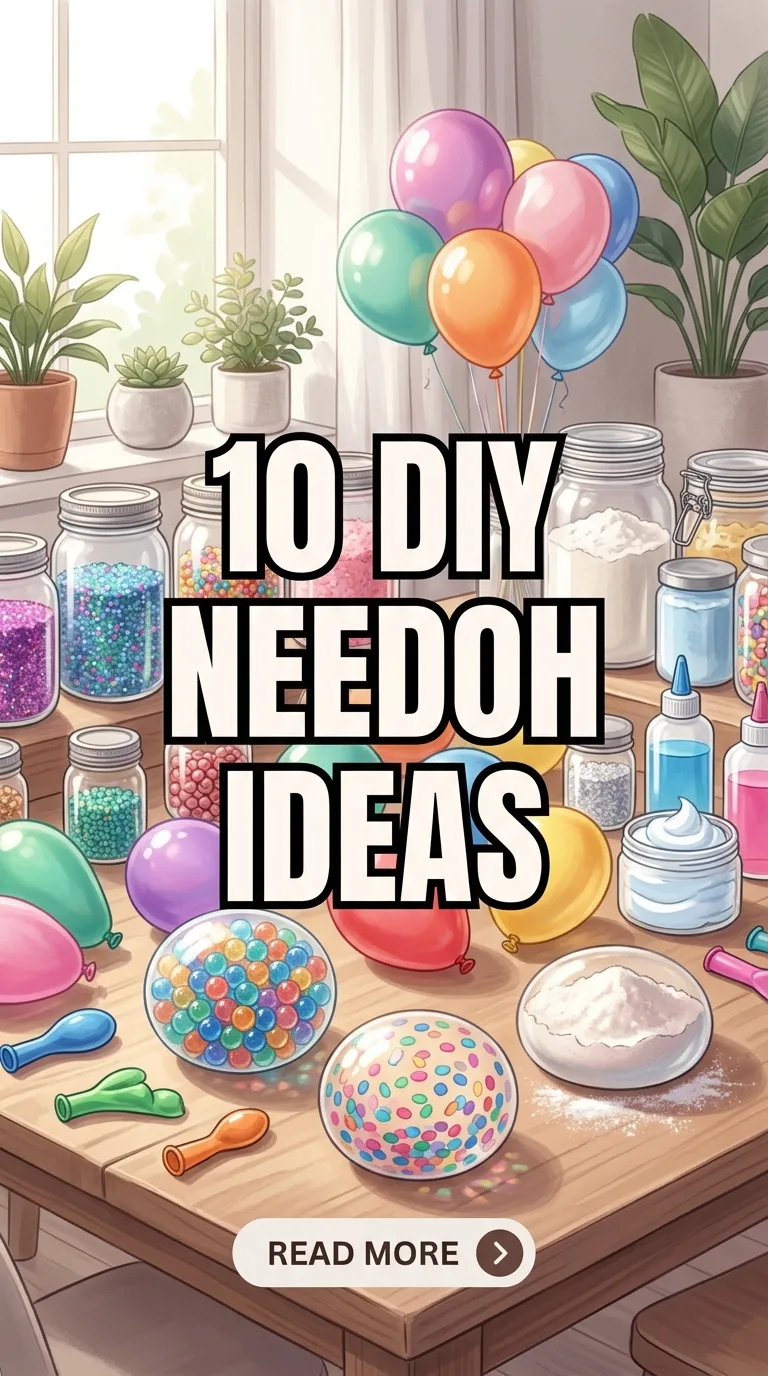
    10 DIY NeeDoh Ideas

    NeeDoh toys have become incredibly popular because of their satisfying squishy texture and stress-relieving benefits. Whether you’re a parent looking for engaging activities for your children, a teacher searching for sensory play ideas, or someone who simply enjoys DIY crafts, creating your own NeeDoh-inspired stress balls can be a fun and budget-friendly project.

    DIY NeeDoh ideas allow you to customize colors, textures, and themes while enjoying a creative hands-on experience. These homemade sensory toys can help reduce stress, improve focus, and provide endless entertainment for people of all ages.

    In this guide, we’ll explore 10 DIY NeeDoh ideas that are simple to create using common household materials. Let’s get started.

    Why DIY NeeDoh Projects Are So Popular

    Before diving into the ideas, it’s important to understand why DIY NeeDoh projects have gained so much attention.

    Benefits of DIY NeeDoh Crafts

    • Relieve stress and anxiety
    • Improve sensory development
    • Encourage creativity
    • Provide screen-free entertainment
    • Cost less than store-bought alternatives
    • Perfect for classroom activities
    • Great for party favors and gifts

    These benefits make DIY NeeDoh crafts an excellent choice for both children and adults.

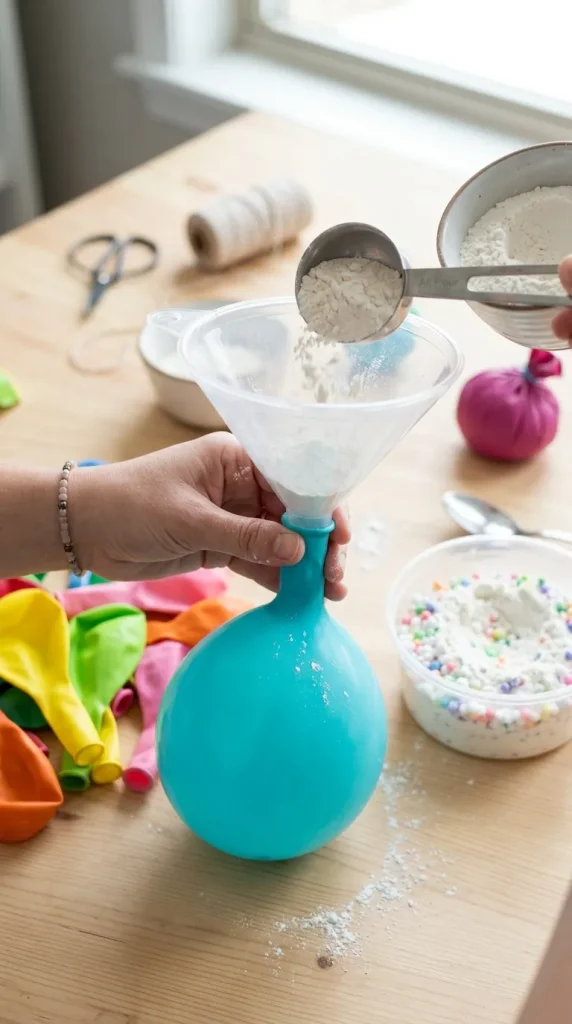
    1. Classic Flour-Filled NeeDoh Ball

    The classic flour-filled stress ball is one of the easiest DIY NeeDoh ideas.

    Materials Needed

    • Balloon
    • Flour
    • Funnel
    • Spoon

    Instructions

    1. Stretch the balloon.
    2. Insert the funnel into the balloon opening.
    3. Carefully fill it with flour.
    4. Tie the balloon securely.
    5. Add a second balloon layer for durability.

    Why It Works

    The flour creates a soft, squeezable texture that closely resembles popular NeeDoh toys.

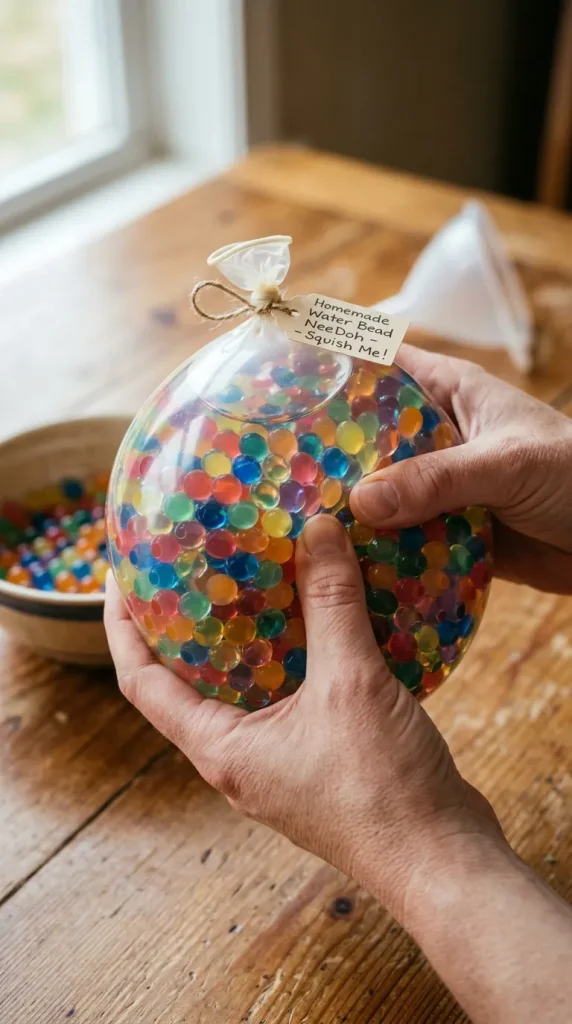
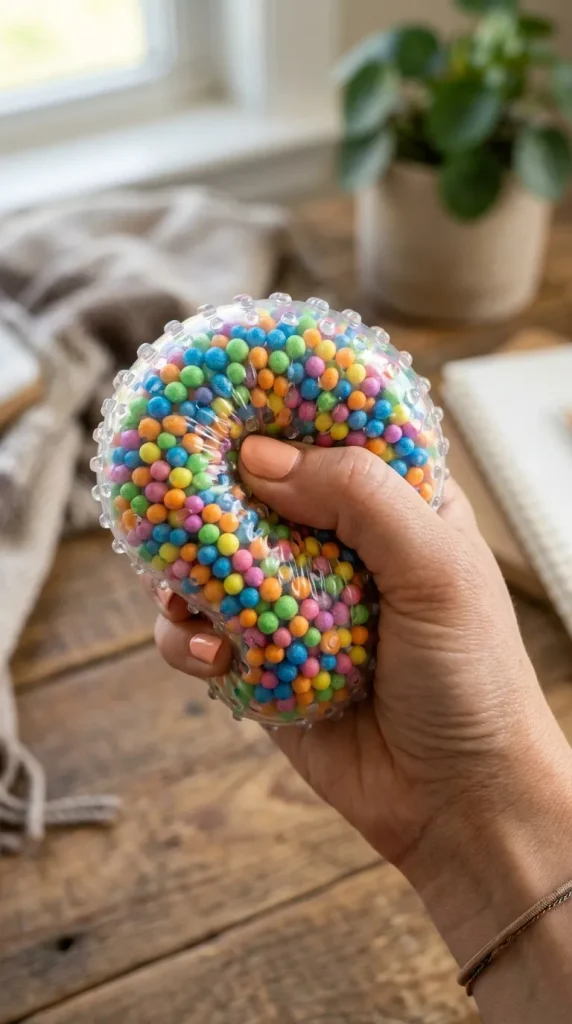
    2. Water Bead NeeDoh Sensory Ball

    Water beads create a unique squishy sensation and visual appeal.

    Materials Needed

    • Clear balloon
    • Water beads
    • Water
    • Funnel

    Instructions

    1. Soak water beads according to package instructions.
    2. Fill the balloon with hydrated beads.
    3. Add a small amount of water.
    4. Tie securely.

    Benefits

    • Provides sensory stimulation
    • Creates colorful visual effects
    • Encourages tactile exploration

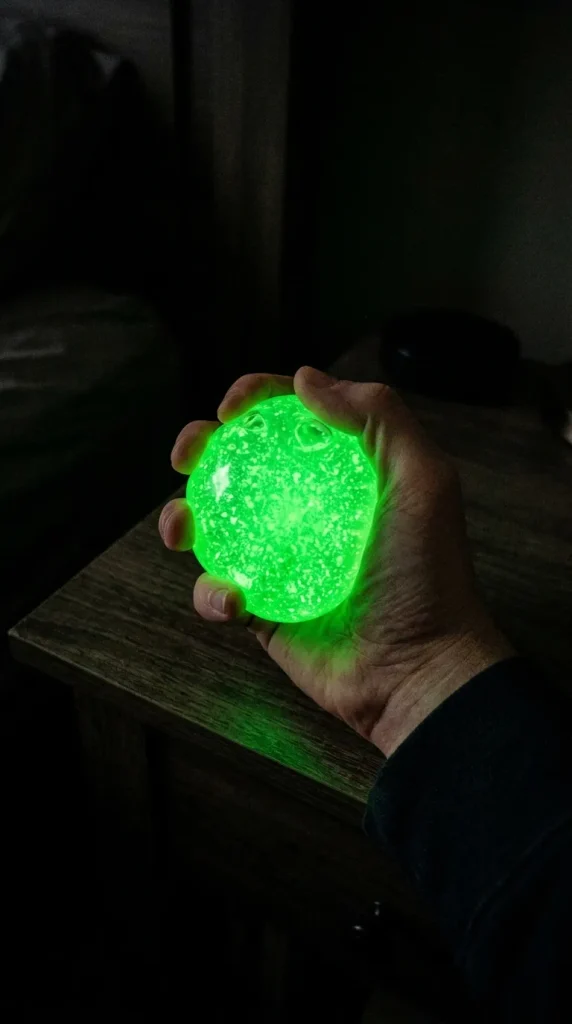
    3. Glow-in-the-Dark DIY NeeDoh

    This exciting version glows in dark environments.

    Materials Needed

    • Balloon
    • Flour
    • Glow-in-the-dark powder
    • Funnel

    Instructions

    1. Mix flour and glow powder.
    2. Fill the balloon.
    3. Tie tightly.
    4. Charge under light before use.

    Why Kids Love It

    The glowing effect adds excitement and makes it perfect for nighttime sensory play.

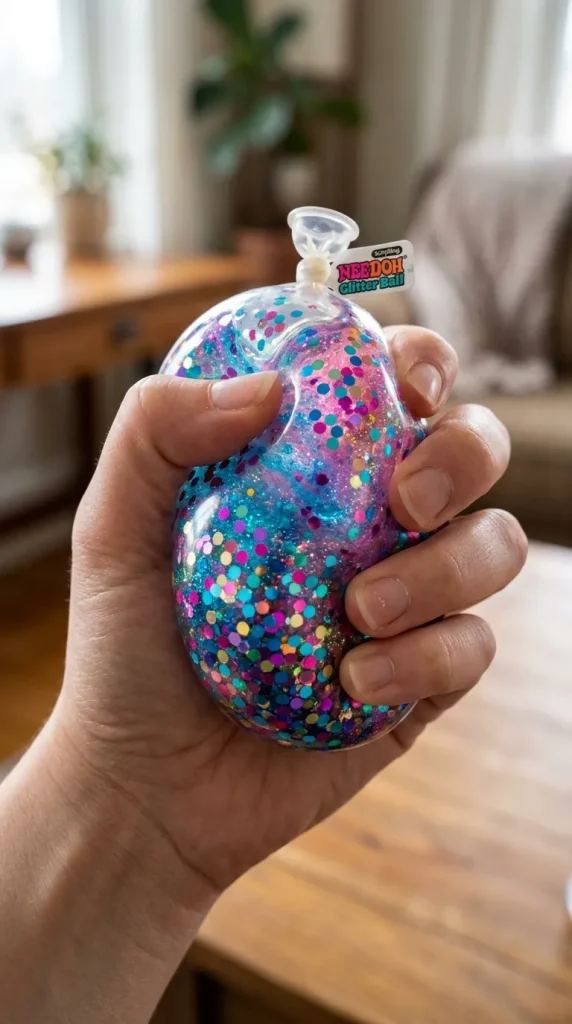
    4. Glitter NeeDoh Stress Ball

    Add sparkle to your DIY stress ball with glitter.

    Materials Needed

    • Clear balloon
    • Hair gel
    • Fine glitter
    • Funnel

    Instructions

    1. Mix hair gel with glitter.
    2. Fill the balloon.
    3. Remove air bubbles.
    4. Tie securely.

    Benefits

    The glitter creates a mesmerizing visual effect that can be calming and relaxing.

    5. Rainbow Layered NeeDoh Ball

    Create a colorful masterpiece with multiple layers.

    Materials Needed

    • Balloons
    • Colored flour
    • Funnel

    Instructions

    1. Divide flour into several bowls.
    2. Add different food coloring to each portion.
    3. Allow the flour to dry.
    4. Layer colors inside the balloon.

    Result

    A vibrant rainbow effect that looks beautiful when squeezed.

    6. Foam Bead NeeDoh Ball

    Foam beads provide a crunchy and satisfying texture.

    Materials Needed

    • Balloon
    • Foam beads
    • Hair gel

    Instructions

    1. Mix foam beads with hair gel.
    2. Insert mixture into balloon.
    3. Tie securely.

    Sensory Benefits

    This DIY NeeDoh offers both soft and textured sensations, making it highly engaging.

    7. Emoji-Themed NeeDoh

    Personalize your stress ball with fun emoji faces.

    Materials Needed

    • Yellow balloon
    • Marker
    • Flour or gel filling

    Instructions

    1. Fill the balloon.
    2. Draw emoji expressions.
    3. Create happy, sad, laughing, or surprised faces.

    Perfect For

    • School rewards
    • Party favors
    • Personalized gifts

    8. Scented DIY NeeDoh

    Combine stress relief with aromatherapy.

    Materials Needed

    • Balloon
    • Flour
    • Essential oils

    Instructions

    1. Add a few drops of essential oil to flour.
    2. Mix thoroughly.
    3. Fill balloon and tie.

    Popular Scents

    • Lavender
    • Lemon
    • Peppermint
    • Vanilla

    Benefits

    The pleasant fragrance can help create a calming experience.

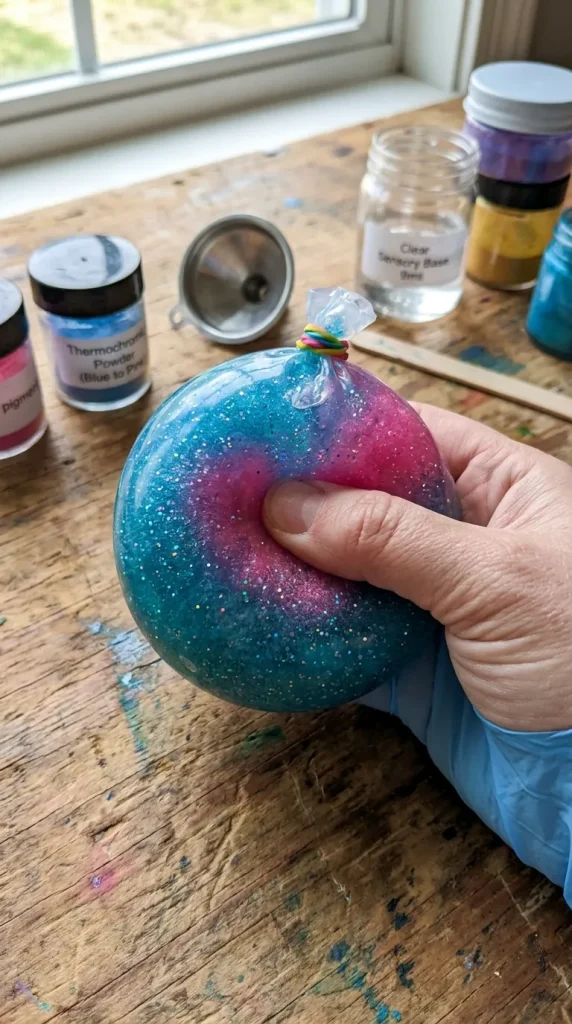
    9. Color-Changing NeeDoh Ball

    Create a fascinating sensory toy with color-changing elements.

    Materials Needed

    • Clear balloon
    • Thermochromic pigment
    • Hair gel

    Instructions

    1. Mix pigment into gel.
    2. Fill balloon.
    3. Tie securely.

    Fun Feature

    The color changes when warmed by your hands, creating an interactive experience.

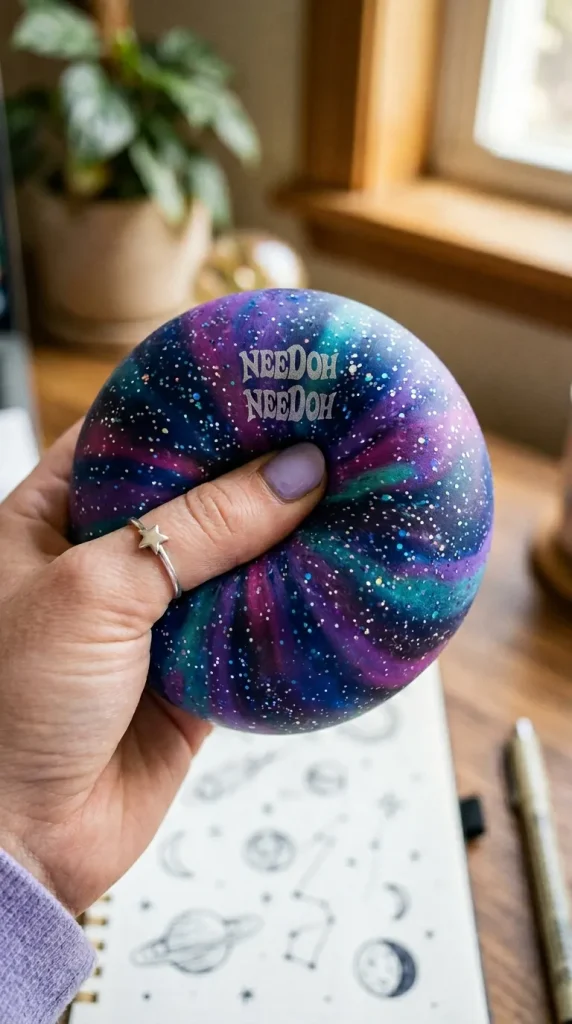
    10. Galaxy-Themed NeeDoh

    Bring the beauty of space into your DIY project.

    Materials Needed

    • Clear balloon
    • Dark-colored gel
    • Glitter
    • Blue and purple coloring

    Instructions

    1. Mix gel with colors and glitter.
    2. Fill the balloon.
    3. Tie securely.

    Why It’s Popular

    The cosmic appearance makes this one of the most visually stunning DIY NeeDoh ideas.

    Tips for Making Durable DIY NeeDoh Toys

    To ensure your homemade stress balls last longer:

    Use Double Balloons

    A second balloon layer reduces the risk of leaks and breakage.

    Avoid Overfilling

    Too much filling can cause the balloon to burst.

    Store Properly

    Keep your DIY NeeDoh away from sharp objects and direct sunlight.

    Choose Quality Balloons

    Thicker balloons provide better durability and flexibility.

    Safety Tips for DIY NeeDoh Projects

    While these crafts are generally safe, follow these precautions:

    • Supervise young children.
    • Avoid small materials for toddlers.
    • Check for balloon allergies.
    • Dispose of damaged stress balls immediately.
    • Use non-toxic materials whenever possible.

    Frequently Asked Questions

    What can I use instead of flour for DIY NeeDoh?

    You can use cornstarch, hair gel, kinetic sand, rice, foam beads, or water beads.

    Are DIY NeeDoh toys safe for kids?

    Yes, when made with non-toxic materials and under adult supervision.

    How long do homemade NeeDoh balls last?

    With proper care and double-layered balloons, they can last for several weeks or months.

    Can adults use DIY NeeDoh stress balls?

    Absolutely. Many adults use stress balls for relaxation, focus, and anxiety relief.

    Which DIY NeeDoh idea is best for beginners?

    The classic flour-filled stress ball is the easiest and most affordable option.

    Conclusion

    DIY NeeDoh ideas are a fantastic way to combine creativity, sensory play, and stress relief. Whether you choose a classic flour-filled stress ball, a glitter-filled sensory toy, or a galaxy-themed masterpiece, these projects offer endless opportunities for fun and customization.

    By making your own NeeDoh-inspired toys, you can save money, personalize designs, and enjoy a rewarding craft experience. Try these 10 DIY NeeDoh ideas today and discover your favorite squishy creation.