Blog

  • 10 Best Hairstyle Ideas

    10 Best Hairstyle Ideas

    Finding the perfect hairstyle is one of the easiest ways to refresh your personal style, boost your confidence, and make a memorable statement. However, with endless trends circulating on social media, narrowing down the absolute best look can feel overwhelming. The ideal hairstyle balances aesthetic appeal with practicality, complementing your face shape, lifestyle, and hair texture.

    Whether you are looking for a dramatic chop, a low-maintenance daily look, or a sophisticated style for a special occasion, we have you covered. Here are the 10 best hairstyle ideas that stand the test of time, complete with expert styling and maintenance advice.
    1. The Classic Textured Bob

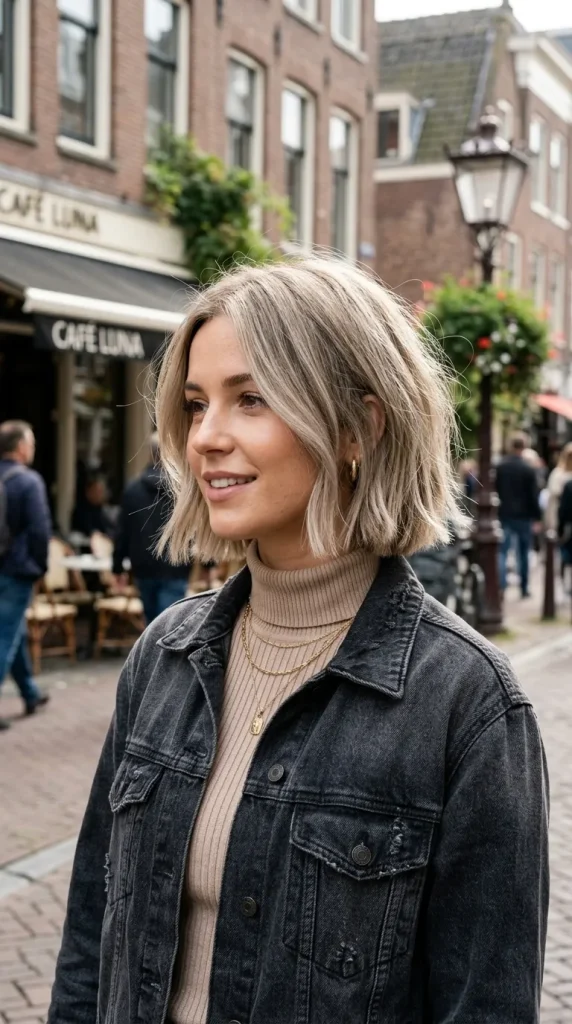
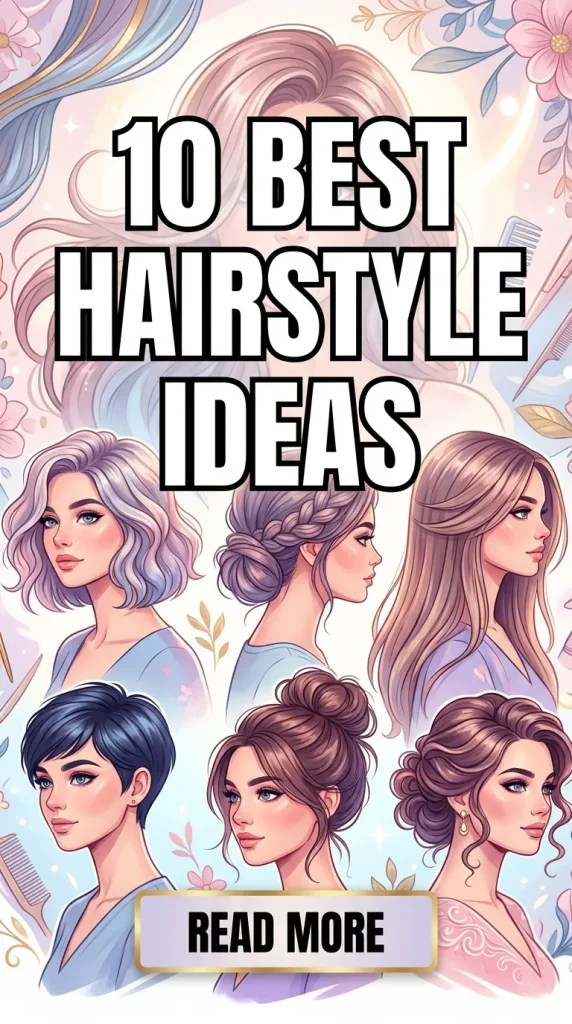
    The textured bob is arguably the most versatile short haircut in existence. Falling anywhere between the jawline and the shoulders, this cut moves away from the rigid, blunt bobs of the past and embraces soft layers and choppy ends to add movement and volume.

    • Why It Works: It works beautifully on straight, wavy, and fine hair types, giving an instant illusion of thickness.
    • How to Style: Apply a lightweight texturizing sea-salt spray to damp hair, then rough-dry with a blow dryer. Use a flat iron to create subtle, lazy bends in the mid-lengths for a perfectly undone finish.
    2. Effortless Long Layers with Curtain Bangs

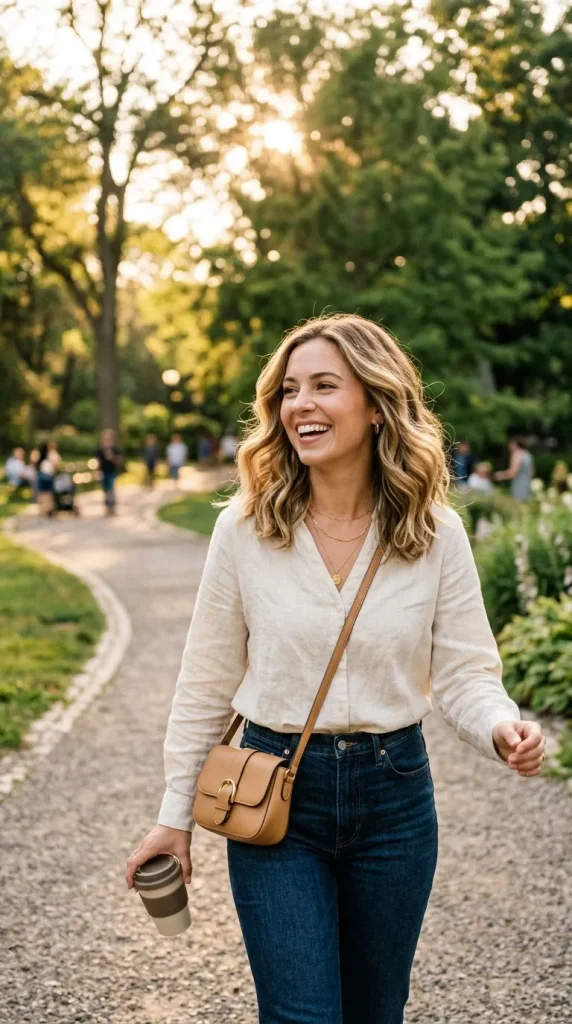
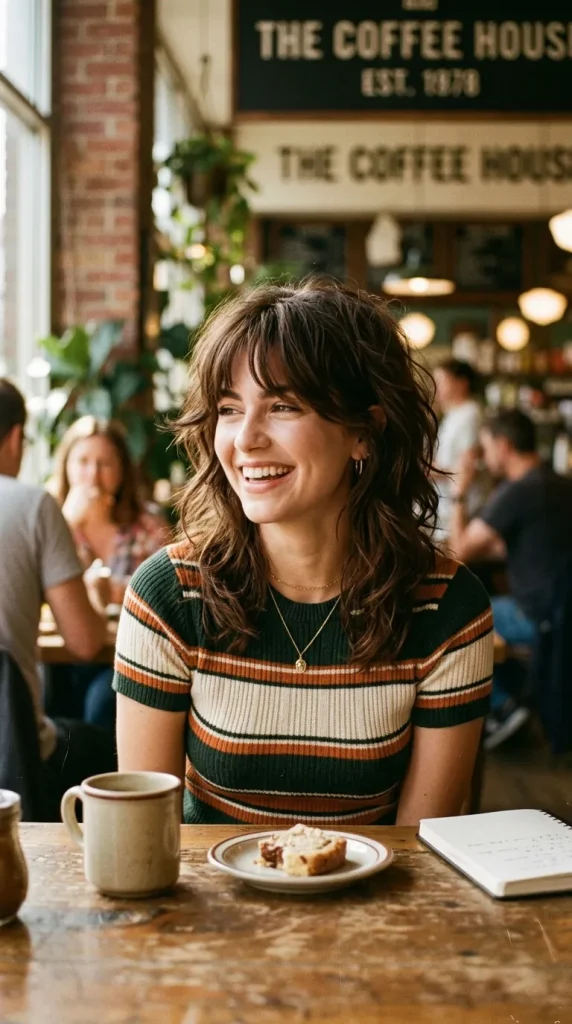
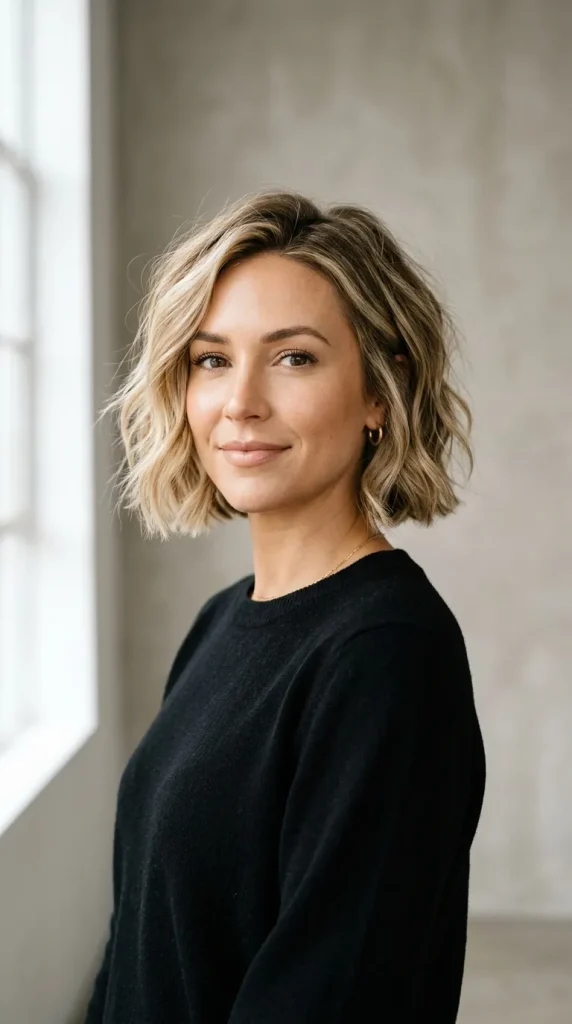
    If you love keeping your length but hate flat, heavy hair, long layers paired with 1970s-inspired curtain bangs are the ultimate solution. Curtain bangs frame the face on both sides, sweeping outward to highlight your eyes and cheekbones beautifully.

    • Why It Works: It adds incredible dimension to long hair and softens angular face shapes like square or diamond profiles.
    • How to Style: Use a large round brush to blow-dry the curtain bangs away from your face. For the rest of the hair, use a curling wand to create big, bouncy waves.

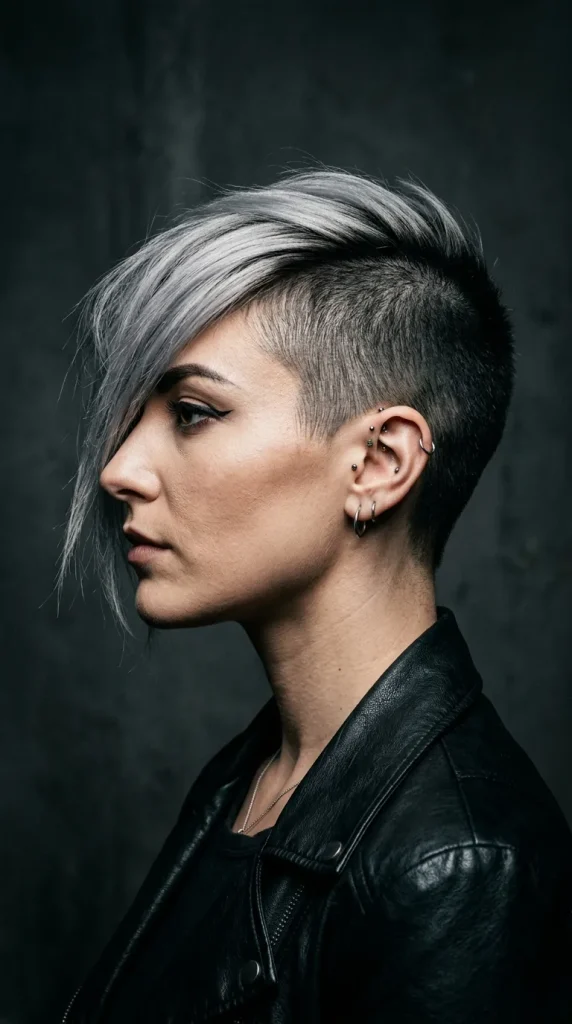
    3. The Edgy Textured Pixie Cut

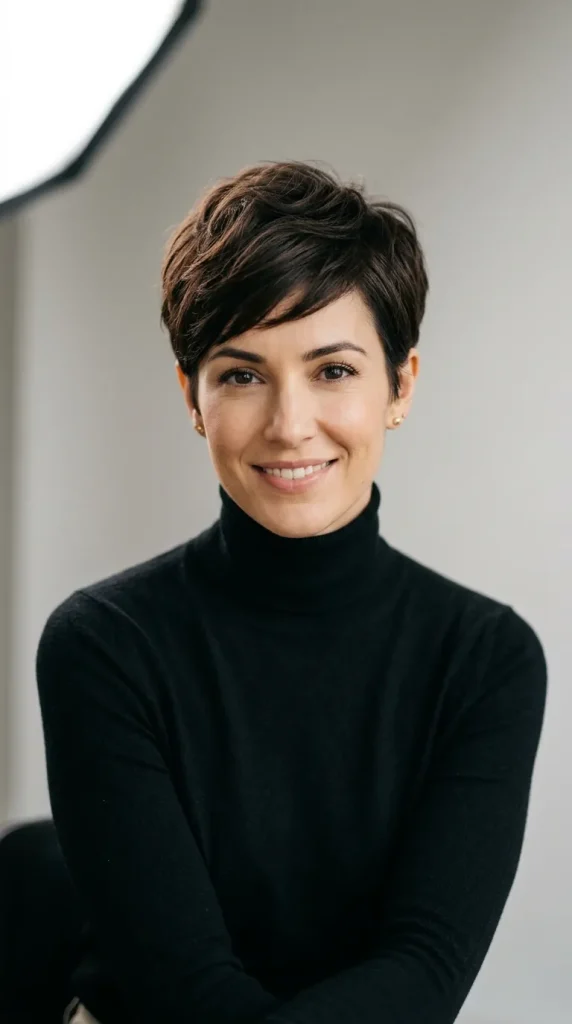
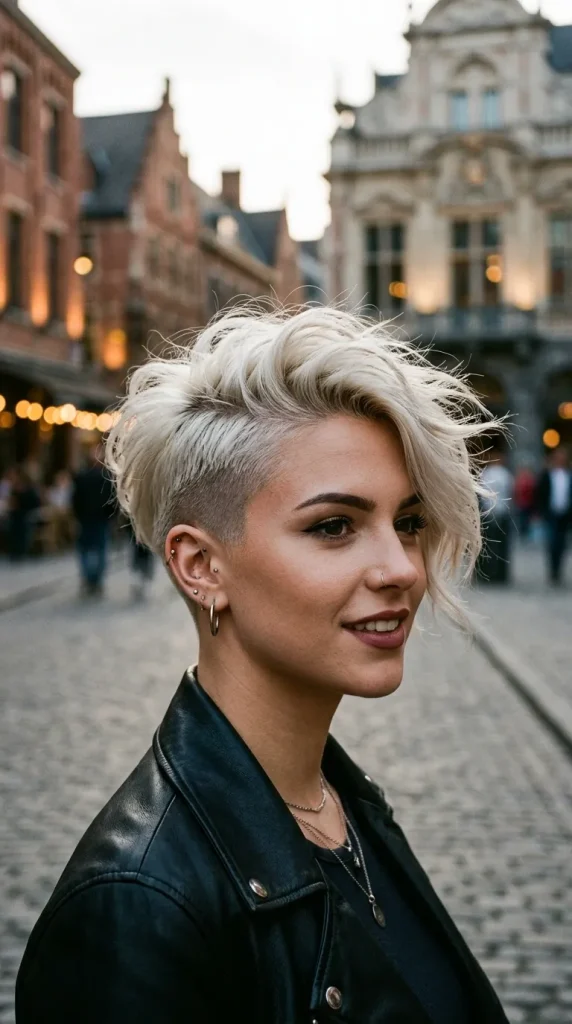
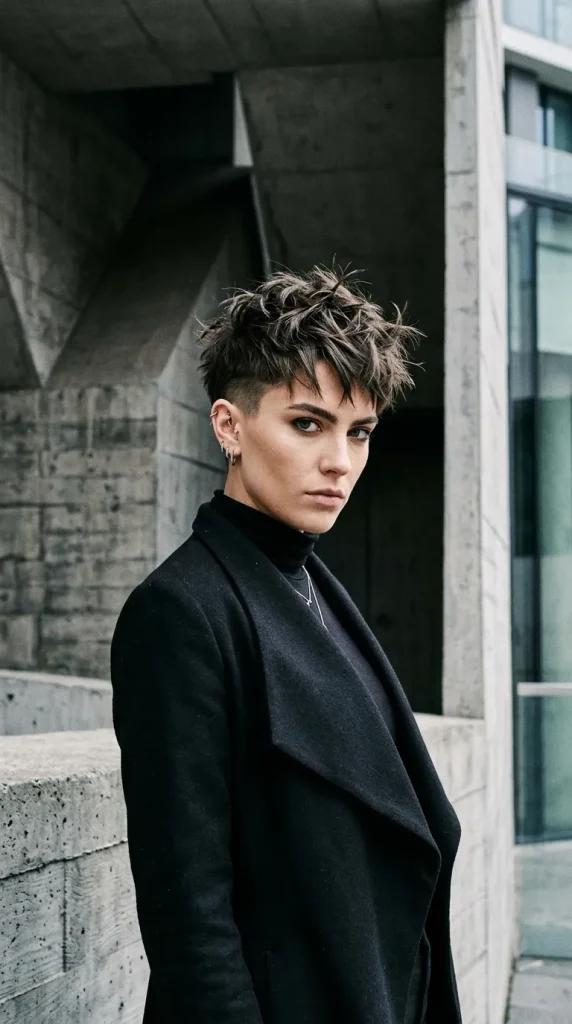
    For the bold and daring, the textured pixie cut is a timeless statement of confidence. This style keeps the sides and back short while leaving the top slightly longer and heavily layered, allowing for versatile styling.

    • Why It Works: It brings ultimate focus to your facial features and drastically reduces styling and drying time.
    • How to Style: Rub a small dime-sized amount of matte styling wax or pomade between your fingers and piece out the top layers to create a messy, high-fashion texture.
    4. The Glamorous Hollywood Waves

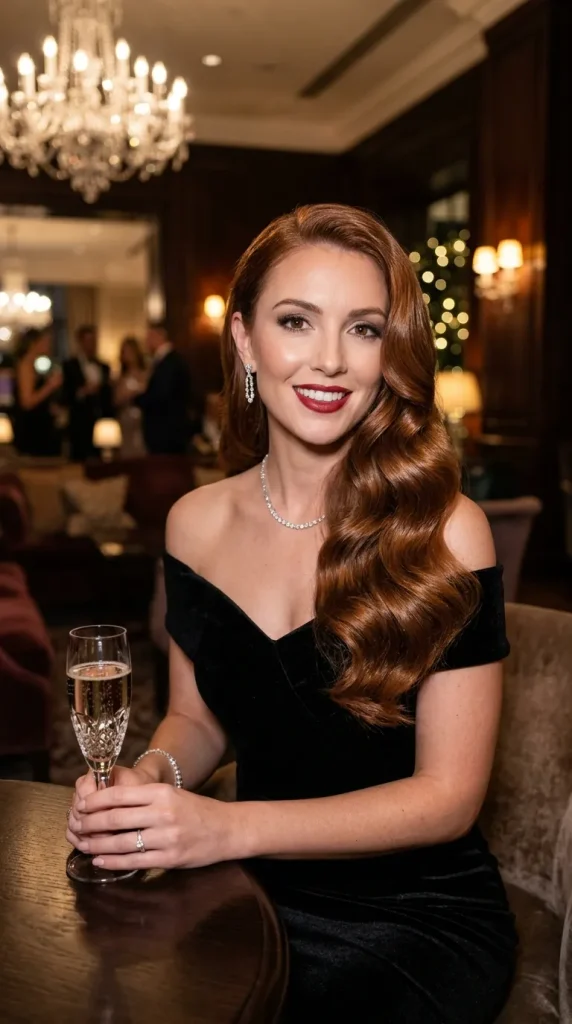
    When it comes to formal events, red carpets, or weddings, nothing competes with the vintage elegance of Hollywood waves. This seamless, uniform wave pattern cascades over the shoulders, offering a high-gloss, ultra-polished finish.

    • Why It Works: It oozes luxury and sophistication, working best on medium to long hair lengths.
    • How to Style: Curl all sections of your hair in the exact same direction using a curling iron. Once the curls cool completely, use a boar bristle brush to gently brush them out until they merge into a single, flowing wave pattern. Finish with a high-shine gloss spray.
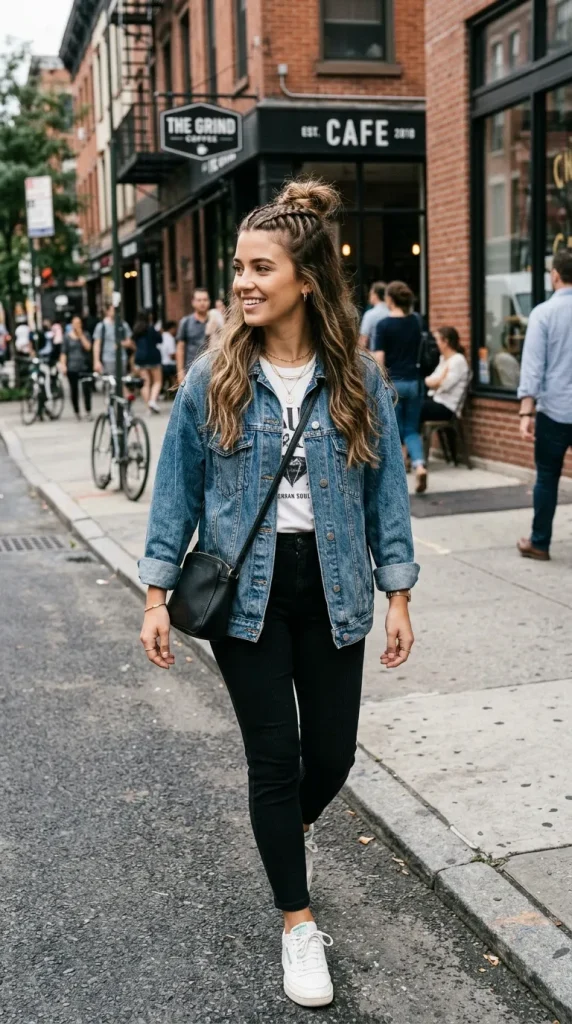
    5. The Chic Half-Up Top Knot

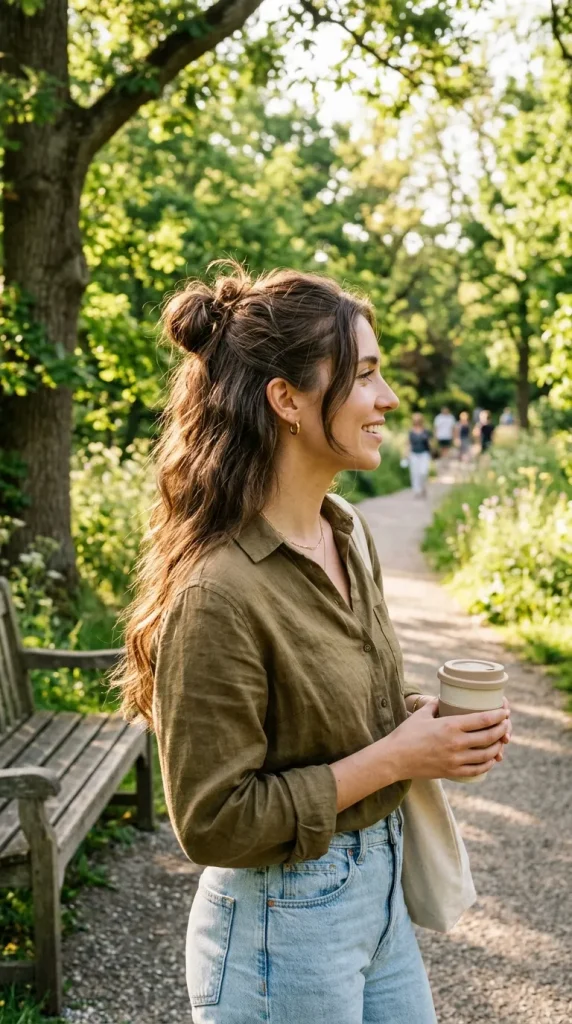
    The half-up top knot is the reigning champion of casual, street-style hair. By sectioning off the top crown portion of your hair and twisting it into a cute bun while letting the rest flow freely, you achieve a look that is playful yet functional.

    • Why It Works: It keeps the hair out of your face while maintaining the romantic feel of wearing your hair down.
    • How to Style: Gather the hair from the temples up to the crown, secure it into a high ponytail, twist it into a bun, and pin it down. Leave the lower section natural, or add quick flat-iron waves.
    6. The Sleek Blunt Clavi-Cut (Lob)

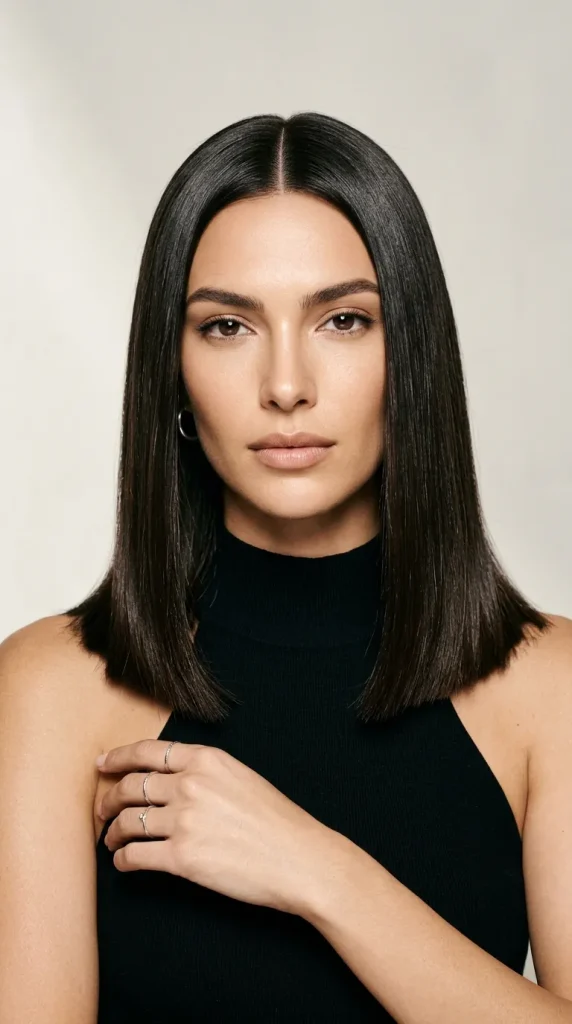
    The “clavi-cut” is a long bob (lob) that hits exactly at the collarbone. Styled bone-straight with sharp, blunt ends, this hairstyle is the epitome of modern, minimalist chic.

    • Why It Works: It offers the crispness of a short haircut while retaining enough length to tie your hair back into a ponytail when needed.
    • How to Style: Apply a heat protectant serum and flat-iron the hair in small sections. Curve the iron slightly inward at the very tips to keep the style looking neat and tucked.
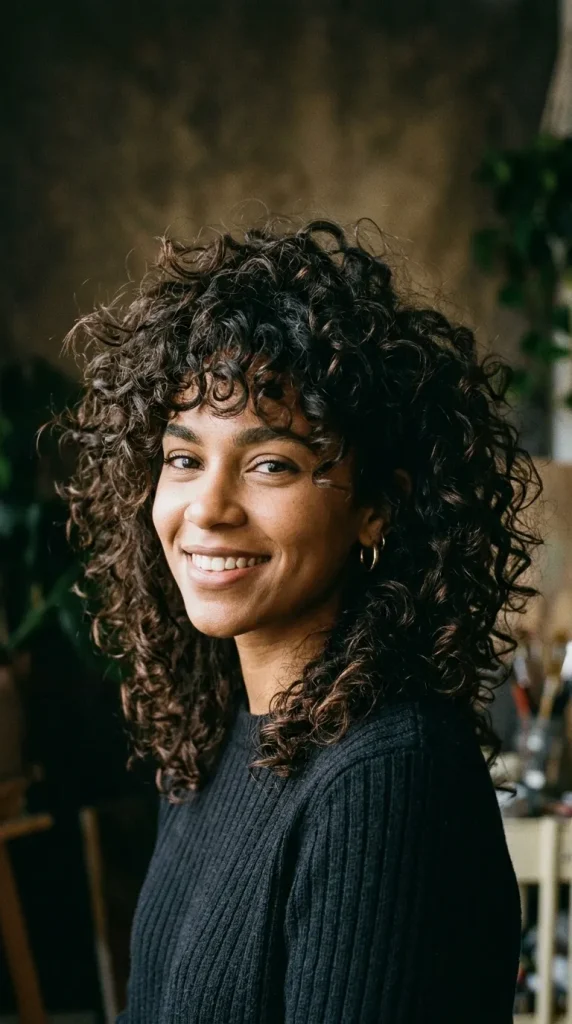
    7. The Voluminous Shag Cut

    The modern shag is a heavily layered, texturized cut that celebrates wild volume and a rock-and-roll aesthetic. It features shorter choppy layers around the crown and a wispy perimeter, often accompanied by a full fringe.

    • Why It Works: It is a dream come true for natural waves and curls, as the heavy layering removes weight and allows curls to bounce freely.
    • How to Style: Apply a dollop of curl-defining mousse or volume cream to damp strands and use a diffuser attachment on your blow dryer to enhance your hair’s natural pattern.
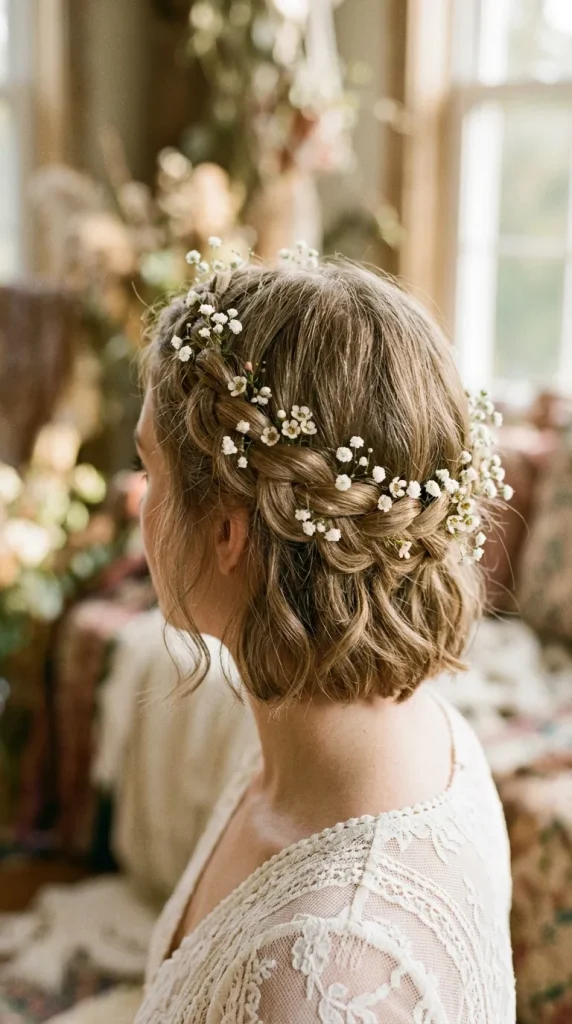
    8. The Twisted Crown Halo Braid

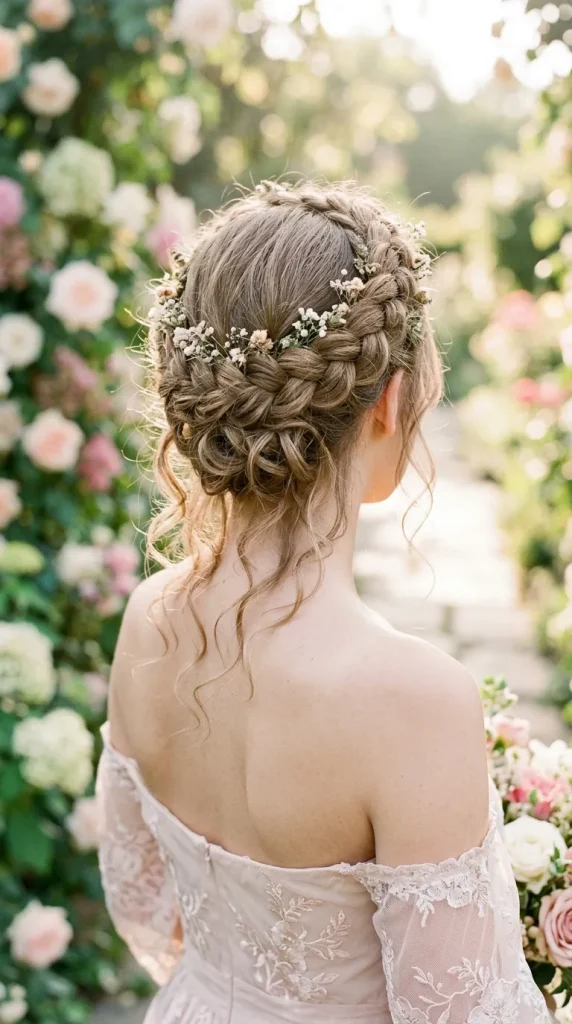
    For an ethereal, romantic, or bohemian vibe, the halo braid is a masterpiece. It involves braiding or twisting two sections of hair from the front and wrapping them around the back of the head, creating a crown-like effect.

    • Why It Works: It is an elegant updo that keeps you cool in hot weather while looking incredibly intricate and detailed.
    • How to Style: Create two regular braids or rope twists on either side of your head. Pull them around to the back, overlap them, tuck the ends under, and secure tightly with bobby pins. Pull out a few small strands around the ears to keep it soft.
    9. The High-Gloss Sleek Ponytail

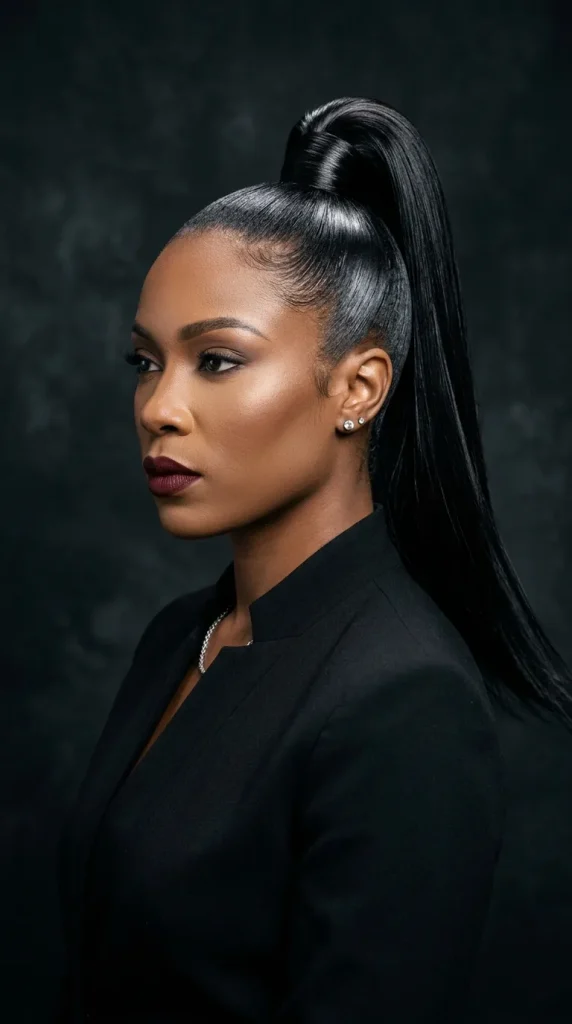
    This is the ultimate power move hairstyle. A high ponytail pulled tightly back at the crown creates an instant lifting effect for the face and radiates a sharp, professional, and confident aura.

    • Why It Works: It works across almost all hair types and instantly elevates even the simplest outfit.
    • How to Style: Smooth back your roots using a firm-hold hair gel and a soft bristle brush. Secure tightly with a bungee hair tie. Wrap a small strand of hair around the band to hide it, and flat-iron the tail until it is sleek and glossy.
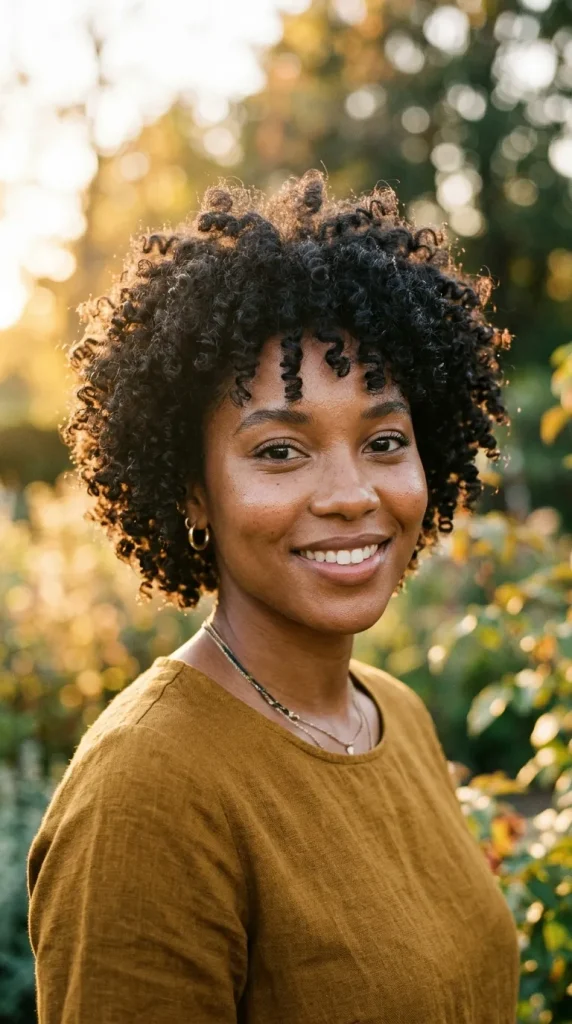
    10. Natural Defined Ringlets (The Curly Cut)

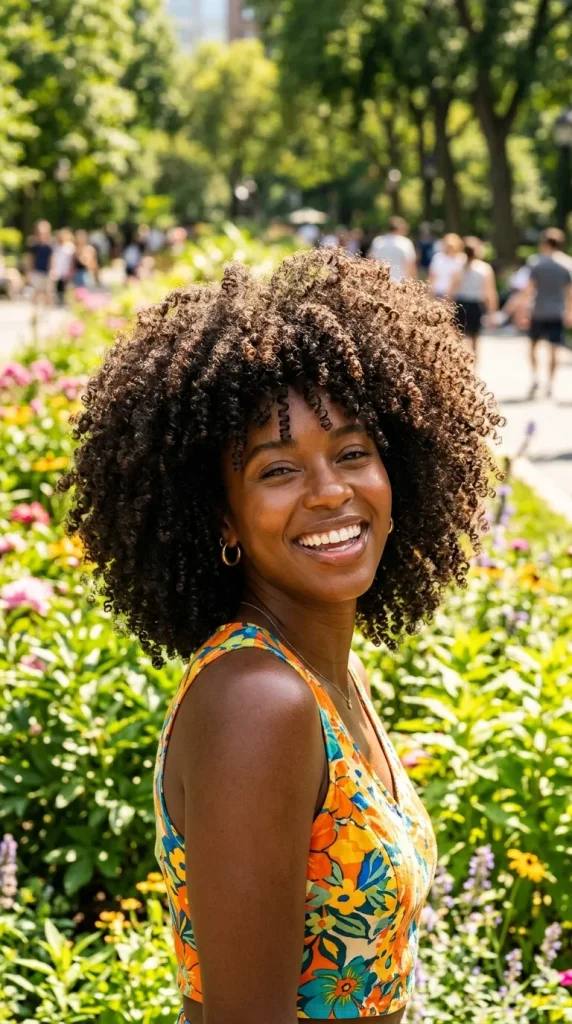
    Embracing natural texture is a massive global movement. A customized curly cut shapes curly, coily, or kinky hair into a beautifully rounded, voluminous silhouette that celebrates natural bounce and definition.

    • Why It Works: It honors your hair’s natural state, prioritizing hair health and structural volume.
    • How to Style: Use the “LOC” method (Leave-in conditioner, Oil, and Cream) on soaking wet hair to seal in moisture. Air-dry or diffuse, then gently shake the roots to build magnificent volume.
    Conclusion

    The best hairstyle is ultimately the one that makes you feel unstoppable. Whether you opt for the crisp, clean lines of a blunt clavi-cut, the playful bounce of long layers with curtain bangs, or the regal structure of a halo braid, changing your hair is a powerful form of self-expression. Consult with your stylist, consider your daily routine, and don’t be afraid to try something brand new!
  • 10 Stunning Hairstyle Ideas for Black Girls

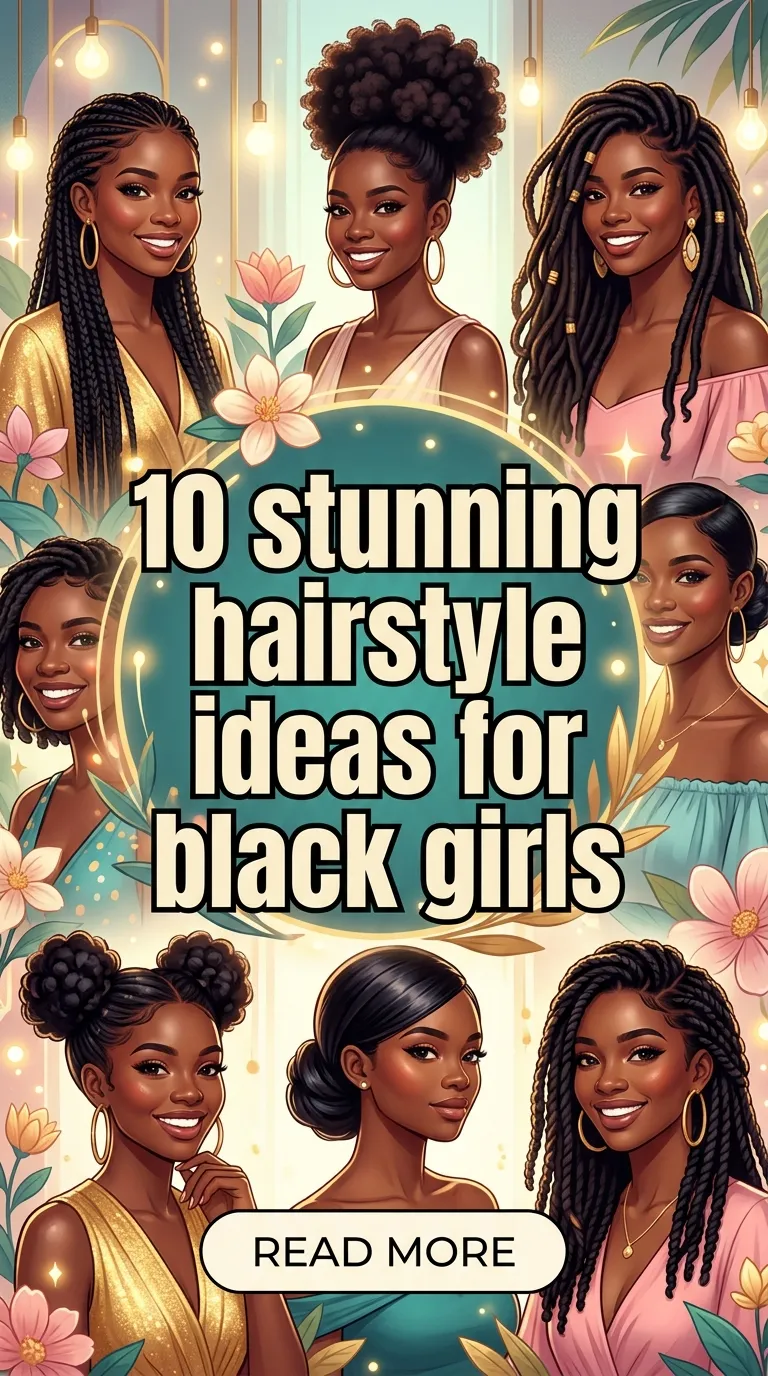
    10 Stunning Hairstyle Ideas for Black Girls

    When it comes to hair versatility, creativity, and self-expression, Black hair stands in a league of its own. From intricate protective styles that guard delicate strands to voluminous natural afros that celebrate texture, the options are truly endless. Whether you are looking for a low-maintenance look for a busy work week, a bold color transition, or an elegant updo for a formal event, there is a style perfectly suited for your hair journey.

    Choosing the right hairstyle is not just about aesthetics; it’s about celebrating culture, preserving hair health, and feeling confident. To inspire your next salon visit or DIY hair day, we have curated 10 trendy and timeless hairstyle ideas for Black girls, complete with maintenance tips and styling advice.

    1. The Classic Box Braids

    Box braids are an absolute staple in the world of protective styling. Characterized by square-shaped hair divisions, this style offers a perfect blend of tradition, versatility, and low maintenance. You can experiment with different lengths, thicknesses (from micro to jumbo), and a kaleidoscope of colors without altering your natural hair.

    • Styling Tip: Box braids can be styled into a high bun, a half-up look, or accessorized with metallic hair cuffs and beads for a personalized, regal touch.
    • Maintenance: Keep your scalp hydrated by applying a lightweight tea tree or peppermint oil mix, and sleep with a satin bonnet to prevent frizz.

    2. The Defined Wash-and-Go

    Celebrating your natural curl pattern is incredibly empowering, and the wash-and-go is the ultimate way to do it. This style relies on high-quality hydrating products to define and lock in your natural coils, kinks, or curls (ranging from 3C to 4C textures) right after a wash.

    • Styling Tip: Apply a generous amount of leave-in conditioner followed by a defining gel or mousse to soaking wet hair. Use the “shingling” method (smoothing product through small sections) for maximum definition.
    • Maintenance: Use a diffuser on low heat to dry, and preserve the curls at night using the “pineapple” method (gathering hair loosely at the top of the head).

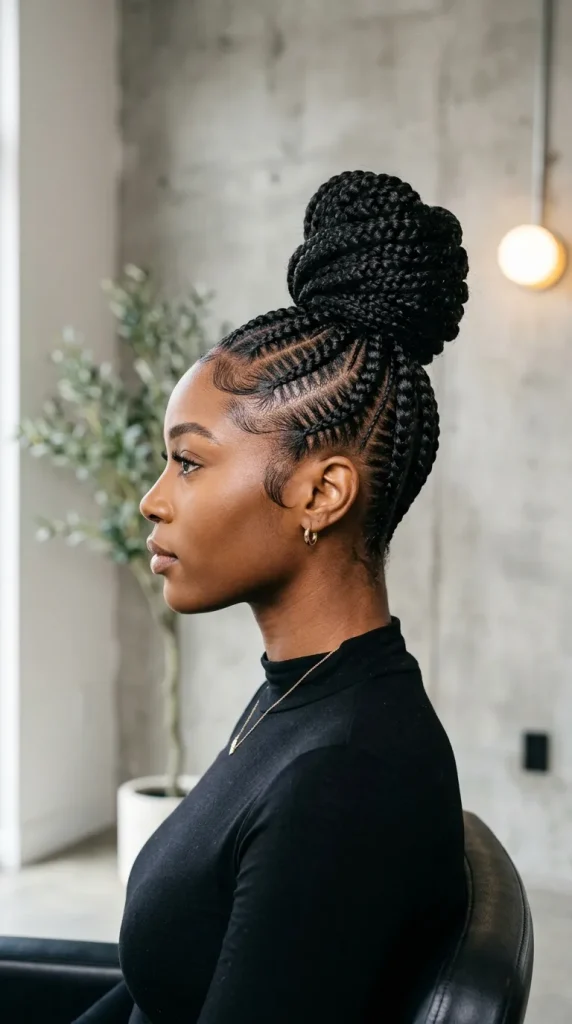
    3. High-Top Knot Feed-In Braids

    Feed-In braids provide a seamless, natural illusion where the extensions are gradually “fed” into your natural hair, starting thin at the hairline and thickening as they move back. Gathering these braids into a sleek, sky-high top knot creates an instantly polished and fierce look.

    • Styling Tip: This style looks incredibly sharp when paired with intricately laid “baby hairs” or smooth edges using a firm-hold edge control gel.
    • Maintenance: Wrap a silk scarf tightly around your perimeter at night to keep the edges flat and frizz-free.

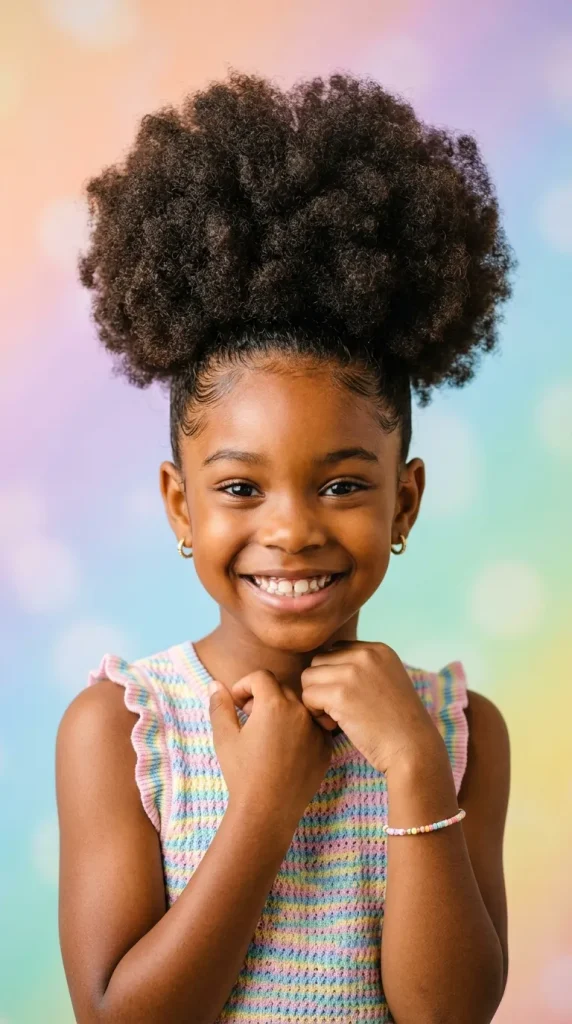
    4. The Statement Afro Puff

    The Afro puff is a quick, classic, and effortlessly chic way to style natural texture. Whether you opt for a single voluminous puff at the crown or playful double puffs (space buns), this style highlights your facial features beautifully while letting your texture shine.

    • Styling Tip: Use a wide-tooth comb to fluff out the puff for maximum volume, and use a soft bristle brush with a slicking gel to make the base smooth and sleek.
    • Maintenance: Avoid pulling the hair elastic too tight to prevent tension headaches and hairline breakage.

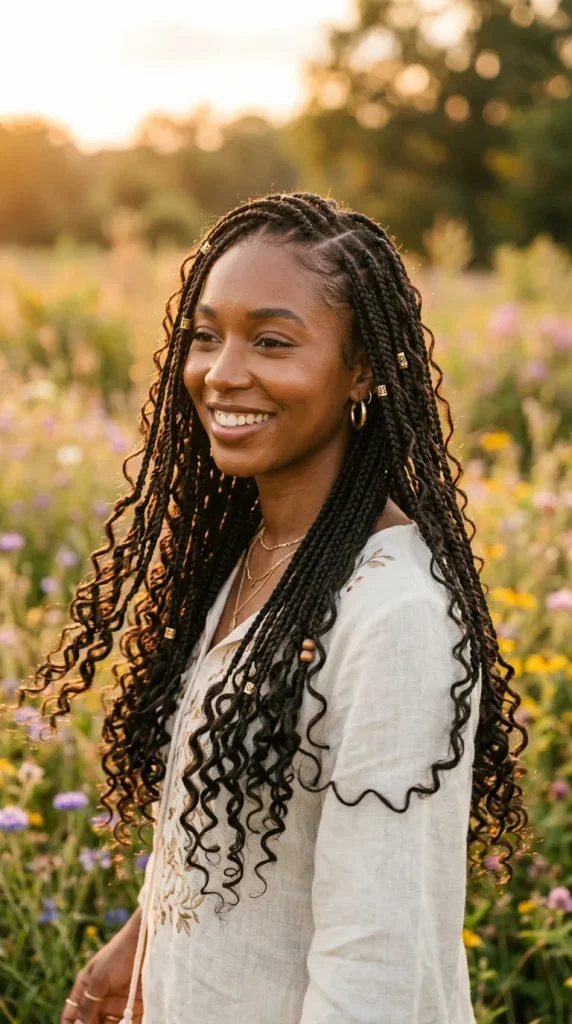
    5. Knotless Braids with Curly Tendrils (Goddess Braids)

    Knotless braids have revolutionized the braiding game by eliminating the tight knot at the root, making them incredibly lightweight and pain-free. Adding synthetic or human hair curly tendrils throughout the length of the braids transforms the look into the ethereal “Goddess Braid” aesthetic.

    • Styling Tip: Opt for a bohemian vibe by letting the curly ends cascade freely over your shoulders.
    • Maintenance: Spray the curly tendrils with a mixture of water and leave-in conditioner daily to keep them from tangling or matting.

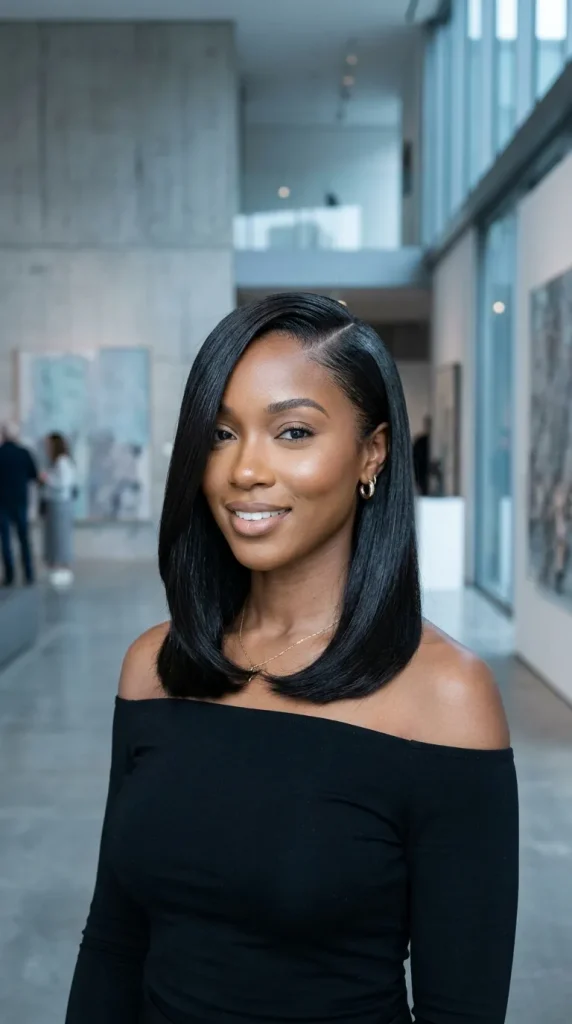
    6. The Sleek Silk Press

    For those who want a temporary break from curls and coils without using harsh chemical relaxers, a silk press is the perfect option. This technique uses a blow dryer and a flat iron to straighten natural hair, leaving it incredibly smooth, bouncy, and full of body.

    • Styling Tip: Add long, face-framing layers or deep body waves to your silk press for a luxurious, glamorous finish.
    • Maintenance: Avoid moisture and sweat at all costs! Wrap your hair in a circular “doobie” wrap at night and cover it with a satin scarf.

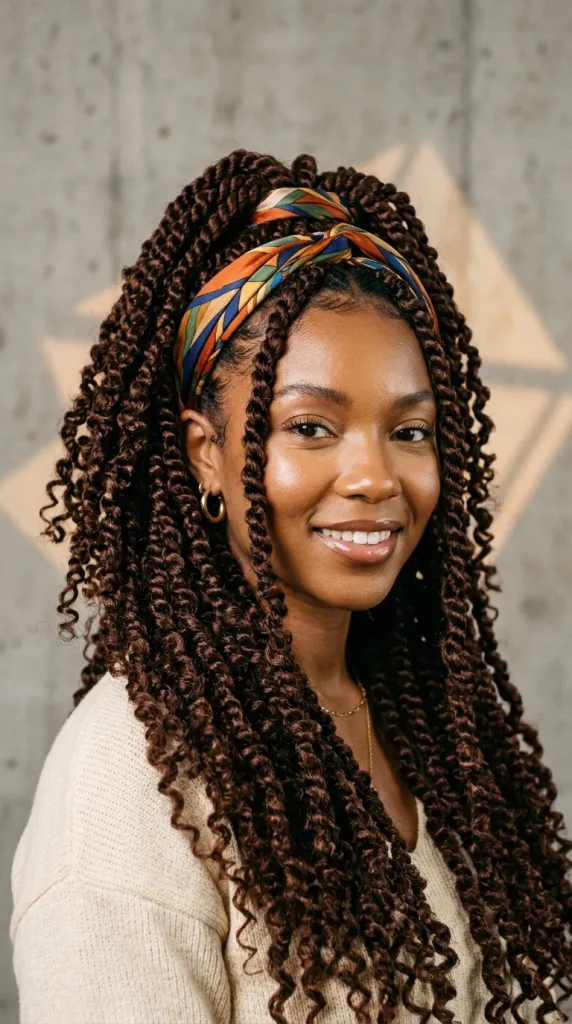
    7. Chic Passion Twists

    Passion twists are a gorgeous hybrid between Senegalese twists and goddess locs. Created using curly braiding hair, they result in a bohemian, water-wave texture that looks incredibly natural, soft, and texturized.

    • Styling Tip: A deep side part adds instant drama and volume to this lightweight look.
    • Maintenance: Wash your scalp gently with diluted shampoo, and use a refreshing mousse to keep the twists looking neat and hydrated.

    8. The Bold Tapered TWA (Teeny Weeny Afro)

    If you are ready for a major change or are starting fresh after a “big chop,” a tapered TWA is a spectacular choice. This style features shorter faded sides with a more voluminous, texturized top, beautifully framing the face and highlighting the jawline.

    • Styling Tip: Elevate a tapered cut by adding a sharp geometric side part or experimenting with bold hair colors like platinum blonde, honey brown, or pastel copper.
    • Maintenance: Moisturize daily with a leave-in cream and oil to keep the short coils soft and healthy.

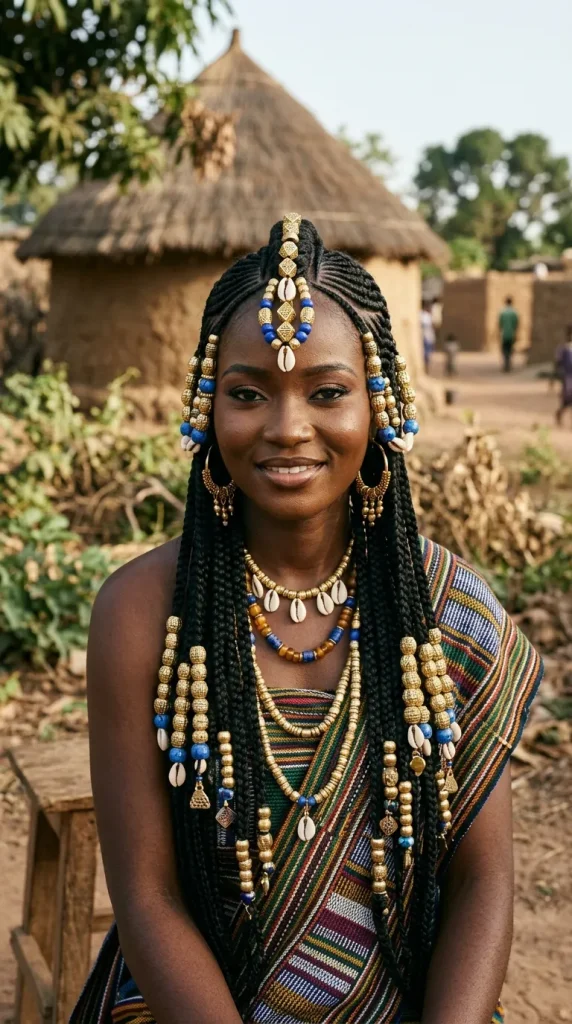
    9. Fulani Braids with Beads

    Rooted in rich West African culture, Fulani braids typically feature a central braid down the middle of the head, braids moving from the back toward the front at the sides, and traditional geometric parting. Adorning the ends with wooden, glass, or metallic beads creates a beautiful, rhythmic sound and stunning visual appeal.

    • Styling Tip: Match the color of your hair beads to your wardrobe or jewelry for a highly coordinated, regal fashion statement.
    • Maintenance: Tie the braids down gently at night to prevent the weight of the beads from pulling on your roots.

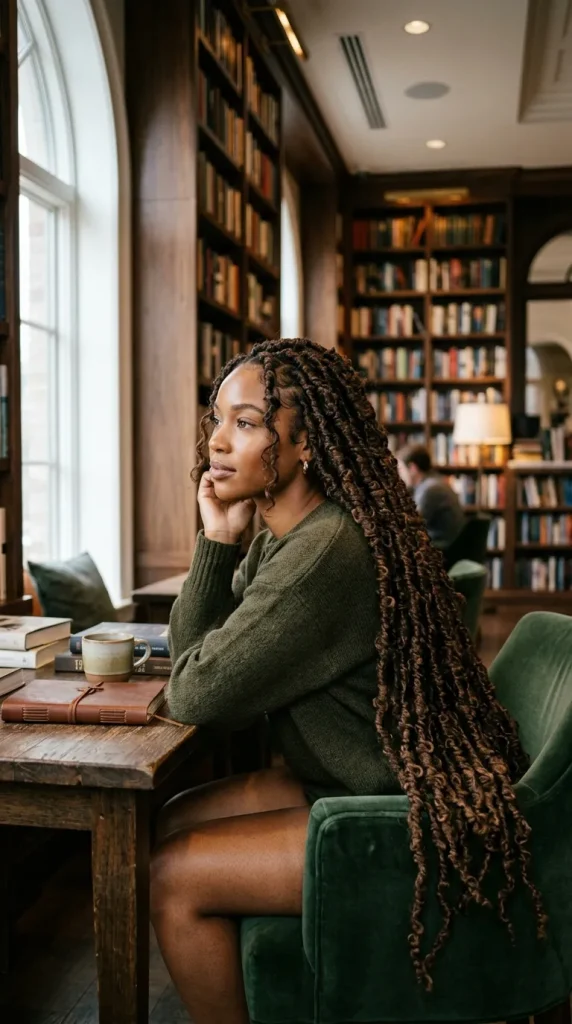
    10. Long, Voluminous Butterfly Locs

    Butterfly locs are a distressed, messy, and incredibly beautiful variant of faux locs. They are created by wrapping wavy hair loosely around a braided base, using a thumb method to form loops that mimic the textured wings of a butterfly.

    • Styling Tip: This style looks best when it’s long and slightly distressed, leaning into an organic, carefree aesthetic.
    • Maintenance: Because these locs are naturally textured, they get better with age. Keep your scalp clean and moisturized with a nozzle-applicator oil.

    Conclusion

    Your hair is your crowning glory, and the beauty of Black hair lies in its ability to transform completely from one week to the next. Whether you are rocking a beautifully defined wash-and-go afro or sitting for an intricate set of goddess knotless braids, these styles offer excellent ways to express your personal identity while keeping your hair protected and healthy.

  • 10 Creative Art and Craft Ideas

    10 Creative Art and Craft Ideas

    In today’s fast-paced digital world, taking a break to create something with your hands is one of the most therapeutic things you can do. Whether you are looking to declutter your mind, decorate your home on a budget, or find a fun weekend project to do with family, arts and crafts offer the perfect escape.

    The best part? You don’t need to be a professional artist to start. With a few basic supplies and a dash of curiosity, anyone can create stunning, functional pieces of art.

    If you are looking for fresh inspiration, here are 10 unique art and craft ideas to unlock your inner artist.

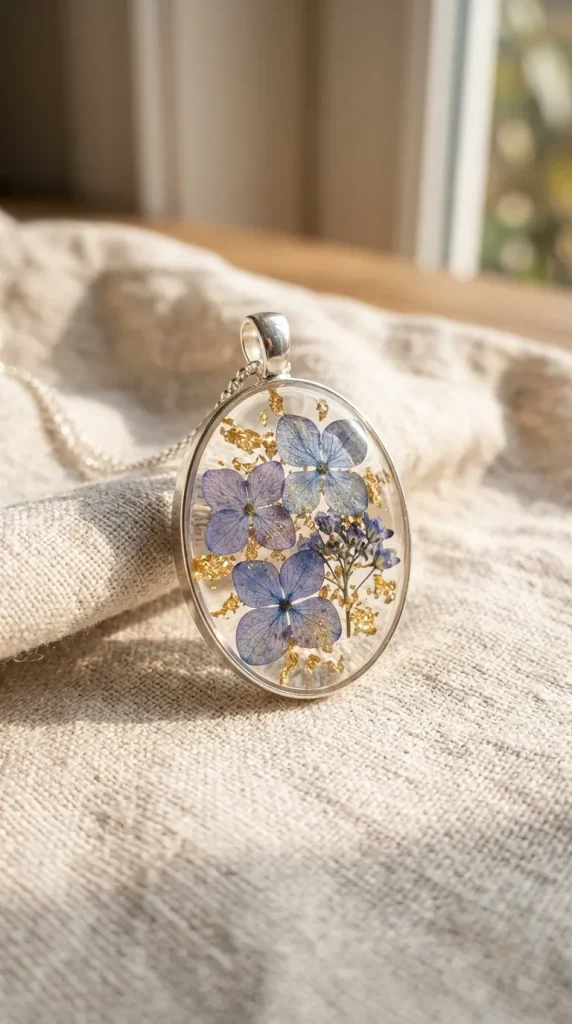
    1. Pressed Flower Resin Jewelry

    Bringing a piece of nature with you wherever you go is easy with resin jewelry. By embedding dried, pressed flowers into clear epoxy resin, you can create timeless necklaces, rings, and earrings.

    • Supplies needed: Epoxy resin, silicone jewelry molds, dried flowers, and jewelry bezels.
    • Why try it: It’s a wonderful way to preserve sentimental flowers from weddings, anniversaries, or special bouquets.

    2. Macrame Wall Hangings

    The bohemian aesthetic is here to stay, and macrame is the ultimate way to achieve it. This craft involves knotting cords into beautiful, textured geometric patterns.

    • Supplies needed: Macrame cotton cord, a wooden dowel or a piece of driftwood, and scissors.
    • Why try it: Once you master the basic square knot, you can create massive, stunning wall art that adds instant warmth to any room.

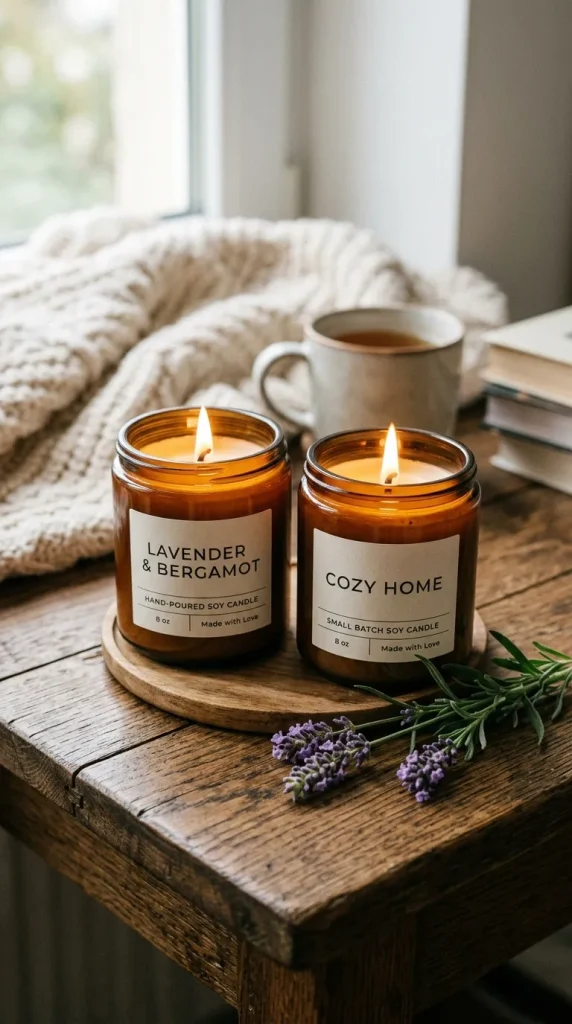
    3. Hand-Poured Soy Candles

    Why buy expensive luxury candles when you can make customized ones at home? Soy candles burn cleaner and longer than traditional paraffin wax, making them a favorite among crafters.

    • Supplies needed: Soy wax flakes, candle wicks, essential oils, and glass jars or vintage teacups.
    • Why try it: You can mix and match scents to create your signature fragrance, and they make incredible, personalized gifts.

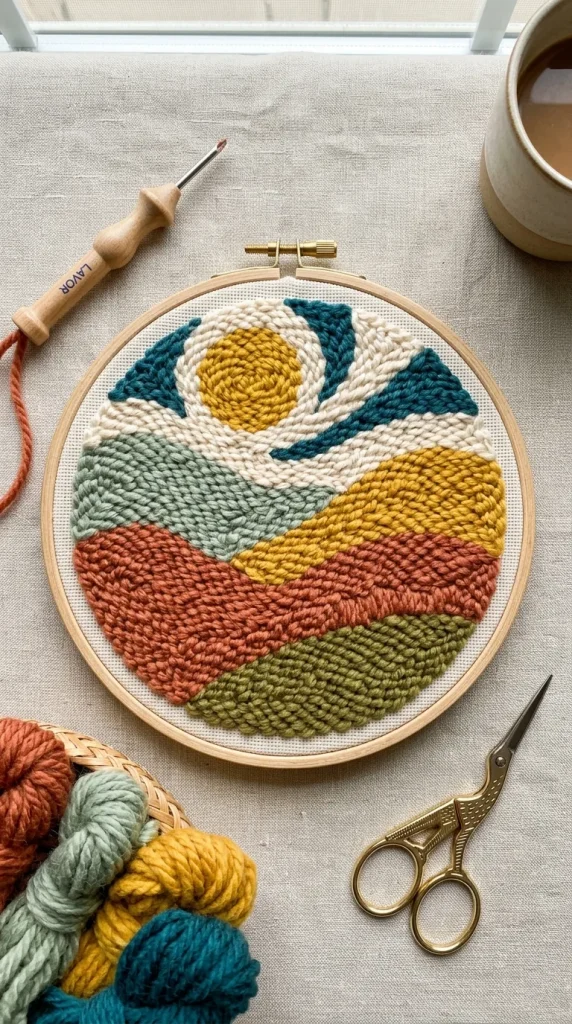
    4. Punch Needle Embroidery

    If traditional embroidery feels too slow or tedious, punch needle is the perfect alternative. It uses a hollow needle to loop yarn into fabric, creating a thick, rug-like texture.

    • Supplies needed: Punch needle tool, monks cloth, an embroidery hoop, and colorful yarn.
    • Why try it: It is incredibly fast, highly satisfying, and perfect for making cozy coasters, throw pillow covers, or textured wall art.

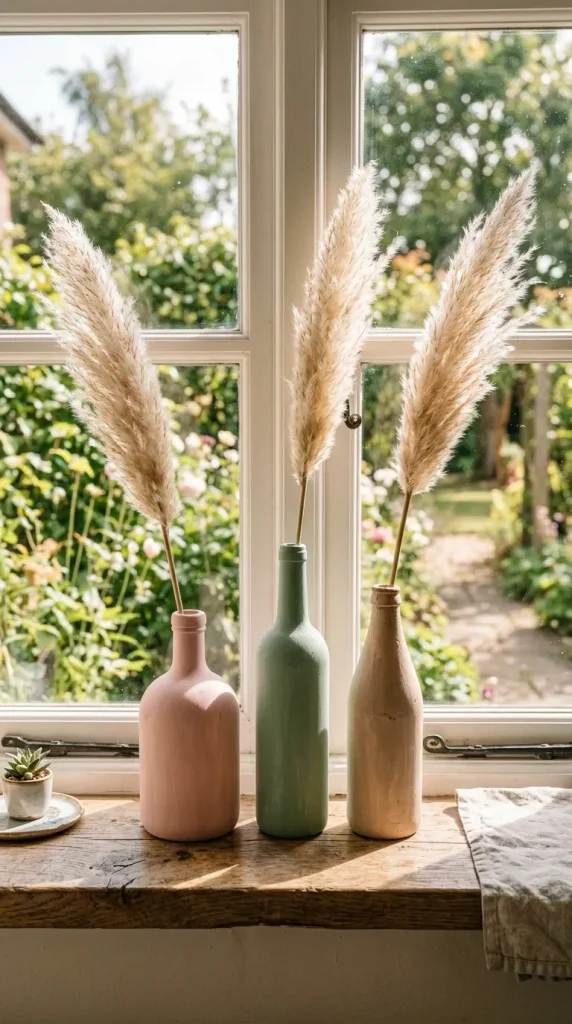
    5. Upcycled Glass Bottle Vases

    Instead of throwing away empty pasta sauce jars or glass beverage bottles, transform them into chic home decor. With a little paint or twine, trash becomes treasure.

    • Supplies needed: Empty glass bottles, acrylic paint or matte spray paint, and painter’s tape for clean lines.
    • Why try it: This is an eco-friendly craft that costs almost nothing but yields beautiful, modern minimalist vases.

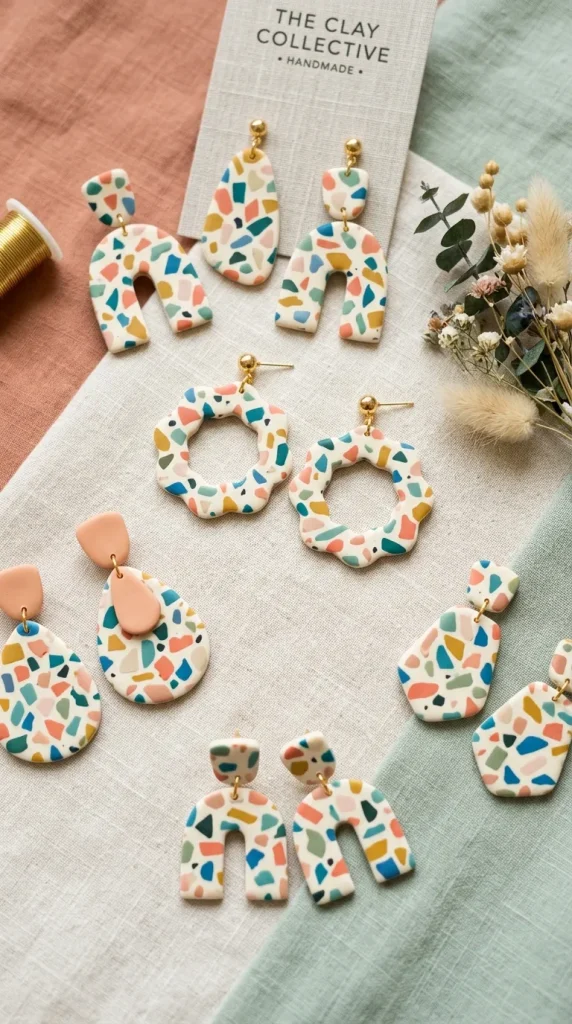
    6. Polymer Clay Earrings

    Polymer clay is a versatile medium that bakes hard in a standard home oven. Making statement earrings out of clay has exploded in popularity because the design possibilities are endless.

    • Supplies needed: Polymer clay (various colors), clay cutters, a rolling pin, and earring posts.
    • Why try it: You can experiment with marbling effects, terrazzo patterns, and unique shapes to create lightweight, fashionable jewelry.

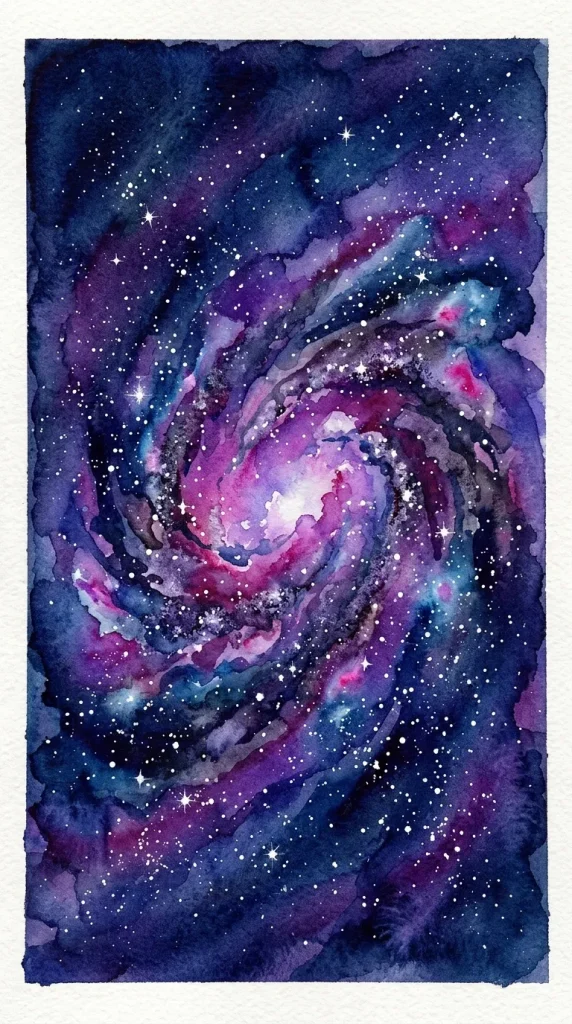
    7. Watercolor Galaxy Art

    Watercolors are famously unpredictable, but that’s exactly what makes them perfect for painting deep space and galaxies. Layering rich blues, purples, and blacks creates a dreamy, cosmic effect.

    • Supplies needed: Watercolor paper, watercolor paints, a paintbrush, and white acrylic paint for the stars.
    • Why try it: Splattering white paint off the bristles of a toothbrush to create a field of stars is deeply satisfying and requires no advanced drawing skills.

    8. DIY Terrazzo Coasters using Jesmonite

    Jesmonite (an eco-friendly alternative to concrete and resin) is perfect for creating trendy terrazzo homeware. By mixing broken, colored chips into a white base, you get a beautiful faux-stone finish.

    • Supplies needed: Jesmonite liquid and powder, pigment liquids, and silicone coaster molds.
    • Why try it: It cures incredibly fast (usually under an hour) and gives a smooth, high-end, professional satin finish.

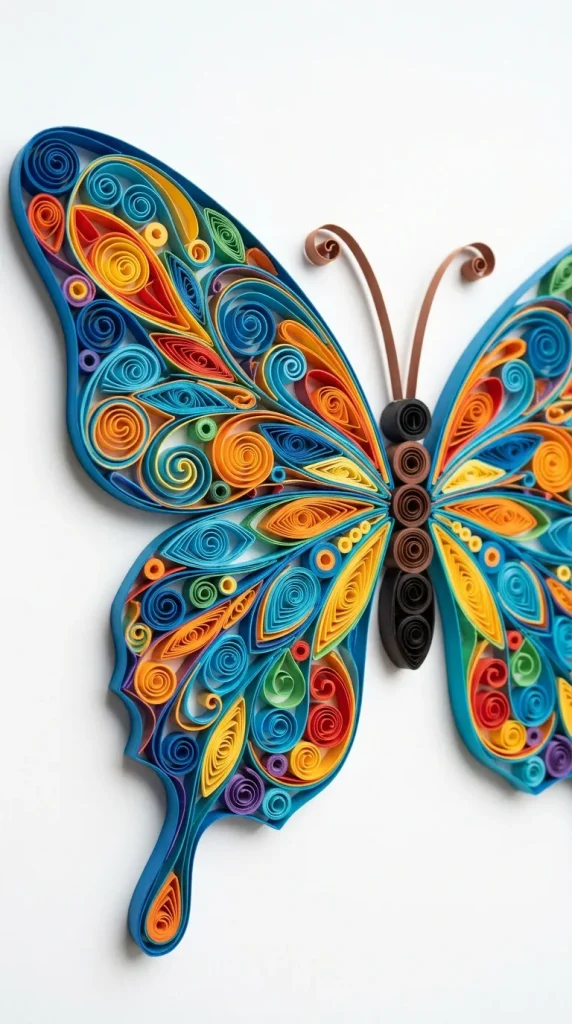
    9. Paper Quilling Art

    Paper quilling is the art of rolling, shaping, and gluing narrow strips of paper together to create intricate 3D designs. From flowers to typography, quilling adds incredible depth to paper crafts.

    • Supplies needed: Quilling paper strips, a slotted quilling tool, and craft glue.
    • Why try it: It is a low-cost, highly meditative craft that rewards patience with breathtakingly delicate designs.

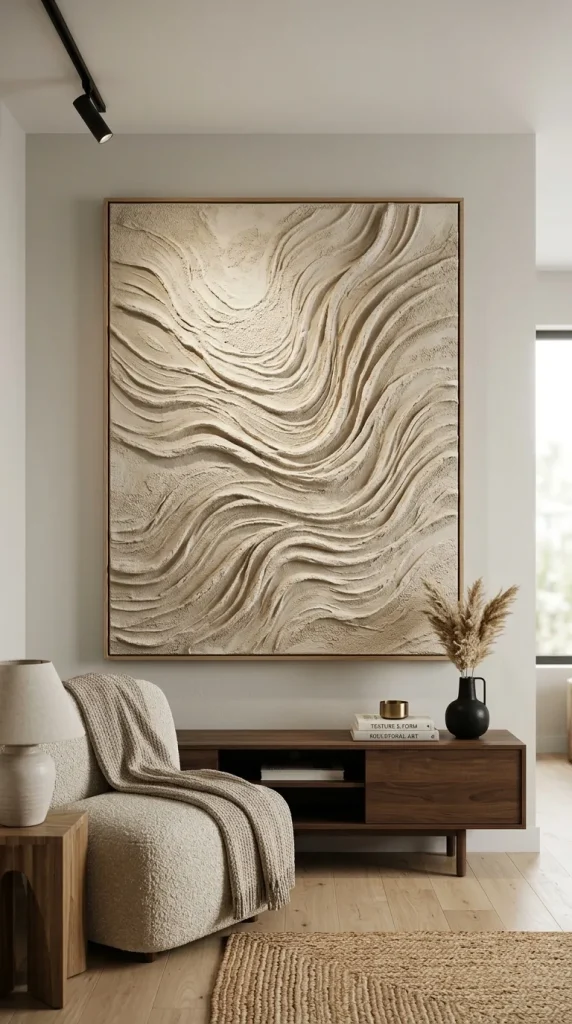
    10. Textured Canvas Art (Plaster Art)

    If you want large-scale, modern art for your living room without spending a fortune, textured canvas art is the answer. Using joint compound or plaster, you can create minimalist 3D waves and lines on a blank canvas.

    • Supplies needed: Stretched canvas, joint compound (plaster), and a notched trowel or comb.
    • Why try it: It is incredibly forgiving—if you don’t like the texture, you can scrape it flat and start over while it’s wet. Once dry, paint it a solid color for a high-end gallery look.

    Conclusion

    Crafting isn’t just about the final product; it’s about the joy of the process. Whether you choose the cozy textures of macrame or the sleek finish of polymer clay, taking time to create something unique is a rewarding experience. Pick one idea from this list, gather your supplies, and let your creativity flow!
  • 10  Short Hairstyles

    10 Short Hairstyles

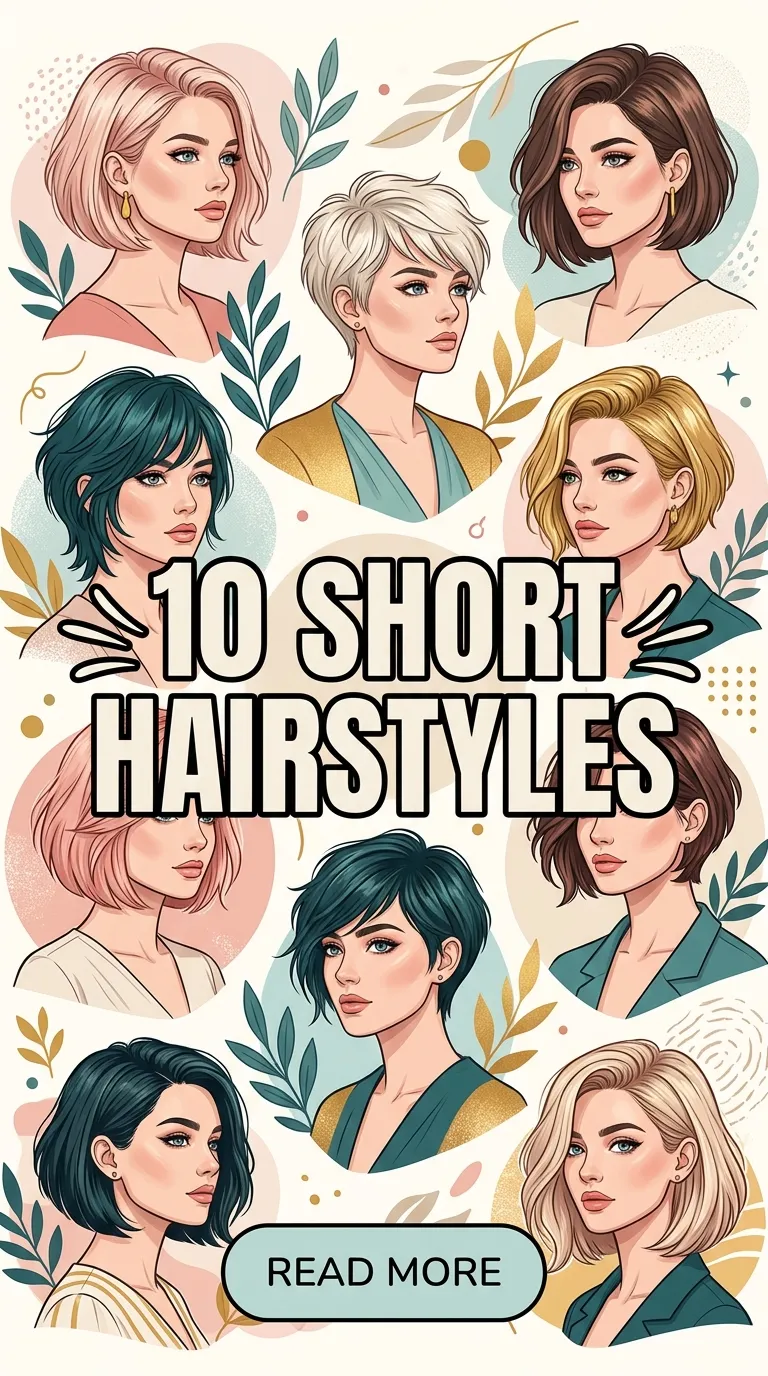
    Short hair is no longer just a matter of convenience; it is a powerful fashion statement. From sleek, modern cuts to effortless, textured layers, short hairstyles offer a liberating sense of confidence, ease, and sophistication. If you are looking to chop your locks or want to refresh your current short crop, finding the right inspiration is key.

    In this comprehensive guide, we explore 10 trendsetting short hairstyles that suit various face shapes, hair textures, and personal styles. Plus, we have included optimized visual prompts at the end to help you visualize your next salon look perfectly.

    1. The Classic Pixie Cut

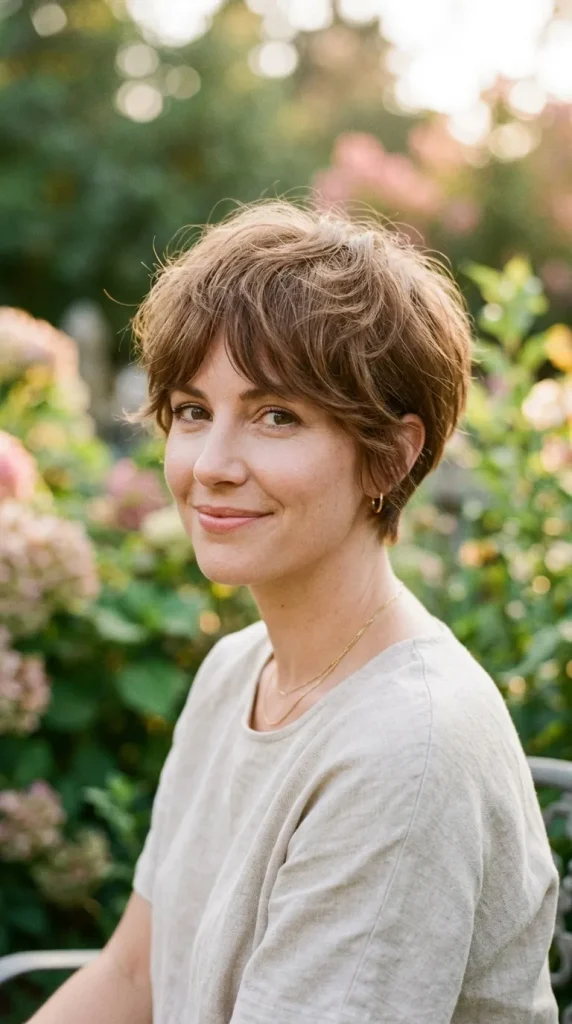
    The classic pixie cut remains an timeless symbol of bold elegance. Characterized by short sides and back with slightly longer layers on top, this style beautifully accentuates your facial features, particularly your cheekbones and jawline. It requires minimal daily styling—a touch of pomade or texturizing spray is all it takes to achieve a clean, polished look.

    2. The Textured Blunt Bob

    If you want something sophisticated yet modern, the textured blunt bob is an excellent choice. Cut straight across at the jawline or just below the chin, this hairstyle adds an illusion of thickness to fine hair. By adding subtle, textured layers throughout the ends, the cut avoids looking too heavy or boxy, giving it a fresh, movement-filled finish.

    3. The Asymmetrical Pixie

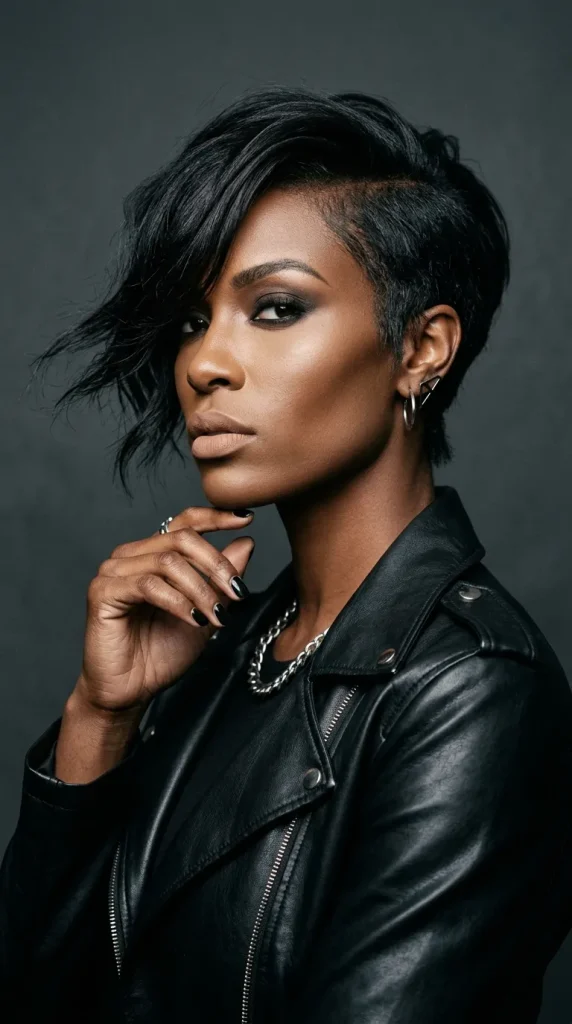
    For those who love an edgy, contemporary vibe, the asymmetrical pixie delivers dramatic flair. This cut features one side kept distinctly longer than the other, creating a beautiful side-swept fringe that frames the face. It is highly versatile, allowing you to style the longer side straight and sleek or wavy and voluminous.

    4. The Wavy Lob (Long Bob)

    Can’t decide between short and medium length? The lob (long bob) is the perfect middle ground, typically resting right at the shoulders or collarbone. Styling a lob with loose, beachy waves adds instant volume and a relaxed, effortless charm. It is incredibly flattering for almost every face shape and allows enough length for quick updos.

    5. The Choppy Shag with Bangs

    Bringing back the best of vintage aesthetics, the modern short shag is all about texture, attitude, and layers. This cut utilizes choppy, disconnected layers to create maximum volume at the crown and a feathered effect toward the edges. Paired with wispy curtain bangs or full fringe, it provides a beautifully messy, rock-and-roll vibe.

    6. The Sleek A-Line Bob

    The A-line bob is shorter in the back and gradually angles into longer pieces at the front. When styled sleek and straight, this geometric cut looks incredibly high-fashion and professional. It frames the face beautifully and offers a clean, structured silhouette that works exceptionally well on straight hair textures.

    7. The Layered Undercut

    If you want to clear away bulk or simply make a bold statement, the layered undercut is a fantastic option. This style involves shaving or closely buzzing the hair at the nape of the neck or along the sides, while leaving longer, textured layers on top. It offers a surprising amount of versatility, as you can hide the undercut when worn down or show it off with a creative sweep.

    8. The Curly French Bob

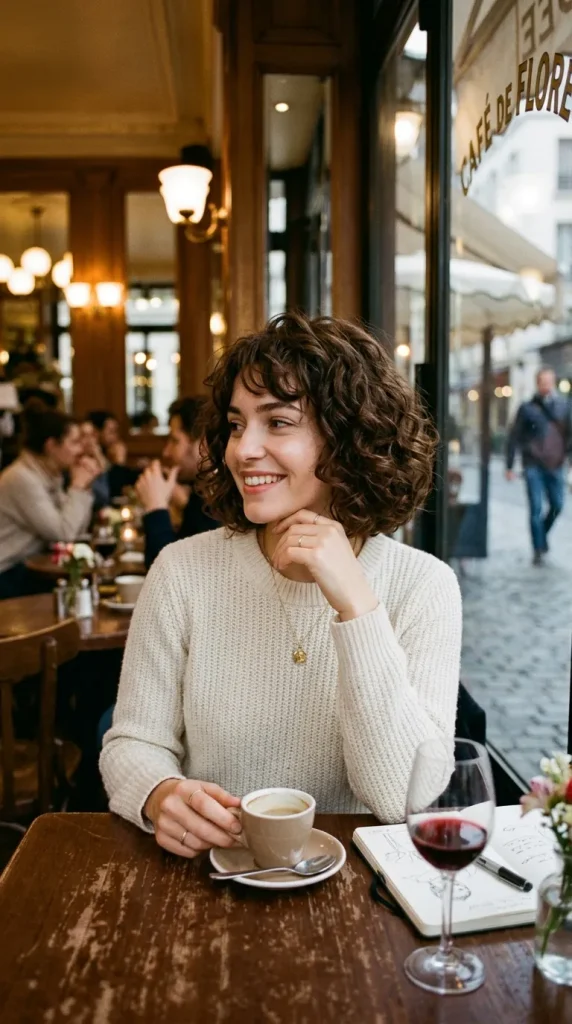
    The French bob is a super-short, jaw-grazing bob that oozes effortless Parisian chic. When paired with natural curls or tight waves, this cut takes on a romantic, bouncy life of its own. Often paired with short, brow-skimming bangs, the curly French bob frames the eyes and adds a gorgeous, youthful softness to the face.

    9. The Wispy Tapered Cut

    A tapered cut features a smooth, gradual transition from longer hair at the top to very short hair at the nape of the neck. By introducing wispy, feathered layers on top, this hairstyle gains a soft, feminine touch. It is an excellent choice for women who want a very short cut that still feels gentle, airy, and easy to style.

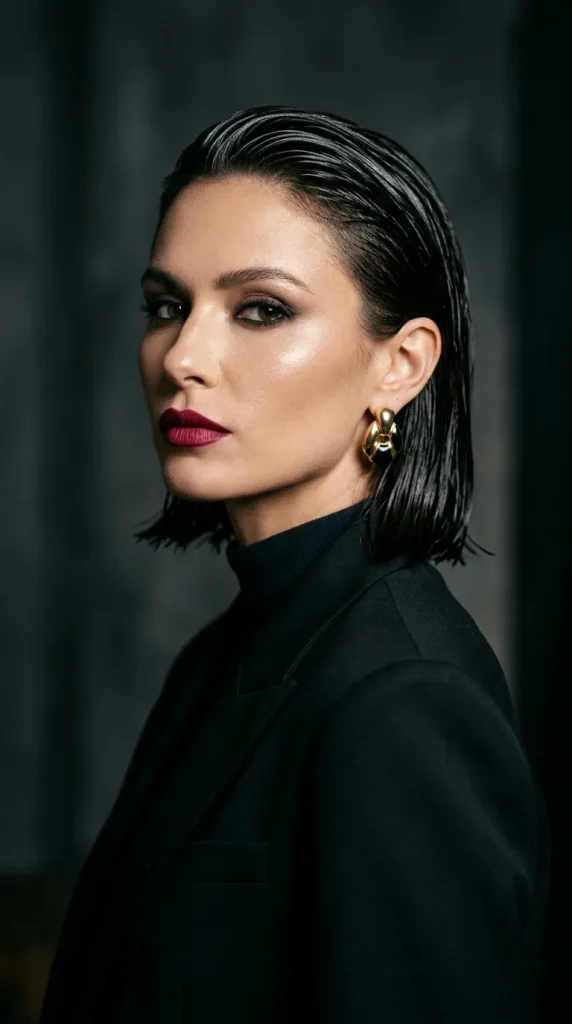
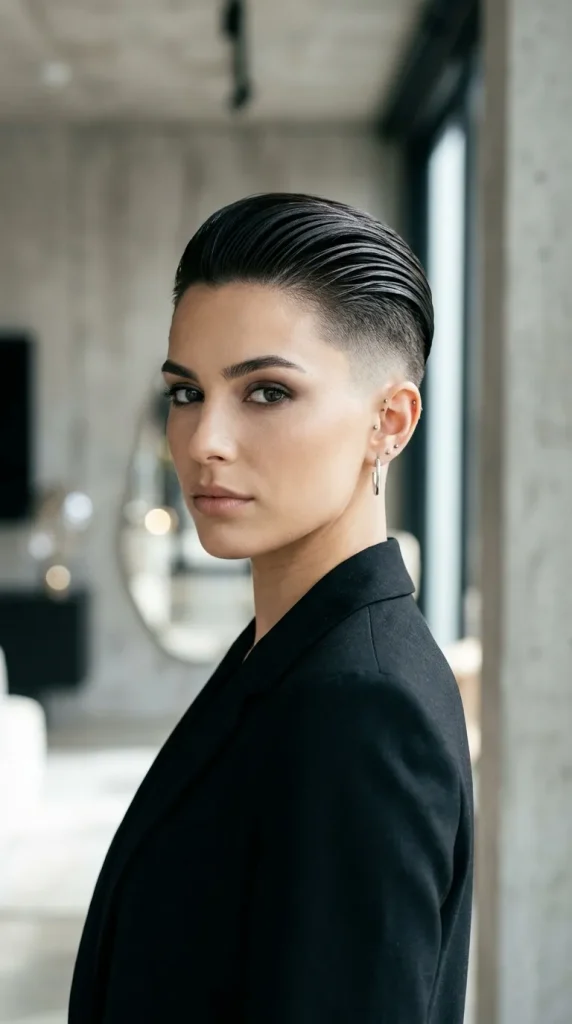
    10. The Slicked-Back Wet Look Bob

    Perfect for special events or evening wear, the slicked-back wet look transforms a standard bob into a high-fashion masterpiece. Using high-shine gel or glossing serum, the hair is combed straight back away from the face. This styling technique highlights your makeup, emphasizes your brow structure, and gives off an ultra-modern, editorial appeal.

    Conclusion

    Switching to a short hairstyle is a refreshing way to reinvent your personal style and simplify your hair care routine. Whether you prefer the daring look of a pixie, the classic structure of a bob, or the retro energy of a shag, there is a short haircut tailored to your personality. Bring your favorite concept to your stylist to create a customized look that makes you feel vibrant and confident.

  • 10 Creative DIY Art Ideas

    10 Creative DIY Art Ideas

    In a world full of mass-produced decor, nothing makes a house feel more like a home than custom, handmade art. Creating your own wall decor and home accents isn’t just a budget-friendly alternative to expensive galleries—it’s also a therapeutic, deeply satisfying outlet for your personal creativity. Whether you are an experienced crafter or a complete beginner picking up a paintbrush for the first time, the world of DIY art offers endless possibilities.

    If you are ready to refresh your space, clear out some everyday materials, and dive into a new creative project, you are in the right place. In this comprehensive SEO guide, we explore 10 unique, budget-friendly DIY art ideas that will instantly elevate your interior design.

    1. Textured Canvas Painting with Joint Compound

    Textured wall art is dominating contemporary interior design trends. Instead of spending hundreds on gallery pieces, you can create your own structural masterpiece using a blank stretched canvas and a tub of basic joint compound or heavy-body acrylic gesso.

    Using a putty knife, a notched trowel, or even an old comb, apply the compound directly onto the canvas to form sweeping waves, minimalist geometric lines, or abstract ridges. Once it dries completely over 24 hours, you can leave it a clean, matte white for a Scandinavian look, or paint over it with earthy tones like terracotta, beige, or sage green.

    2. Upcycled Mosaic Art Using Recycled Bowls and Plates

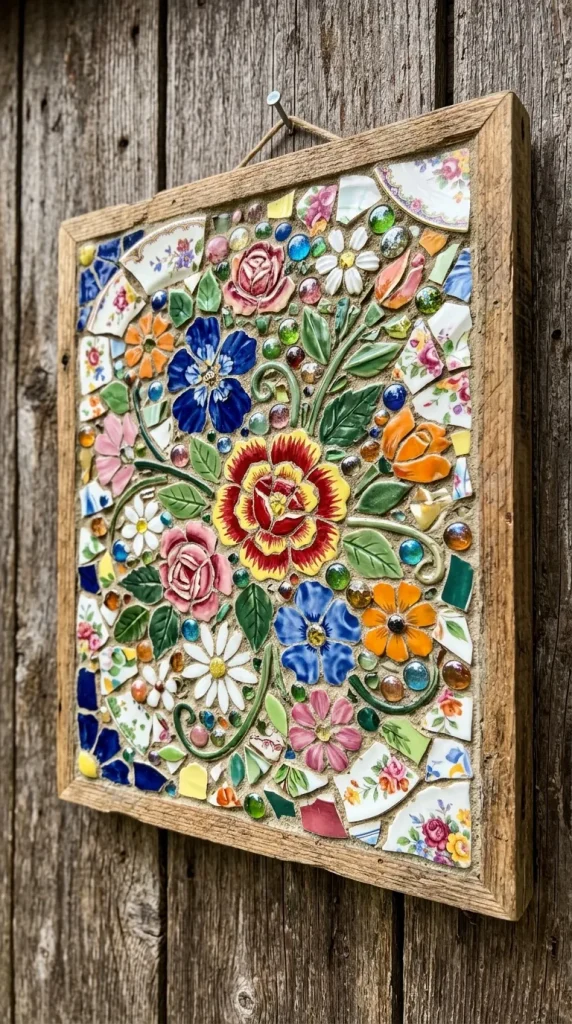
    Don’t throw away chipped ceramic bowls, broken porcelain plates, or leftover glass beads. Instead, turn them into an eye-catching piece of mosaic wall art. This eco-friendly project breathes new life into everyday materials.

    To create this look, safely break your colorful ceramic scraps into smaller pieces using a cloth and a hammer. Arrange the pieces in a mosaic pattern—such as a floral design or an abstract mandala—on a sturdy wooden panel. Secure them with heavy-duty craft glue, apply pre-mixed grout into the gaps, and wipe away the excess for a stunning, glossy finish that catches the light beautifully.

    3. Faux Ceramic Vases with Paint and Baking Soda

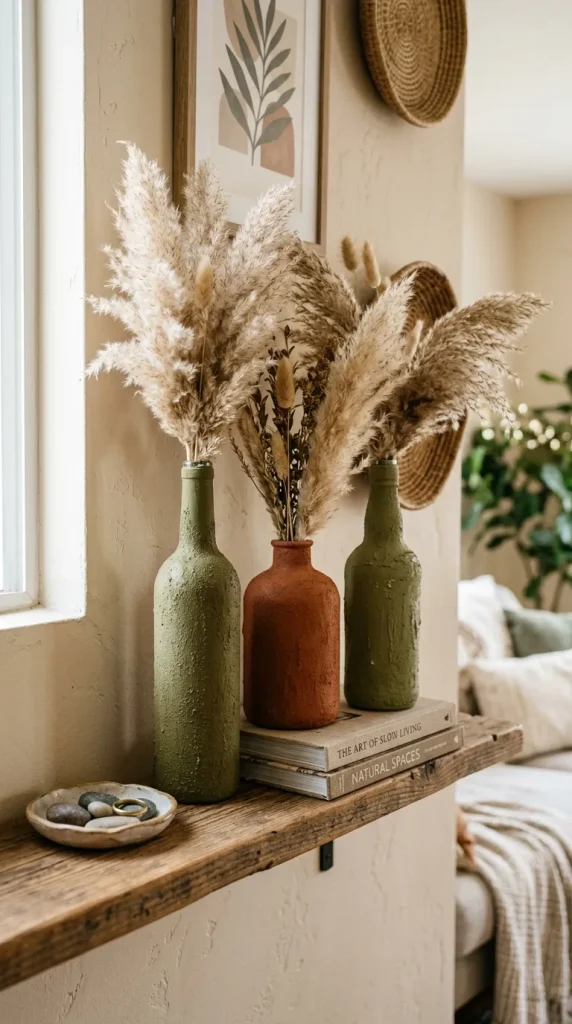
    If you love the rustic, matte look of expensive stoneware but only have cheap glass jars or plastic bottles lying around, this DIY hack is a game-changer. You can easily mimic the textured finish of high-end pottery using acrylic paint and a common kitchen staple: baking soda.

    Mix a teaspoon of baking soda into your choice of acrylic paint (muted tones like olive, cream, or charcoal work best). The mixture will puff up into a thick, gritty paste. Brush it onto your old glass jars or recycled bottles using broad, imperfect strokes. Once dry, the paint transforms the shiny surfaces into gorgeous, faux-ceramic vessels perfect for displaying dried pampas grass or faux florals.

    4. Pressed Botanical Floating Frames

    Bring the calming beauty of nature indoors by creating pressed botanical art. This project is incredibly cost-effective and adds a delicate, organic touch to any room.

    Gather unique leaves, ferns, or vibrant wildflowers from your garden. Press them inside a heavy book lined with parchment paper for one to two weeks until they are completely flat and dry. Once preserved, arrange the botanicals inside a glass floating frame (a frame with two glass panes and no backing). The wall color behind the frame will peek through, making the botanical specimens appear as if they are beautifully suspended in mid-air.

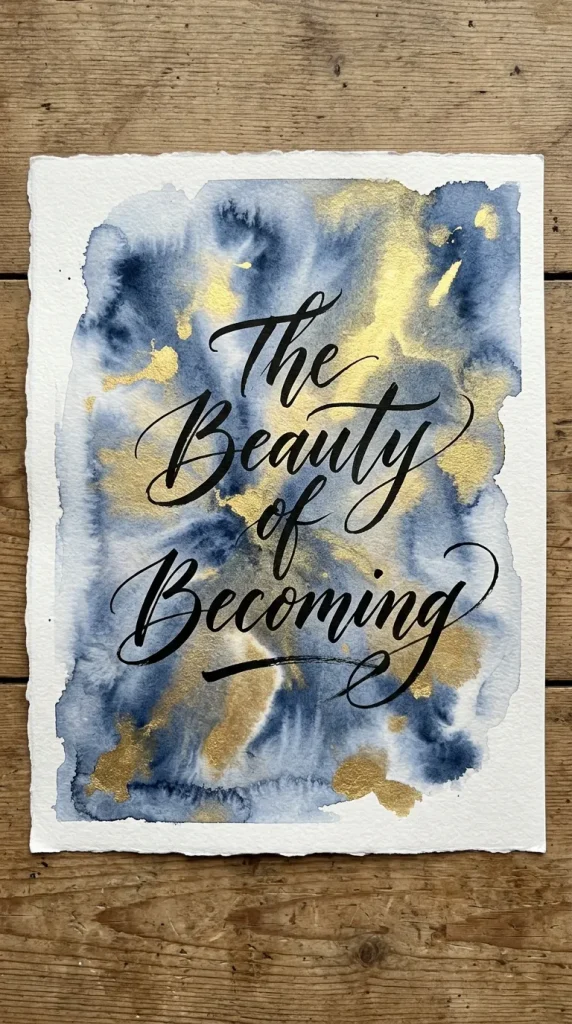
    5. Abstract Watercolor and Calligraphy Quotes

    Combining soft, fluid abstract backgrounds with sharp, crisp lettering creates a striking visual contrast. This idea allows you to customize your space with your favorite inspirational quotes, poems, or names.

    Start by wetting a piece of thick, high-quality watercolor paper. Wash diluted watercolor pigments (like soft blushes, deep indigos, or metallic golds) across the surface, letting the colors bleed naturally. Once the background is completely dry, use a fine-tip brush, an elegant calligraphy pen, or a digital stencil to overlay bold, black or metallic lettering across the center of the watercolor wash.

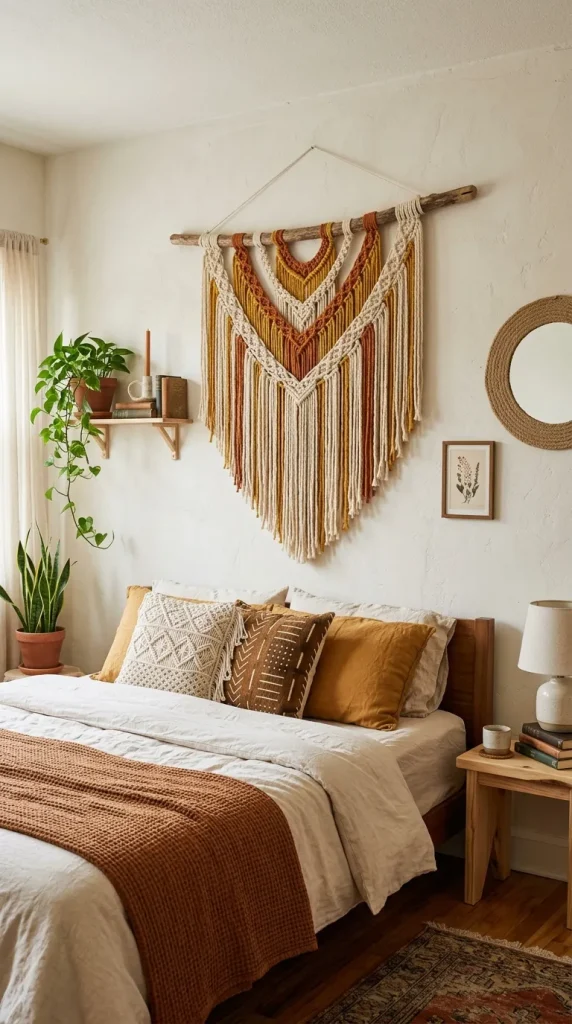
    6. Bohemian Yarn Wall Hangings

    If you want to add warmth, softness, and texture to a room, a bohemian-inspired yarn wall hanging is the perfect weekend project. It requires absolutely no knitting or weaving skills.

    Find a clean, rustic wooden dowel or a sturdy tree branch from outdoors. Cut multiple strands of thick, textured yarn—incorporating different colors like cream, mustard, and rust—to double your desired hanging length. Loop the yarn strands around the dowel using a simple lark’s head knot until the wood is covered. Trim the bottom edges into a clean V-shape, a straight blunt cut, or a soft asymmetrical angle for an instant cozy, boho accent.

    7. Geometric Cardboard Relief Art

    You don’t need a massive budget to create high-end, architectural art. You can build stunning 3D geometric art using discarded cardboard shipping boxes, scissors, and glue.

    Cut thick pieces of cardboard into sharp geometric shapes like triangles, semi-circles, rectangles, and arches. Layer and glue these shapes onto a sturdy cardboard backing to create a raised, multi-dimensional relief pattern. To hide the raw edges and give the piece a unified, professional look, spray the entire assembly with a matte textured spray paint or a coat of thick gesso. The resulting play of shadows across the geometric shapes looks incredibly sophisticated.

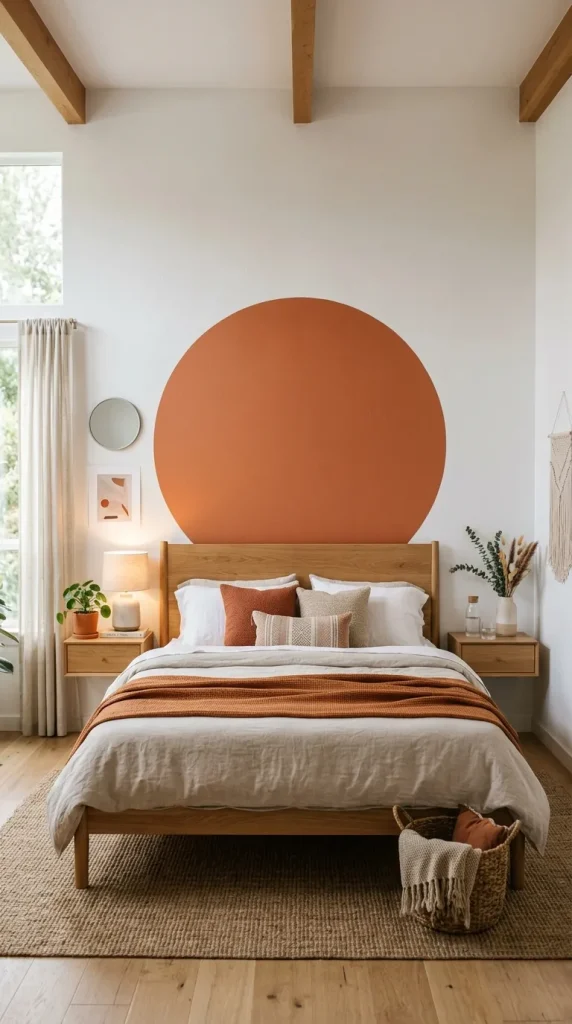
    8. Earthy Terracotta Circle Murals

    If you want to make a big impact without hanging a heavy frame, consider painting a simple geometric mural directly onto an accent wall. A perfect circle painted in a rich, warm terracotta or burnt orange tone can instantly anchor a room.

    To draw a flawless circle on your wall, tie a piece of string to a pencil, pin the other end of the string to the center point of your intended circle, and rotate the pencil around the center to sketch the outline. Fill in the shape using a rich matte wall paint. This minimalist, earthy focal point looks fantastic behind a bed headboard, a floating shelf, or a mid-century modern entryway table.

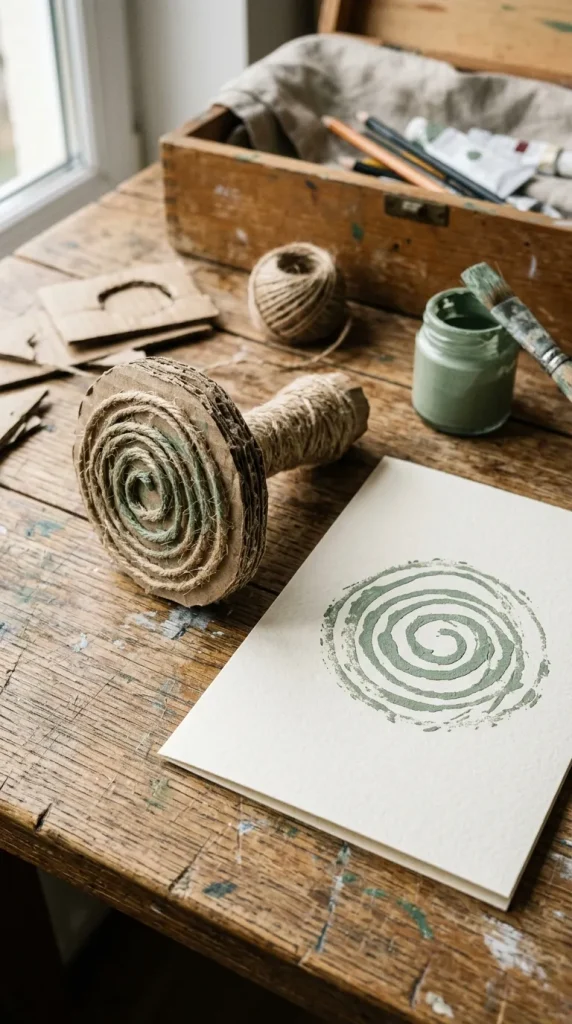
    9. Pressed Cardboard and Twine Stamps

    Block printing is an incredible way to create custom patterned art or handmade wrapping paper, and you can make your own stamps using everyday household trash.

    Cut out small squares of thick cardboard to act as your stamp bases. Glue pieces of twisted jute twine, thick yarn, or shapes cut from foam sheets onto the cardboard base to create patterns like spirals, abstract faces, or leaf veins. Once the glue is dry, dip your homemade stamp lightly into acrylic paint and press it firmly onto cardstock paper. Repeat the pattern to create a beautifully irregular, hand-printed art piece.

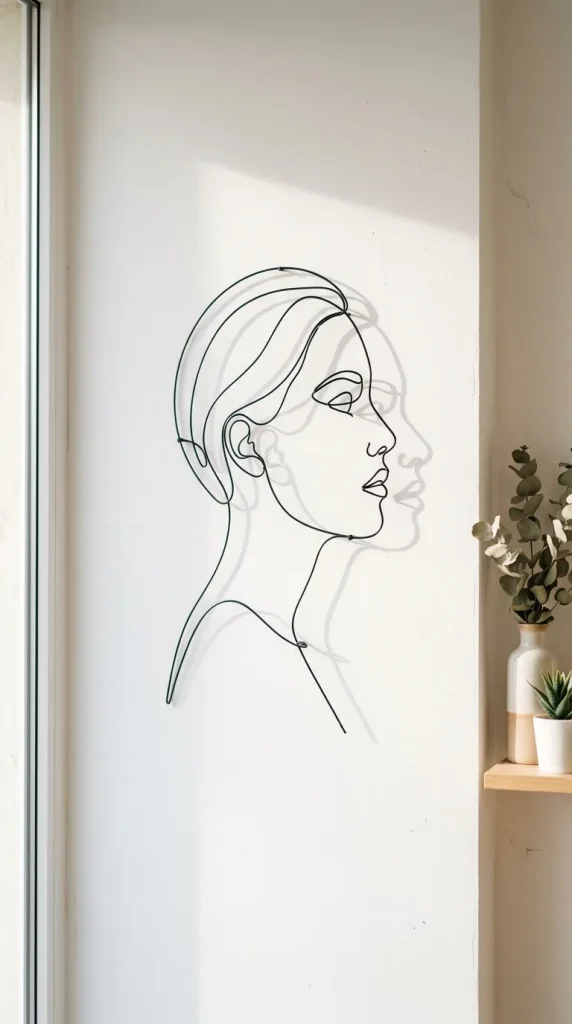
    10. Minimalist Line Art with Wire

    For an ultra-modern, industrial, or minimalist aesthetic, wire line art offers a unique alternative to traditional paper prints. It creates a subtle 3D shadow effect on your wall that changes throughout the day as the room’s lighting shifts.

    Print out a simple, continuous-line drawing template—such as a silhouette of a face, a botanical leaf, or an abstract body form. Using a pair of pliers, carefully bend flexible black craft wire or aluminum wire along the lines of the template. Once the shape is formed, secure the wire ends together and hang the piece using tiny, invisible finishing nails.

    Conclusion

    Decorating your home doesn’t have to mean spending a fortune at retail decor stores. With a bit of patience, some creativity, and everyday materials like canvas, cardboard, yarn, or old bottles, you can craft beautiful, gallery-worthy art pieces tailored to your personal taste. Pick one of these 10 DIY projects this weekend and enjoy the process of bringing your unique vision to life!

  • 10 Trendy And Beautiful Braid Hairstyle Ideas For Girls

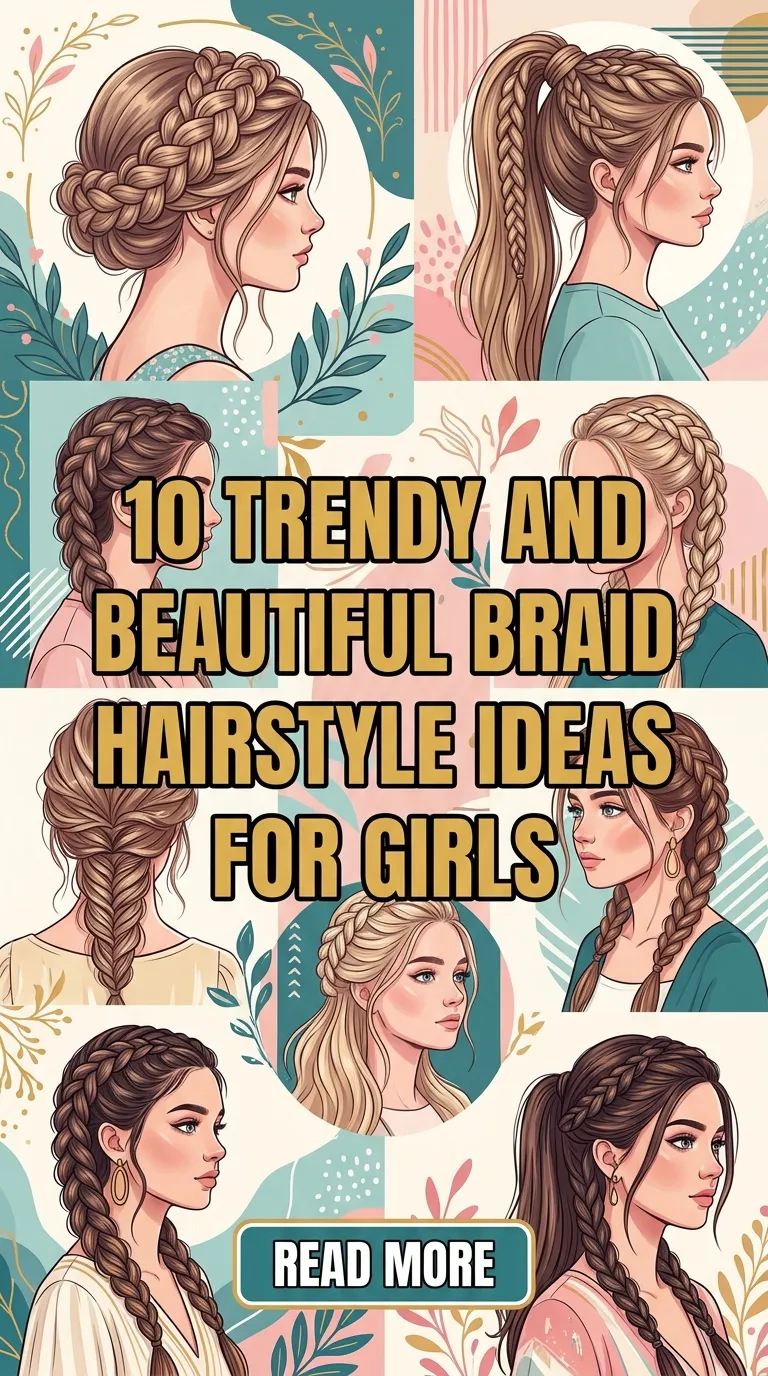
    10 Trendy And Beautiful Braid Hairstyle Ideas For Girls

    When it comes to versatile, protective, and timeless hairstyles, braids always top the list. Whether it is for a casual day at school, a formal wedding, or just a fun weekend outing, braided hairstyles offer the perfect blend of elegance and practicality.

    Not only do braids keep hair neatly out of the face, but they also protect strands from damage and breakage. If you are looking for some fresh hair inspiration, you are in the right place. Here are 10 stunning braid hairstyle ideas for girls that are trendy, easy to style, and perfect for any occasion.

    1. The Classic French Braid

    The French braid is a timeless staple that never goes out of style. It is elegant, secure, and works beautifully on medium to long hair. By weaving three strands of hair while gradually adding more from the sides, you get a sleek, pulled-back look.

    • Best Occasion: School, sports, or casual day outs.
    • Pro Tip: Spritz a little texturizing spray before braiding to give your hair a better grip.

    2. Dutch Braids (Double Boxer Braids)

    Often called “inside-out” French braids, Dutch braids are created by crossing the strands under each other rather than over. This makes the braid pop out dynamically against the head. Wearing them as double braids (boxer braids) gives off a sporty, edgy, and youthful vibe.

    • Best Occasion: Gym sessions, festivals, or a trendy street-style look.
    • Why We Love It: It stays intact for days, making it perfect for busy schedules.

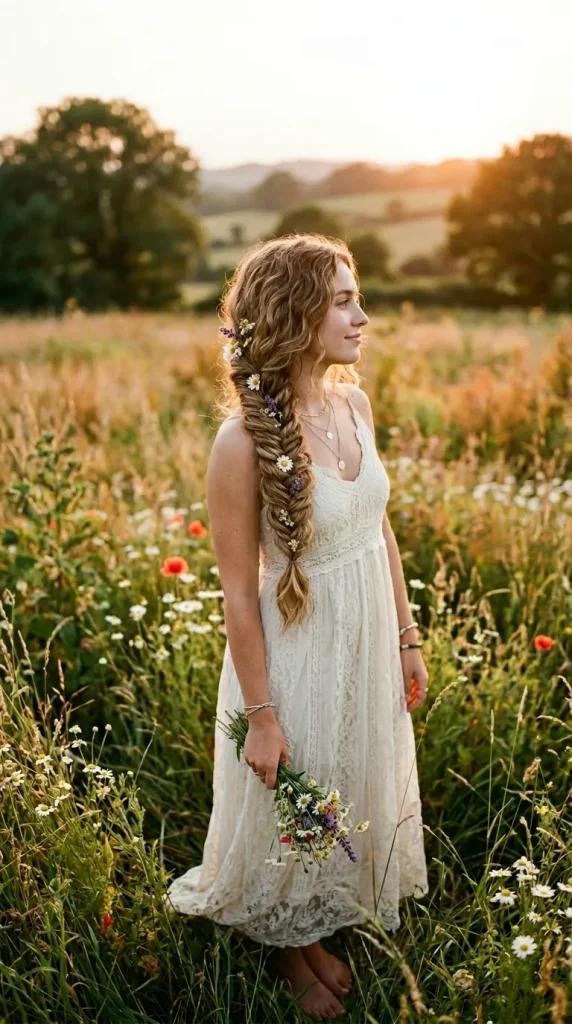
    3. Elegant Fishtail Braid

    If you want something that looks intricate but is surprisingly simple to do, the fishtail braid is your best bet. By using only two main sections of hair and crossing thin outer strands over, you achieve a gorgeous, woven texture that resembles a mermaid tail.

    • Best Occasion: Casual lunches, beach days, or bohemian-themed events.
    • Styling Idea: Gently pull apart the edges of the braid once finished to give it a fuller, messy-chic volume.

    4. Cute Bubble Braids

    While technically not a traditional weave, bubble braids use small elastic bands to create “bubbles” down a ponytail. It mimics the look of a voluminous braid and is incredibly popular on social media. It takes less than five minutes but looks like a professional salon job.

    • Best Occasion: Birthday parties, school pictures, or concerts.
    • Great For: Girls with long, thick hair who want a quick style.

    5. Romantic Waterfall Braid

    The waterfall braid is a variation of the French braid where pieces of hair are left to cascade downward, mimicking a flowing waterfall. It acts as a beautiful crown around the head while letting the rest of the hair flow naturally.

    • Best Occasion: Weddings, proms, or formal family dinners.
    • Best Combined With: Soft curls or beach waves on the loose hair beneath.

    Braid Comparison Table: Quick Reference

    Braid StyleDifficulty LevelHair Length RequiredOverall Vibe
    French BraidEasyMedium to LongClassic & Neat
    Dutch BraidsMediumShort to LongSporty & Edgy
    Fishtail BraidMediumLongBoho-Chic
    Bubble BraidsSuper EasyMedium to LongPlayful & Trendy
    Waterfall BraidAdvancedMedium to LongRomantic & Formal

    6. Crown Braid (Halo Braid)

    For a look that makes any girl feel like royalty, the crown braid is unmatched. This style involves wrapping a Dutch or French braid entirely around the perimeter of the head, creating a seamless “halo” effect.

    • Best Occasion: Eid festivals, weddings, or formal parties.
    • Accessory Tip: Tuck tiny pearls or fresh flowers into the braid for an ethereal finish.

    7. Half-Up, Half-Down Top Knot Braid

    Can’t decide between keeping your hair down or tying it up? Get the best of both worlds. This style features a small, tight braid (like a Dutch braid or regular braid) on the crown of the head that finishes into a cute, messy top knot bun, while the rest of the hair hangs loose.

    • Best Occasion: Casual college days, shopping trips, or hanging out with friends.
    • Why It Works: It keeps hair out of your eyes while maintaining a relaxed, trendy look.

    8. Space Buns with Braids

    Space buns are already incredibly cute, but adding braids takes them to the next level. You can either braid the pigtails before twisting them into buns, or create upside-down braids starting from the nape of your neck leading up to the buns.

    • Best Occasion: Theme parks, weekend picnics, or fun dress-up days.
    • Vibe: Bright, energetic, and highly photogenic.

    9. Side Feed-In Cornrows

    Feed-in cornrows offer a sleek, asymmetrical look by braiding hair flat against the scalp on just one side of the head, leaving the rest of the hair to flow naturally to the other side. It gives a bold, rockstar-chic appearance without requiring a full head of braids.

    • Best Occasion: Concerts, dance performances, or bold fashion statements.
    • Hair Type: Works excellently on textured, curly, or straight hair.

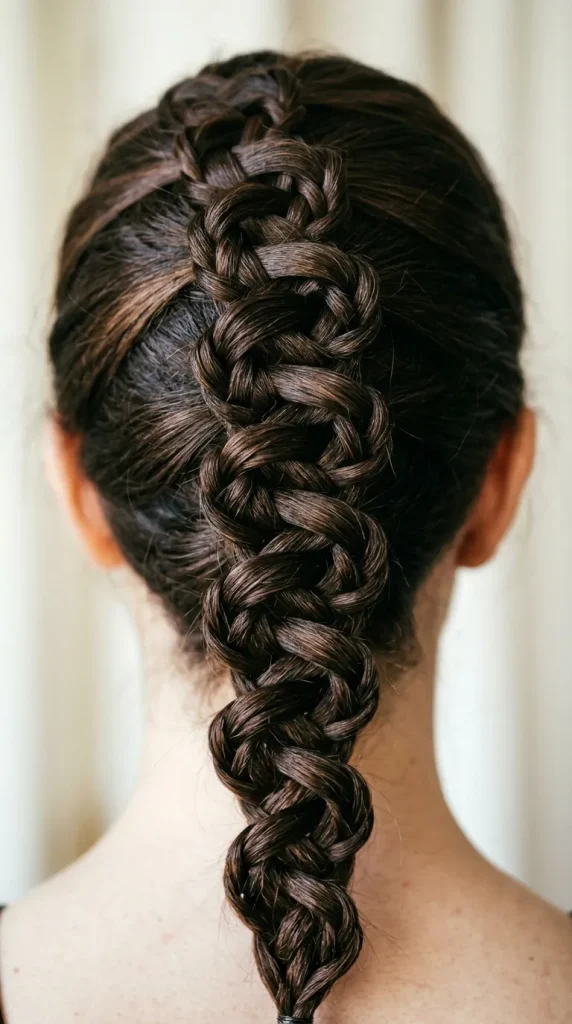
    10. The Snake Braid

    The snake braid is a fun, quick hair trick. You start by making a standard three-strand braid, but before tying it off, you hold one strand firmly and slide the other two strands upwards. The result is a cool, zig-zag wavy pattern that looks like a snake winding down.

    • Best Occasion: Quick school morning fixes.
    • Why It’s Great: It takes under two minutes but looks completely unique and mysterious.

    Conclusion

    Braids are much more than just a way to manage messy hair—they are a form of artistic expression. From the sporty energy of Dutch braids to the fairytale elegance of the waterfall braid, there is a style on this list for every hair type and personality. Don’t be afraid to experiment, add colorful ribbons, or use fun clips to make these styles uniquely yours!

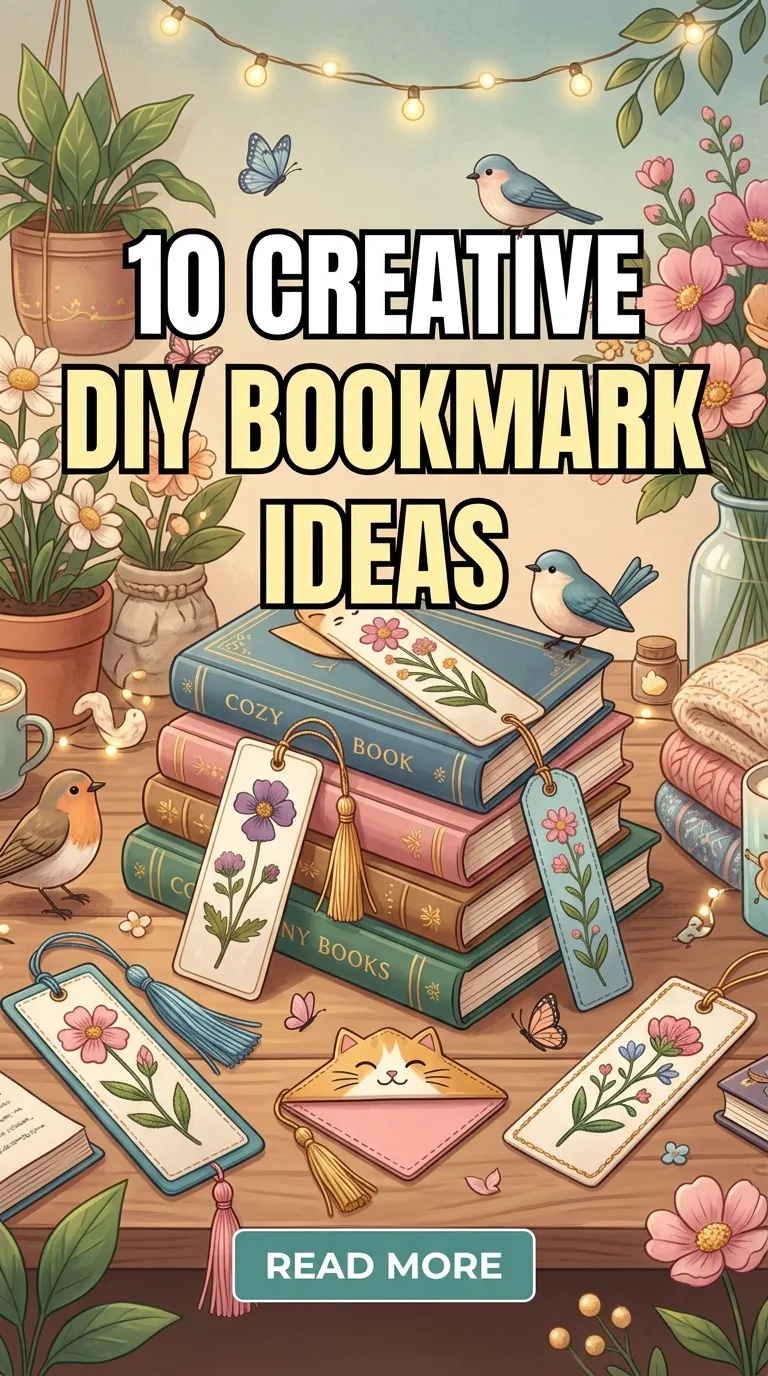
  • 10 Creative DIY Bookmark Ideas.

    10 Creative DIY Bookmark Ideas.

    For any true bibliophile, a book isn’t just a collection of pages—it’s an escape, a journey, and a prized possession. And a dog-eared page? That is a minor heartbreak. While any random scrap of paper, old receipt, or bus ticket can hold your place, a beautiful, handcrafted bookmark honors the reading experience.

    Creating your own bookmarks is an incredibly satisfying, low-cost craft project. It allows you to express your artistic side, recycle leftover craft materials, and create thoughtful, personalized gifts for the readers in your life. Whether you love sleek modern designs, cozy textures, or artistic paint strokes, here are 10 unique DIY bookmark ideas to elevate your next reading session.

    1. The Elegant Calligraphy and Watercolor Ribbon Bookmark

    There is nothing quite as elegant as the pairing of hand lettering and soft watercolor washes. For this craft, cut a thick strip of heavy, 300 GSM watercolor paper. Paint a soft, blending gradient using your favorite colors—like deep indigo melting into a blush pink. Once completely dry, use a fine-tip brush or brush pen to write an inspiring literary quote or a name in elegant calligraphy.

    • Finishing Touch: Punch a hole at the top and loop a matching silk or satin ribbon through it.
    • Best for: Lovers of classic literature and poetry.

    2. The Cozy Yarn Pom-Pom Tail Bookmark

    If you love a tactile, cozy aesthetic, a pom-pom bookmark is the perfect project. Using a fork or a cardboard template, wrap your favorite colorful yarn repeatedly to create a fluffy, dense pom-pom. When trimming the excess yarn to make it a perfect sphere, ensure you leave one long, uncut strand of yarn dangling from the center.

    • How it Works: The fluffy pom-pom sits playfully on top of the book, while the long yarn tail rests between the pages to mark your spot.
    • Best for: Cozy winter reads, fiction lovers, and children’s books.

    3. The Minimalist Pressed Botanical Laminate Bookmark

    Bring a piece of nature into your reading routine by preserving seasonal elements. Collect small, flat leaves, delicate ferns, or colorful flower petals from your garden. Press them inside a heavy encyclopedia for a few days until completely flat. Arrange them artistically on a strip of clear cardstock, and seal them using a laminating sheet or clear packing tape.

    • Aesthetic: Clean, minimalist, and beautifully organic.
    • Best for: Non-fiction readers, nature enthusiasts, and gardeners.

    4. The Upcycled Cardboard Corner Page-Corner Bookmark

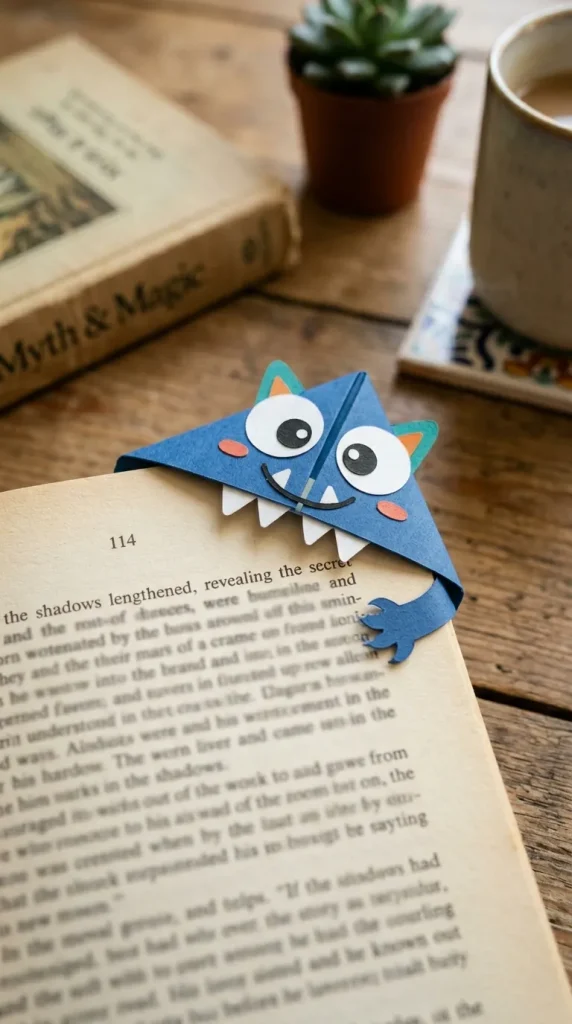
    Instead of a traditional vertical strip, a corner bookmark slips right over the corner of your page like a little pocket. You can easily make these by folding a small square of recycled thin cardboard or heavy origami paper. Decorate the front of the corner triangular pocket to look like a cute monster, a slice of pizza, or a sleek geometric pattern.

    • Eco-Friendly Factor: Excellent way to upcycle old cereal boxes or product packaging.
    • Best for: Students, textbooks, and quick-paced thrillers.

    5. The Chic Elastic Ribbon and Decorative Bead Bookmark

    Tired of bookmarks slipping out of your book when it’s tossed into a backpack? This clever design wraps around the entire book to stay perfectly secure. Measure a piece of colorful decorative elastic ribbon so it fits snugly around a standard book vertically. Sew or securely glue the two ends together.

    • The Details: Thread a few large, premium decorative glass or wooden beads onto the front of the band to give it a jewelry-like finish.
    • Best for: Commuters, students, and anyone who reads on the go.

    6. The Abstract Acrylic Paint Swatch Bookmark

    You don’t need to be an expert painter to create a stunning piece of modern art. Take a strip of dark or black heavy cardstock. Using a palette knife or a piece of thick cardboard, scrape thick, intentional layers of acrylic paint across the strip. Use contrasting colors like metallic gold, teal, and crisp white. The result is a highly textured, abstract masterpiece.

    • Visual Appeal: The heavy, raised texture of the dried acrylic paint feels premium to the touch.
    • Best for: Art lovers and fans of contemporary fiction.

    7. The Retro Vintage Kraft Paper and Twine Bookmark

    For those who love the warm, nostalgic look of old libraries and antique shops, rustic kraft paper is the ultimate medium. Cut a strip of brown kraft paper and slightly scuff or ink the edges with a brown stamp pad to give it an aged, distressed look. Stamp it with vintage motifs—like old keys, vintage clocks, or typewriters—and finish it with a piece of rough jute twine.

    • Pro Tip: Write a favorite quote using a vintage typewriter font style or fine-liner pen.
    • Best for: Historical fiction fans and history buffs.

    8. The Whimsical Fabric Scrap Sewn Bookmark

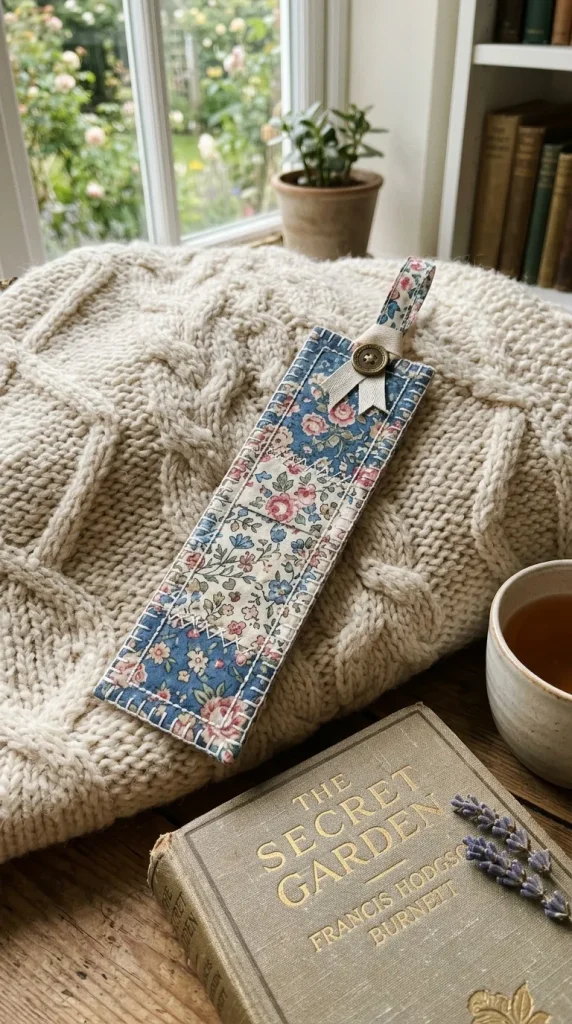
    If you have a collection of beautiful fabric scraps leftover from sewing or clothing alterations, turn them into durable, soft bookmarks. Cut two identical strips of patterned cotton fabric and sandwich a piece of stiff interfacing or thin cardboard between them. Stitch around the border with a sewing machine or use a contrasting embroidery thread for a rustic, hand-sewn blanket stitch.

    • Durability: These are incredibly long-lasting and completely shatter-proof if dropped.
    • Best for: Crafters, quilters, and lovers of cozy cottagecore styles.

    9. The Modern Geometric Washi Tape Bookmark

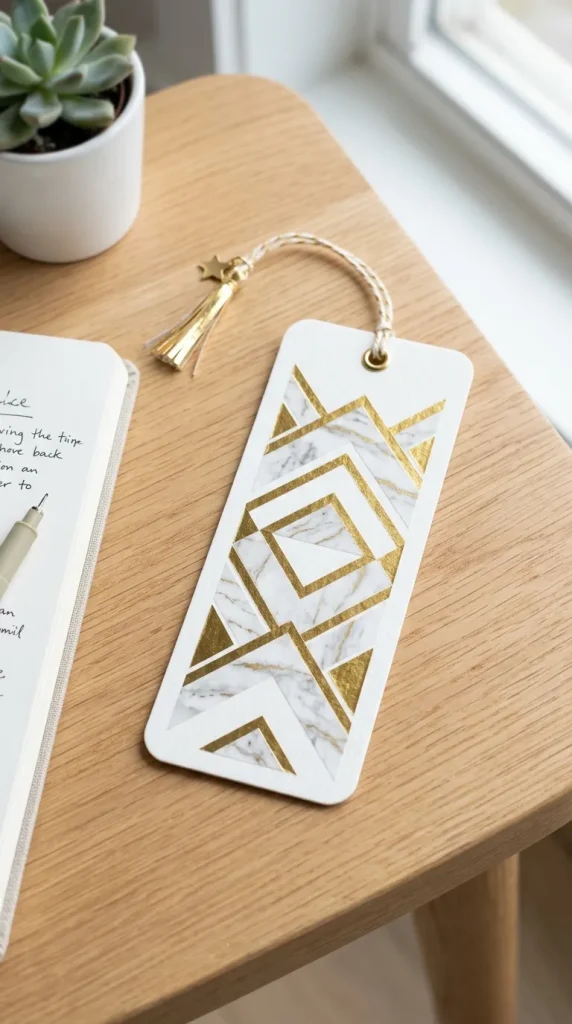
    Washi tape is an effortless way to create perfectly neat, colorful patterns without dealing with messy paint or ink. Take a sturdy white cardstock base. Lay down various strips of patterned, metallic, or solid-colored washi tape in overlapping geometric angles. Use a craft knife to trim away the excess tape hanging over the edges for a perfectly sharp, crisp look.

    • Ease of Crafting: This is a fantastic, mess-free craft project to do with kids.
    • Best for: Graphic design lovers and bullet journal enthusiasts.

    10. The Intricate Textured Mandala Paper Cut-Out Bookmark

    For a high-contrast, hypnotic design, create a silhouette cut-out. Draw or print a symmetrical, circular mandala pattern onto a piece of stark black cardstock. Using a sharp precision craft knife, carefully cut out the negative spaces of the pattern. Glue this intricate black cut-out over a bright, solid metallic silver or holographic background paper.

    • Visual Effect: The metallic background shimmers beautifully through the intricate black paper windows.
    • Best for: Fantasy readers and fans of intricate puzzle books.

    Conclusion

    A handmade bookmark adds a layer of intentionality and joy to your reading habits. It celebrates your progress through a story and keeps your books looking pristine. With just a few basic household craft items like paper, yarn, ribbons, or paint, you can easily create an accessory that makes opening your book feel even more special.

  • 10 Stunning DIY Wall Hanging Craft Ideas.

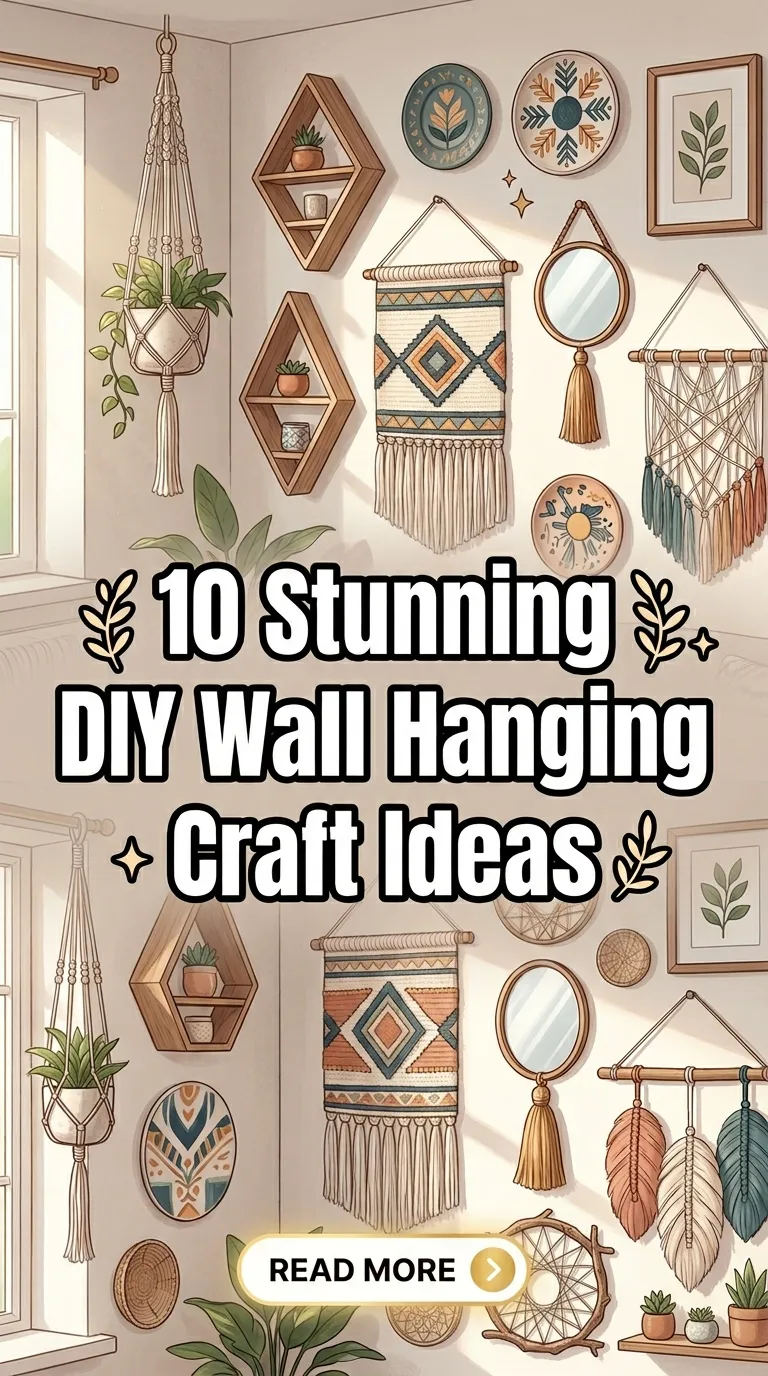
    10 Stunning DIY Wall Hanging Craft Ideas.

    Wall decor plays a massive role in interior design. It sets the tone of a room, reflects your personal personality, and ties the entire aesthetic of your home together. While buying ready-made art pieces is always an option, creating your own wall hangings adds an unmatched layer of charm, warmth, and character to your living space.

    Moreover, engaging in DIY crafts is an incredible way to de-stress, recycle household items, and explore your artistic side without breaking the bank. Whether you lean toward a cozy bohemian vibe, a sleek modern look, or a rustic country feel, here are 10 unique and stunning DIY wall hanging craft ideas to elevate your bare walls.

    1. The Elegant Calligraphy and Floral Canvas Hanging

    Combining text art with soft botanical elements creates a sophisticated focal point for any room. For this craft, stretch a piece of light-toned fabric or canvas between two wooden dowels. Use bold, elegant calligraphy ink to write an inspiring quote, a family name, or a single meaningful word in the center. Frame the text with delicate pressed flowers or painted leaf motifs.

    • Best for: Living rooms, entryways, or study rooms.
    • Aesthetic: Elegant, thoughtful, and personalized.

    2. Upcycled Eco-Friendly Tissue Roll Mandala

    You don’t need expensive materials to make premium-looking art. By saving cardboard toilet paper or paper towel rolls, you can create an intricate, symmetrical mandala. Cut the rolls into even, half-inch rings, pinch the edges to shape them like flower petals, and glue them together in a repeating geometric pattern. Paint the entire structure with a metallic gold, bronze, or matte black finish to instantly mimic expensive wrought-iron metal art.

    • Best for: Hallways, bedrooms, or accent walls.
    • Aesthetic: Geometric, eco-friendly, and surprisingly luxurious.

    3. The Bohemian Macrame Driftwood Hanging

    Macrame has taken the interior design world by storm, and it’s easy to see why. Using cotton macrame cord, you can practice basic knots like the square knot or lark’s head knot to create beautiful, flowing textures. Anchor your cords onto a sturdy piece of natural driftwood collected from a beach or forest walk to ground the piece in nature.

    • Best for: Bedrooms, cozy reading nooks, or nursery rooms.
    • Aesthetic: Cozy, earthy, and bohemian.

    4. Modern Minimalist Abstract Clay Discs

    For a sleek, contemporary vibe, polymer air-dry clay is your best friend. Roll out the clay and cut out various geometric shapes—circles, semi-circles, triangles, and arches. Poke small holes in the top and bottom of each piece before they dry. Once hardened, paint them in a warm earthy palette (terracotta, beige, sage green, and charcoal) and string them vertically using a thin leather cord or metallic wire.

    • Best for: Modern apartments, home offices, or minimalist spaces.
    • Aesthetic: Scandinavian, abstract, and contemporary.

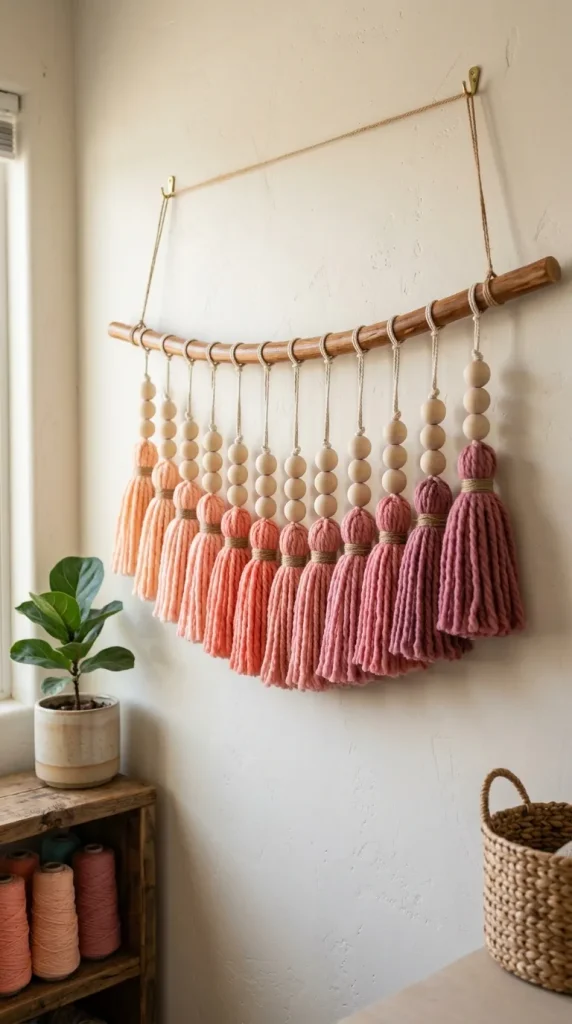
    5. Vibrant Yarn Tassel and Bead Garland

    If you want to inject a splash of color and fun into a room, a layered yarn tassel wall hanging is the way to go. Create numerous thick yarn tassels in a gradient or contrasting color scheme. Tie these tassels to a thick wooden branch or dowel at varying lengths. To give it a premium, handcrafted look, thread large, decorative wooden beads right above each tassel.

    • Best for: Kids’ rooms, creative studios, or plain white walls needing a pop of color.
    • Aesthetic: Playful, textured, and vibrant.

    6. Rustic Shabby-Chic Twig and Twine Photo Display

    Cherish your favorite memories by displaying them on a rustic, ladder-style hanging. Collect three to four straight, sturdy twigs from your garden and tie them together horizontally using thick jute twine, leaving space between each row. Use tiny wooden clothespins to clip Polaroid photos, postcards, or fairy lights onto the twine string lines.

    • Best for: Personal bedrooms, dorm rooms, or family rooms.
    • Aesthetic: Nostalgic, rustic, and warm.

    7. Textured Abstract Canvas Art with Joint Compound

    You don’t need to be a master painter to create a breathtaking canvas. Grab a blank canvas and use a putty knife to apply joint compound or heavy structural paste across the surface. Create deep, sweeping arcs, waves, or linear grooves to give it a heavy 3D texture. Once completely dry, paint it with a single monochrome color, like a rich off-white or deep navy, allowing the shadows of the texture to do all the talking.

    • Best for: Dining areas, modern living rooms, or fireplace mantels.
    • Aesthetic: High-end gallery style, minimalist, and tactile.

    8. Magical Pressed Botanical Glass Frame Hanging

    Bring the serenity of the outdoors inside by preserving seasonal leaves, ferns, and colorful petals. Press your gathered botanicals inside a heavy book for a week. Once flat and dry, arrange them artistically between two pieces of glass inside a floating metallic frame. Hang the frame using an elegant velvet or suede ribbon.

    • Best for: Sunrooms, bathrooms, or near large windows.
    • Aesthetic: Vintage, botanical, and delicate.

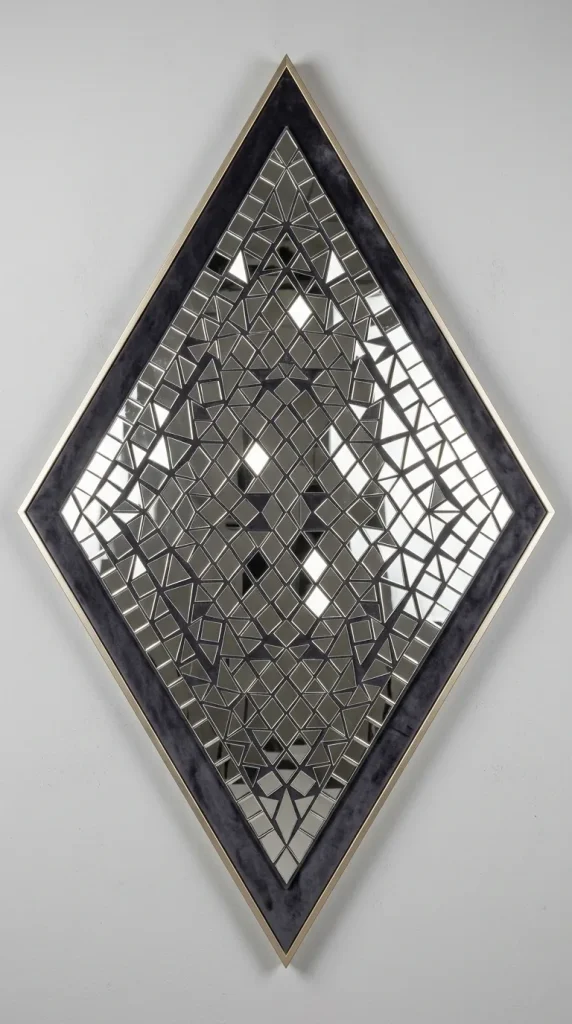
    9. Geometric Thermocol and Mirror Mosaic Art

    Thermocol sheets (styrofoam) provide a fantastic, lightweight base for large-scale wall installations. Cut a sheet of dense thermocol into a clean geometric shape, like a large hexagon or diamond. Cover the surface with a textured fabric or dark velvet paper, and glue small, diamond-shaped craft mirror pieces onto it in a mosaic pattern. It reflects light beautifully and brightens up darker corners of a room.

    • Best for: Dark hallways, entryways, or dining spaces.
    • Aesthetic: Glamorous, reflective, and artistic.

    10. The Enchanting Driftwood and Feather Mobile

    Capture a dreamlike, whimsical atmosphere with a hanging wall mobile. Suspend a beautiful piece of weathered wood horizontally. From it, hang thin, almost invisible fishing lines or fine silver chains loaded with soft, decorative feathers, small crystals, and tiny metallic stars. It sways gently with the natural airflow of the room, creating a calming visual rhythm.

    • Best for: Above a bed, meditation spaces, or nurseries.
    • Aesthetic: Whimsical, ethereal, and calming.

    Conclusion

    Decorating your home doesn’t require a massive budget—it just requires a spark of imagination. These 10 DIY wall hanging ideas show that with simple materials like yarn, paper rolls, clay, or a bit of nature, you can create breathtaking art that turns a house into a warm, personalized home. Pick the craft that speaks to your personal style, put on some music, and start creating!

  • 10 Creative Father’s Day Card Ideas.

    10 Creative Father’s Day Card Ideas.

    Father’s Day is the perfect opportunity to show the leading man in your life just how much he means to you. While store-bought cards are fine, nothing speaks louder than a DIY or personalized card. A handmade or custom card carries effort, love, and a personal touch that a generic, mass-produced card simply can’t match.

    If you are looking for some inspiration to surprise your dad, grandfather, or husband this year, you’ve come to the right place. Here are 10 unique and creative Father’s Day card ideas that range from funny and sentimental to sleek and modern.

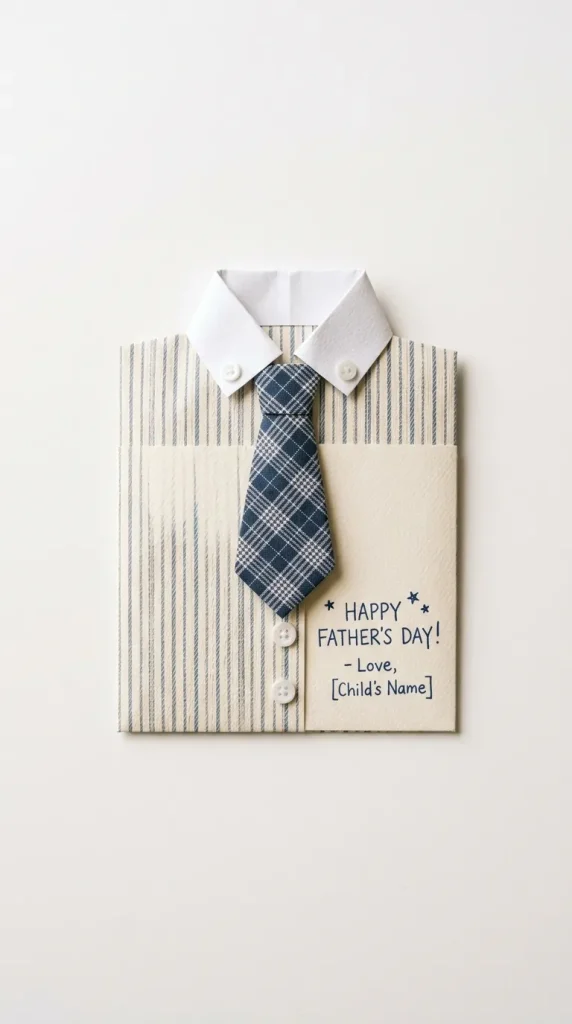
    1. The Classic Origami Shirt and Tie Card

    You can never go wrong with a classic. The origami shirt and tie card is a timeless favorite because it looks highly skilled but is surprisingly easy to make.

    Using a colored piece of cardstock, you fold the top to resemble a shirt collar and attach a contrastingly colored origami paper tie or bowtie.

    • Best for: The sharp-dressed dad or the office goer.
    • Inside Message Idea: “Dad, you’re looking sharp! Thanks for always keeping it together.”

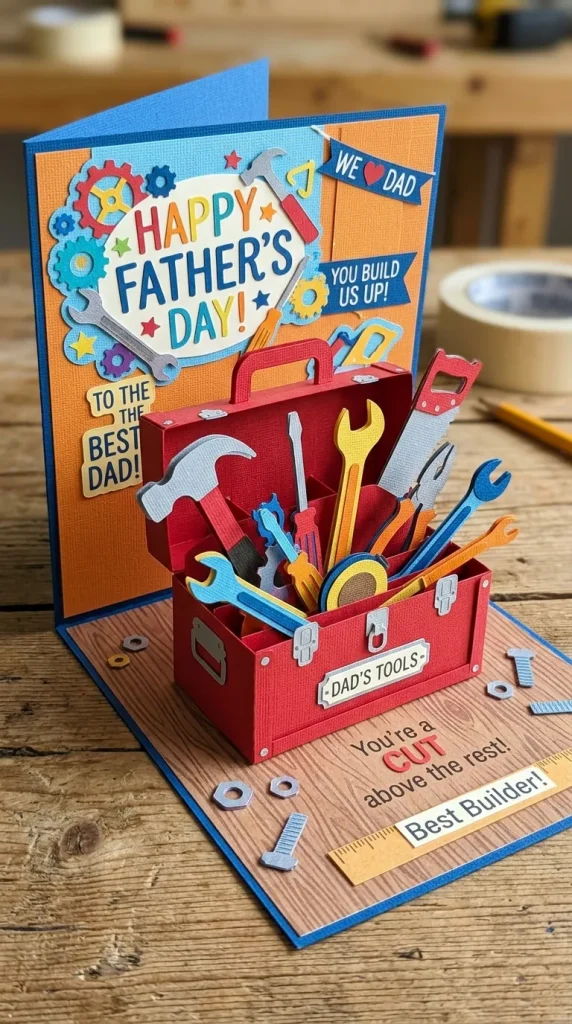
    2. The Pop-Up Tool Box Card

    If your dad is the ultimate handyman who can fix absolutely anything around the house, this 3D pop-up card will blow him away.

    When he opens the card, a paper toolbox pops up, filled with paper cutouts of hammers, wrenches, and screwdrivers. You can even write little jokes on each tool.

    • Best for: The DIY enthusiast or handyman dad.
    • Inside Message Idea: “Thank you for helping me build my life and fixing all my mistakes!”

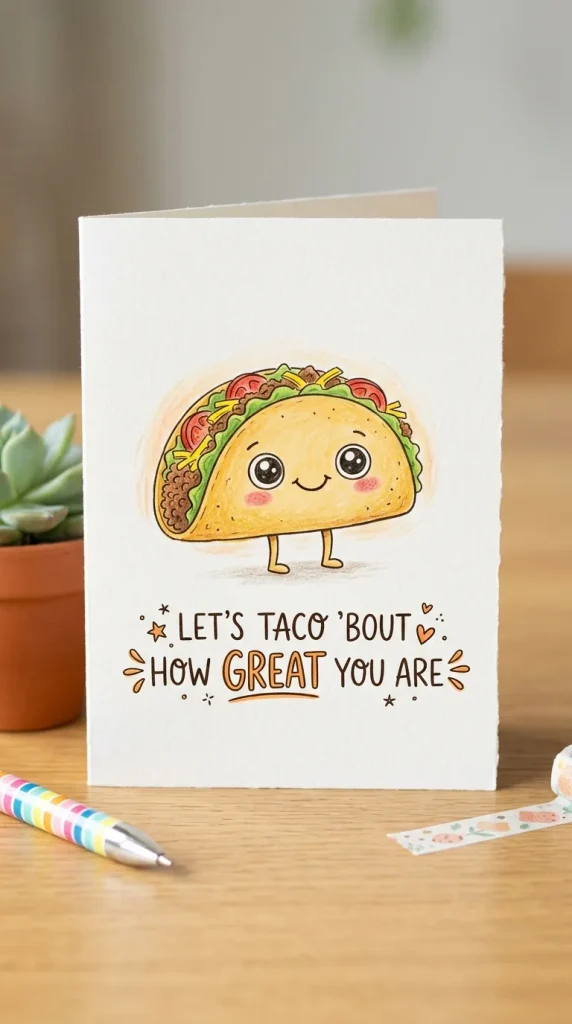
    3. The “Punny” Foodie Card

    Does your dad appreciate a good dad joke? Combine humor and his favorite snacks with a pun-intended food card.

    You can draw or paste pictures of food items. For example, a drawing of two peas in a pod, a slice of pizza, or a taco. The puns write themselves, making it a lighthearted and fun card to receive.

    • Best for: The dad who loves cooking, eating, or making terrible puns.
    • Inside Message Idea: “In case you didn’t know, we are taco ’bout how awesome you are!”

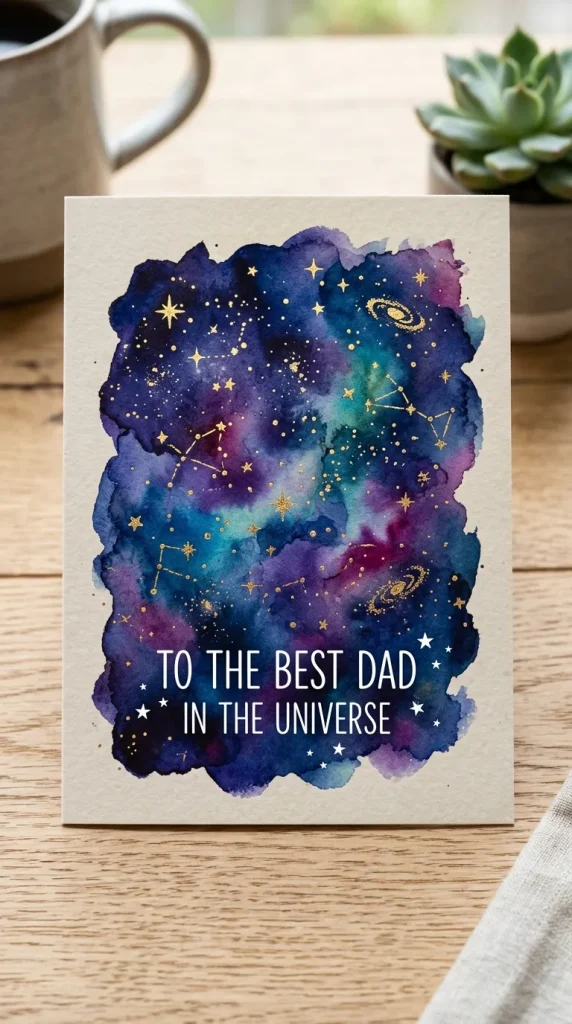
    4. The Minimalist Galaxy Watercolor Card

    For a dad who appreciates clean aesthetics and modern design, a minimalist watercolor card is a stunning choice.

    Using watercolor paints, create a beautiful, deep-space galaxy blending blues, purples, and blacks. Once dry, use a white gel pen or metallic gold marker to write a neat, modern font over the top.

    • Best for: The artistic, calm, or sci-fi-loving dad.
    • Inside Message Idea: “To the best dad in the universe.”

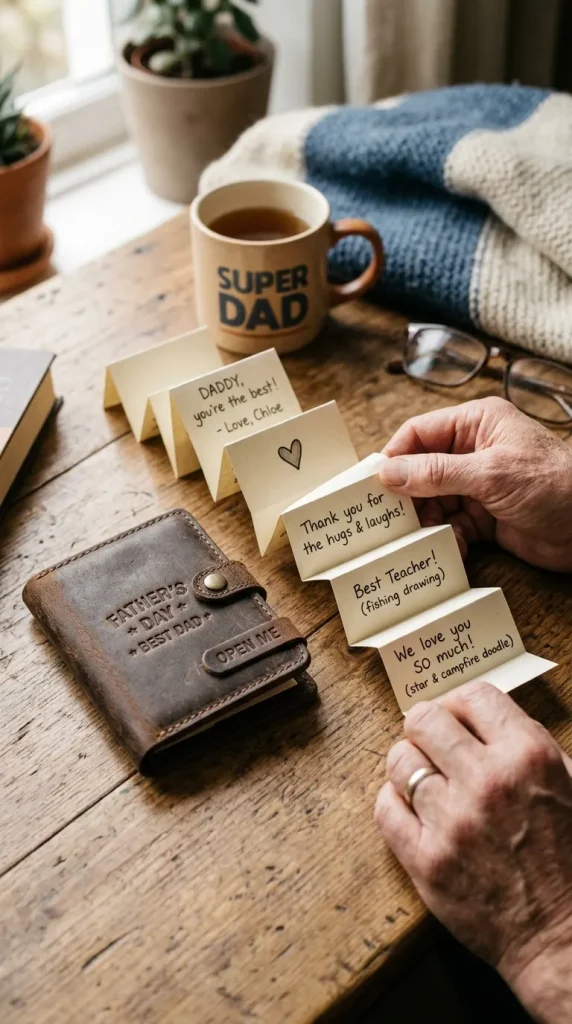
    5. The Wallet-Sized “Reasons I Love You” Pull-Out Card

    This card doubles as a keepsakes. Design a card shaped like a leather wallet. Inside, instead of money, create a pull-out accordion strip of paper where every fold lists a different reason why you love and appreciate him.

    Because of its design, he can easily fold it up and keep it in his actual wallet to look at whenever he needs a boost.

    • Best for: The sentimental dad who treasures memories.
    • Inside Message Idea: “A wallet full of reasons why you’re my ultimate hero.”

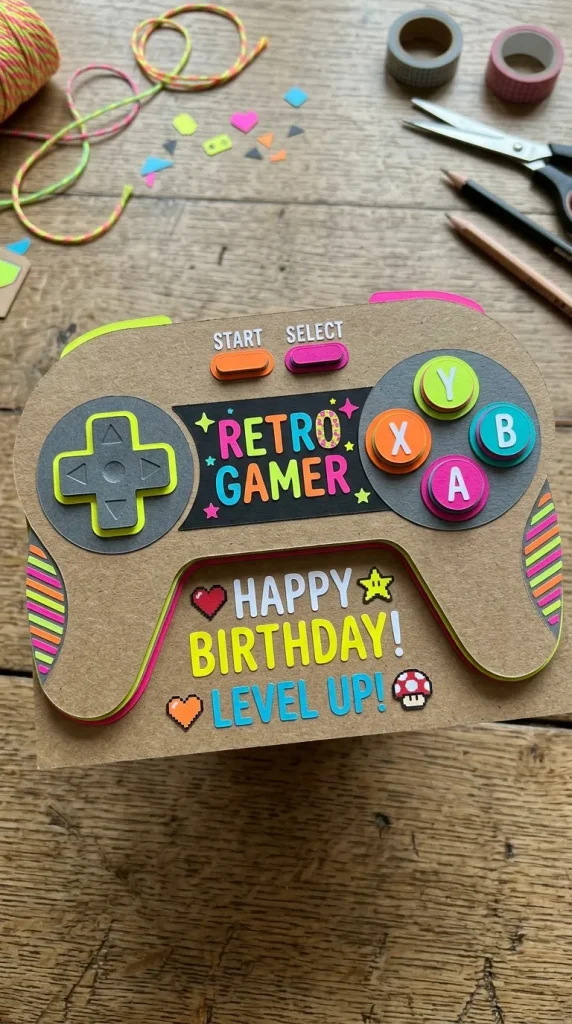
    6. The Retro Gamer Controller Card

    If your dad spent his youth in arcades or still loves to pick up a console controller on weekends, a retro gaming card will hit all the right nostalgia buttons.

    Cut the cardstock into the shape of a classic retro controller (like a PlayStation, Xbox, or old-school NES controller). Use 3D foam tape to elevate the buttons for a tactile feel.

    • Best for: The gamer dad or tech geek.
    • Inside Message Idea: “Happy Father’s Day to the guy who taught me how to level up in life!”

    7. The 3D Pop-Up Barbecue Grill Card

    For many families, Father’s Day is synonymous with a backyard barbecue. Celebrate his grilling mastery with a card featuring a 3D pop-up grill.

    When opened, a tiny paper grill unfolds, complete with paper flames, tiny steaks, and burgers. It’s vibrant, fun, and incredibly festive.

    • Best for: The backyard grill master and king of the BBQ.
    • Inside Message Idea: “No one can match your sizzle, Dad! Have a flamin’ hot Father’s Day.”

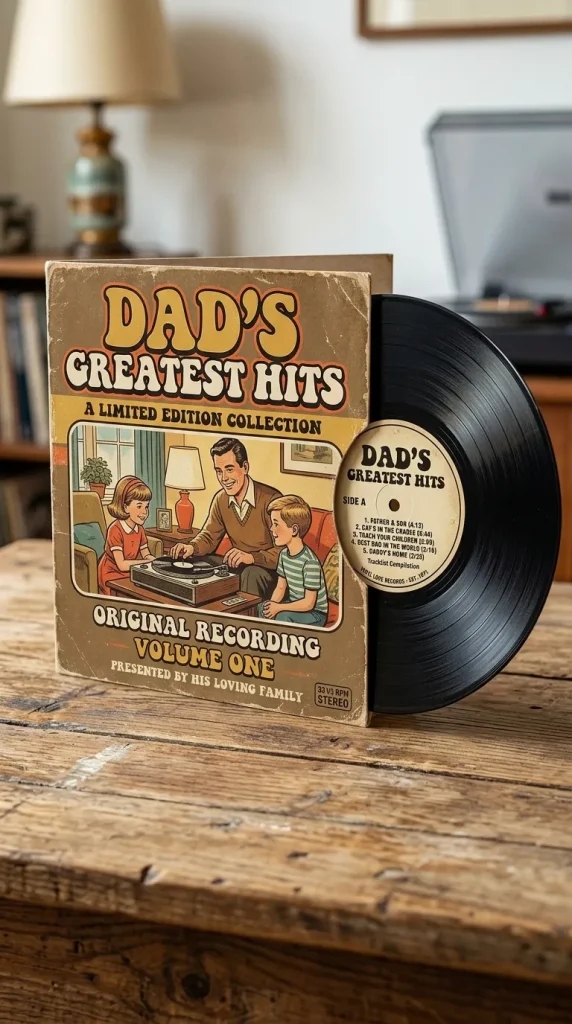
    8. The Vintage Vinyl Record Card

    Music-loving dads will absolutely adore a vintage-inspired vinyl record card. Create a card that looks like a retro record sleeve. Inside, place a circular piece of black cardstock styled to look like a vinyl record that slides out.

    You can write his favorite song lyrics on the record sleeve or label the record as “Dad’s Greatest Hits.”

    • Best for: The audiophile, music enthusiast, or rock-and-roll dad.
    • Inside Message Idea: “You’ll always be the rockstar of our family, Dad.”

    9. The Superhero Emblem Card

    Dads are real-life superheroes without the capes. Acknowledge his strength and protection with a superhero-themed card.

    You can design the front to look like a button-up shirt being pulled open to reveal a custom “D” (for Dad) superhero emblem underneath, mimicking the iconic Superman pose.

    • Best for: The heroic, protective, and strong father figure.
    • Inside Message Idea: “Not all superheroes wear capes. Some are just called ‘Dad’.”

    10. The Nature Silhouette Landscape Card

    If your dad’s favorite place to be is outdoors—whether fishing, hiking, camping, or just walking in the woods—a nature silhouette card is a peaceful and beautiful option.

    Use layered paper cutouts of pine trees, mountains, and a small lake silhouette against a glowing sunset background to create depth and a stunning 3D landscape effect.

    • Best for: The outdoorsman, camper, or nature lover.
    • Inside Message Idea: “Wishing the greatest explorer I know a very happy Father’s Day.”

    Conclusion

    No matter which idea you choose, the most important element of any Father’s Day card is the message you write inside. Pair these creative visual concepts with your genuine words of gratitude, and you will create a keepsake that your dad will cherish for years to come.

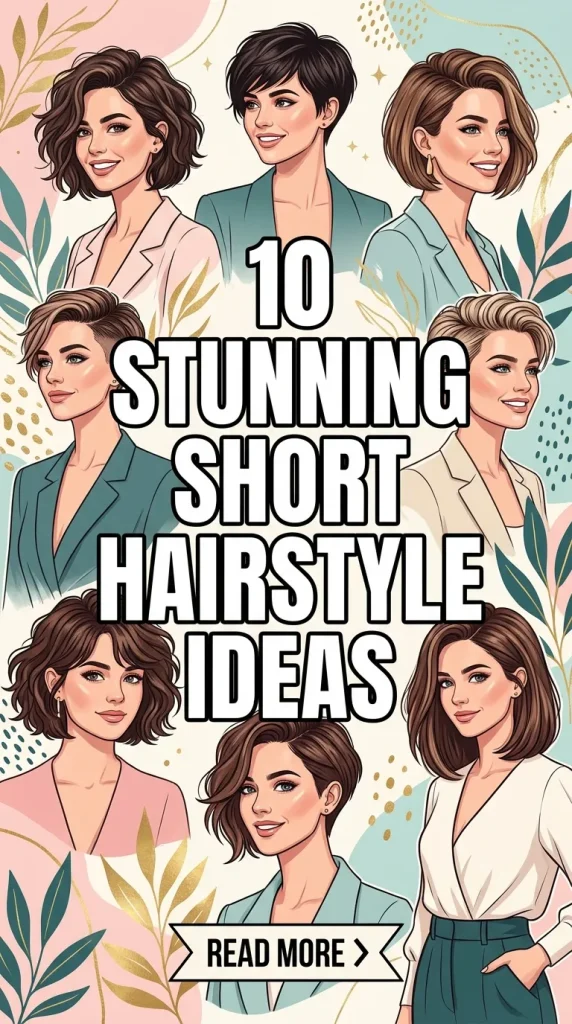
  • 10 Stunning Short Hairstyle Ideas

    Are you thinking about chopping your locks, or are you already rocking a short crop and looking to switch up your style? Short hair is having a massive moment in the fashion world. Far from being limiting, short haircuts offer an incredible range of versatility, sophistication, and edge. Plus, the reduction in styling time and product usage is a major bonus.

    Whether you want something sharp and professional, soft and romantic, or bold and edgy, there is a short hairstyle perfect for your hair texture and face shape. In this ultimate style guide, we break down 10 trendsetting short hairstyle ideas that will inspire your next salon visit, along with expert styling tips to keep your look fresh.

    Why Short Hair is the Ultimate Power Move

    Before diving into the styles, let’s talk about why short hair is so empowering. A great short haircut frames your face, highlights your cheekbones, and elongates your neck. It strips away the “security blanket” of long hair, instantly projecting confidence and individuality. Modern cutting techniques mean that even the shortest crops can be customized with layers, texture, and color to suit anyone.

    Top 10 Short Hairstyle Ideas to Try Right Now

    1. The Classic Textured Pixie Cut

    The pixie cut is timeless for a reason. A textured pixie features shorter back and sides with slightly longer, piecey layers on top. This creates natural volume and movement, preventing the hair from looking flat.

    • Best For: Oval, round, and heart-shaped faces.
    • Styling Tip: Use a small pea-sized amount of matte texturizing paste or pomade. Run your fingers through the top layers to create a messy, effortlessly chic bedhead look.

    2. The Blunt Paper-Cut Bob

    If you love clean lines and a high-fashion aesthetic, the blunt paper-cut bob is your go-to. Cut sharply at a single length—usually right at the jawline—this style looks incredibly sleek, healthy, and thick.

    • Best For: Fine, straight hair and oval or angular face shapes.
    • Styling Tip: Apply a heat protectant and use a flat iron to achieve a pin-straight finish. Finish with a high-shine gloss spray for a glass-like reflection.

    3. The Wavy Lob (Long Bob)

    Not ready to go ultra-short? The “lob” hits right between the chin and the collarbone, offering the best of both worlds. Adding soft, relaxed waves gives this cut a breezy, beachy, and youthful vibe.

    • Best For: All hair types and face shapes (highly universally flattering).
    • Styling Tip: Use a wide-barrel curling wand to create loose waves, leaving the ends straight for a modern look. Spray with sea salt spray for added texture.

    4. The Edgy Asymmetrical Pixie

    For those who want to stand out, the asymmetrical pixie offers a dramatic contrast. One side is closely cropped or shaved, while the other side features long, sweeping bangs that frame the face beautifully.

    • Best For: Square and round faces, as the asymmetry elongates the facial features.
    • Styling Tip: Blow-dry the longer side using a round brush to create volume and a smooth sweep across the forehead.

    5. The Shaggy French Bob

    The French bob is all about effortless Parisian elegance. It is typically cut slightly shorter than a classic bob—around the cheekbones—and paired with soft, wispy eyebrow-grazing bangs. The edges are lightly texturized for a lived-in feel.

    • Best For: Naturally wavy or straight hair.
    • Styling Tip: Emphasize your natural texture. Let it air-dry, scrunching in a lightweight mousse or curl cream to give it that perfectly undone French aesthetic.

    6. The Sleek Tapered Undercut

    An undercut adds an instant element of surprise and edge to short hair. The hair underneath (at the nape of the neck or sides) is buzzed tight, while the top layers remain longer and can be styled sleekly or with volume.

    • Best For: Thick, dense hair, as it removes excess bulk beautifully.
    • Styling Tip: Use a strong-hold gel to slick the top section back or over to one side for an ultra-modern, sophisticated evening look.

    7. The Curly Choppy Crop

    Short hair looks phenomenal with natural curls and coils. A choppy crop utilizes strategic layering to shape the curls, preventing the dreaded “triangle hair” effect and giving your curls beautiful bounce and definition.

    • Best For: Naturally curly, wavy, or coily hair patterns.
    • Styling Tip: Apply a rich leave-in conditioner or curl-defining gel to wet hair. Use a diffuser attachment on your blow dryer to dry the curls without introducing frizz.

    8. The Wispy Layered Bixie

    Can’t decide between a bob and a pixie? The “bixie” is the ultimate hybrid trend. It combines the short length of a pixie with the face-framing shape and fullness of a bob, loaded with soft, wispy layers.

    • Best For: Fine to medium hair textures looking for instant volume.
    • Styling Tip: Use a root-lifting spray on damp hair before blow-drying with a small round brush to maximize body and bounce.

    9. The Sleek Side-Parted Micro Bob

    The micro bob is an ultra-short version of the bob that hits right below the ears. When styled with a deep, sharp side part and tucked behind one ear, it transforms into an incredibly elegant and sophisticated style.

    • Best For: Sharp jawlines and oval faces.
    • Styling Tip: Create a precise part using a rat-tail comb. Smooth down any flyaways with a lightweight hair oil or pomade for a clean, polished finish.

    10. The Voluminous Short Shag

    The modern shag is a nod to the 70s but with a fresh, contemporary twist. It features heavy layering throughout the crown, lots of texture, and a choppy fringe. It’s wild, messy, and packed with rock-and-roll attitude.

    • Best For: Adding volume to flat hair and softening square face shapes.
    • Styling Tip: Shake it out! Spray dry shampoo or volume powder at the roots, tilt your head upside down, and massage the scalp to maximize the shaggy volume.

    How to Maintain and Protect Short Hair

    While short hair takes less time to style daily, keeping it looking sharp requires a bit of consistency:

    • Regular Trims: Schedule a salon visit every 4 to 6 weeks to maintain the shape of pixies and sharp bobs.
    • Invest in Styling Products: Short hair relies heavily on the right products (pomades, texturizing sprays, and clays) to achieve definition and hold.
    • Scalp Care: Because styling products are applied closer to the roots on short hair, use a clarifying shampoo once a week to prevent product buildup.

    Conclusion

    Short hair is much more than a convenience—it is a bold fashion statement. From the sleek lines of a blunt bob to the carefree volume of a short shag, there is a look to match every personality and lifestyle. Take your favorite idea from this list to your stylist and embrace the freedom of a short, stunning crop!