Blog

  • 10 Easy Toddler Boo Basket Ideas

    10 Easy Toddler Boo Basket Ideas

    Halloween is a magical time for toddlers, filled with costumes, candy, and creative fun. One of the best ways to make the holiday special for little ones is by putting together a toddler Boo Basket. These baskets are a delightful alternative to traditional trick-or-treating, offering a safe and curated selection of treats, toys, and activities tailored to young children. Whether you’re a parent, grandparent, or caregiver, a Boo Basket can bring joy and excitement to your toddler’s Halloween experience.

    In this article, we’ll explore 10 creative and engaging Boo Basket ideas that are perfect for toddlers. From sensory-friendly toys to educational activities, these baskets are designed to be both fun and functional. Each idea is carefully crafted to suit the developmental stage of toddlers, ensuring they have a memorable and enjoyable Halloween. Let’s dive into these toddler-friendly Boo Basket ideas and make this Halloween one to remember!

    1. Sensory-Friendly Halloween Basket
    1
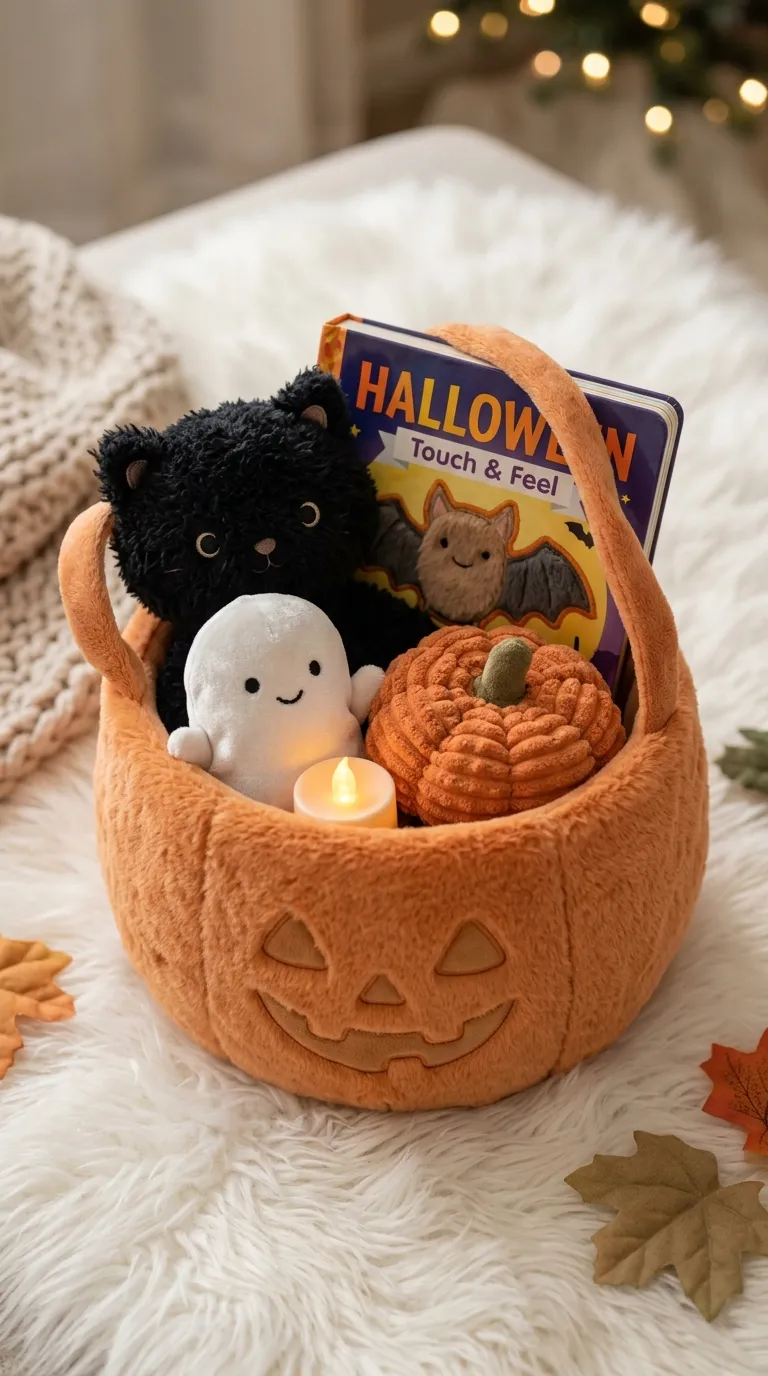
    A sensory-friendly Boo Basket is ideal for toddlers who are sensitive to textures, sounds, or bright lights. This basket can include soft, plush Halloween-themed toys, such as a fuzzy black cat or a gentle ghost plushie. Add in some sensory tools like a textured pumpkin squishy or a Halloween-themed fidget spinner to keep little hands busy. To make it extra special, include a small LED tea light for a calming glow and a Halloween board book with touch-and-feel elements.

    This type of basket is perfect for creating a soothing and enjoyable Halloween experience. It encourages exploration and play without overwhelming your toddler. You can also include a soft Halloween-themed blanket for cozy comfort during storytime or quiet play.

    2. Outdoor Adventure Boo Basket
    2
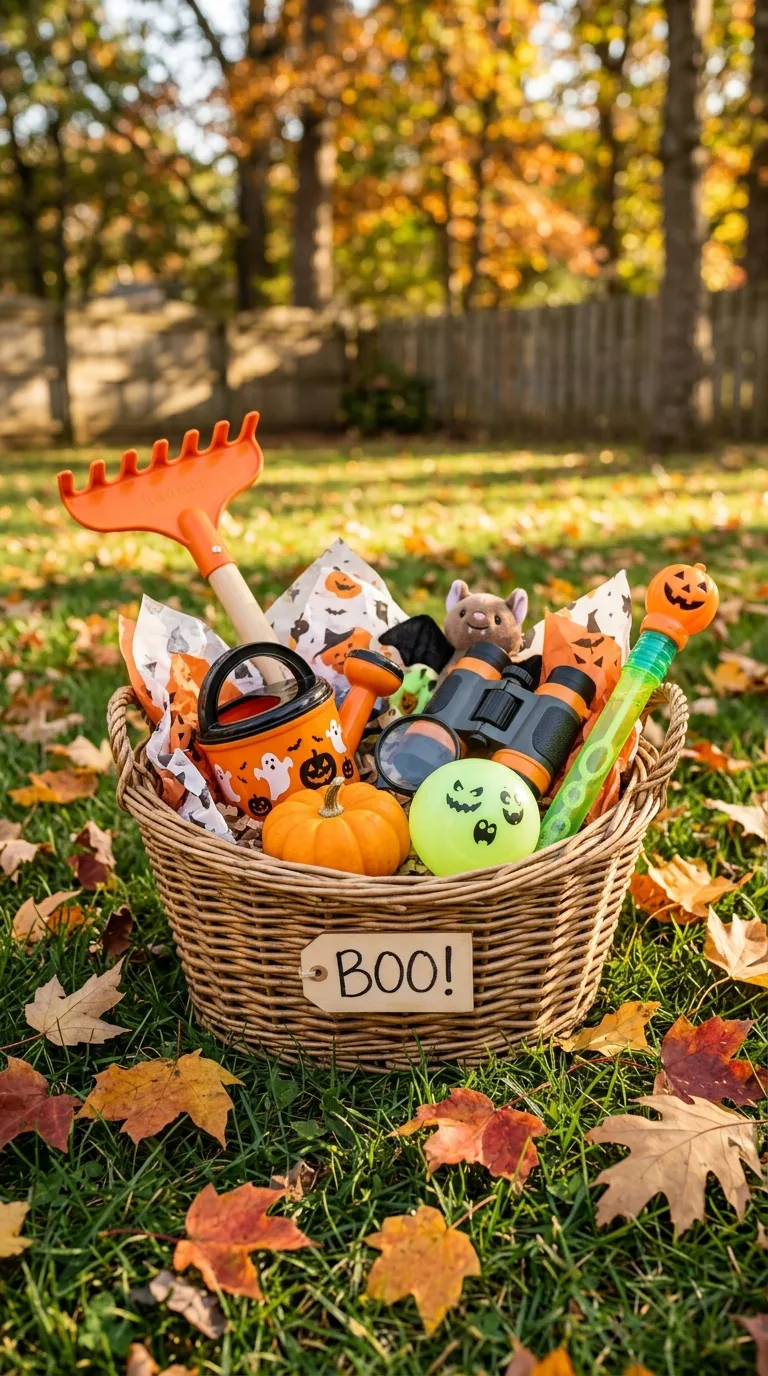
    If your toddler loves exploring the outdoors, an Outdoor Adventure Boo Basket is a fantastic choice. Fill it with items that encourage outdoor play and discovery. Include a miniature pumpkin that your toddler can decorate with stickers or washable markers. Add a kid-sized rake for helping with fall leaf cleanup, turning chores into a fun activity. A Halloween-themed watering can can also be a hit for little gardeners.

    For extra fun, include a glow-in-the-dark ball for evening play and a Halloween-themed bubble wand to blow spooky bubbles. This basket is perfect for active toddlers who enjoy spending time outside, and it provides plenty of opportunities for physical activity and imaginative play.

    3. Arts and Crafts Boo Basket
    3
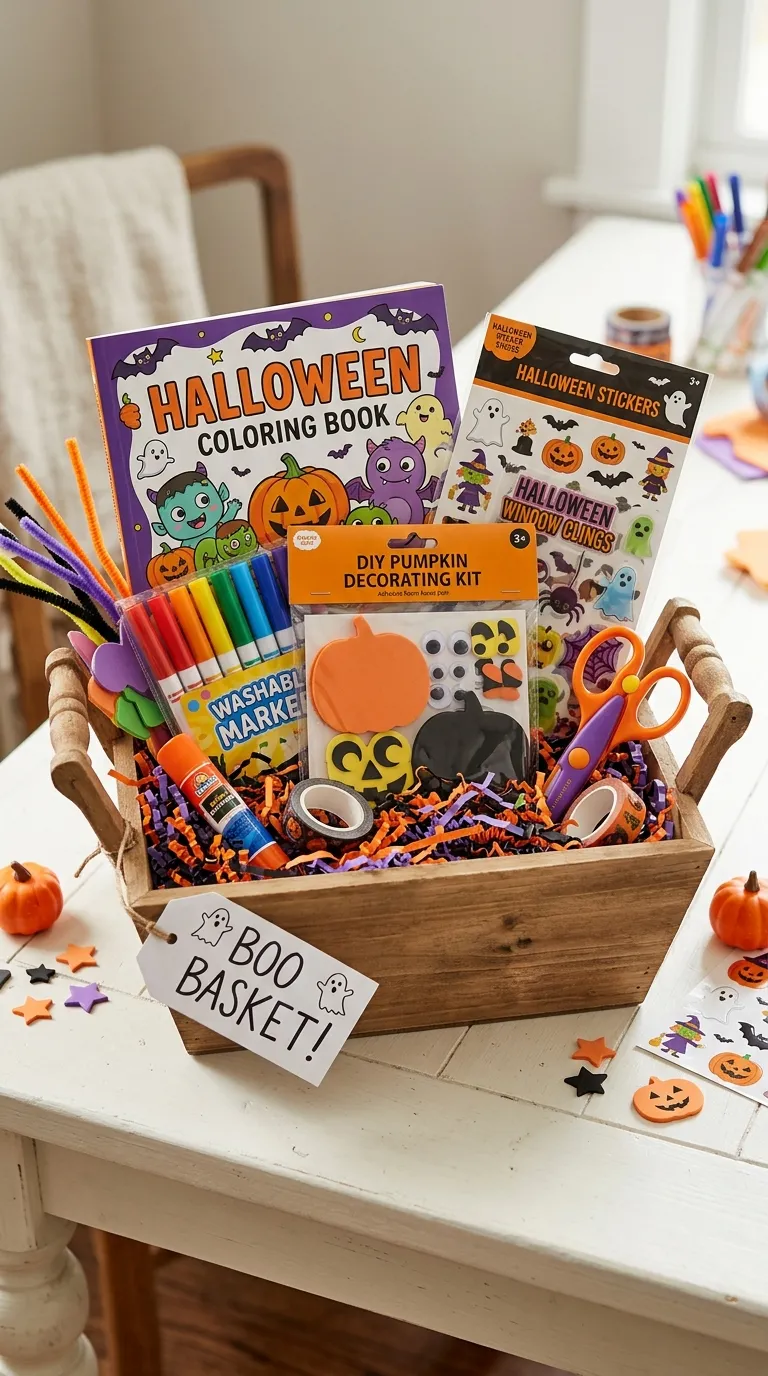
    Encourage your toddler’s creativity with an Arts and Crafts Boo Basket. This basket can be packed with Halloween-themed craft supplies, such as washable markers, stickers, and colored construction paper. Include a DIY pumpkin decorating kit with foam shapes and glue, or a Halloween coloring book with large, easy-to-color images.

    Add a set of child-safe scissors and a glue stick to help your toddler create their own Halloween masterpieces. For a mess-free option, include window clings that can be reused year after year. This basket is perfect for indoor fun and can keep your toddler engaged for hours while fostering fine motor skills and artistic expression.

    4. Storytime Boo Basket
    4
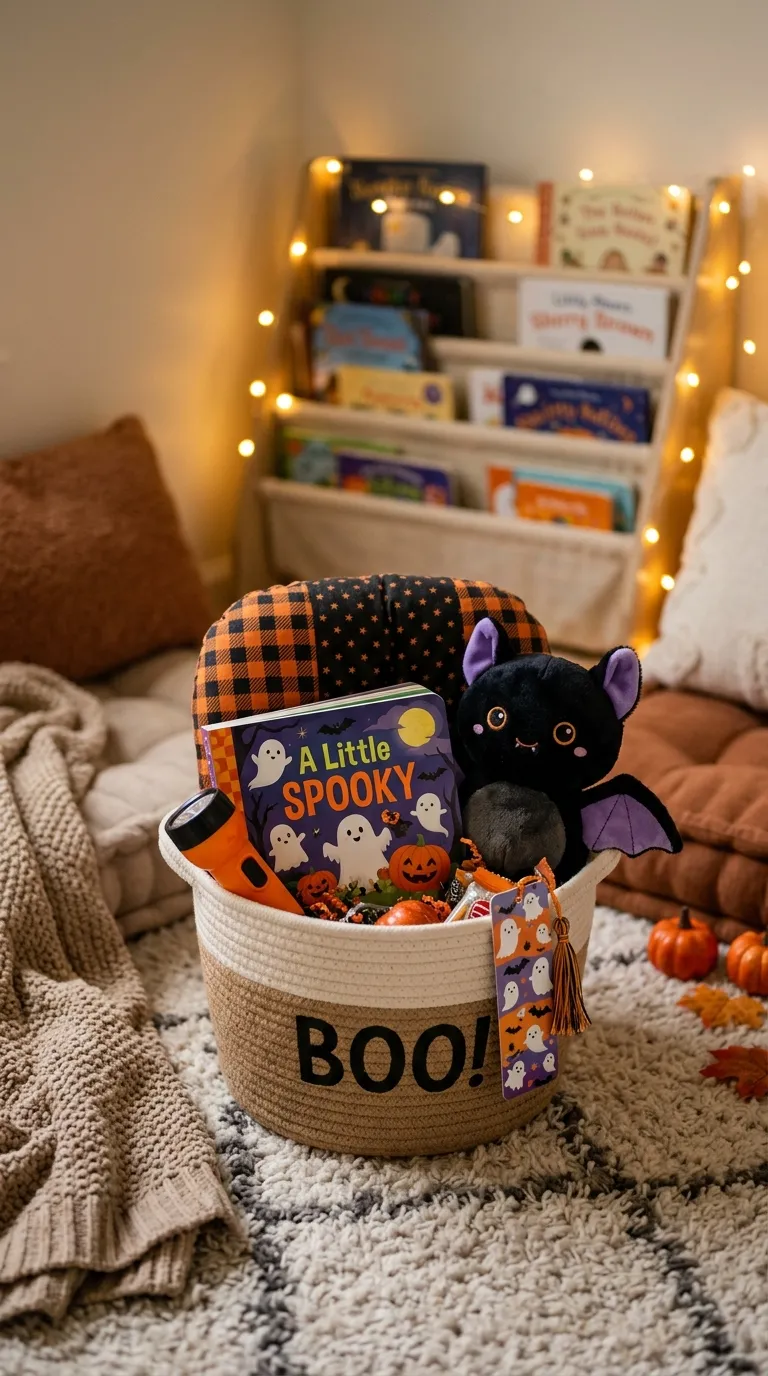
    Foster a love for reading with a Storytime Boo Basket. This basket is perfect for toddlers who enjoy being read to or flipping through books on their own. Include a selection of Halloween-themed board books with bright illustrations and simple text. Some popular choices include “Room on the Broom” by Julia Donaldson or “Little Blue Truck’s Halloween” by Alice Schertle.

    To make storytime even more special, add a soft, cozy reading pillow and a Halloween-themed stuffed animal to snuggle with. You can also include a small flashlight for reading under the covers or a Halloween-themed bookmark to keep track of their favorite pages. This basket is a wonderful way to create lasting memories and promote early literacy skills.

    5. Music and Movement Boo Basket
    5
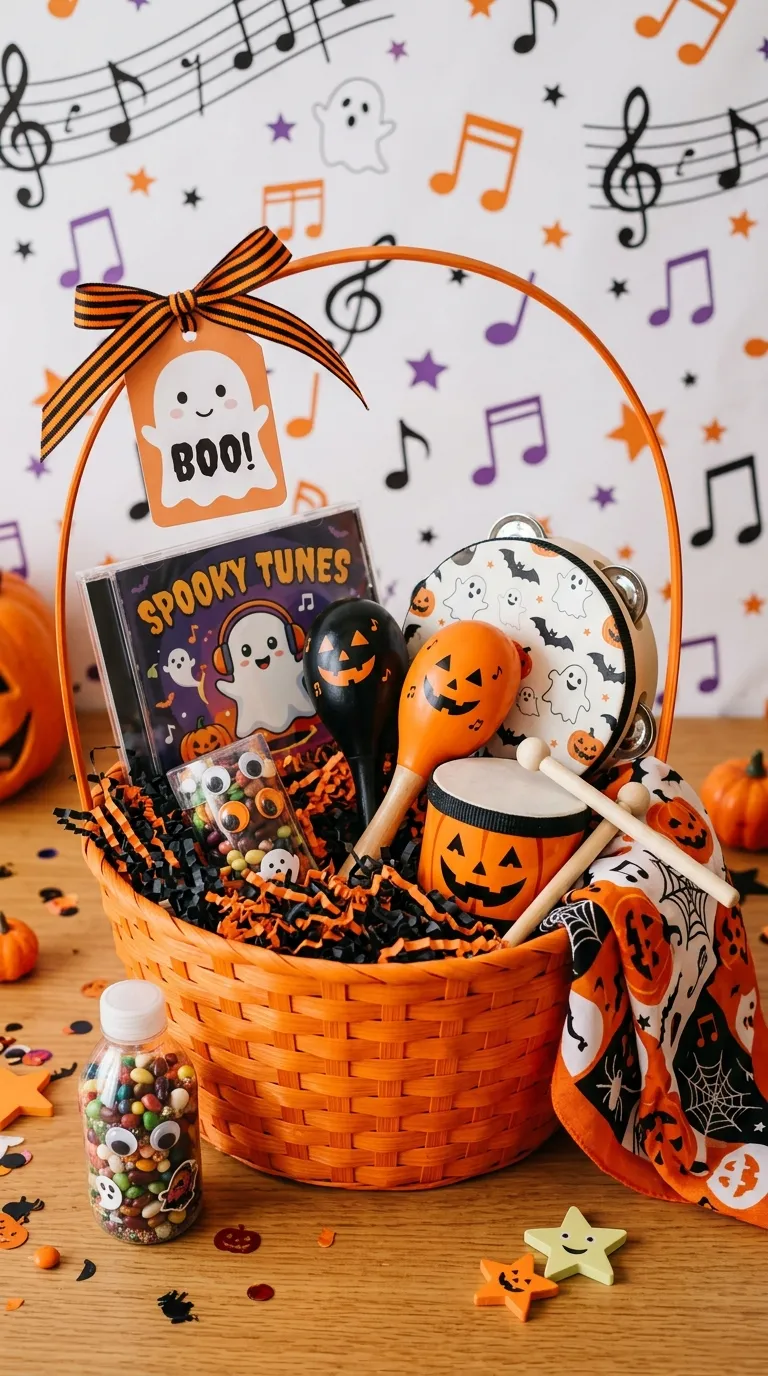
    Toddlers love to dance and move, and a Music and Movement Boo Basket can provide hours of active fun. Include a Halloween-themed CD or playlist with kid-friendly songs like “Monster Mash” or “Five Little Pumpkins”. Add a set of maracas or a tambourine for making music, and a Halloween-themed scarf for dancing and twirling.

    For extra fun, include a miniature pumpkin drum or a DIY shaker made from a small plastic container filled with beads or rice. This basket is perfect for encouraging physical activity, rhythm, and coordination. It’s also a great way to get the whole family involved in a Halloween dance party!

    6. Snack Attack Boo Basket
    6
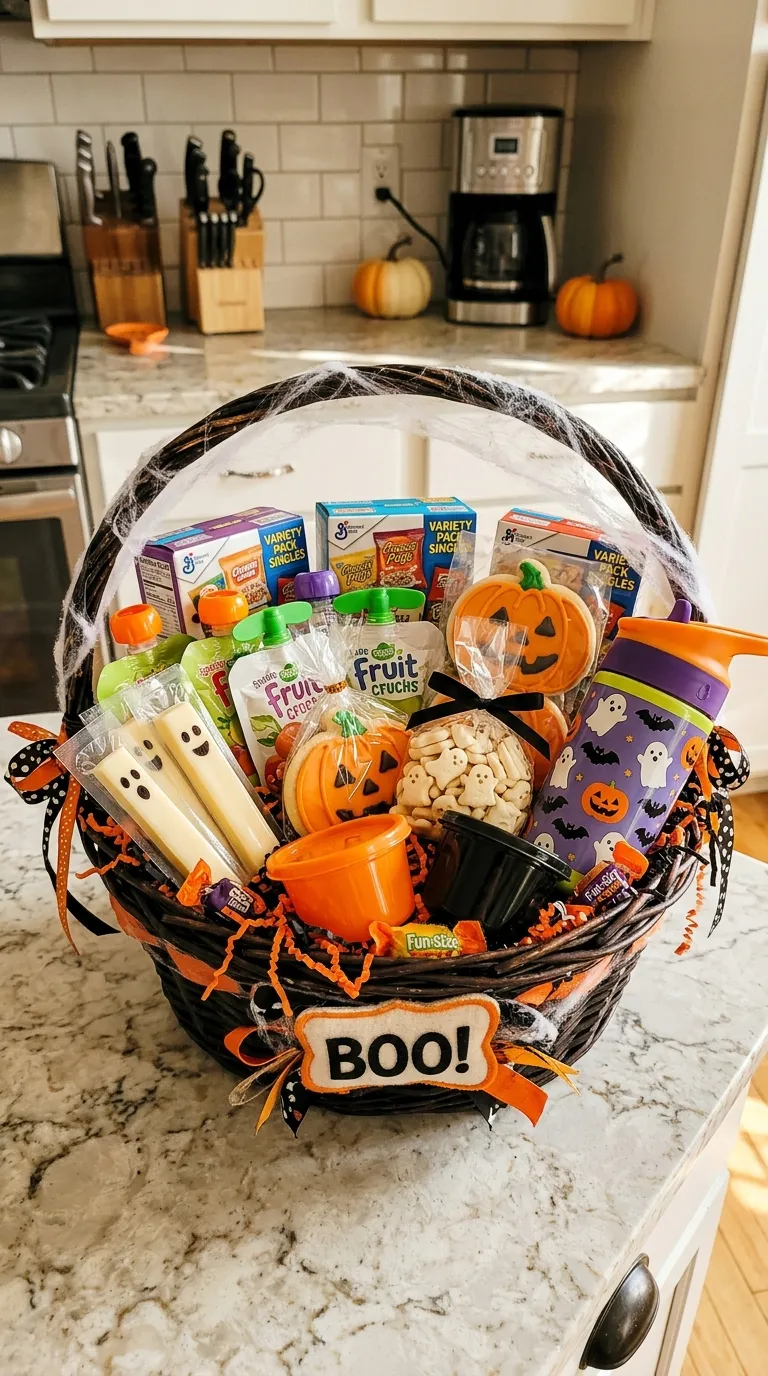
    No Halloween is complete without some tasty treats, and a Snack Attack Boo Basket is a fun way to include them. Fill the basket with a variety of toddler-friendly snacks, such as mini boxes of cereal, fruit pouches, and cheese sticks. For a Halloween twist, include pumpkin-shaped cookies or ghost-shaped crackers.

    Add a small water bottle with a Halloween-themed label and a set of reusable snack cups to keep treats organized. For a healthier option, include dried fruit or yogurt-covered raisins. This basket is perfect for on-the-go snacking or a fun Halloween picnic. Just be sure to check for any allergies or dietary restrictions before including specific snacks.

    7. Dress-Up Boo Basket
    7
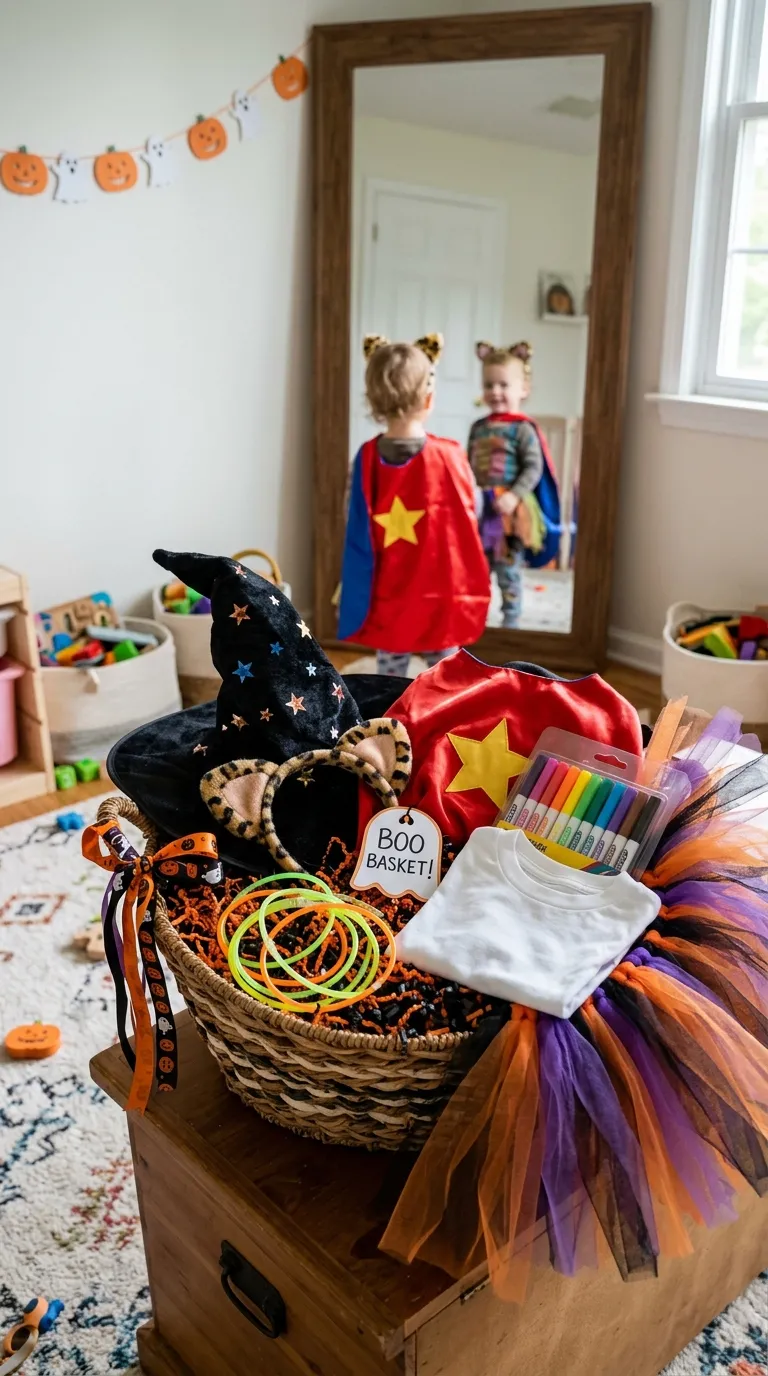
    Toddlers love to play dress-up, and a Dress-Up Boo Basket can provide endless imaginative play. Include a selection of Halloween-themed costumes and accessories, such as a witch hat, a superhero cape, or a set of animal ears. Add a Halloween-themed tutu or a glow-in-the-dark necklace for extra fun.

    For a DIY touch, include a plain white T-shirt and a set of fabric markers so your toddler can design their own Halloween shirt. This basket encourages role-playing and creativity, and it can be used for Halloween parties, playdates, or just everyday fun at home.

    8. STEM Learning Boo Basket
    8
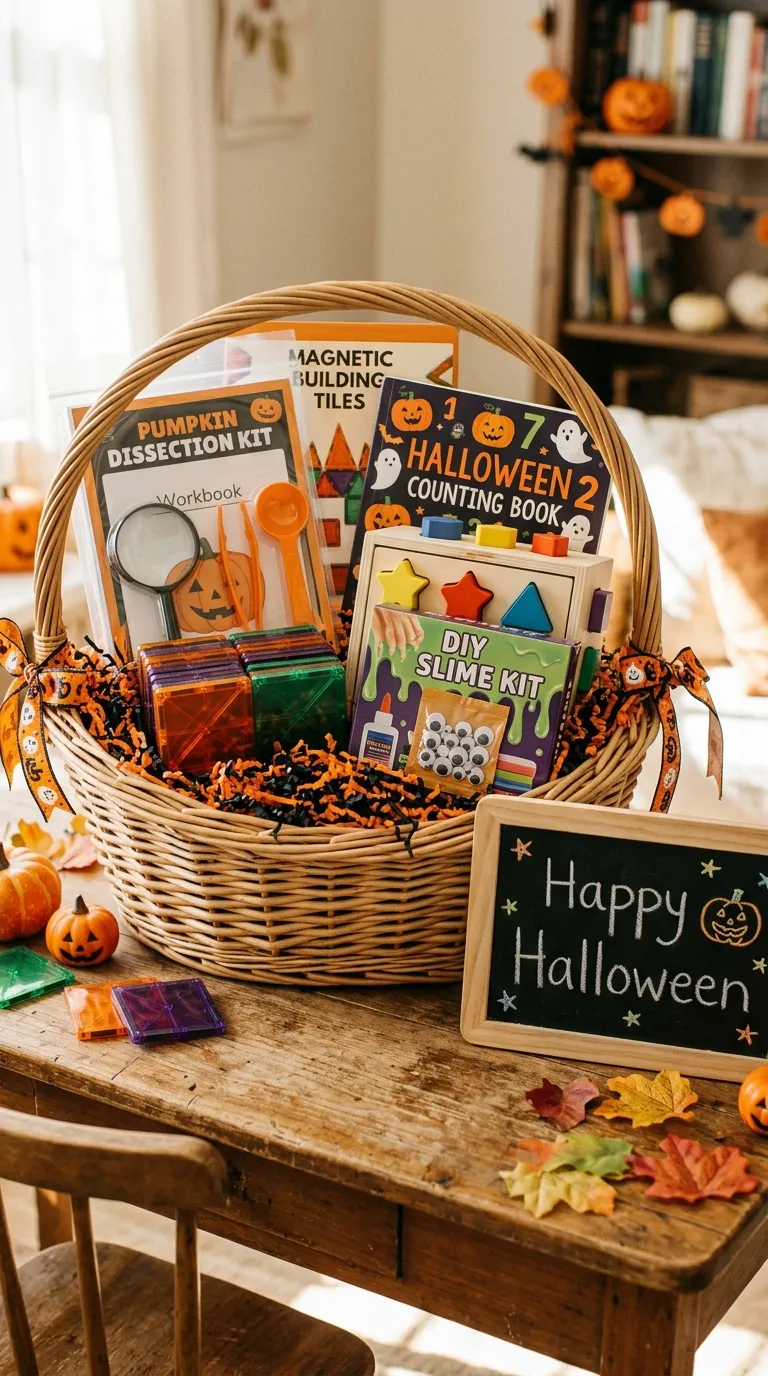
    Introduce your toddler to the world of science, technology, engineering, and math with a STEM Learning Boo Basket. This basket can include Halloween-themed STEM activities, such as a pumpkin dissection kit for exploring the inside of a pumpkin or a set of magnetic building tiles for constructing spooky structures.

    Add a Halloween-themed counting book or a set of shape sorters to help your toddler develop early math skills. For a hands-on activity, include a DIY slime kit with Halloween-themed add-ins like googly eyes or orange glitter. This basket is perfect for fostering curiosity and a love for learning.

    9. Cozy Movie Night Boo Basket
    9
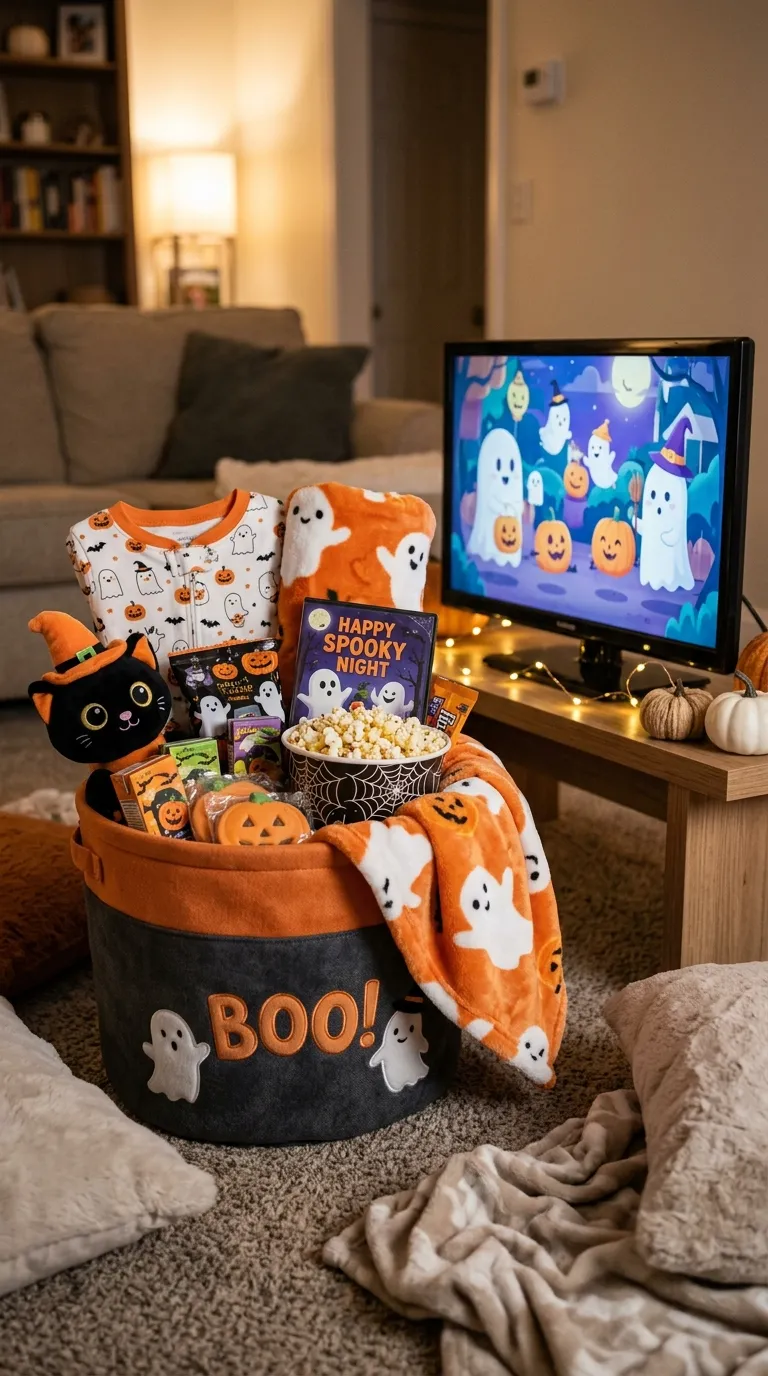
    Create a memorable Halloween experience with a Cozy Movie Night Boo Basket. This basket is perfect for a relaxing evening at home with your toddler. Include a Halloween-themed DVD or streaming code for a kid-friendly movie like “It’s the Great Pumpkin, Charlie Brown” or “Coco”. Add a soft, cozy blanket and a set of Halloween-themed pajamas for a snuggly movie night.

    For snacks, include popcorn in a fun Halloween-themed bowl and a selection of toddler-friendly treats. Add a Halloween-themed stuffie for extra comfort during the movie. This basket is a wonderful way to create a calming and enjoyable Halloween tradition that your toddler will look forward to each year.

    10. Community Helper Boo Basket
    10
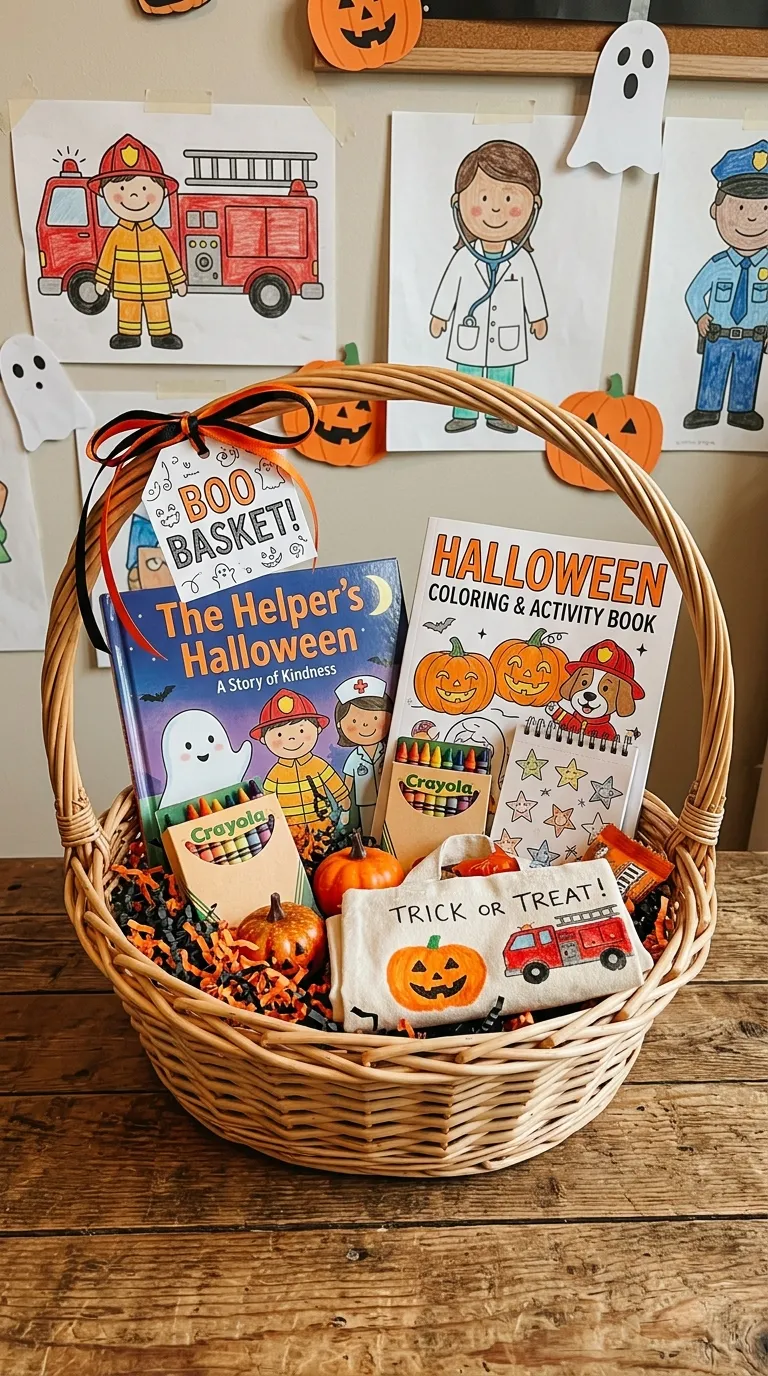
    Teach your toddler about the importance of giving back with a Community Helper Boo Basket. This basket can include items that encourage kindness and community involvement. Start with a Halloween-themed coloring book with pages dedicated to community helpers like firefighters, police officers, and doctors. Add a set of crayons and a small notebook for drawing or writing thank-you notes.

    Include a DIY trick-or-treat bag that your toddler can decorate and use to collect candy for a local charity or food bank. Add a Halloween-themed book about kindness, such as “The Little Ghost Who Wanted to Be Scary” by Marie-Louise Gay. This basket is perfect for instilling values of empathy and generosity while still celebrating the fun of Halloween.

    Conclusion

    Creating a toddler Boo Basket is a wonderful way to make Halloween special for your little one. Whether you choose a sensory-friendly basket, an outdoor adventure basket, or any of the other creative ideas we’ve shared, each option is designed to bring joy, engagement, and a touch of Halloween magic to your toddler’s day. These baskets offer a safe and curated way to celebrate the holiday while tailoring the experience to your child’s interests and developmental stage.

    Remember, the key to a great Boo Basket is personalization. Think about what your toddler loves most and build the basket around their unique preferences. Whether it’s crafts, snacks, dress-up, or learning, there’s a Boo Basket idea here that will make this Halloween unforgettable. So grab a basket, fill it with love and creativity, and get ready to see your toddler’s face light up with excitement!
  • 10 Afrohemian Home Decor Ideas (Bold, Warm & Soulful) ✨

    10 Afrohemian Home Decor Ideas (Bold, Warm & Soulful) ✨

    Afrohemian decor blends the warmth and richness of African cultural aesthetics with the free-spirited, eclectic vibe of bohemian design. This unique fusion creates a space that feels both grounded and adventurous, filled with vibrant colors, natural textures, and meaningful artifacts. Whether you’re looking to revamp your entire home or just add a few statement pieces, Afrohemian decor offers endless possibilities for creating a cozy, stylish, and spiritually uplifting environment.

    In this article, we’ll explore 10 Afrohemian home decor ideas that will help you transform your living space into a sanctuary of cultural expression and artistic flair. From bold textiles to handcrafted furniture, these ideas will inspire you to embrace the beauty of Afrocentric design while maintaining the relaxed, layered essence of boho style.

    1. Vibrant African Print Throw Pillows

    1
    One of the easiest ways to introduce Afrohemian decor into your home is through vibrant African print throw pillows. These pillows, often featuring bold geometric patterns, tribal motifs, or Ankara fabrics, instantly add a pop of color and cultural depth to sofas, beds, or floor seating areas. Choose a mix of patterns in complementary hues—such as deep reds, golden yellows, earthy browns, and emerald greens—to create a dynamic yet harmonious look.

    For a truly bohemian touch, layer these pillows in different sizes and textures. Pair them with neutral-toned cushions to balance the visual intensity. You can also opt for handmade pillows from African artisans, which not only support fair trade but also bring an authentic, story-rich element to your space. This simple addition can tie together an entire room, making it feel both inviting and artistically curated.

    2. Woven raffia and jute area rugs

    2
    A woven raffia or jute area rug is a staple in Afrohemian decor, offering a natural, earthy foundation for your space. These rugs bring texture and warmth to any room while maintaining the organic, handcrafted aesthetic that defines the style. They work particularly well in living rooms, bedrooms, or even as a statement piece in a hallway.

    Raffia and jute rugs are not only visually appealing but also durable and sustainable, aligning with the eco-conscious values often associated with bohemian living. To enhance the Afrohemian vibe, layer your woven rug with a smaller, patterned rug—such as a Moroccan or West African design—to create depth and visual interest. This combination adds richness to your flooring while keeping the space grounded and cozy.

    3. Hand-Carved Wooden Furniture

    3
    Hand-carved wooden furniture is a hallmark of Afrohemian interiors, bringing both functionality and artistry into your home. Think of intricately designed coffee tables, stools, or bookshelves made from reclaimed or sustainably sourced wood. These pieces often feature traditional African motifs, such as Adinkra symbols or tribal carvings, which add a layer of cultural significance to your decor.

    Incorporating hand-carved furniture into your space creates a sense of authenticity and craftsmanship. For a balanced look, pair these statement pieces with simpler, bohemian-inspired items like macramé wall hangings or woven baskets. This contrast allows the furniture to stand out while maintaining the overall relaxed and eclectic atmosphere of Afrohemian design.

    4. Beaded and Macramé Wall Hangings

    4
    Wall decor plays a crucial role in Afrohemian style, and beaded or macramé wall hangings are perfect for adding texture and visual intrigue. Beaded wall art, often inspired by African beadwork traditions, can feature intricate patterns and vibrant colors that tell a story or represent cultural heritage. Macramé, on the other hand, brings a boho-chic softness with its knotted, fibrous designs.

    Hang these pieces above a sofa, bed, or fireplace to create a focal point that draws the eye. For a layered effect, combine a beaded wall hanging with a macramé piece or a woven tapestry. This mix of materials and techniques embodies the fusion of African and bohemian aesthetics, making your walls a canvas for creative expression.

    5. Earthy Terracotta and Clay Pottery

    5
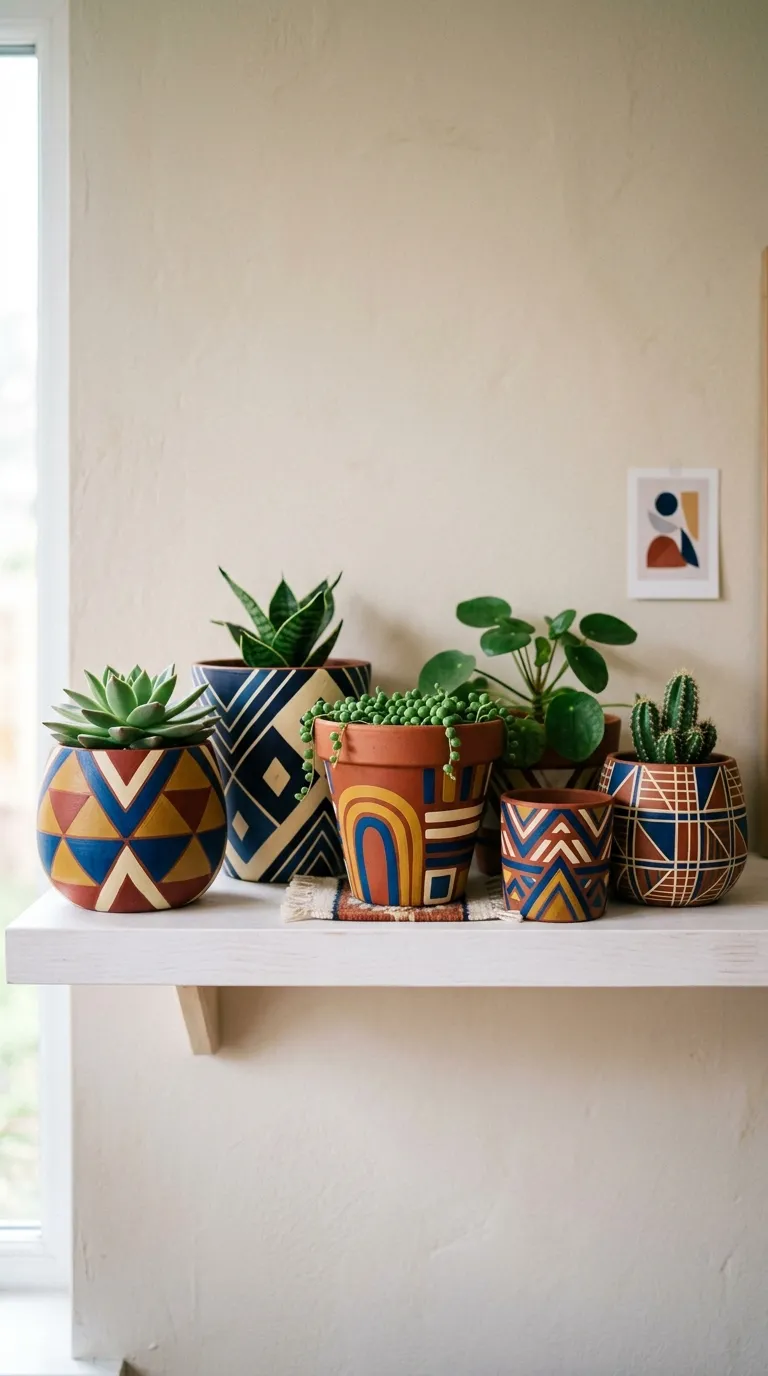
    Terracotta and clay pottery are essential elements in Afrohemian decor, offering a raw, organic touch that connects your space to the earth. These pieces can range from large floor vases to small decorative bowls, all showcasing the natural beauty of handcrafted ceramics. Their warm, earthy tones complement the bold colors and patterns found in Afrohemian interiors.

    Display your pottery on shelves, mantels, or as centerpieces on coffee tables. For an added bohemian flair, mix in other natural elements like dried grasses, feathers, or small succulents. This combination not only enhances the aesthetic but also brings a sense of tranquility and connection to nature, which is central to Afrohemian design.

    6. Bold, Patterned Curtains

    6
    Bold, patterned curtains are a fantastic way to infuse Afrohemian energy into your home. Opt for fabrics like Ankara, Kente, or Bogolan (mud cloth) to introduce rich textures and vibrant designs. These curtains can serve as a backdrop for neutral furniture or act as a bold statement in an otherwise minimalist room.

    To achieve a balanced look, pair patterned curtains with simpler, solid-colored drapes or sheers. This layering technique softens the intensity of the patterns while still allowing them to shine. Additionally, consider hanging your curtains from ceiling to floor to create the illusion of height and grandeur, a common trick in bohemian interiors to make spaces feel larger and more open.

    7. Natural Fiber Lighting Fixtures

    7
    Lighting is a key component in setting the mood for any space, and in Afrohemian decor, natural fiber lighting fixtures add both function and style. Think of pendant lights made from woven rattan, jute, or bamboo, which cast a warm, diffused glow that enhances the cozy atmosphere of your home.

    These fixtures work well in living rooms, bedrooms, or even as a statement piece in a dining area. For a layered lighting effect, combine a woven pendant light with string lights or lanterns made from metal or wood. This mix of materials and light sources creates a warm, inviting ambiance that is quintessentially Afrohemian.

    8. African Mud Cloth Upholstery

    8
    African mud cloth, or Bogolan, is a traditional Malian fabric known for its earthy tones and intricate, hand-painted patterns. Incorporating mud cloth into your upholstery—whether on chairs, ottomans, or headboards—is a bold way to embrace Afrohemian decor. The fabric’s natural, organic feel pairs beautifully with the layered, textured look of bohemian style.

    If you’re not ready to commit to large upholstered pieces, start with smaller items like throw blankets or cushion covers. The deep browns, blacks, and whites of mud cloth provide a neutral yet striking base that can be accessorized with brighter colors and patterns. This approach allows you to experiment with the look without overwhelming your space.

    9. Eclectic Gallery Wall with African Art

    9
    An eclectic gallery wall is a perfect way to showcase your love for Afrohemian decor. Mix and match African masks, paintings, photographs, and other art pieces to create a visually dynamic display. The key to a successful gallery wall is balance—combine different sizes, shapes, and textures while maintaining a cohesive color palette or theme.

    Include a variety of frames, from rustic wood to sleek black, to add depth and interest. You can also incorporate other bohemian elements like dreamcatchers, small shelves with trinkets, or woven tapestries. This layered approach not only highlights your African art but also creates a personalized, story-filled wall that reflects your unique style.

    10. Indoor Plants with Woven Baskets

    10
    Bringing nature indoors is a cornerstone of both African and bohemian design, and indoor plants paired with woven baskets are a simple yet impactful way to achieve this. Choose lush, green plants like snake plants, fiddle leaf figs, or monstera to add life and freshness to your space. Place them in handwoven baskets made from natural fibers to enhance the organic, earthy feel.

    In addition to their aesthetic appeal, indoor plants improve air quality and create a calming atmosphere. Group several plants together in a corner or place them strategically around the room to create a sense of balance and harmony. This touch of greenery, combined with woven textures, completes the Afrohemian look, making your home feel like a serene, nature-inspired retreat.

    Conclusion

    Afrohemian home decor is all about celebrating the richness of African culture while embracing the free-spirited, layered aesthetic of bohemian design. By incorporating elements like vibrant textiles, handcrafted furniture, natural fibers, and earthy tones, you can create a space that feels both grounded and adventurous. Whether you start small with throw pillows and wall hangings or go all out with statement furniture and bold patterns, the key is to let your personality shine through.

    These 10 Afrohemian home decor ideas offer a starting point for transforming your living space into a warm, inviting, and culturally rich sanctuary. Experiment with different combinations, layer textures and patterns, and most importantly, have fun with the process. Your home should tell your story, and Afrohemian decor provides the perfect canvas for that expression.

  • 10 DIY Egg Carton Craft Ideas for Toddlers

    10 DIY Egg Carton Craft Ideas for Toddlers

    Looking for fun, budget-friendly, and eco-conscious craft activities to keep your toddler engaged? Egg cartons are a versatile and often overlooked material that can be transformed into a variety of creative projects. These DIY egg carton crafts for toddlers not only encourage imaginative play but also help develop fine motor skills, hand-eye coordination, and cognitive abilities. Whether you’re a parent, teacher, or caregiver, these simple egg carton crafts are perfect for rainy days, playdates, or educational activities at home or in the classroom.

    From adorable animals to interactive toys, the possibilities are endless. Best of all, these projects require minimal supplies—most of which you likely already have at home. In this guide, we’ll explore 10 easy egg carton crafts for kids that are safe, engaging, and tailored for little hands. Each idea includes step-by-step instructions and tips to make the process smooth and enjoyable for both you and your child.

    1. Egg Carton Caterpillars

    1
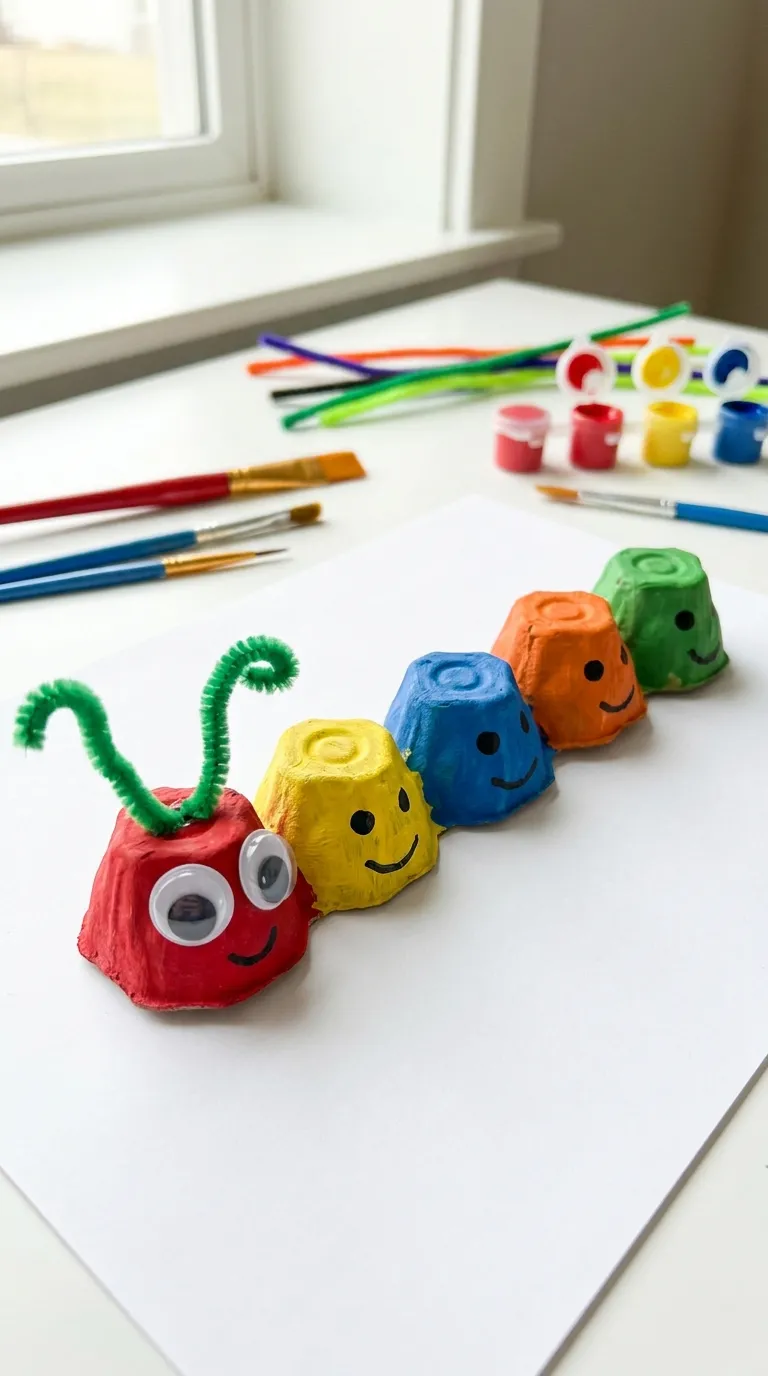
    Transform an egg carton into a cute and colorful caterpillar that your toddler will love to play with. This project is excellent for teaching colors, counting, and sequencing. To get started, cut the egg carton into a strip of connected cups—usually five or six for the body. Let your child paint each section in bright, vibrant colors. Once dry, add googly eyes to the first cup to create the head. Use pipe cleaners for antennae and small pom-poms or stickers for decorative details.

    This toddler-friendly egg carton craft can be extended by turning it into a learning activity. Ask your child to count the segments or name the colors they used. For added fun, create a simple story where the caterpillar transforms into a butterfly, incorporating educational elements about life cycles.

    2. Egg Carton Flower Bouquet

    2
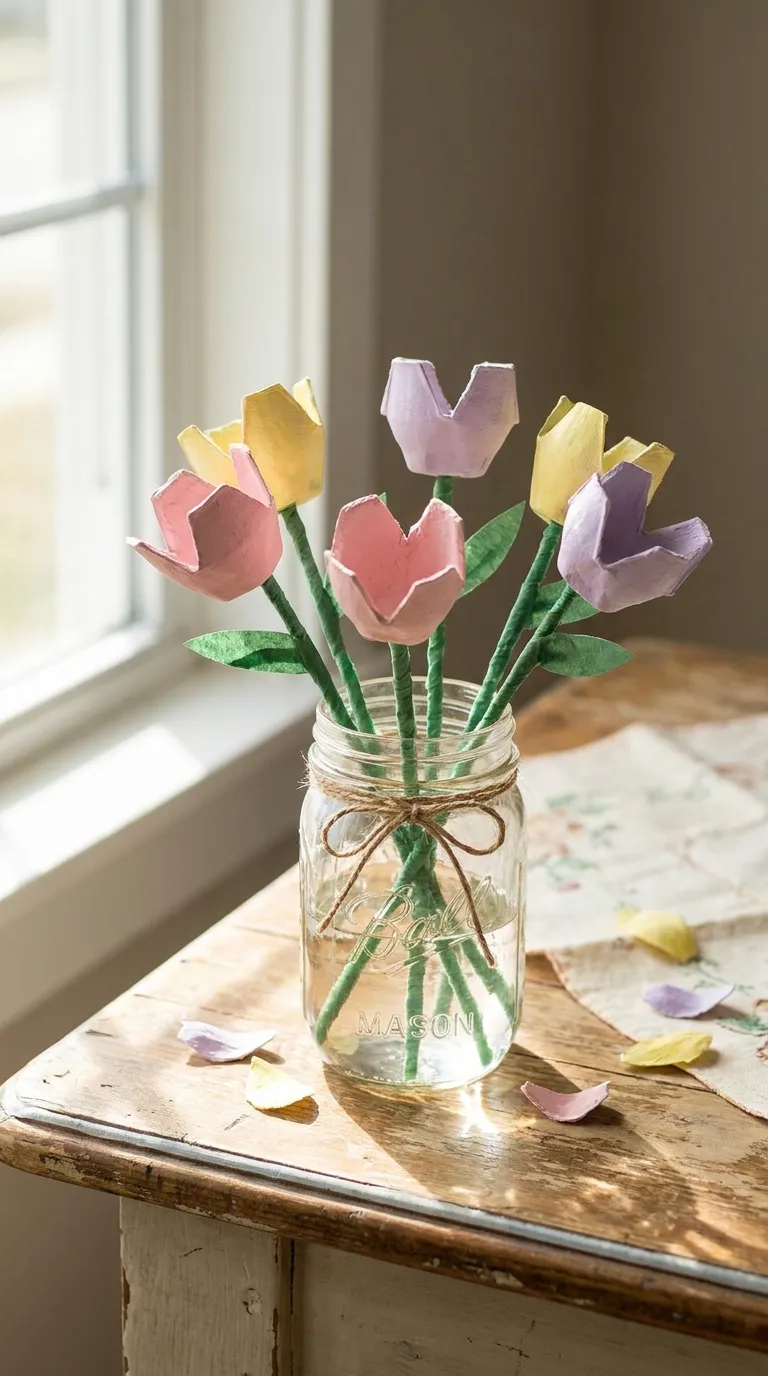
    Bring a touch of nature indoors with a beautiful egg carton flower bouquet. This craft is perfect for spring or Mother’s Day gifts. Begin by cutting individual cups from the egg carton. Trim the edges to shape them into petals. Let your toddler paint the cups in various colors—pink, yellow, purple, or any shade they love. Once dry, poke a small hole in the bottom of each cup and thread a pipe cleaner through to create the stem. Bend the end of the pipe cleaner to secure it.

    Arrange the flowers in a small vase or tie them together with a ribbon. This easy egg carton craft for kids teaches fine motor skills as they paint and assemble the flowers. You can also discuss the parts of a flower, such as petals, stems, and leaves, to add a layer of learning.

    3. Egg Carton Ladybugs

    3
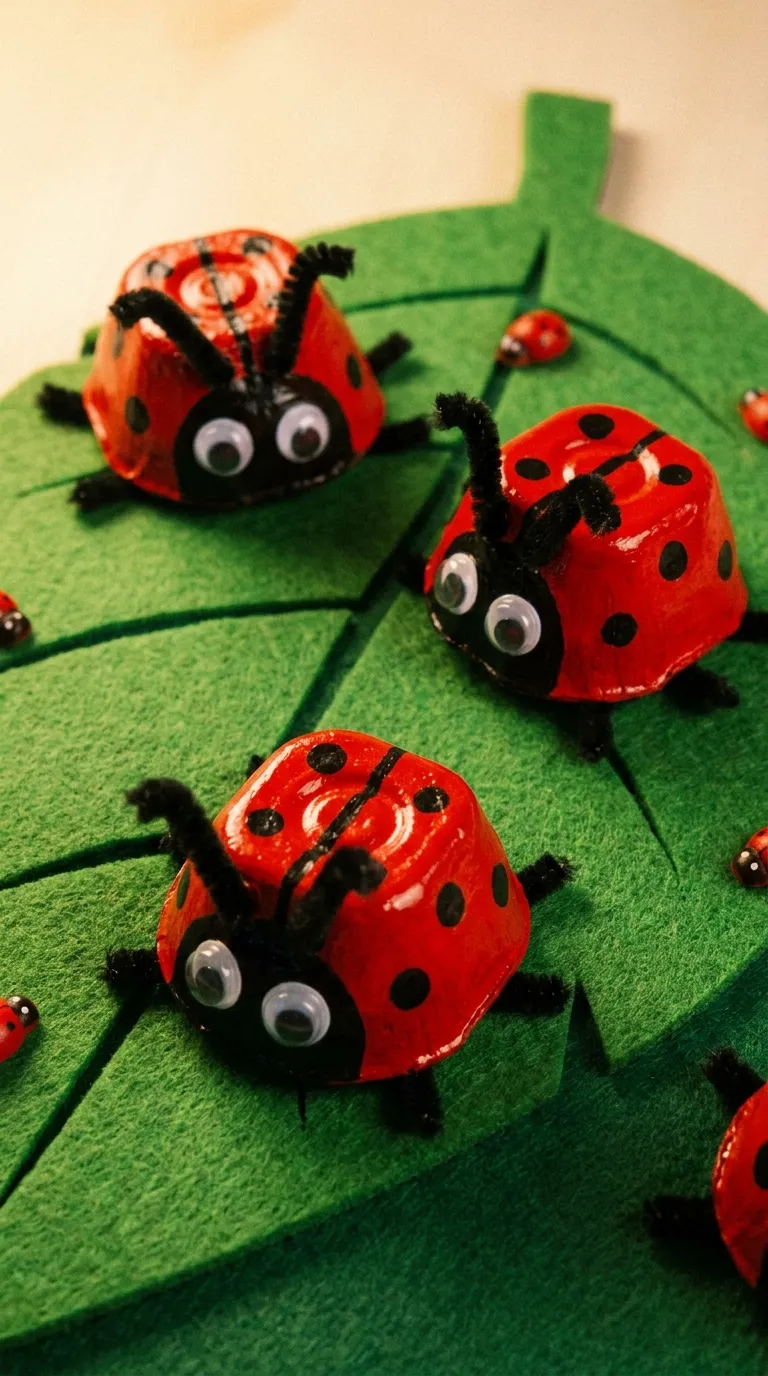
    Ladybugs are a favorite among toddlers, and creating them from egg cartons is both simple and delightful. Cut the egg carton into individual cups, and let your child paint them red. Once dry, use black paint or markers to add spots. For the head, cut a small circle from the remaining carton material or use black construction paper. Glue on googly eyes and attach the head to the red body with glue or tape. Pipe cleaners can be used for antennae.

    This DIY egg carton insect can be part of a larger garden-themed craft session. Encourage your toddler to create a small garden scene using green paper for leaves and blue for the sky. This activity promotes creativity and storytelling as they play with their new ladybug friends.

    4. Egg Carton Train

    4
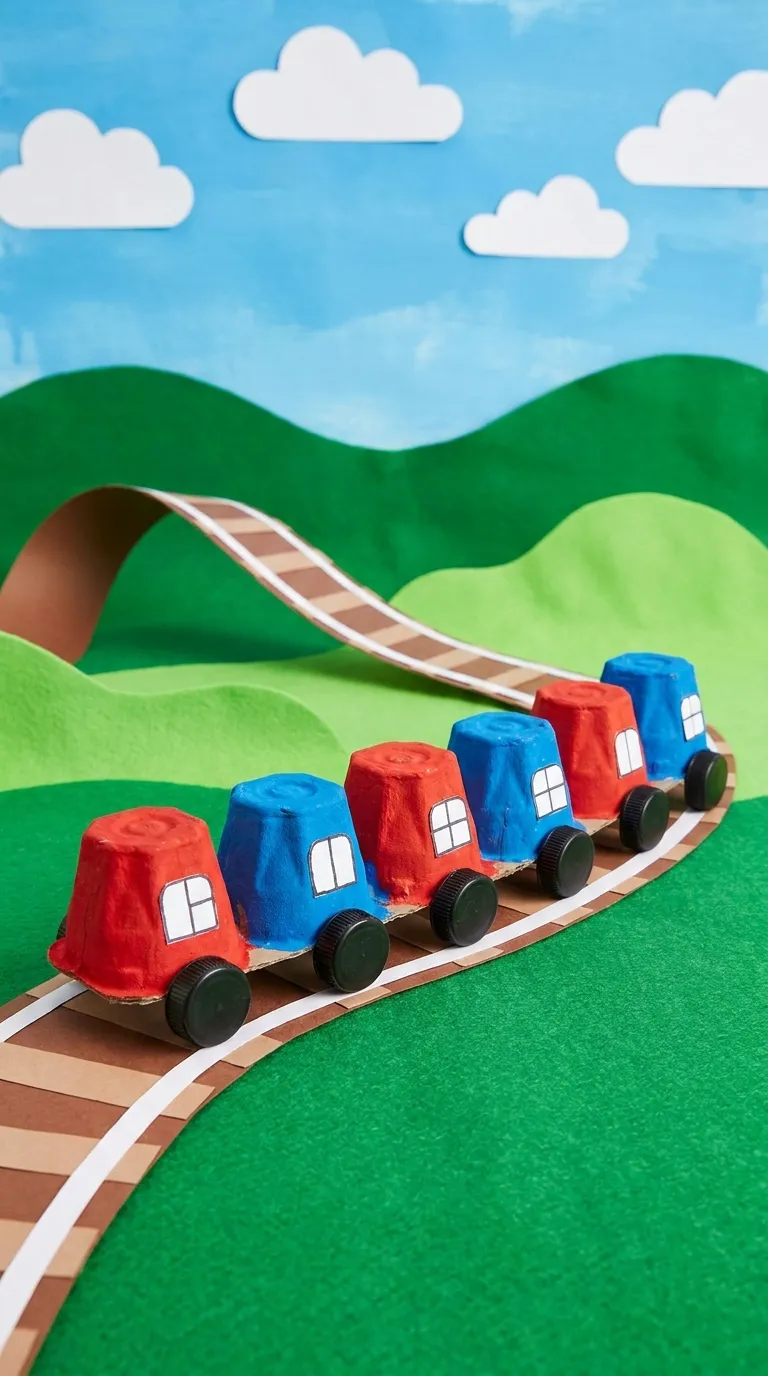
    All aboard the creativity express! An egg carton train is a fantastic way to upcycle materials into a fun toy. For this project, cut the egg carton into a long strip of connected cups—enough to form the train cars. Paint the entire strip in a single color or let your toddler choose different colors for each car. Once dry, add details like windows and wheels using markers or small circular stickers. Connect the cars with pipe cleaners or string.

    This interactive egg carton craft encourages imaginative play as your child pretends to drive the train, load cargo, or create a train station. You can also incorporate learning by counting the cars or discussing colors and shapes used in the design.

    5. Egg Carton Treasure Box

    5
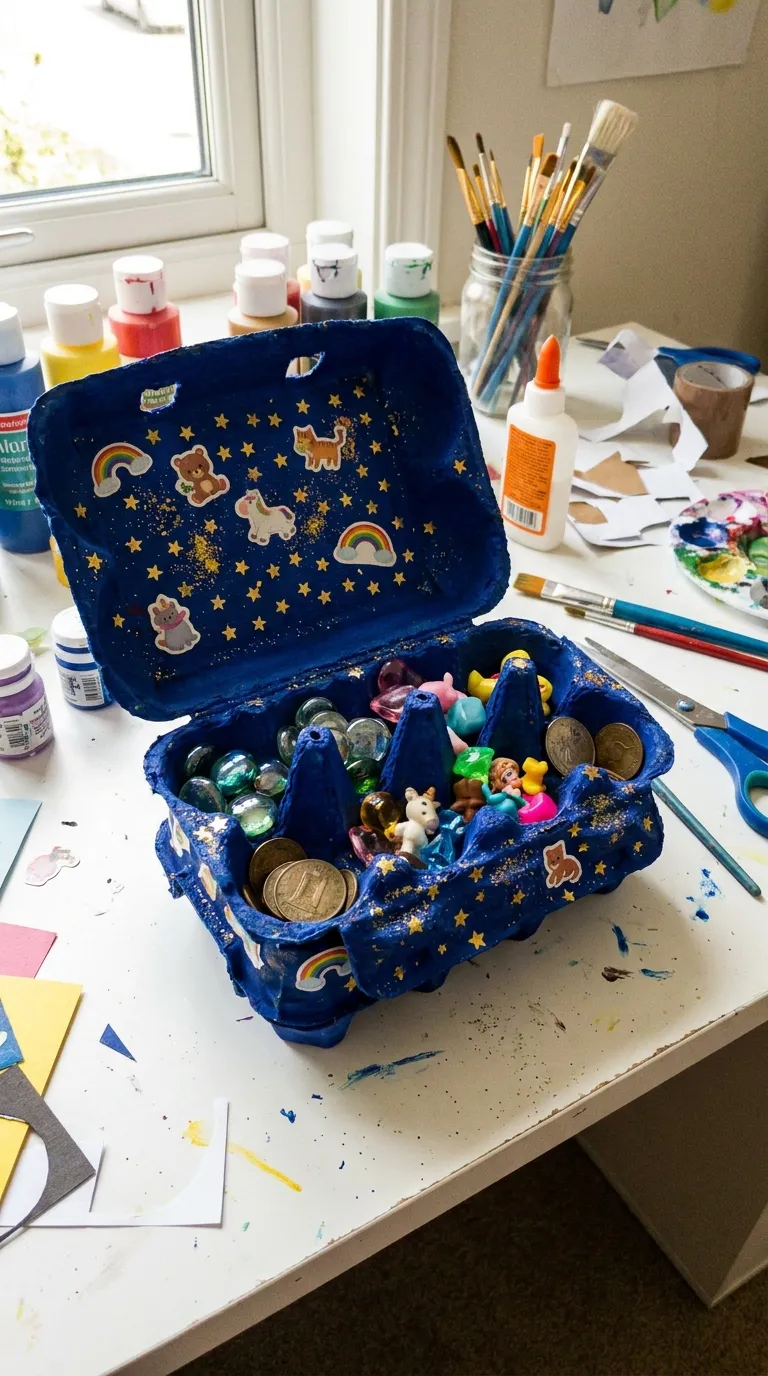
    Every toddler loves a special place to keep their tiny treasures. An egg carton treasure box is both practical and fun to make. Start by cutting the lid off the egg carton and painting the entire box in your child’s favorite color. Let them decorate it with stickers, glitter, or drawings. Once dry, the box can be used to store small toys, beads, or other trinkets.

    This practical egg carton craft for toddlers teaches organization and responsibility as they learn to care for their belongings. You can also turn it into a sorting activity by having them group items by color, size, or type.

    6. Egg Carton Animals: Turtles and Frogs

    6
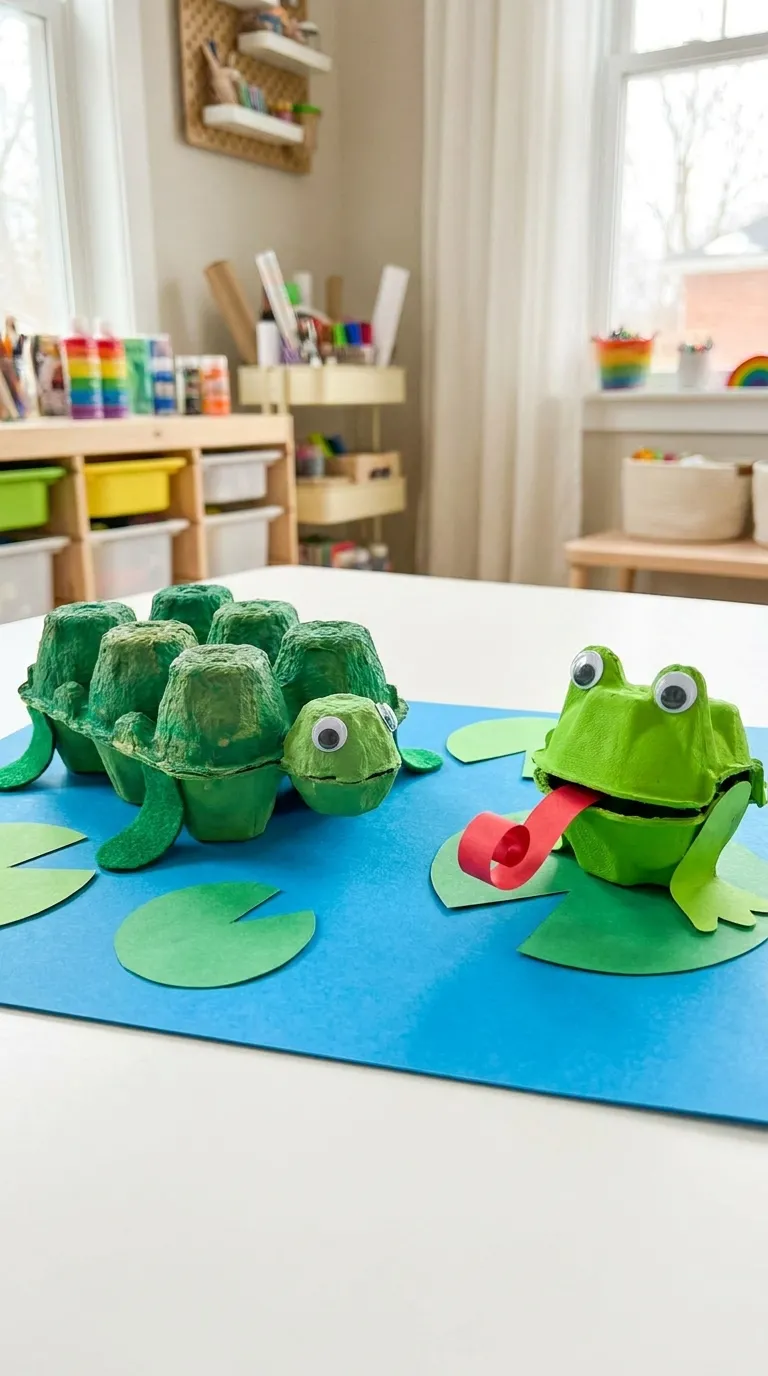
    Egg cartons can easily be transformed into a variety of animals, with turtles and frogs being two of the simplest and most engaging options. For a turtle, cut the egg carton into a single cup and paint it green. Add a head and legs using small pieces of green construction paper or felt. Use googly eyes to bring the turtle to life. For a frog, follow a similar process but paint the cup green and add a long red tongue using paper.

    These egg carton animal crafts are perfect for storytelling and pretend play. Create a small pond or forest scene using blue and green paper, and let your toddler act out stories with their new animal friends. This activity also provides an opportunity to teach them about different animals and their habitats.

    7. Egg Carton Christmas Tree

    7
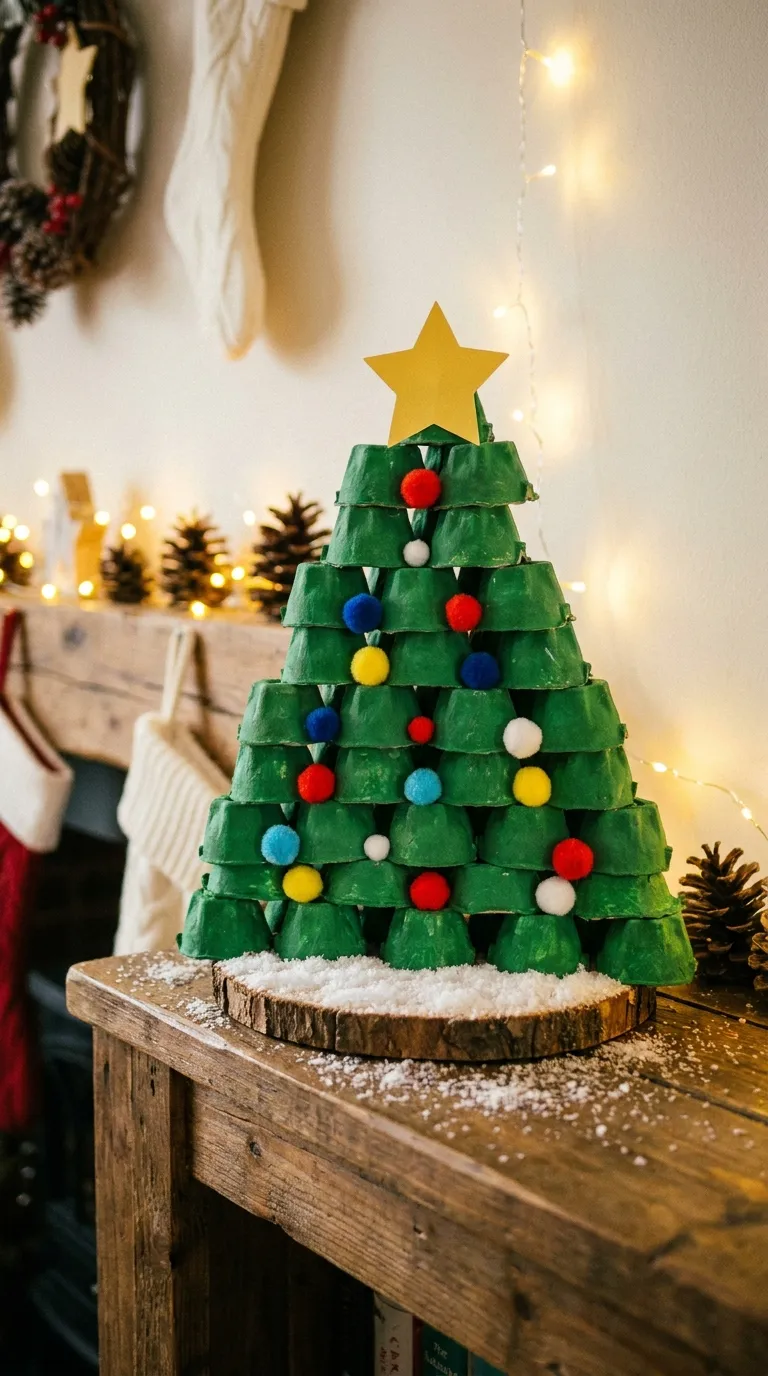
    Bring some holiday cheer into your home with an egg carton Christmas tree. This craft is ideal for the festive season and can be a fun way to decorate your space. Cut the egg carton into a triangular shape by arranging the cups in a pyramid. Paint the tree green and let it dry. Once dry, let your toddler decorate it with pom-poms, sequins, or small stickers for ornaments. Add a star or a small yellow pom-pom at the top for the tree topper.

    This holiday-themed egg carton craft can be a great way to introduce your child to holiday traditions. You can also use it as an opportunity to discuss shapes, as they recognize and create the triangular form of the tree.

    8. Egg Carton School Bus

    8
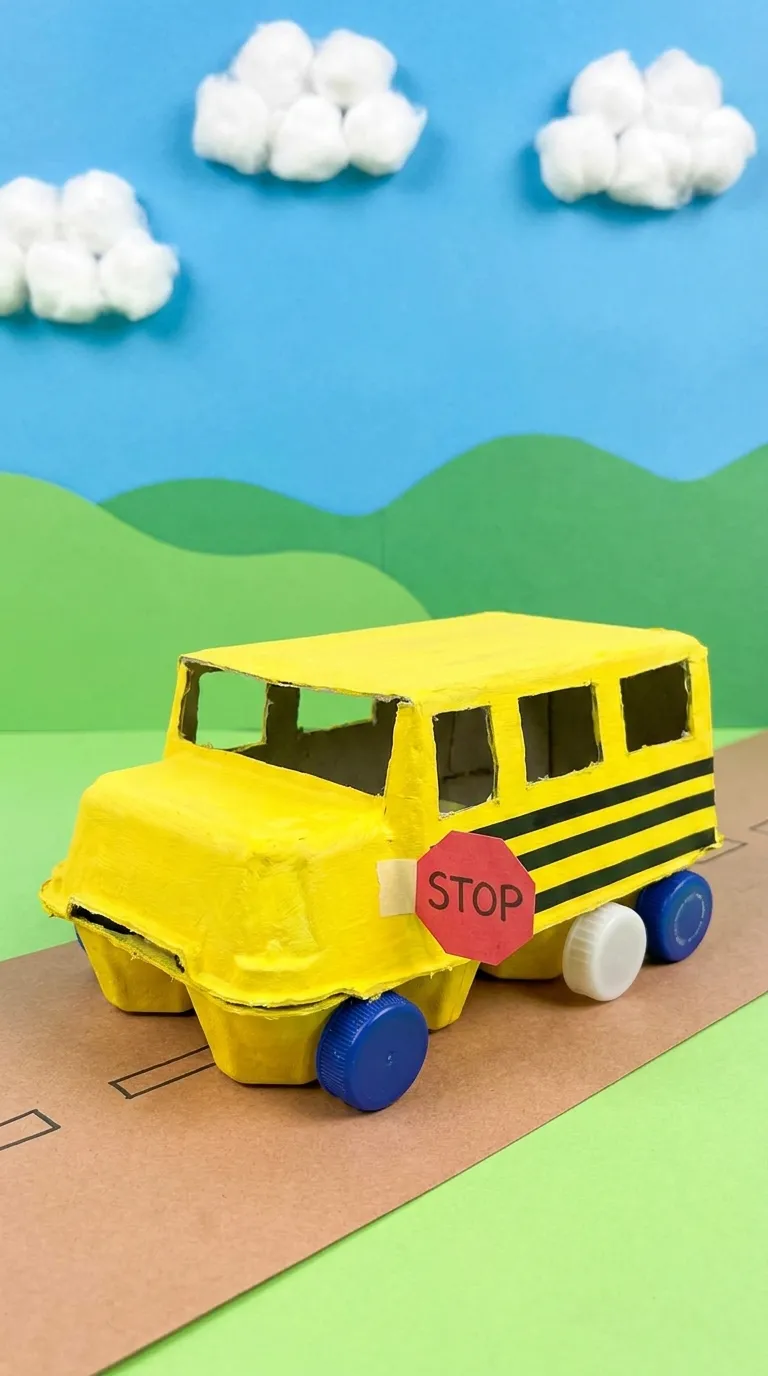
    Rev up the fun with an egg carton school bus that your toddler can use for imaginative play. Cut the egg carton lengthwise to form the body of the bus. Paint it yellow and add black stripes using paint or markers. Use bottle caps or circular stickers for the wheels, and add windows with markers or small pieces of paper. Don’t forget the red stop sign, which can be made from a small piece of red paper.

    This transportation-themed egg carton craft is perfect for teaching your child about vehicles and their functions. Encourage them to create a small road or city scene using paper, and let them drive their bus around, picking up and dropping off passengers (which can be small toys or drawings).

    9. Egg Carton Binoculars

    9
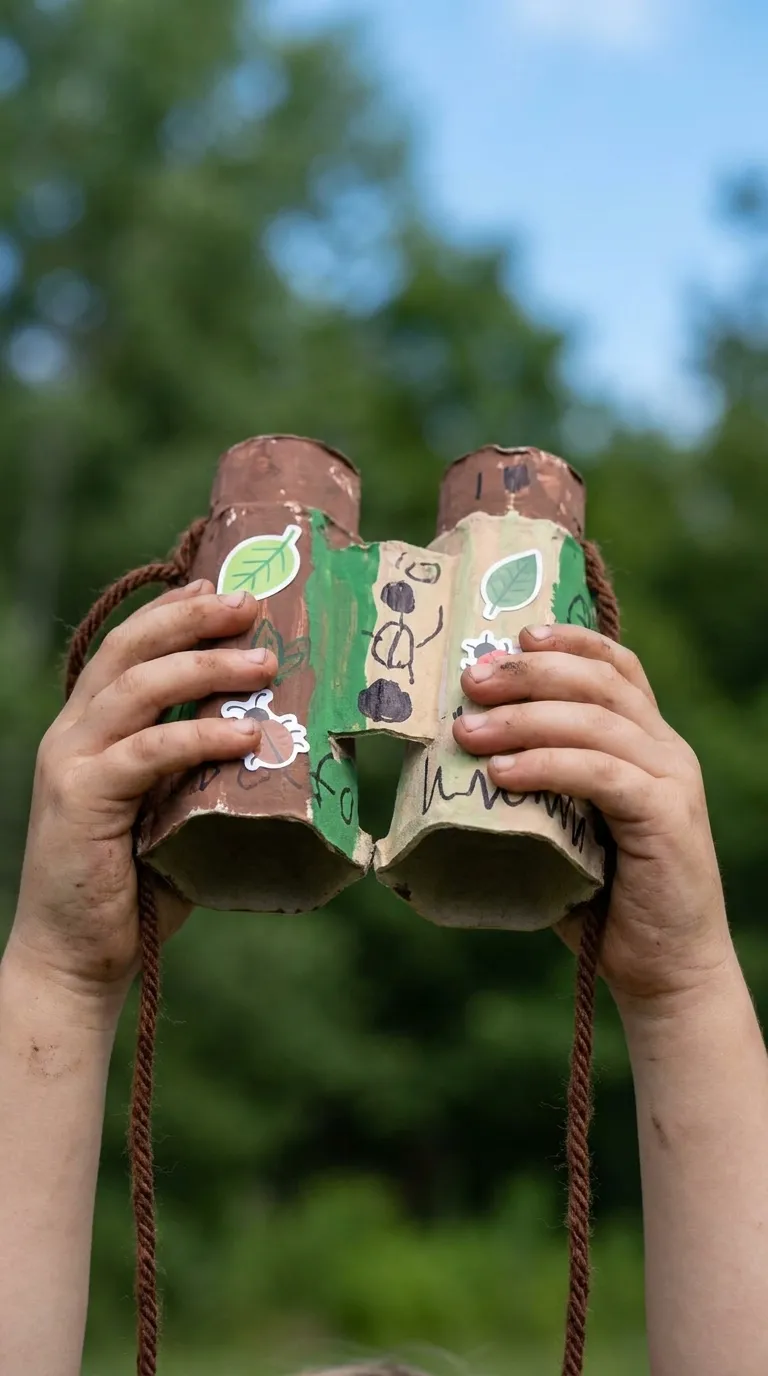
    Encourage outdoor exploration with a pair of DIY egg carton binoculars. Cut two cups from the egg carton and tape them together side by side. Let your toddler paint and decorate the binoculars with stickers or markers. Once dry, poke a hole on the outer side of each cup and attach a string or yarn to create a strap. Your child can wear the binoculars around their neck and use them to explore the backyard, park, or even their own home.

    This outdoor-themed egg carton craft promotes curiosity and observation skills. Go on a nature scavenger hunt and ask your child to find items like leaves, birds, or flowers using their binoculars. This activity is a great way to combine crafting with outdoor play.

    10. Egg Carton Musical Shakers

    10
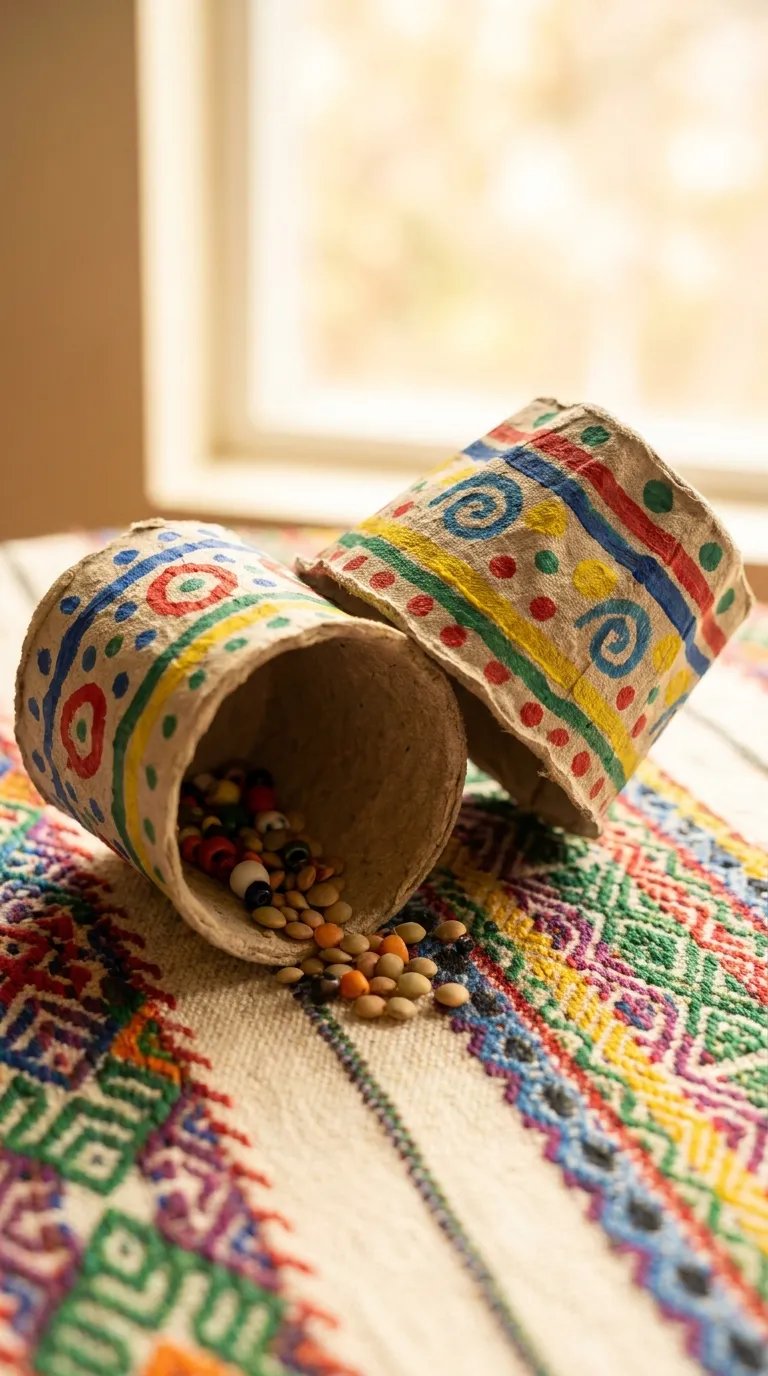
    Turn egg cartons into musical instruments with this fun and interactive craft. Cut the egg carton into individual cups and fill each with small items like rice, beans, or beads to create different sounds. Seal the open end with tape or glue a piece of cardboard to close it. Let your toddler decorate the outside of the shakers with paint, stickers, or markers. Once dry, they can shake the instruments to create their own music.

    This musical egg carton craft for kids introduces your child to the world of sound and rhythm. Play along with them by creating simple songs or beats, and encourage them to experiment with different sounds by shaking the shakers at various speeds. This activity is perfect for developing auditory skills and a love for music.

    Conclusion

    Egg cartons are a treasure trove of crafting potential, offering endless opportunities for creativity and learning. These 10 DIY egg carton crafts for toddlers are not only fun and engaging but also promote the development of essential skills such as fine motor control, problem-solving, and imaginative thinking. Whether you’re looking for a quiet indoor activity or a hands-on learning experience, these projects are sure to provide hours of entertainment.

    What’s more, these crafts are eco-friendly, making them a great way to teach your child about recycling and reusing materials. So, the next time you finish a dozen eggs, don’t toss the carton—turn it into a masterpiece! Share these ideas with friends, family, or fellow parents, and spread the joy of crafting with everyday materials.

  • 10 Homecoming Pose Ideas with Friends

    10 Homecoming Pose Ideas with Friends

    Homecoming is one of the most memorable events of the school year, and capturing the perfect photos with your friends is a must. Whether you’re posing before the dance, during the game, or at an after-party, the right poses can make your pictures stand out. From classic group shots to creative and fun arrangements, these homecoming pose ideas with friends will help you create stunning, share-worthy memories.

    In this guide, we’ll explore 10 unique and creative homecoming poses that work for groups of all sizes. Whether you’re going for elegant, playful, or candid vibes, these ideas will ensure your photos look polished and authentic. Plus, we’ll provide tips on lighting, angles, and expressions to elevate your shots even further. Get ready to strike a pose and make this homecoming unforgettable!

    1. The Classic Group Hug

    1
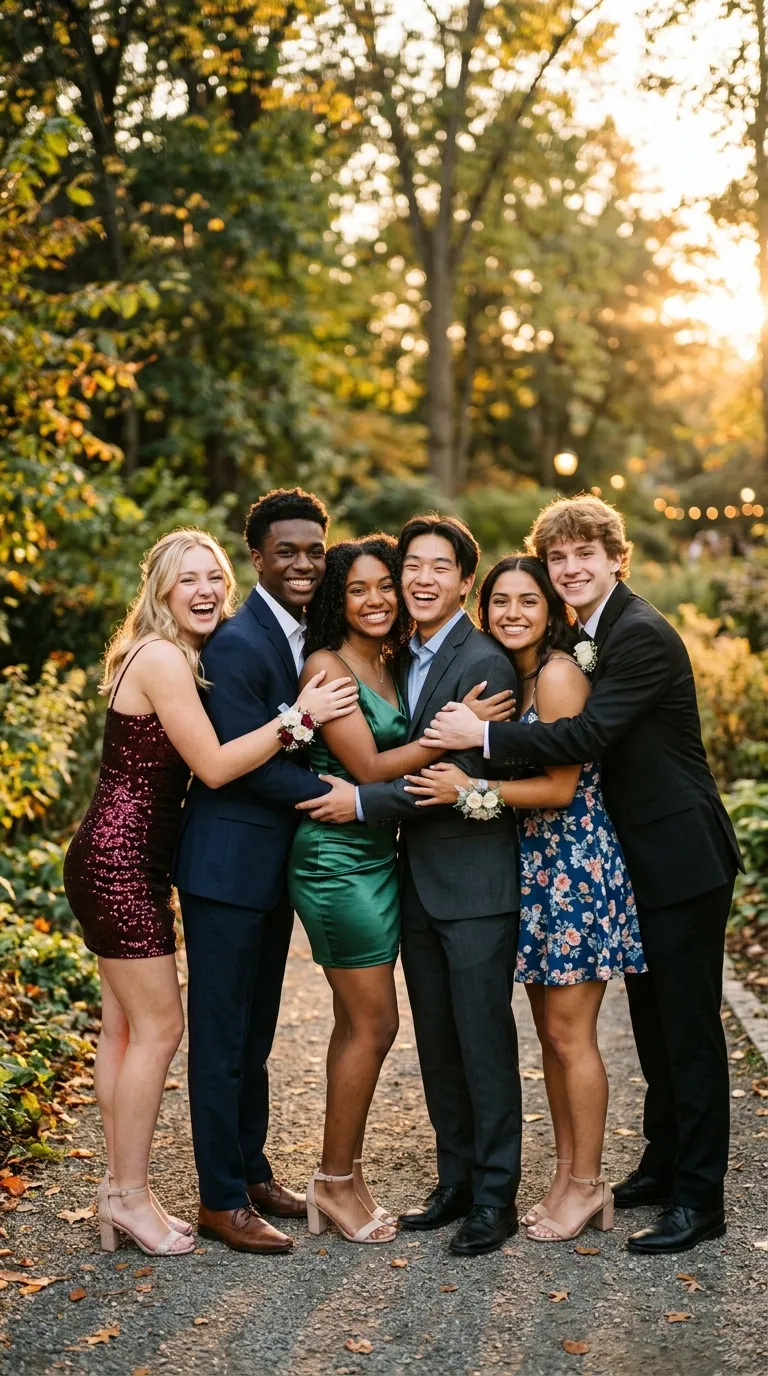
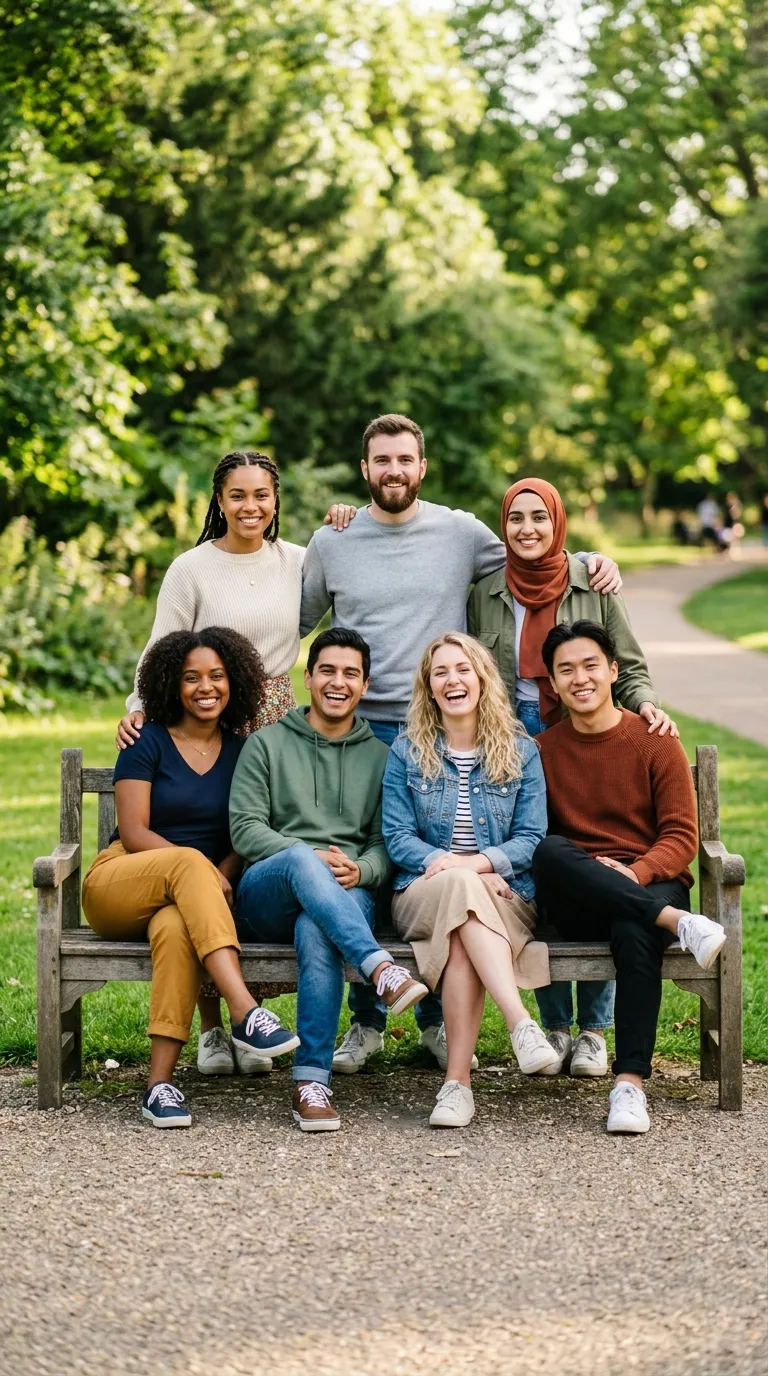
    The classic group hug is a timeless homecoming pose that radiates warmth and friendship. This pose works perfectly for both small and large groups, making everyone feel included. To execute it, have everyone stand close together, with arms wrapped around each other’s shoulders or waists. Lean in slightly toward the center to create a cohesive, tightly-knit look.

    For the best results, ensure that everyone’s faces are visible. Avoid having anyone’s head blocked by another person. A slight tilt of the head or a big smile can add energy to the shot. This pose is ideal for pre-dance photos or casual snapshots with your closest friends. The simplicity of the group hug makes it a go-to for capturing genuine connections.

    Pro tip: Ask the photographer to take the shot from a slightly elevated angle to avoid unflattering perspectives. Natural lighting, such as during golden hour, will enhance the warmth of the moment.

    2. The Back-to-Back Circle

    2
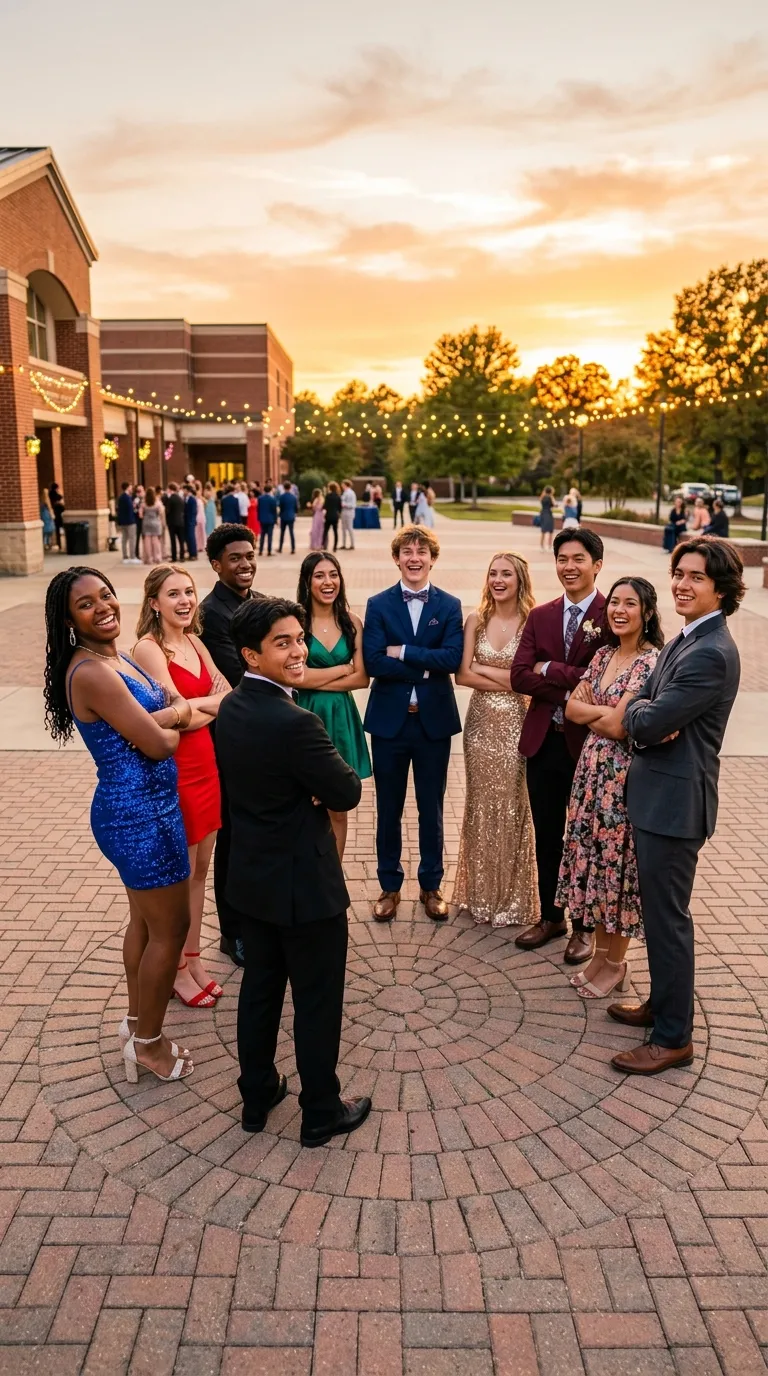
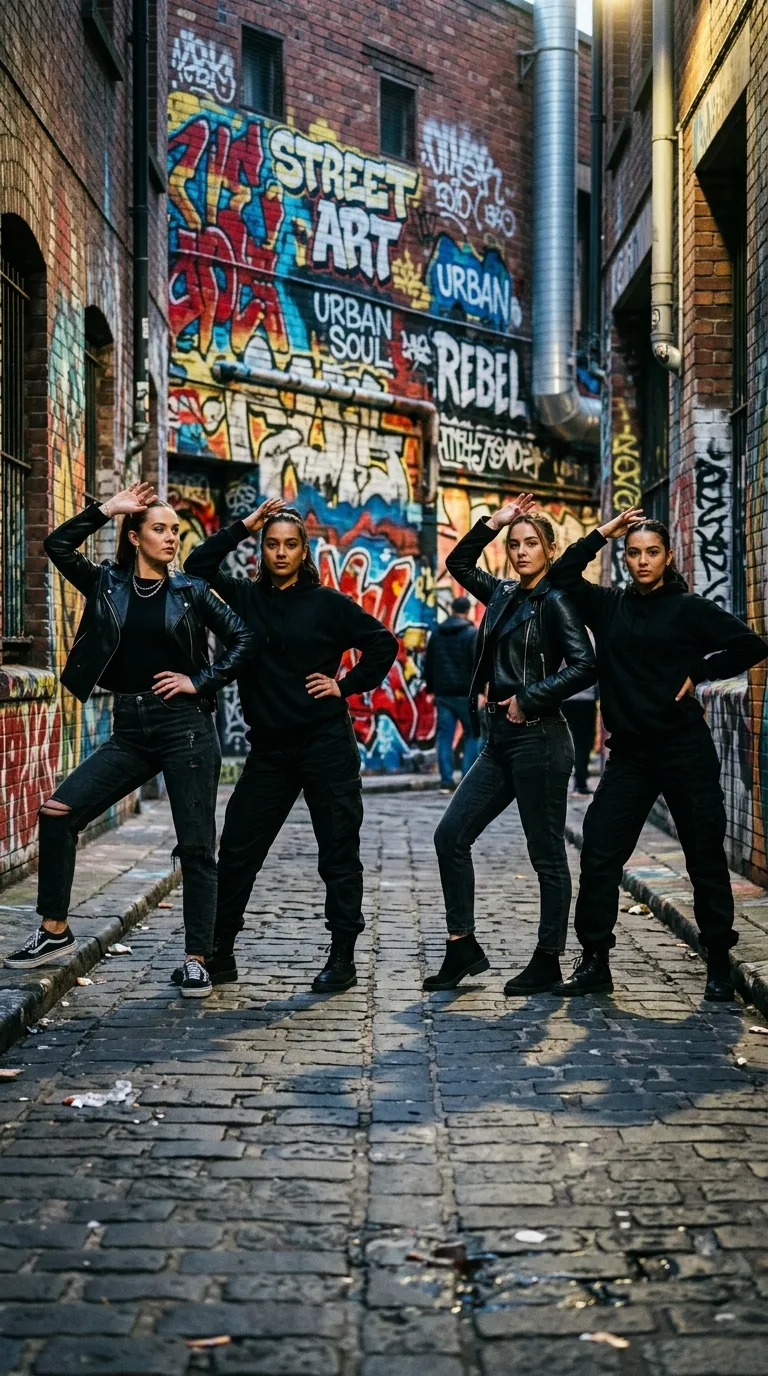
    If you want a fun and dynamic pose for homecoming pictures with friends, try the back-to-back circle. This pose involves everyone standing in a circle with their backs to the center, looking over their shoulders toward the camera. It creates a sense of unity while keeping each person’s face visible.

    To make it more interesting, have everyone strike a similar pose, such as crossing their arms or placing their hands on their hips. This pose works especially well for larger groups and adds a playful, coordinated vibe to your photos. It’s also a great way to show off the back details of your outfits, such as unique dresses or suits.

    For an extra touch, have a few people in the circle turn slightly to the side to break up the symmetry. This small adjustment can make the pose feel more natural and less staged. A wide-angle lens can help capture the entire group without distortion.

    3. The Jump Shot

    3
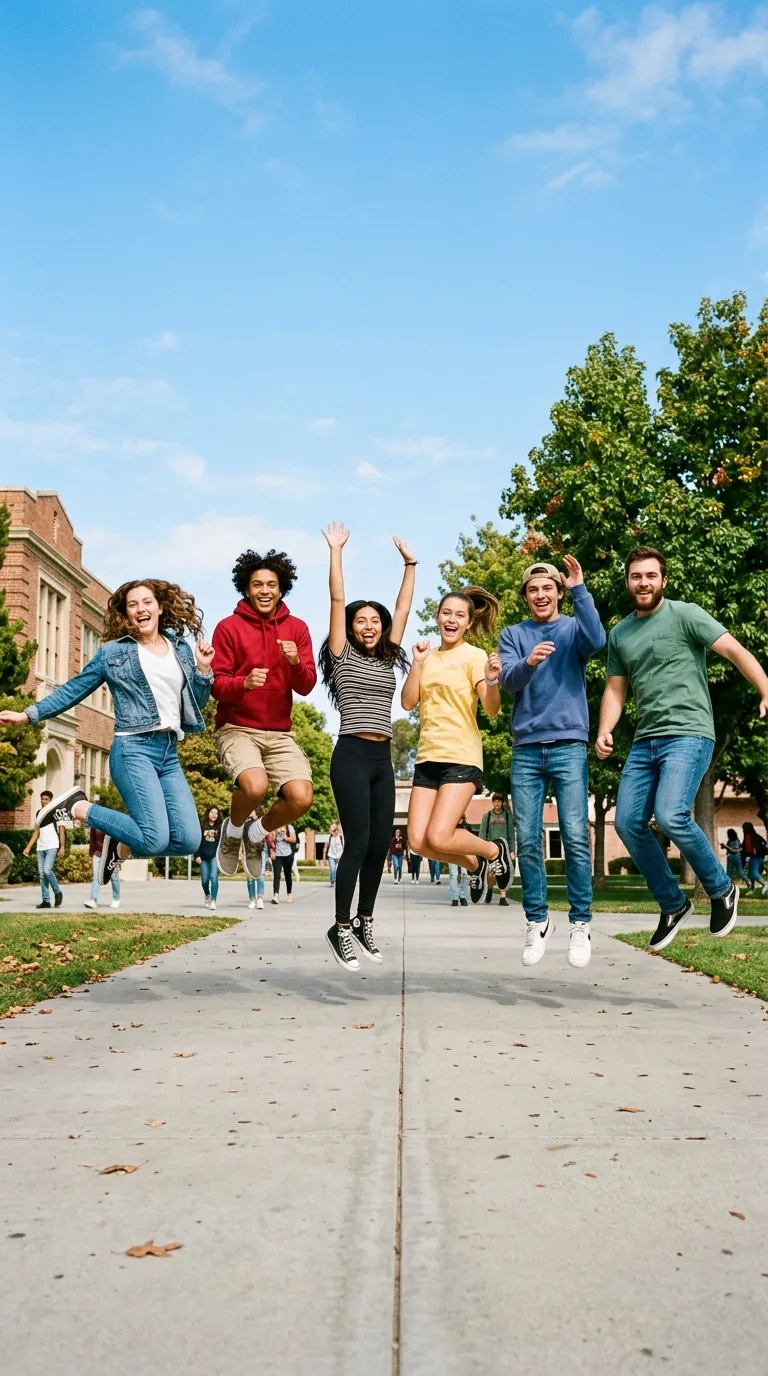
    Nothing says fun and excitement like a jump shot! This energetic homecoming pose is perfect for capturing the joy and anticipation of the event. To get the timing right, have everyone crouch down first and then jump on the count of three. The photographer should take a burst of shots to ensure at least one perfect capture.

    The key to a great jump shot is synchronization. Make sure everyone jumps at the same time and keeps their legs and arms in similar positions. Encourage big smiles and maybe even a few peace signs or other hand gestures. This pose works best outdoors where there’s plenty of space to move freely.

    Keep in mind that jump shots require good lighting and a fast shutter speed to avoid blurriness. If you’re indoors, ensure the lighting is bright enough to freeze the motion. This pose is a fantastic way to showcase your group’s energy and spirit.

    4. The V-Formation

    4
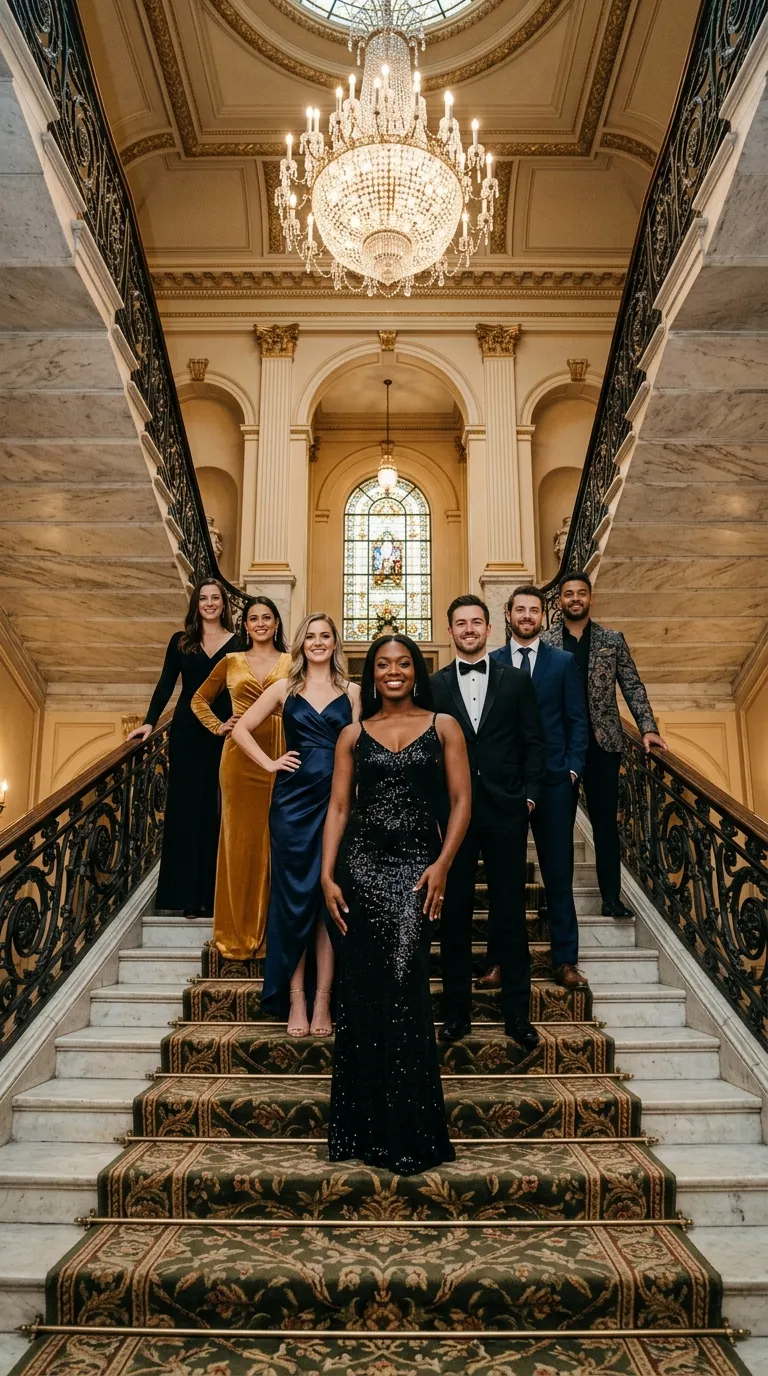
    For a polished and symmetrical look, the V-formation is an excellent choice among homecoming photo poses with friends. This pose involves arranging your group in a V shape, with one person at the front and the others fanning out behind them. It’s a great way to highlight a leader or simply create a balanced composition.

    The person at the front of the V can stand confidently with their hands on their hips or arms crossed, while the people behind can mirror their pose or add their own flair. This formation works particularly well for groups of 5-10 people and can be adapted for both formal and casual settings.

    To enhance the V-formation, consider using props like homecoming mums, corsages, or signs. A low angle shot can make the group look even more impressive, emphasizing the shape and depth of the formation. This pose is ideal for pre-dance photos or school spirit shots.

    5. The Piggyback Ride

    5
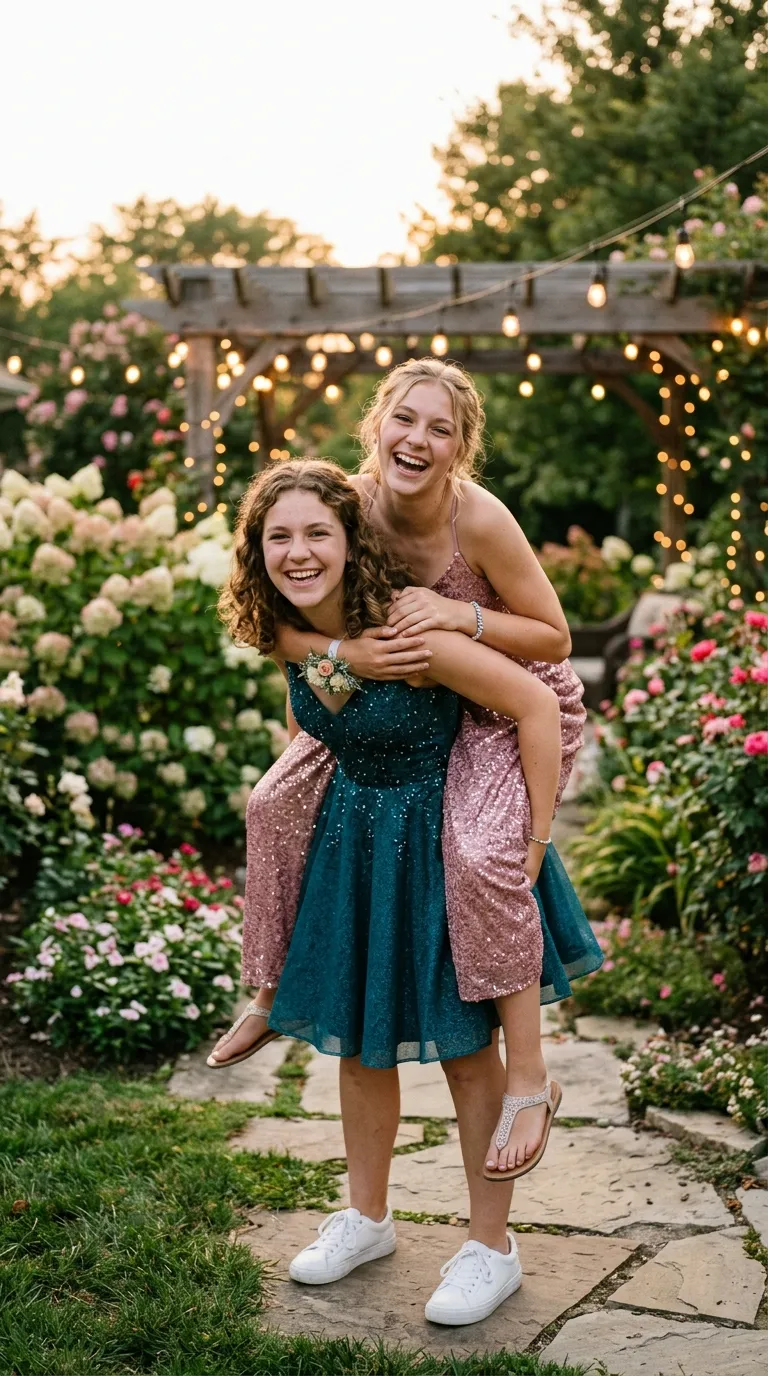
    Add a playful and personal touch to your photos with the piggyback ride pose. This cute homecoming pose is perfect for pairs or small groups and adds a sense of fun and closeness. One person can give another a piggyback ride while both look at the camera with big smiles. For groups, you can have multiple pairs doing the same thing side by side.

    This pose works especially well for couples or best friends, but it can also be a fun way to mix up a larger group shot. Just make sure everyone is comfortable and safe—no one wants a tumble right before the dance! The piggyback pose is a great way to show off your personalities and create a lighthearted, memorable image.

    For the best results, have the person giving the ride stand slightly to the side so that both faces are clearly visible. The photographer can capture this from a low angle to emphasize the height and playfulness of the pose.

    6. The Candlelight Gather

    6
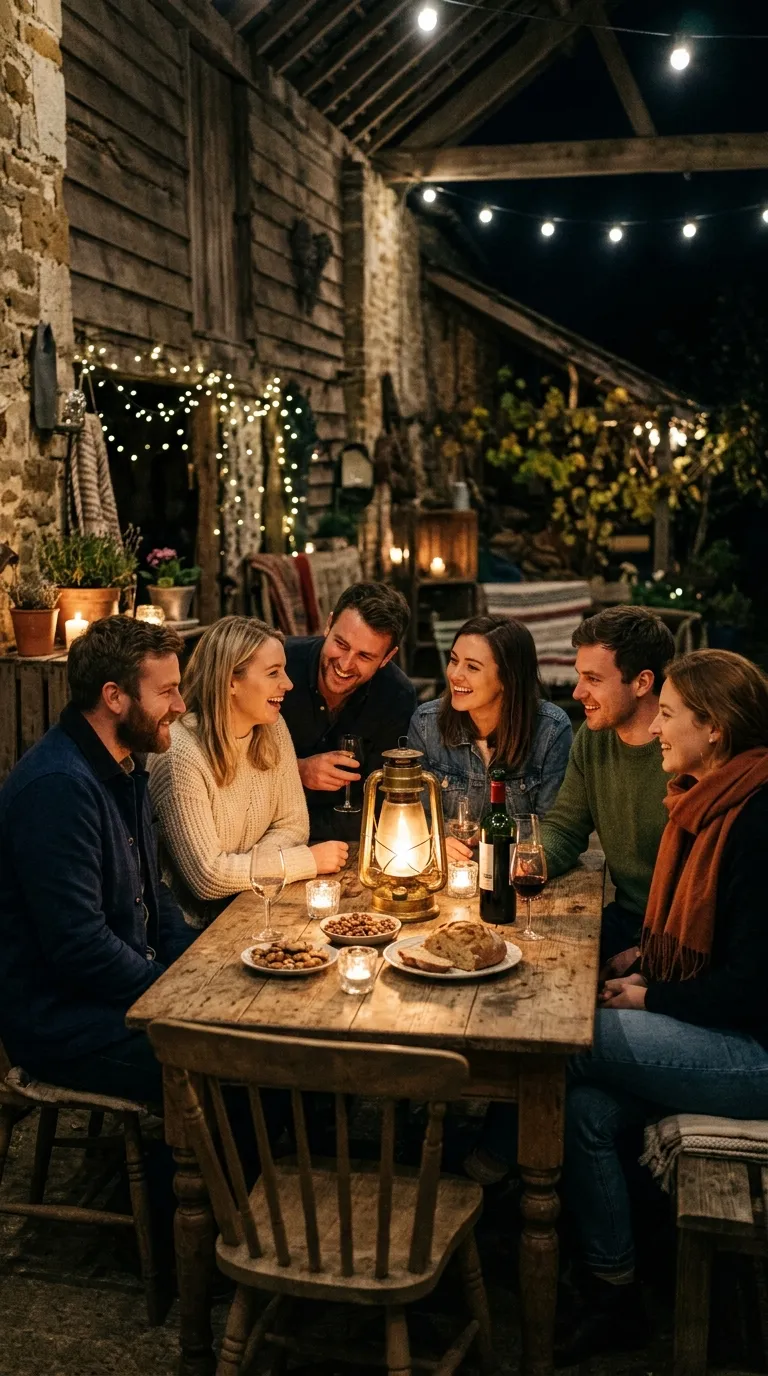
    For a more romantic or dramatic effect, try the candlelight gather pose. This elegant homecoming pose is perfect for evening photos, especially if you’re at an outdoor event or a dimly lit venue. Have your group gather closely around a central point, such as a candle, lantern, or even a bonfire if you’re at a post-dance gathering.

    Everyone can hold their own candles or simply lean in toward the center as if sharing a secret. The soft, warm glow of the candles will create a magical atmosphere in your photos. This pose works well for both small and medium-sized groups and adds a touch of sophistication to your images.

    To enhance the effect, use a camera with good low-light capabilities or a slow shutter speed to capture the candlelight beautifully. Encourage everyone to keep their expressions soft and serene to match the mood of the pose.

    7. The Sit and Stand Combo

    7
    Create depth and variety in your group photos with the sit and stand combo. This versatile homecoming pose involves some people sitting on the ground or a bench while others stand behind them. It’s a great way to ensure everyone is visible, regardless of height differences.

    For example, the front row can sit with their legs crossed or stretched out, while the back row stands with their hands on the shoulders of the people in front. This pose allows for a lot of creativity—you can mix and match sitting and standing positions to create an interesting composition.

    The sit and stand combo works well for both indoor and outdoor settings. If you’re outside, consider using a park bench or steps as a natural prop. This pose is also a great opportunity to show off your shoes, so make sure everyone’s footwear is on point!

    8. The Mirror Pose

    8
    For a stylish and symmetrical look, try the mirror pose. This creative homecoming pose involves two or more people mirroring each other’s poses on either side of the frame. For example, if one person has their hand on their hip, the person beside them does the same on the opposite side. This creates a balanced and visually appealing image.

    The mirror pose works well for pairs or larger groups, as long as everyone is in sync. It’s a great way to highlight matching or complementary outfits, such as coordinated dresses or suits. This pose also adds a sense of harmony and intentionality to your photos.

    To make the mirror pose even more striking, use a symmetrical background, such as a hallway, staircase, or architectural feature. The photographer can center the shot perfectly to emphasize the symmetry of the pose.

    9. The Action Shot

    9
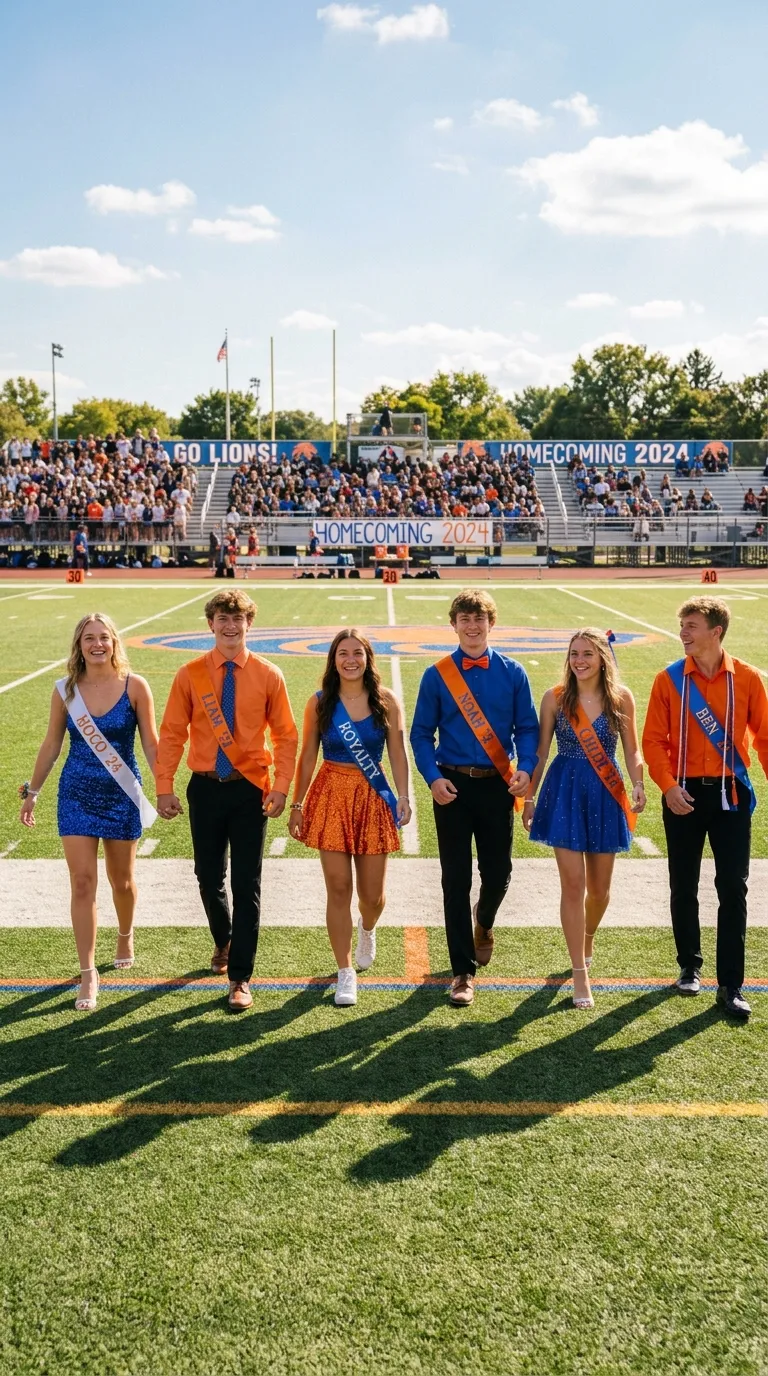
    Capture the energy and movement of homecoming with an action shot. This dynamic pose idea involves everyone in the group doing something active, such as walking, twirling, or throwing confetti. Action shots are a fantastic way to create candid and lively photos that feel spontaneous and fun.

    For example, your group could walk toward the camera in a line, holding hands or swinging their arms. Alternatively, you could have everyone twirl in their dresses or suits for a playful, spinning effect. If you have props like pom-poms or signs, incorporate them into the action for added flair.

    To get the best action shots, use a fast shutter speed to freeze the motion. The photographer should take multiple shots in quick succession to capture the perfect moment. This pose is ideal for outdoor settings where there’s plenty of space to move around.

    10. The Confetti Toss

    10
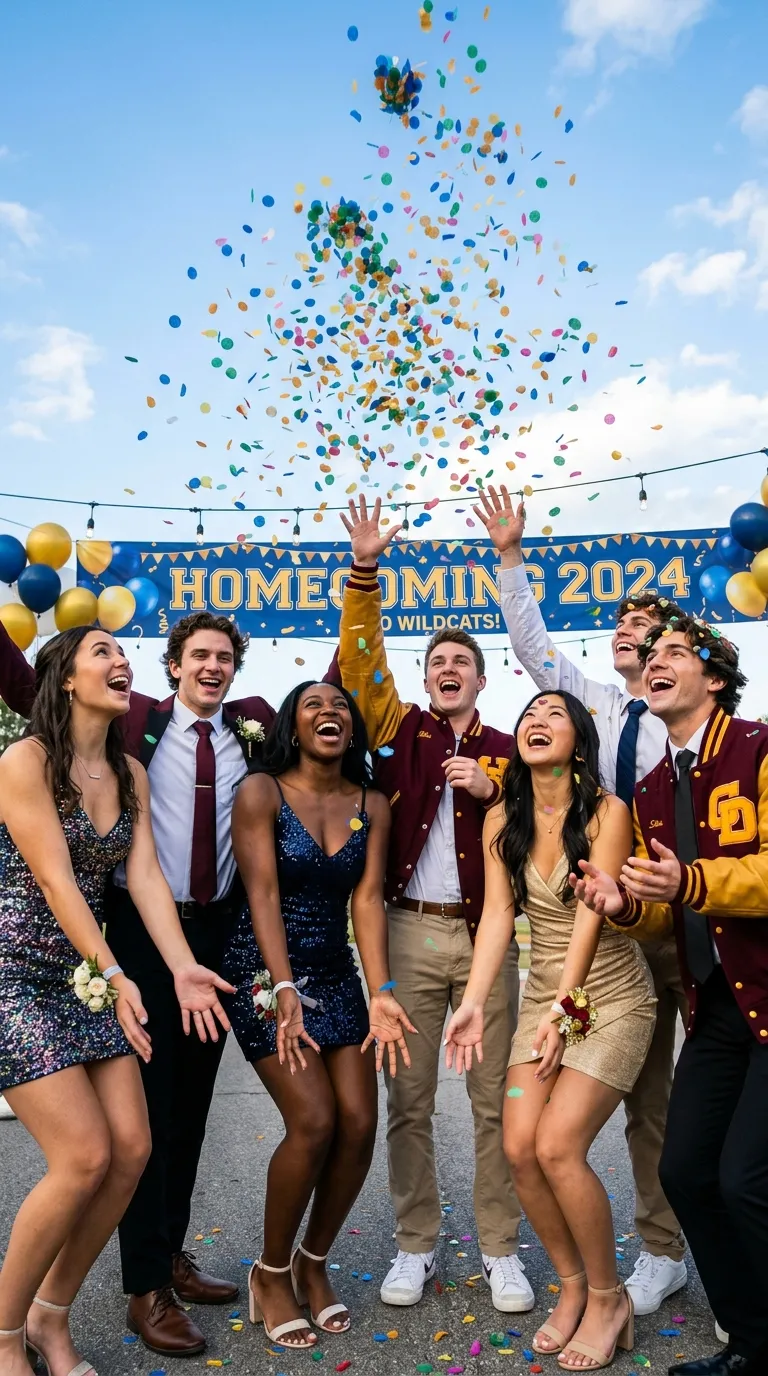
    End your homecoming photo session on a high note with the confetti toss. This festive pose is perfect for celebrating the occasion and adding a pop of color and excitement to your images. Have everyone gather closely together and toss a handful of confetti into the air at the same time.

    For the best results, use biodegradable confetti to avoid harming the environment. You can also use alternatives like flower petals or colorful paper shreds. Make sure everyone looks up at the confetti as they toss it to capture their reactions naturally.

    The confetti toss works well as a final shot of the day, symbolizing the joy and memories you’ve created. A wide-angle lens can help capture the full extent of the confetti and the group’s expressions. This pose is sure to be a hit on social media and in your photo albums!
    Conclusion

    Homecoming is all about celebrating friendship, school spirit, and unforgettable moments. With these 10 homecoming pose ideas with friends, you’ll have plenty of inspiration to create stunning photos that capture the essence of the event. From classic group hugs to dynamic action shots, each pose offers a unique way to showcase your group’s personality and connection.

    Remember, the key to great photos is to have fun and be yourselves. Don’t be afraid to experiment with different poses, angles, and expressions. The more natural and relaxed you feel, the better your photos will turn out. And don’t forget to consider lighting, background, and props to enhance the overall look of your images.

    Whether you’re preparing for the dance, cheering at the game, or celebrating afterward, these poses will help you create memories that last a lifetime. So grab your friends, strike a pose, and make this homecoming one to remember!
  • 10 Cute Chunky Yarn Pumpkin Crochet Ideas For Fall Decor

    10 Cute Chunky Yarn Pumpkin Crochet Ideas For Fall Decor

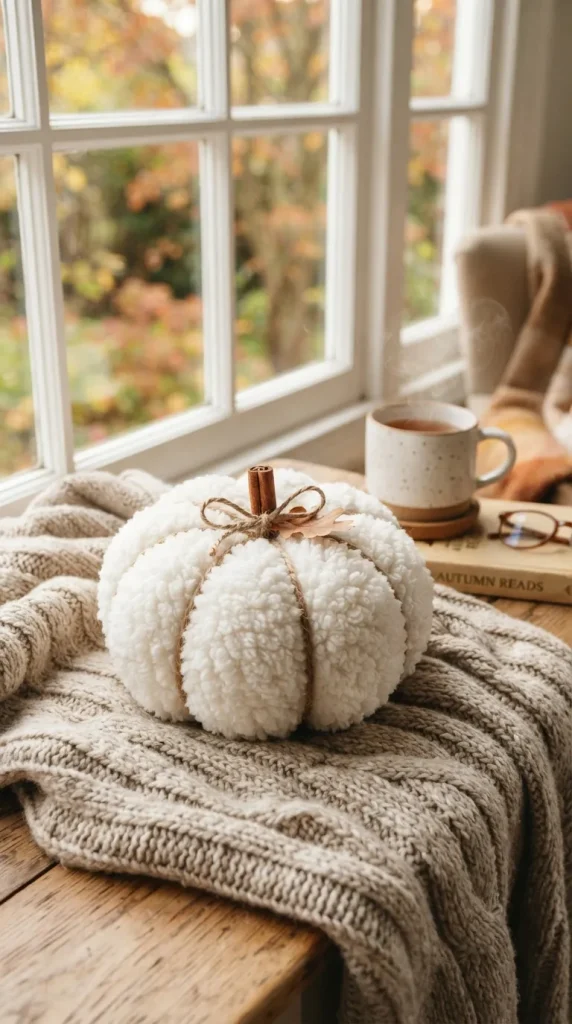
    Handcrafted crochet pumpkins made with ultra-thick, plush fibers instantly transform a living space into a warm autumn haven. Working with chunky or jumbo yarn (weight categories 6 and 7) makes these projects exceptionally fast to complete, yielding rich textural depth and cozy volume that delicate yarns simply cannot match. Whether styled across a rustic mantel, clustered on an entryway console, or stacked inside a woven basket, these ten creative chunky yarn crochet pumpkin ideas bring handmade charm to modern fall decor.

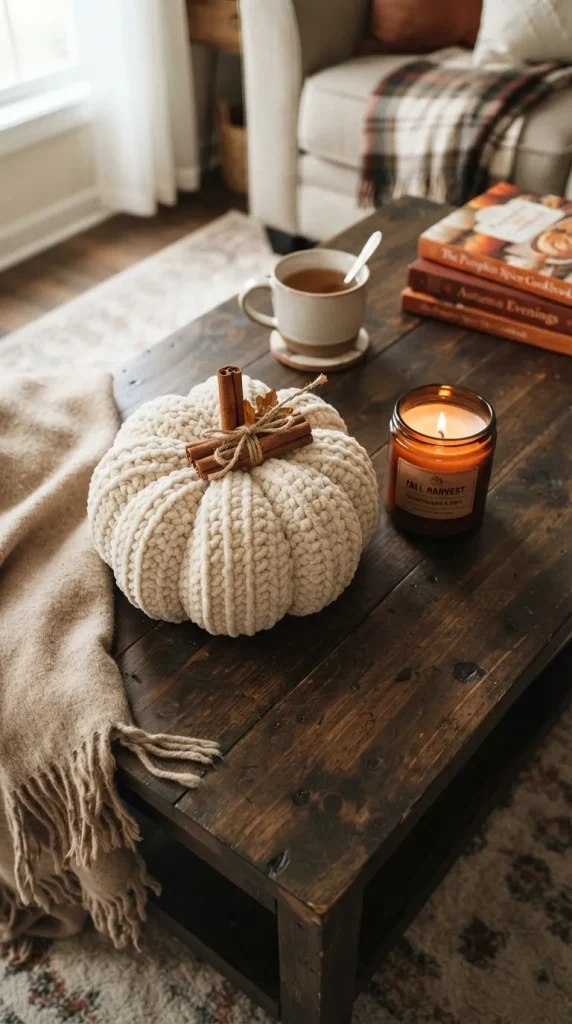
    1. Jumbo Chenille Ribbed Pumpkin with Cinnamon Stick Stems

    Chenille yarn produces an irresistibly soft, velvet-like surface that catches light beautifully. By working simple single or half-double crochet stitches into the back loops only, you create deep, accordion-style ridges that mimic natural pumpkin segments. Once the rectangle is seamed and cinched, top the center with three bundled real cinnamon sticks tied with natural jute twine. The aromatic cinnamon introduces a subtle autumnal fragrance to your tabletop, while the plush ridges add tactile luxury to open shelving or coffee tables.

    2. Minimalist Ivory Bouclé Mini Pumpkins

    Bouclé yarn, characterized by its looped, curly texture, gives standard crochet pumpkins a modern organic look reminiscent of shearling. Worked in compact rounds using single crochet, these palm-sized pumpkins require no aggressive ribbing; the inherent texture of the yarn creates an artisanal, cloud-like silhouette. Finish them with slim, dried birch twigs for stems and display them in groups of five across a low wooden dough bowl alongside dried eucalyptus sprigs.

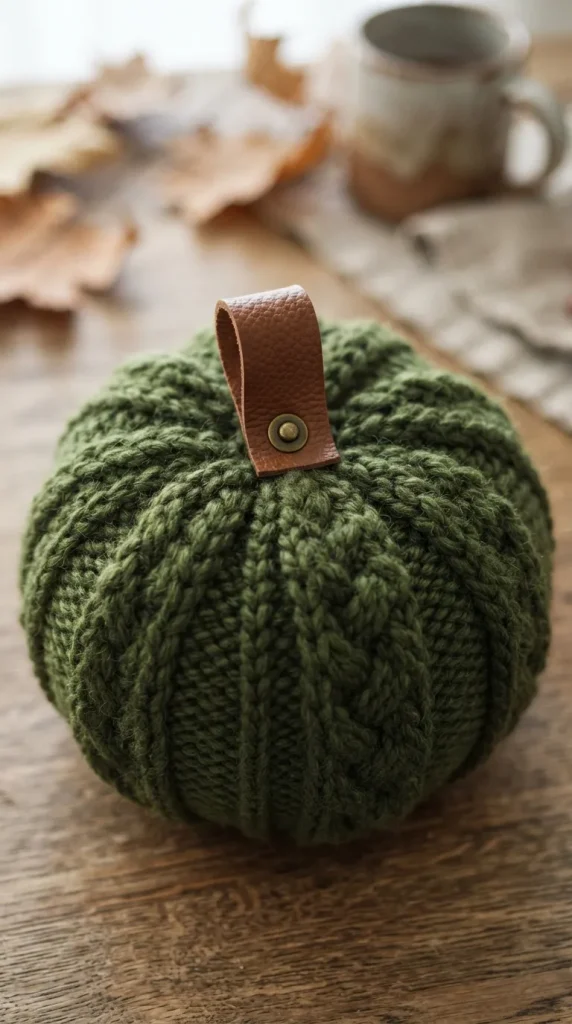
    3. Rustic Moss Green Cable-Stitch Gourds

    Break away from standard orange palettes by using a deep moss or olive green super-bulky wool blend. Incorporating front-post and back-post crochet stitches creates raised braided cables winding vertically up the pumpkin. This intricate stitch pattern adds heritage farmhouse elegance. Finish the piece with a dark faux-leather strap folded into a loop as a modern stem, securing it with an antique brass rivet. These look striking paired alongside white ceramic pottery and brass candleholders.

    4. Modern Velvet Pumpkin with Gilded Metallic Stems

    For an upscale, moody autumnal interior, opt for a micro-velvet chunky yarn in deep charcoal, midnight navy, or rich aubergine. Crochet a tight, firm sphere to ensure the polyfill stuffing remains completely hidden. Instead of rustic wooden elements, hot-glue a cast-metal or resin stem finished in brushed antique gold to the crown. The contrast between deep matte velvet and gleaming metallic hardware adds an instant touch of modern luxury to a dining room tablescape.

    5. Sunset Ombré Chunky Wool Stack

    Capture the full gradient of fall foliage by crocheting a graduated three-tier pumpkin stack. Create three distinct sizes—small, medium, and large—using chunky wool roving in mustard gold, burnt sienna, and rich terracotta. After cinching each pumpkin with strong contrasting embroidery floss to define pronounced lobes, stack them vertically, securing the cores with a central dowel. Position this substantial piece on a covered porch bench or beside an indoor fireplace hearth.

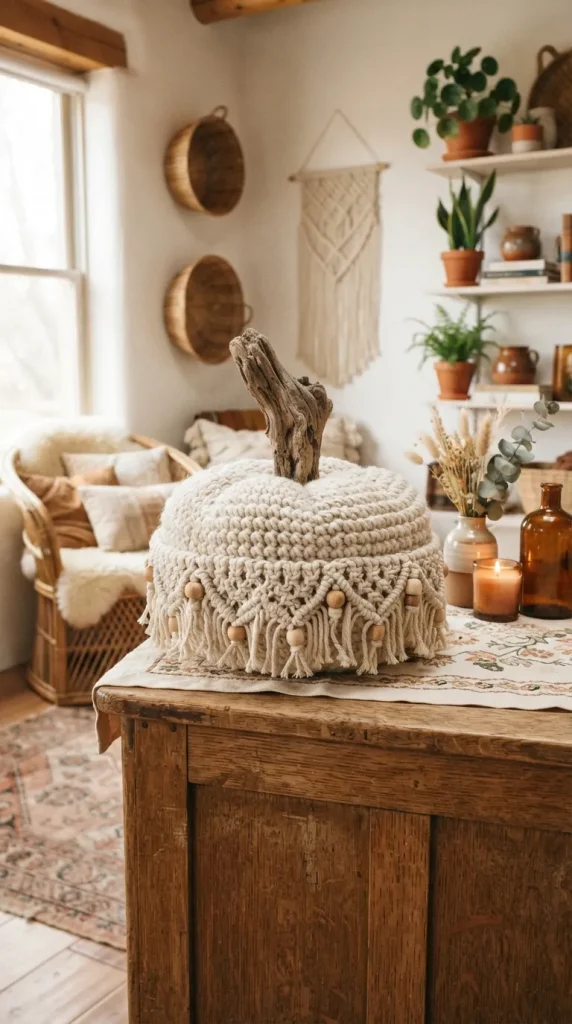
    6. Boho Fringe and Tassel Pumpkin

    Bring a playful bohemian touch to your harvest decor by incorporating natural cotton rope or thick unspun roving yarn in an unbleached linen tone. Work the body in a relaxed moss stitch for light surface texture. Along the lower hem or gathered around a driftwood stem, integrate short strands of raw fringe and macramé-style wooden beads. This relaxed aesthetic fits seamlessly into neutral, coastal, or eclectic bohemian interiors.

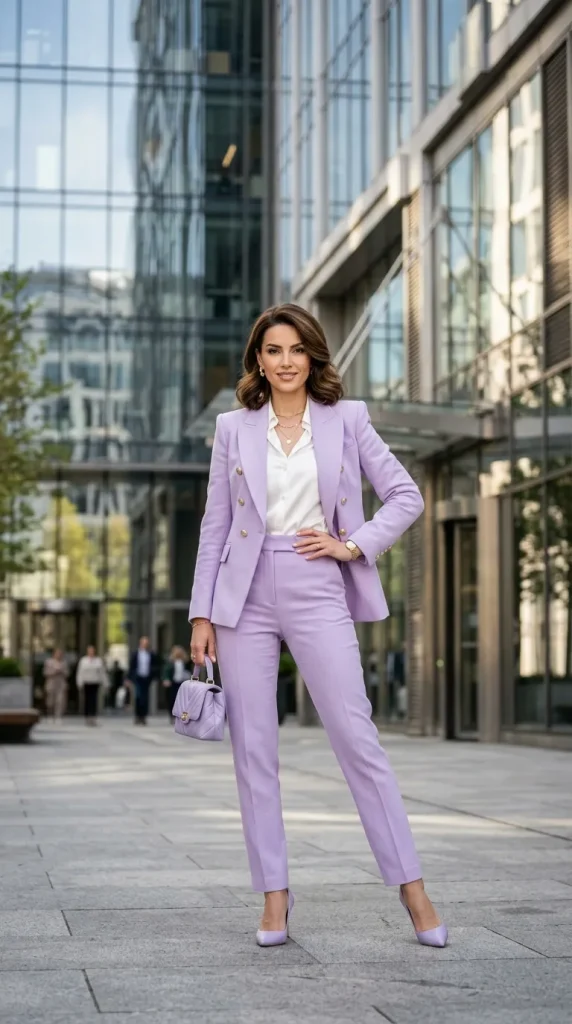
    7. Deep Terracotta Waffle-Stitch Floor Cushion Pumpkin

    Chunky yarn scales up effortlessly into functional statement furniture. Using a 25mm crochet hook and jumbo tubular yarn, crochet an oversized cylinder using the waffle stitch to create deep, geometric pockets across the surface. Stuff firmly with dense upholstery-grade foam chips or fiberfill before cinching tightly into a wide, flattened gourd shape. Add a thick, braided macramé stem to complete a cozy floor pouf ideal for reading nooks or fireside lounging.

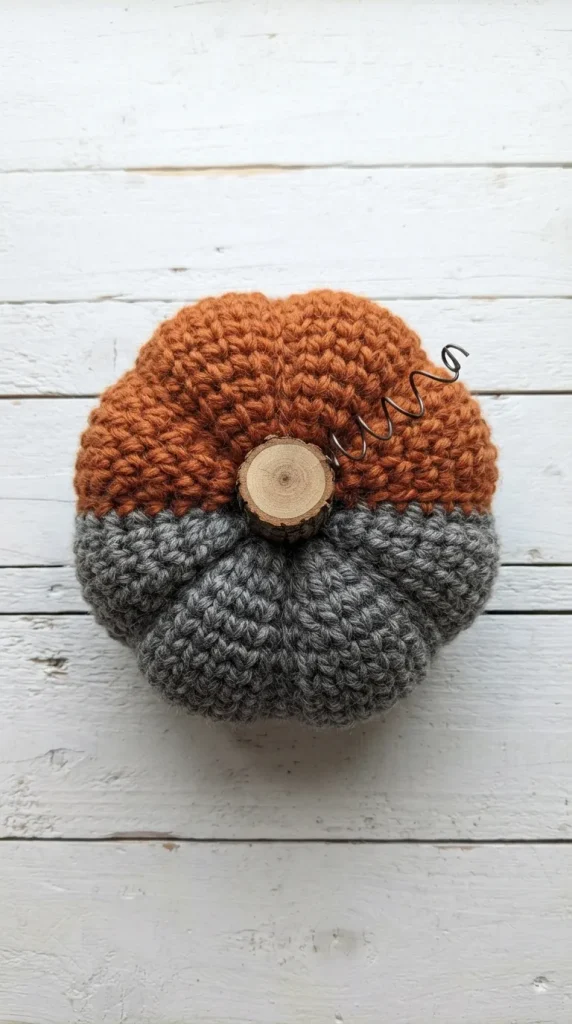
    8. Color-Blocked Heather Grey and Rust Farmhouse Pumpkin

    Color-blocking offers a fresh geometric twist on classic seasonal palettes. Split your crochet foundation into clean horizontal or vertical halves, pairing a soft heather-grey wool with a vibrant pumpkin-spice rust. Use standard half-double crochet stitches to keep the transition lines crisp and clean. Top with a slice of natural wood branch and a curled wire tendril to bridge the gap between contemporary colorwork and traditional rustic charm.

    9. Fluffy Sherpa Faux-Fur Pumpkin with Twine Accents

    Faux-fur jumbo yarn hides stitch definition entirely, resulting in an ultra-plush piece that looks like a high-end designer boutique find. Because the fluffy pile obscures complex stitchwork, simple single crochet in the round is all that is required. Once stuffed into a plump sphere, wrap thick brown jute twine tightly around the outside four to six times, pulling inward to shape deep, organic clefts. The rough, earthy twine cuts through the ultra-soft fluff to create an eye-catching interplay of textures.

    10. Pastel Blush and Sage Chunky Trio

    Pastel fall palettes offer a softer alternative to high-contrast autumn tones. Using bulky blanket yarn in soft blush pink, muted sage green, and warm oat cream, crochet a coordinated trio in varying heights and diameters. Shape the segments gently with invisible nylon thread to maintain clean lines, and finish each with a pale, bleached driftwood stem. This soft color story coordinates gracefully with contemporary Scandinavian or modern cottage interior schemes.

    Selecting the right stuffing and structural tension is essential for long-lasting display pieces. Pack your polyfill firmly toward the outer walls to maintain a round profile, leaving slight give in the center if you plan to press the top and bottom together for a flatter, traditional gourd silhouette. Natural elements like dried star anise, real wood stems, and leather accents elevate these handmade textiles into timeless autumn focal points.

  • Top 10 Homecoming Hair Styles That Will Turn Heads

    Top 10 Homecoming Hair Styles That Will Turn Heads

    Homecoming is one of the most exciting events of the school year. It’s a night filled with memories, photos, dancing, and celebrating with friends. While finding the perfect dress often gets most of the attention, your hairstyle can completely transform your overall look and elevate your confidence.

    Many students struggle with choosing the right hairstyle. Should you wear your hair up or down? Should you go for a trendy style or a timeless classic? How can you make sure your hairstyle lasts through hours of dancing and countless photos?

    The good news is that you don’t need to spend hours scrolling through social media searching for inspiration. This guide covers the top 10 homecoming hair styles that will turn heads, complete with styling tips, benefits, and recommendations for different hair types and face shapes.

    Whether you prefer glamorous curls, elegant updos, or modern braids, you’ll find a stunning hairstyle that matches your personality and helps you stand out on homecoming night.

    Why Your Homecoming Hairstyle Matters

    Your hairstyle is more than just a finishing touch. It plays a major role in your overall appearance and confidence.

    A great homecoming hairstyle can:

    • Complement your dress
    • Enhance your facial features
    • Last throughout the evening
    • Look amazing in photos
    • Reflect your personal style
    • Make you feel confident and comfortable

    The best hairstyle is one that balances beauty, comfort, and practicality.

    Quick Comparison Table: Best Homecoming Hairstyles

    HairstyleStyling TimeDifficultyMaintenanceBest For
    Hollywood Waves45-60 minsMediumLowGlamorous looks
    High Ponytail20-30 minsEasyLowModern styles
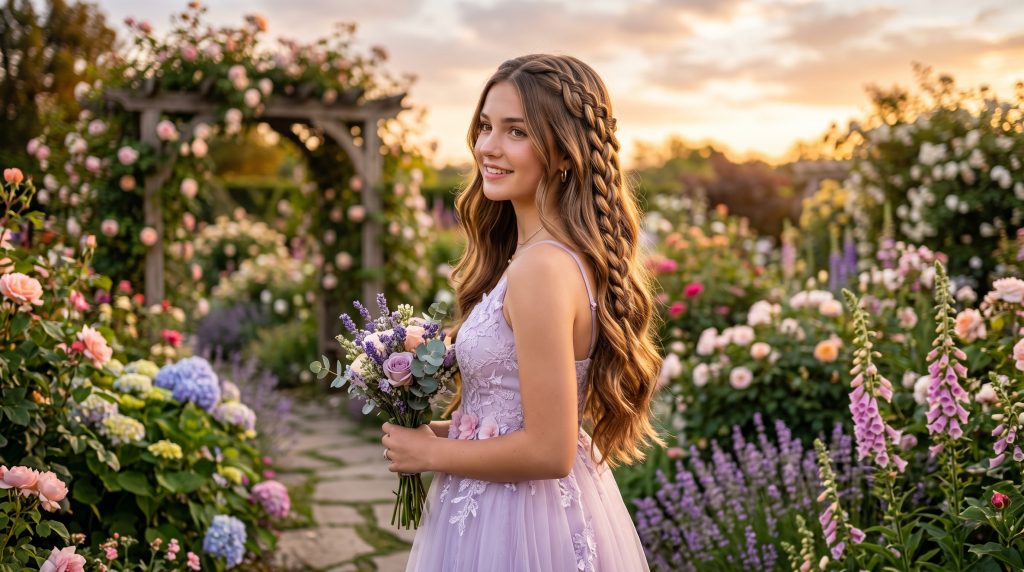
    Braided Crown40-50 minsMediumMediumRomantic looks
    Messy Bun Updo30-45 minsEasyLowElegant dresses
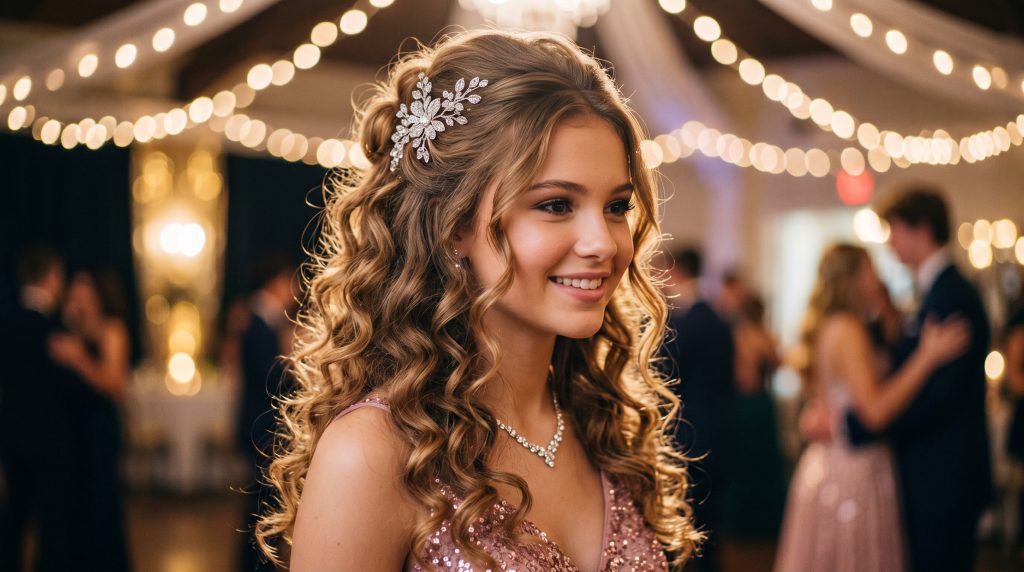
    Half-Up Half-Down Curls35-50 minsEasyLowMost face shapes
    Sleek Low Bun20-35 minsEasyVery LowMinimalist style
    Waterfall Braid35-50 minsMediumMediumLong hair
    Textured Beach Waves25-40 minsEasyLowCasual elegance
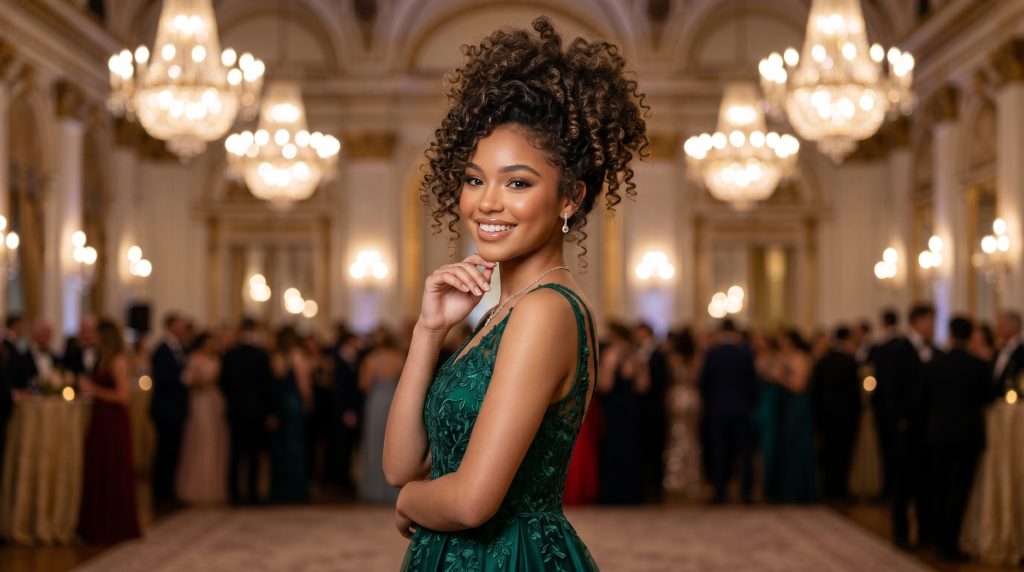
    Curly Updo45-60 minsMediumMediumNaturally curly hair
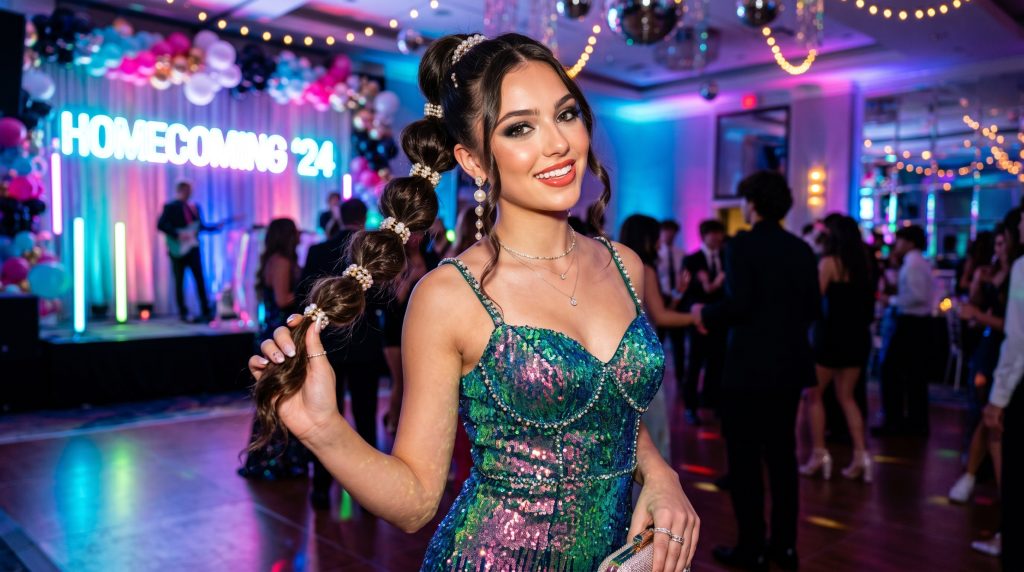
    Bubble Ponytail20-30 minsEasyVery LowTrendy fashion-forward looks

    1. Hollywood Waves

    Description

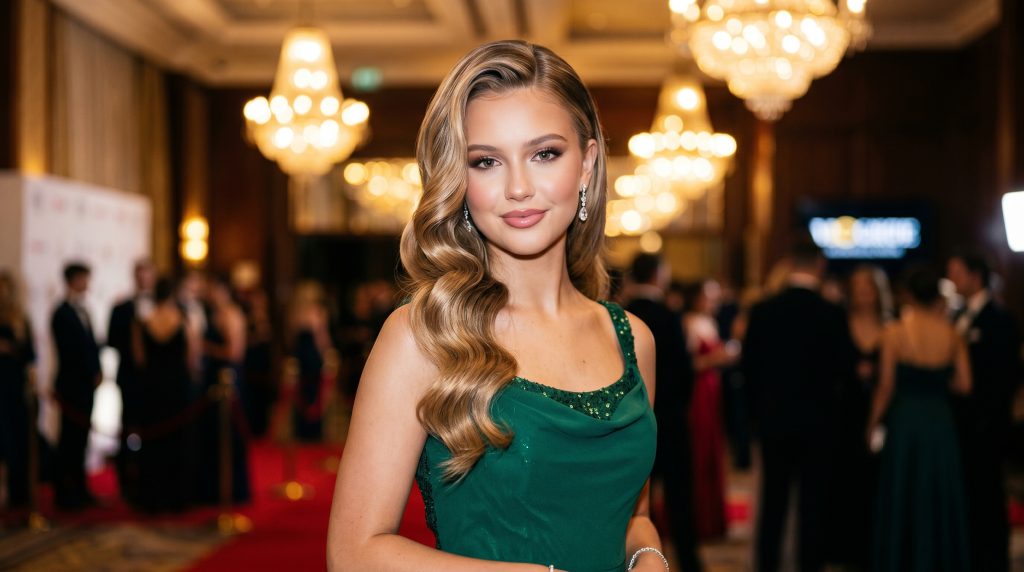
    Hollywood waves are timeless, glamorous, and effortlessly elegant. This classic hairstyle features smooth, polished waves that create a luxurious red-carpet appearance.

    Who It Suits Best

    • Medium to long hair
    • Oval face shapes
    • Heart-shaped faces
    • Formal and elegant dresses

    Styling Tips

    • Use a large-barrel curling iron.
    • Curl all sections in the same direction.
    • Brush curls gently after cooling.
    • Finish with shine spray.

    Benefits

    • Creates a sophisticated appearance
    • Photographs beautifully
    • Complements almost any dress style
    • Never goes out of fashion

    2. High Voluminous Ponytail

    Description

    The high ponytail has evolved from a casual everyday look into one of the most fashionable homecoming hairstyles. With volume at the crown and soft curls in the ponytail, it creates a youthful yet polished appearance.

    Who It Suits Best

    • Round face shapes
    • Medium to long hair
    • Trend-conscious students
    • Strapless dresses

    Styling Tips

    • Tease the crown slightly.
    • Wrap a hair section around the elastic.
    • Add soft curls for movement.
    • Use texturizing spray for volume.

    Benefits

    • Keeps hair off the face
    • Comfortable for dancing
    • Looks modern and stylish
    • Easy to maintain throughout the night

    3. Braided Crown

    Description

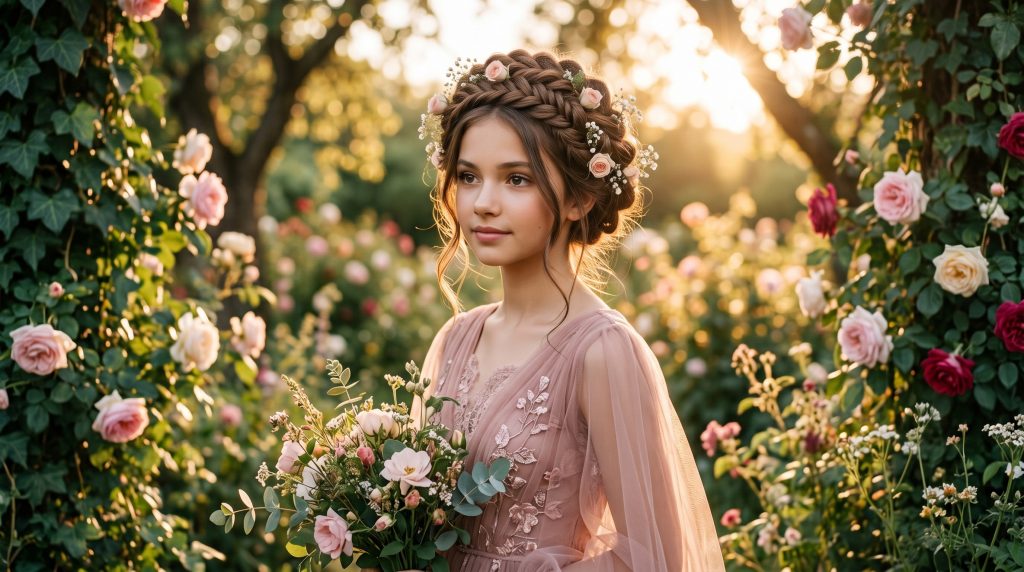
    The braided crown creates a dreamy, princess-inspired look. Braids wrap around the head like a crown, creating a romantic and elegant hairstyle.

    Who It Suits Best

    • Long hair
    • Wavy hair textures
    • Bohemian-inspired outfits
    • Outdoor events

    Styling Tips

    • Loosen the braid slightly for softness.
    • Pull out face-framing strands.
    • Add small floral accessories if desired.
    • Secure with hidden bobby pins.

    Benefits

    • Unique and eye-catching
    • Stays secure all evening
    • Adds texture and dimension
    • Looks beautiful from every angle

    4. Messy Bun Updo

    Description

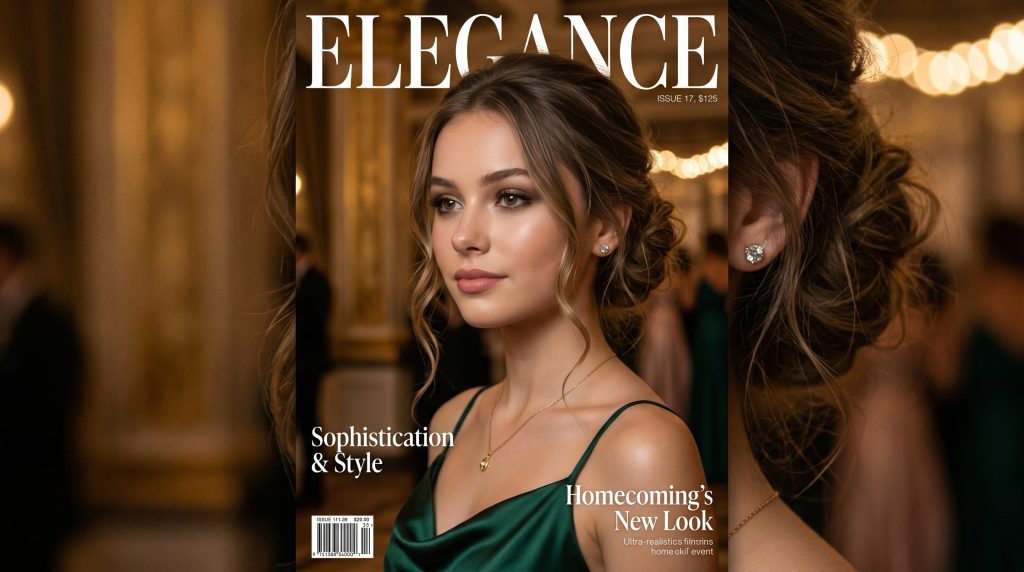
    The messy bun updo combines elegance with effortless charm. This hairstyle features a loosely gathered bun with soft tendrils around the face.

    Who It Suits Best

    • All face shapes
    • Medium to long hair
    • Formal dresses
    • Minimalist fashion styles

    Styling Tips

    • Create texture before styling.
    • Avoid making the bun too perfect.
    • Leave soft pieces around the face.
    • Use flexible-hold hairspray.

    Benefits

    • Sophisticated yet relaxed
    • Extremely comfortable
    • Highlights earrings and makeup
    • Suitable for nearly every dress style

    5. Half-Up Half-Down Curls

    Description

    This versatile hairstyle combines the elegance of an updo with the beauty of flowing curls. The top section is pinned back while the remaining hair cascades down in soft curls.

    Who It Suits Best

    • Nearly all hair types
    • Most face shapes
    • Medium to long hair
    • Classic homecoming looks

    Styling Tips

    • Add volume at the crown.
    • Use loose curls for softness.
    • Incorporate small braids for detail.
    • Secure with decorative pins.

    Benefits

    • Offers the best of both worlds
    • Keeps hair out of the face
    • Works with various dress styles
    • Highly customizable

    6. Sleek Low Bun

    Description

    For those who love sophistication, the sleek low bun is an excellent choice. This clean and polished hairstyle exudes confidence and elegance.

    Who It Suits Best

    • Straight hair
    • Oval face shapes
    • Modern dresses
    • Minimalist aesthetics

    Styling Tips

    • Use smoothing serum.
    • Create a clean center part.
    • Secure tightly at the nape.
    • Finish with shine spray.

    Benefits

    • Looks extremely polished
    • Requires minimal touch-ups
    • Perfect for statement accessories
    • Timeless and elegant

    7. Waterfall Braid

    Description

    The waterfall braid creates a cascading effect where strands flow through the braid like a waterfall. It is intricate yet feminine.

    Who It Suits Best

    • Long hair
    • Thick hair
    • Romantic dress styles
    • Soft, feminine looks

    Styling Tips

    • Curl hair beforehand.
    • Keep braid tension consistent.
    • Use lightweight hairspray.
    • Practice before event day.

    Benefits

    • Unique visual appeal
    • Creates movement and texture
    • Looks stunning in photos
    • Adds elegance without being overly formal

    8. Textured Beach Waves

    Description

    Beach waves offer effortless beauty and modern sophistication. They create natural movement while maintaining a polished appearance.

    Who It Suits Best

    • All hair lengths
    • Casual-chic dresses
    • Modern fashion styles
    • Fine or medium hair

    Styling Tips

    • Alternate curl directions.
    • Use sea salt spray.
    • Avoid over-brushing.
    • Finish with texture spray.

    Benefits

    • Easy to create
    • Low maintenance
    • Trendy and youthful
    • Works with nearly any outfit

    9. Curly Updo

    Description

    A curly updo embraces natural texture while creating a refined formal style. Curls are pinned strategically to create volume and dimension.

    Who It Suits Best

    • Naturally curly hair
    • Thick hair
    • Formal gowns
    • Statement makeup looks

    Styling Tips

    • Define curls beforehand.
    • Use moisturizing products.
    • Pin curls loosely for volume.
    • Finish with anti-frizz spray.

    Benefits

    • Celebrates natural texture
    • Creates dramatic volume
    • Unique and personalized
    • Long-lasting style

    10. Bubble Ponytail

    Description

    The bubble ponytail is one of the trendiest homecoming hairstyles. Hair ties placed at intervals along the ponytail create stylish “bubble” sections.

    Who It Suits Best

    • Long hair
    • Fashion-forward individuals
    • Modern dresses
    • Trend lovers

    Styling Tips

    • Space elastics evenly.
    • Gently pull sections outward.
    • Add accessories for extra flair.
    • Smooth the crown area.

    Benefits

    • Unique and modern
    • Easy to create
    • Stays secure all night
    • Perfect for social media-worthy photos

    Expert Tips for the Perfect Homecoming Hair

    Professional stylists recommend preparing your hair well before the event.

    1. Schedule Hair Prep Early

    Avoid experimenting with new products on homecoming day.

    2. Wash Hair Strategically

    Hair that is one day old often holds styles better than freshly washed hair.

    3. Use Heat Protection

    Always apply a heat protectant before curling or straightening.

    4. Bring Emergency Supplies

    Pack:

    • Bobby pins
    • Mini hairspray
    • Hair ties
    • Small brush
    • Anti-frizz serum

    5. Consider Your Dress Neckline

    Matching your hairstyle to your dress creates a balanced look.

    Examples:

    • High necklines pair well with updos.
    • Strapless dresses complement flowing hairstyles.
    • Off-shoulder dresses work beautifully with side-swept styles.

    Common Homecoming Hair Mistakes to Avoid

    Many students unintentionally sabotage their hairstyles before the event.

    Avoid these mistakes:

    Overusing Hairspray

    Too much product can make hair stiff and unnatural.

    Trying a New Style Last Minute

    Always test your hairstyle beforehand.

    Ignoring Weather Conditions

    Humidity and wind can affect your hairstyle significantly.

    Forgetting Hair Accessories

    Accessories can elevate simple styles instantly.

    Choosing Style Over Comfort

    If a hairstyle feels uncomfortable initially, it will likely become worse throughout the night.

    How to Choose the Best Homecoming Hairstyle

    When selecting your hairstyle, consider:

    Hair Length

    • Short Hair: Textured waves, sleek styles
    • Medium Hair: Half-up styles, low buns
    • Long Hair: Braids, ponytails, glamorous curls

    Face Shape

    • Round Face: High ponytails, layered waves
    • Oval Face: Almost any hairstyle
    • Square Face: Soft curls and loose styles
    • Heart Face: Side-swept waves and textured updos

    Dress Style

    Your hairstyle should complement—not compete with—your outfit.

    Personal Comfort

    Choose a style that makes you feel confident and comfortable all evening.

    Frequently Asked Questions

    What is the most popular homecoming hairstyle?

    Half-up half-down curls remain one of the most popular homecoming hairstyles because they are versatile, flattering, and suitable for many dress styles.

    Should I wear my hair up or down for homecoming?

    It depends on your dress, comfort level, and hair type. Updos offer elegance and practicality, while down hairstyles create a softer, romantic appearance.

    How can I make my homecoming hairstyle last all night?

    Use heat protectant, styling products, flexible-hold hairspray, and secure pins. Carry emergency touch-up supplies for quick fixes.

    Are braids good for homecoming?

    Yes. Braids add texture, visual interest, and durability while remaining elegant and fashionable.

    Can I do my homecoming hairstyle myself?

    Absolutely. Many styles like beach waves, high ponytails, bubble ponytails, and half-up curls are beginner-friendly and easy to recreate at home.

    Final Thoughts

    The perfect homecoming hairstyle does more than complete your outfit—it boosts your confidence and helps you feel your best throughout the night. Whether you choose glamorous Hollywood waves, a sophisticated low bun, a romantic braided crown, or a trendy bubble ponytail, the right style can make a lasting impression.

    Remember to choose a hairstyle that complements your dress, suits your hair type, and reflects your personality. Preparation, practice, and the right products can make all the difference.

    Ready to create your dream homecoming look? Save your favorite hairstyle from this list, do a trial run before the big day, and step into homecoming with confidence, elegance, and head-turning style.

    high quality, ultra realistic, 4k, sharp focus, glamorous Hollywood waves hairstyle on a teenage girl wearing an elegant evening dress, luxurious ballroom background, soft golden lighting, red carpet atmosphere, professional fashion photography, side angle portrait, glossy hair texture

    high quality, ultra realistic, 4k, sharp focus, high voluminous ponytail hairstyle with flowing curls, modern homecoming outfit, bright school dance venue, vibrant lighting, energetic and fashionable mood, three-quarter camera angle, beauty editorial style

    high quality, ultra realistic, 4k, sharp focus, braided crown hairstyle with soft romantic details, delicate floral accents, dreamy garden setting at sunset, warm natural light, princess-inspired aesthetic, front-facing portrait photography

    high quality, ultra realistic, 4k, sharp focus, elegant messy bun updo with face-framing strands, formal homecoming gown, luxury indoor venue, soft ambient lighting, sophisticated beauty shot, close-up camera angle, refined styling

    high quality, ultra realistic, 4k, sharp focus, half-up half-down curly hairstyle, flowing soft curls, sparkling dance hall background, flattering warm lighting, youthful and elegant look, professional beauty photography, medium shot

    high quality, ultra realistic, 4k, sharp focus, sleek low bun hairstyle with center part, minimalist evening fashion, modern upscale venue, dramatic studio lighting, polished and sophisticated appearance, side profile portrait

    high quality, ultra realistic, 4k, sharp focus, waterfall braid hairstyle cascading through long wavy hair, enchanting outdoor garden backdrop, sunset lighting, romantic feminine aesthetic, detailed braid texture, fashion photography angle

    high quality, ultra realistic, 4k, sharp focus, textured beach waves hairstyle, modern homecoming look, stylish rooftop setting, golden hour sunlight, natural movement in hair, lifestyle fashion photography, candid angle

    high quality, ultra realistic, 4k, sharp focus, curly updo hairstyle showcasing defined natural curls, elegant formal gown, luxury ballroom interior, soft spotlight lighting, voluminous texture, professional portrait photography

    high quality, ultra realistic, 4k, sharp focus, trendy bubble ponytail hairstyle with fashionable accessories, contemporary homecoming dress, vibrant event backdrop, colorful lighting effects, social media-ready beauty shot, dynamic camera perspective

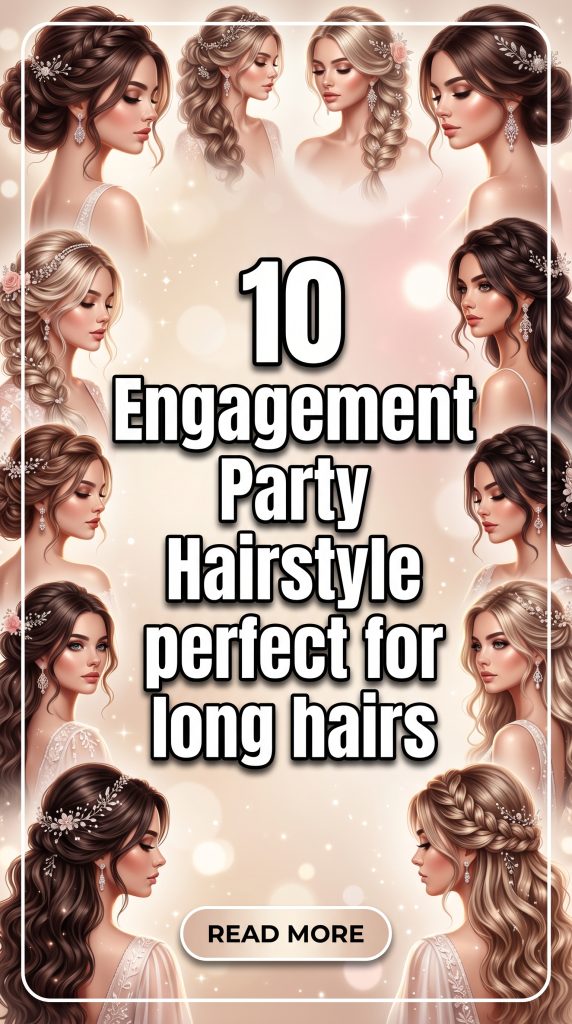
  • 10 Engagement Party Hairstyles Perfect for Long Hair

    10 Engagement Party Hairstyles Perfect for Long Hair

    Here is a publication-ready, SEO-optimized blog article in a reusable writing block.

    10 Engagement Party Hairstyles Perfect for Long Hair That Will Make You Look Stunning

    Meta Title: 10 Engagement Party Hairstyles Perfect for Long Hair

    Meta Description: Discover 10 stunning engagement party hairstyles for long hair with styling tips, benefits, and expert advice for a glamorous celebration look.

    SEO Keywords: engagement party hairstyle, long hair hairstyles, engagement hairstyles for long hair, party hairstyles, bridal hairstyles, elegant long hair looks, hairstyle ideas for engagement

    10 Engagement Party Hairstyles Perfect for Long Hair That Will Make You Look Stunning

    Introduction

    Your engagement party is one of the most memorable celebrations of your life. It’s the moment when family and friends gather to celebrate your love story, take countless photographs, and create unforgettable memories. Naturally, every detail matters—especially your hairstyle.

    If you have long hair, you’re fortunate to have endless styling possibilities. However, choosing the perfect engagement party hairstyle can feel overwhelming. With so many trendy updos, curls, braids, and glamorous styles available, finding the ideal look that complements your outfit, face shape, and personality isn’t always easy.

    The good news? We’ve done the hard work for you.

    In this comprehensive guide, you’ll discover 10 engagement party hairstyles perfect for long hair, complete with styling tips, benefits, suitability recommendations, and expert advice. Whether you’re aiming for timeless elegance, modern glamour, or romantic charm, you’ll find a hairstyle that perfectly matches your engagement celebration.

    Why Choosing the Right Engagement Hairstyle Matters

    Your hairstyle does more than complete your look. It can:

    • Enhance your facial features
    • Complement your engagement dress
    • Boost confidence
    • Improve photo appearance
    • Stay comfortable throughout the event
    • Express your personal style

    The right hairstyle balances beauty, comfort, and durability so you can enjoy your special day without worrying about touch-ups.

    Quick Comparison Table: Best Engagement Hairstyles for Long Hair

    HairstyleStyling TimeDifficultyMaintenanceBest For
    Hollywood Waves45-60 minMediumLowGlamorous look
    Braided Crown30-45 minMediumLowRomantic style
    Low Bun with Tendrils25-40 minEasyLowElegant events
    Half-Up Half-Down Curls35-50 minEasyMediumUniversal face shapes
    Fishtail Braid30-45 minMediumVery LowOutdoor parties
    Voluminous Ponytail20-30 minEasyLowModern chic
    Floral Boho Braid45-60 minMediumMediumGarden engagements
    Twisted Side Sweep25-35 minEasyLowSoft romantic look
    Messy Textured Bun20-30 minEasyLowCasual elegance
    Waterfall Braid Curls40-55 minMediumMediumFairytale-inspired style

    1. Hollywood Glam Waves

    Description

    Hollywood waves are timeless, luxurious, and effortlessly glamorous. This hairstyle features smooth, polished waves flowing beautifully through long hair.

    Best Suited For

    • Oval faces
    • Heart-shaped faces
    • Formal engagement parties
    • Evening celebrations

    Styling Tips

    • Use a large-barrel curling iron.
    • Brush curls gently after setting.
    • Apply shine serum for a glossy finish.
    • Finish with flexible-hold hairspray.

    Benefits

    • Looks elegant in photos.
    • Works with almost every dress style.
    • Creates a red-carpet appearance.
    • Never goes out of fashion.

    2. Braided Crown Hairstyle

    Description

    A braided crown wraps around the head like a delicate halo, creating a dreamy and romantic appearance.

    Best Suited For

    • Garden engagements
    • Outdoor events
    • Bohemian-inspired outfits
    • Oval and round faces

    Styling Tips

    • Add soft curls before braiding.
    • Pull sections gently for extra volume.
    • Decorate with pearl pins or small flowers.

    Benefits

    • Keeps hair secure all day.
    • Looks feminine and graceful.
    • Ideal for windy outdoor settings.

    3. Elegant Low Bun with Face-Framing Tendrils

    Description

    The low bun remains one of the most sophisticated engagement hairstyles for long hair. Soft strands around the face add romance and softness.

    Best Suited For

    • Traditional celebrations
    • Formal engagement dresses
    • All face shapes

    Styling Tips

    • Curl front tendrils slightly.
    • Keep the bun loose rather than tight.
    • Use decorative pins for added elegance.

    Benefits

    • Extremely comfortable.
    • Perfect for statement jewelry.
    • Long-lasting style.

    4. Half-Up Half-Down Romantic Curls

    Description

    This hairstyle combines the elegance of an updo with the beauty of flowing curls.

    Best Suited For

    • Any face shape
    • Indoor or outdoor events
    • Modern brides-to-be

    Styling Tips

    • Create loose curls.
    • Add volume at the crown.
    • Secure with a jeweled clip.

    Benefits

    • Provides versatility.
    • Enhances hair length.
    • Looks youthful and romantic.

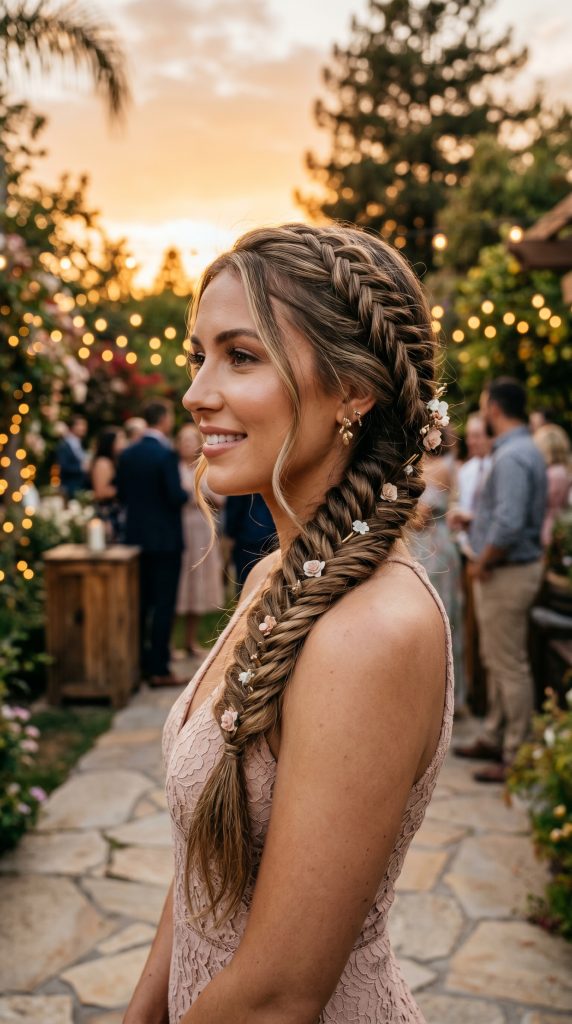
    5. Fishtail Braid Elegance

    Description

    The fishtail braid offers a stylish twist on traditional braids, creating intricate texture and visual interest.

    Best Suited For

    • Rustic themes
    • Beach engagements
    • Casual-luxury celebrations

    Styling Tips

    • Loosen sections for a fuller appearance.
    • Add texture spray before braiding.
    • Secure with invisible elastic bands.

    Benefits

    • Stays neat for hours.
    • Looks unique and fashionable.
    • Excellent for thick long hair.

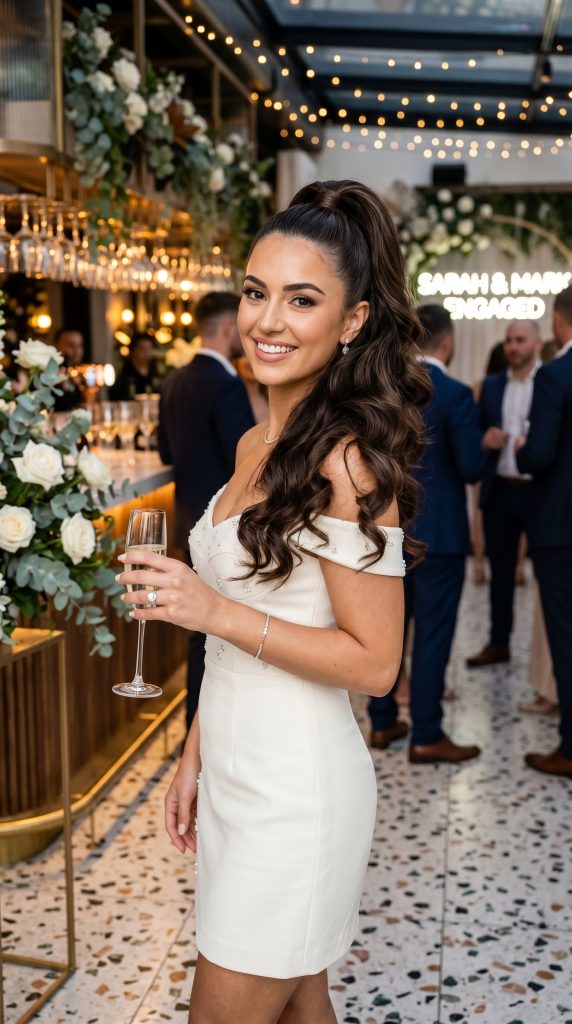
    6. Voluminous High Ponytail

    Description

    A high ponytail can be both classy and modern when styled with volume and polished waves.

    Best Suited For

    • Contemporary engagement parties
    • Fashion-forward brides
    • Younger audiences

    Styling Tips

    • Tease the crown slightly.
    • Wrap a hair section around the elastic.
    • Add loose curls to the ponytail.

    Benefits

    • Comfortable and practical.
    • Creates a youthful appearance.
    • Highlights facial features beautifully.

    7. Boho Floral Braid

    Description

    A bohemian floral braid blends natural beauty with effortless sophistication. Fresh flowers or floral accessories elevate the look.

    Best Suited For

    • Garden celebrations
    • Outdoor engagements
    • Nature-inspired themes

    Styling Tips

    • Use baby’s breath flowers.
    • Keep braids slightly loose.
    • Add texture spray beforehand.

    Benefits

    • Creates stunning photographs.
    • Feels romantic and trendy.
    • Perfect for daytime events.

    8. Twisted Side-Swept Hairstyle

    Description

    This elegant hairstyle sweeps hair to one side while incorporating beautiful twists and soft volume.

    Best Suited For

    • Asymmetrical dresses
    • Glamorous themes
    • Long layered hair

    Styling Tips

    • Curl hair first.
    • Pin twists securely.
    • Add sparkle with crystal accessories.

    Benefits

    • Highlights neck and shoulders.
    • Creates visual balance.
    • Offers sophisticated charm.

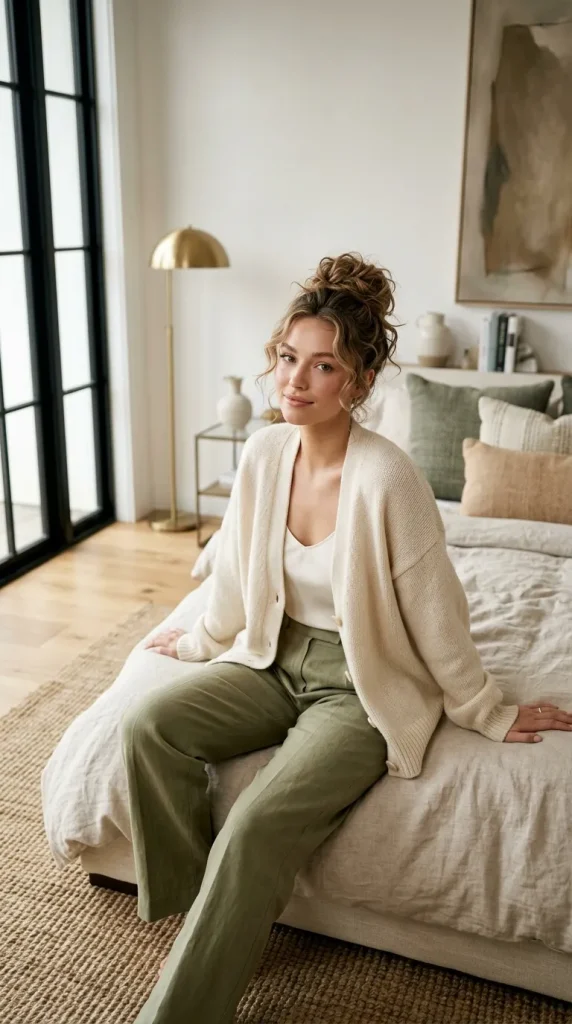
    9. Messy Textured Bun

    Description

    The messy bun has evolved into an elegant engagement hairstyle that combines effortless beauty with modern sophistication.

    Best Suited For

    • Casual-chic parties
    • Minimalist fashion
    • Contemporary celebrations

    Styling Tips

    • Use dry shampoo for texture.
    • Pull out a few face-framing strands.
    • Avoid making it overly structured.

    Benefits

    • Comfortable all evening.
    • Easy to maintain.
    • Creates a naturally beautiful appearance.

    10. Waterfall Braid with Loose Curls

    Description

    The waterfall braid creates a magical cascading effect, making it one of the most romantic hairstyles for long hair.

    Best Suited For

    • Fairytale-inspired themes
    • Romantic settings
    • Long, thick hair

    Styling Tips

    • Curl hair before braiding.
    • Use lightweight hairspray.
    • Add pearl accessories.

    Benefits

    • Creates stunning visual detail.
    • Looks beautiful from every angle.
    • Perfect for photography.

    Expert Tips for the Perfect Engagement Hairstyle

    Professional hairstylists recommend the following:

    1. Schedule a Hair Trial

    Always test your hairstyle before the engagement party.

    2. Consider the Weather

    Humidity, wind, and heat can impact hairstyle longevity.

    3. Match Your Hairstyle to Your Dress

    A heavily detailed neckline may pair better with an updo.

    4. Don’t Overuse Products

    Too much hairspray or serum can weigh down long hair.

    5. Prioritize Comfort

    You’ll wear your hairstyle for several hours, so comfort matters.

    Common Hairstyle Mistakes to Avoid

    Many people unknowingly make styling mistakes that affect their overall look.

    Avoid These Errors:

    • Choosing a style that doesn’t suit your face shape
    • Skipping a hairstyle trial
    • Ignoring weather conditions
    • Over-accessorizing hair
    • Using excessive hair products
    • Selecting trends that don’t fit your personality
    • Neglecting hair health before the event

    How to Make Your Engagement Hairstyle Last All Day

    Follow these simple steps:

    1. Wash hair one day before styling.
    2. Use volumizing products.
    3. Apply heat protectant.
    4. Secure with quality pins.
    5. Finish with long-lasting hairspray.
    6. Carry a small touch-up kit.

    Best Hair Accessories for Engagement Parties

    The right accessories can transform a beautiful hairstyle into an unforgettable one.

    Popular options include:

    • Pearl pins
    • Crystal clips
    • Floral crowns
    • Decorative combs
    • Rhinestone headbands
    • Gold hair vines
    • Elegant hair chains

    Choose accessories that complement rather than overpower your hairstyle.

    Frequently Asked Questions (FAQs)

    Which hairstyle is best for an engagement party with long hair?

    Hollywood waves and half-up half-down curls are among the most popular choices because they offer elegance, versatility, and timeless appeal.

    How far in advance should I plan my engagement hairstyle?

    Ideally, schedule a hair trial 2–4 weeks before the engagement party to ensure everything looks perfect.

    Are braids suitable for formal engagement parties?

    Yes. Styles like fishtail braids and braided crowns can appear incredibly elegant when paired with the right outfit and accessories.

    How can I make my hairstyle last longer?

    Use quality styling products, secure pins properly, and finish with a strong yet flexible hairspray.

    Should I wear accessories with my engagement hairstyle?

    Accessories can enhance your hairstyle, but they should complement your overall look rather than dominate it.

    Conclusion

    Choosing the perfect engagement party hairstyle for long hair can completely transform your appearance and confidence on your special day. Whether you love glamorous Hollywood waves, romantic waterfall braids, elegant buns, or trendy ponytails, the key is selecting a style that reflects your personality and complements your outfit.

    Remember, preparation is everything. Schedule a trial session, consider your event theme, and prioritize comfort alongside beauty. With the right hairstyle, you’ll look stunning from every angle and create unforgettable memories that last a lifetime.

    Ready to find your perfect engagement look? Save your favorite hairstyle from this list, share it with your hairstylist, and start planning your dream engagement party appearance today!

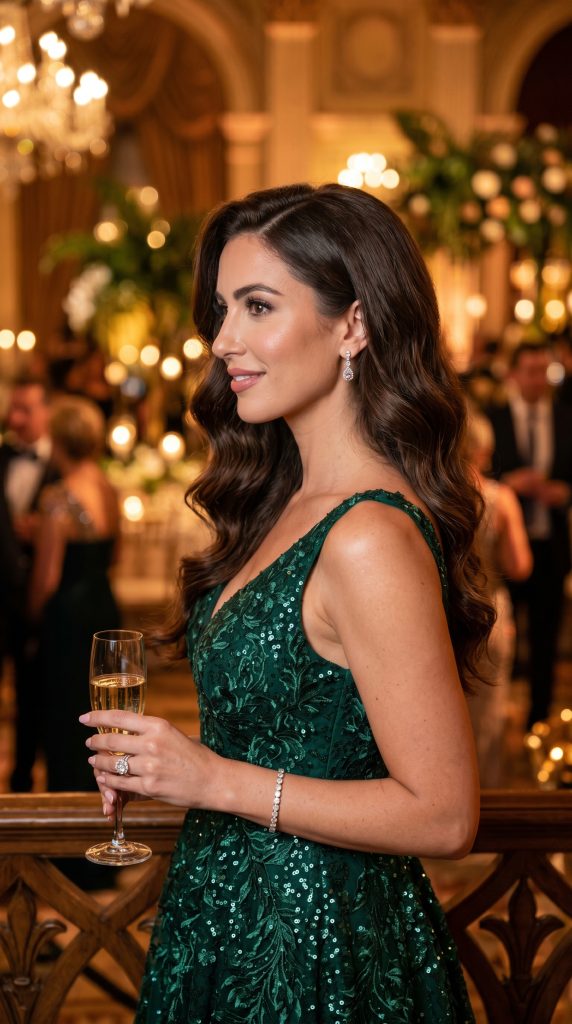
    High quality, ultra realistic, 4k, sharp focus, glamorous woman with long Hollywood waves, luxury engagement party venue, warm golden lighting, elegant evening gown, side profile camera angle, soft bokeh background, professional fashion photography

    High quality, ultra realistic, 4k, sharp focus, long-haired woman wearing a braided crown hairstyle, romantic garden engagement setting, natural sunlight, floral decorations, dreamy atmosphere, front-facing portrait, lifestyle photography

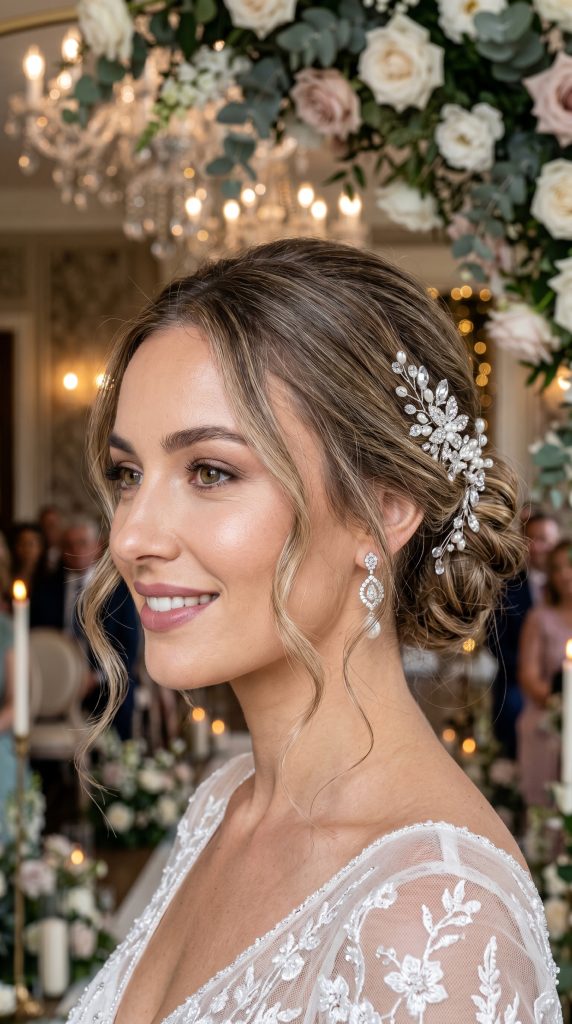
    High quality, ultra realistic, 4k, sharp focus, elegant low bun with soft face-framing tendrils, luxury engagement ceremony backdrop, crystal accessories, sophisticated makeup, close-up portrait shot, cinematic lighting

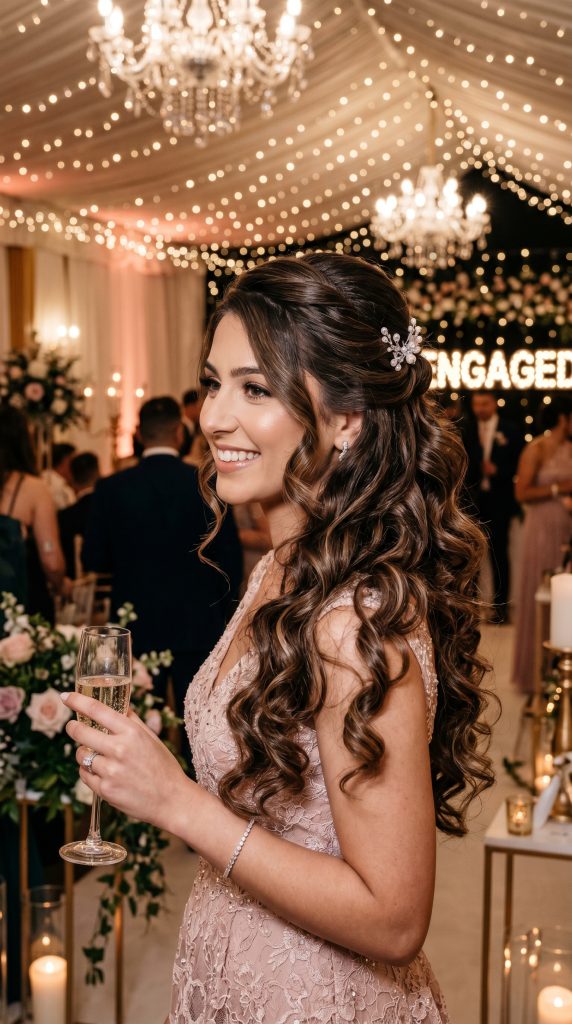
    High quality, ultra realistic, 4k, sharp focus, half-up half-down hairstyle with cascading curls, engagement celebration hall, sparkling lights in background, romantic ambiance, three-quarter camera angle, beauty editorial style

    High quality, ultra realistic, 4k, sharp focus, intricate fishtail braid on long thick hair, outdoor engagement event, sunset lighting, detailed braid texture, side-angle portrait, fashion magazine quality

    High quality, ultra realistic, 4k, sharp focus, voluminous high ponytail with soft curls, modern engagement party setting, contemporary fashion styling, bright elegant lighting, confident pose, professional beauty photography

    High quality, ultra realistic, 4k, sharp focus, boho floral braid with fresh flowers woven throughout long hair, garden engagement celebration, natural golden-hour sunlight, romantic atmosphere, close-up hairstyle showcase

    High quality, ultra realistic, 4k, sharp focus, twisted side-swept hairstyle, glamorous engagement venue, crystal hair accessories, luxury evening ambiance, dramatic side lighting, high-end fashion editorial photography

    High quality, ultra realistic, 4k, sharp focus, messy textured bun with soft loose strands, chic engagement gathering, modern minimalist decor, natural beauty styling, portrait angle, elegant lifestyle photography

    High quality, ultra realistic, 4k, sharp focus, waterfall braid flowing into loose curls, fairytale engagement party setting, sparkling lights, floral backdrop, romantic soft-focus atmosphere, rear and side camera angle, premium bridal photography

  • 10 Quick and Easy Hairstyles to Hide Greasy Hair

    You wake up late, rush to get ready, glance in the mirror, and realize your hair looks oily and flat. Whether you’re between wash days, trying to protect your hair from over-washing, or simply don’t have time for a full shampoo routine, greasy hair can quickly become frustrating.

    The good news?

    You don’t need to wash your hair every time it gets oily. In fact, some hairstyles work even better with second- or third-day hair. The natural oils provide extra grip, texture, and hold, making styling easier than freshly washed hair.

    In this guide, you’ll discover 10 quick and easy hairstyles to hide greasy hair, plus expert styling tips, common mistakes to avoid, and practical solutions that help you look polished and confident in just a few minutes.

    Why Hairstyles Are the Best Solution for Greasy Hair

    When your scalp produces excess oil, hair can appear:

    • Flat and lifeless
    • Clumpy near the roots
    • Shiny in unwanted places
    • Difficult to style

    Instead of constantly washing your hair, strategic hairstyles can:

    ✔ Conceal oily roots

    ✔ Add volume

    ✔ Create a fashionable look

    ✔ Save time

    ✔ Reduce heat styling

    ✔ Extend time between washes

    Quick Comparison Table: Best Hairstyles for Greasy Hair

    HairstyleTime RequiredDifficultyBest ForMaintenance
    Messy Bun2 MinutesEasyAll Hair TypesLow
    High Ponytail3 MinutesEasyLong HairLow
    Dutch Braids10 MinutesMediumMedium to Long HairMedium
    Low Sleek Bun5 MinutesEasyProfessional LooksLow
    Half-Up Top Knot4 MinutesEasyMedium HairLow
    Side Braid5 MinutesEasyLong HairLow
    Bubble Ponytail6 MinutesEasyThick HairMedium
    Headband Hairstyle2 MinutesVery EasyAll LengthsVery Low
    Claw Clip Twist3 MinutesEasyMedium HairLow
    Braided Crown10 MinutesMediumLong HairMedium

    1. The Classic Messy Bun

    Why It Works

    The messy bun is one of the most popular hairstyles for greasy hair because it disguises oily roots while looking intentionally effortless.

    Natural oils actually help keep the bun secure throughout the day.

    Best For

    • Medium hair
    • Long hair
    • Thick hair

    Styling Tips

    1. Gather hair into a high ponytail.
    2. Twist loosely.
    3. Wrap around itself.
    4. Secure with an elastic.
    5. Pull out a few face-framing pieces.

    Benefits

    • Takes less than 2 minutes
    • Hides oily roots instantly
    • Creates effortless volume
    • Suitable for casual and formal occasions

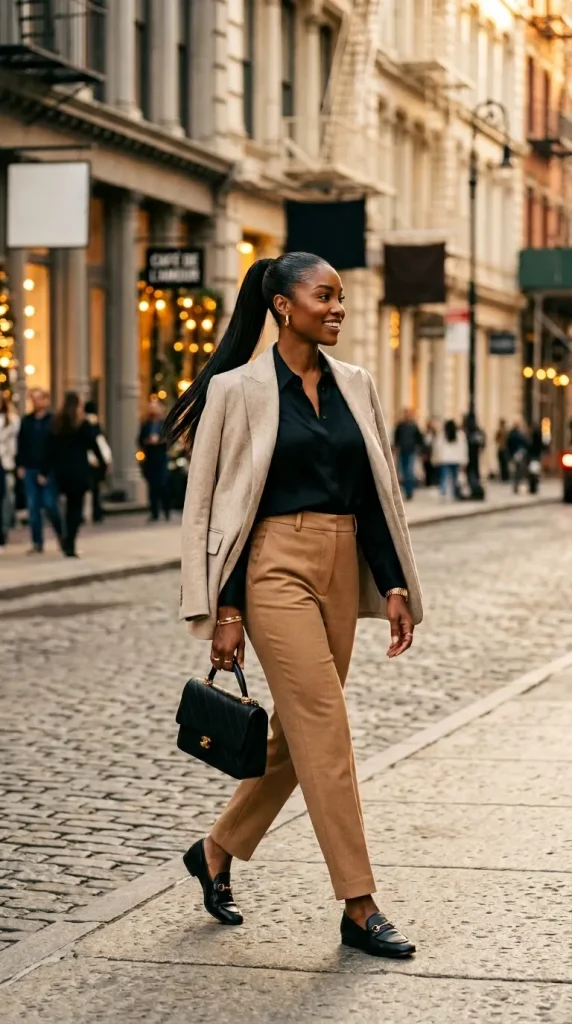
    2. High Ponytail

    Why It Works

    A sleek high ponytail turns greasy hair into an advantage. The natural shine from oils contributes to the polished appearance.

    Best For

    • Straight hair
    • Long hair
    • Thick hair

    Styling Tips

    • Brush hair upward firmly.
    • Smooth flyaways.
    • Wrap a small hair section around the elastic.

    Benefits

    • Professional appearance
    • Quick styling solution
    • Keeps hair off the face
    • Great for workouts

    3. Dutch Braids

    Why It Works

    Braids naturally camouflage oily roots because the texture distracts from any visible grease.

    Best For

    • Medium hair
    • Long hair
    • Active lifestyles

    Styling Tips

    • Create a center part.
    • Braid tightly along the scalp.
    • Secure both ends.

    Benefits

    • Lasts all day
    • Trendy and stylish
    • Perfect for sports
    • Adds texture

    4. Low Sleek Bun

    Why It Works

    When hair is already oily, embracing a sleek style often looks more intentional than trying to create volume.

    Best For

    • Office settings
    • Formal events
    • Straight hair

    Styling Tips

    • Create a middle part.
    • Smooth hair back.
    • Secure into a low bun.

    Benefits

    • Elegant appearance
    • Hides grease effectively
    • Professional look
    • Easy maintenance

    5. Half-Up Top Knot

    Why It Works

    The oiliest section of hair is usually around the crown. A half-up top knot conceals those roots while leaving the rest of the hair down.

    Best For

    • Shoulder-length hair
    • Medium hair
    • Layered cuts

    Styling Tips

    • Gather the top half of your hair.
    • Twist into a mini bun.
    • Leave the lower section loose.

    Benefits

    • Trendy and youthful
    • Adds height
    • Quick styling
    • Works with most hair textures

    6. Side Braid

    Why It Works

    A side braid creates texture and visual interest, drawing attention away from oily roots.

    Best For

    • Long hair
    • Thick hair
    • Wavy hair

    Styling Tips

    • Sweep hair to one side.
    • Loosely braid.
    • Gently pull sections apart for volume.

    Benefits

    • Romantic appearance
    • Beginner-friendly
    • Comfortable all day
    • Great for everyday wear

    7. Bubble Ponytail

    Why It Works

    The bubble ponytail creates multiple sections that distract from greasy roots while adding volume.

    Best For

    • Long hair
    • Thick hair
    • Trend-conscious women

    Styling Tips

    1. Create a ponytail.
    2. Add elastics every few inches.
    3. Gently pull each section outward.

    Benefits

    • Fashion-forward look
    • Instagram-worthy style
    • Easy to create
    • Adds dimension

    8. Headband Hairstyle

    Why It Works

    Headbands instantly cover oily roots while adding a stylish accessory to your look.

    Best For

    • Short hair
    • Medium hair
    • Long hair

    Styling Tips

    • Choose a wide headband.
    • Position it near the hairline.
    • Add loose waves for texture.

    Benefits

    • Fastest option
    • No styling skills required
    • Works with any outfit
    • Great travel solution

    9. Claw Clip Twist

    Why It Works

    Claw clips are fashionable again and perfect for hiding greasy roots while creating a chic updo.

    Best For

    • Medium hair
    • Long hair
    • Thick hair

    Styling Tips

    • Gather hair at the back.
    • Twist upward.
    • Secure with a large claw clip.

    Benefits

    • Comfortable
    • Heat-free
    • Trendy
    • Gentle on hair

    10. Braided Crown

    Why It Works

    A braided crown distributes attention across the entire hairstyle rather than focusing on oily roots.

    Best For

    • Long hair
    • Special occasions
    • Romantic looks

    Styling Tips

    • Create two braids.
    • Wrap them around your head.
    • Pin securely.

    Benefits

    • Elegant appearance
    • Long-lasting style
    • Perfect for events
    • Hides roots effectively

    Pro Tips for Making Greasy Hair Look Fresh

    Use Dry Shampoo Correctly

    Apply dry shampoo:

    • Before bed
    • Not after hair becomes extremely oily
    • Mainly at the roots

    Add Texture

    Use:

    • Texture spray
    • Sea salt spray
    • Volumizing powder

    Change Your Part

    Switching your hair part can instantly create:

    • More volume
    • Less visible oil
    • A refreshed appearance

    Use Accessories

    Try:

    • Headbands
    • Scarves
    • Claw clips
    • Decorative pins

    These accessories divert attention from greasy roots.

    Common Mistakes to Avoid

    1. Overusing Dry Shampoo

    Too much product can create buildup and make hair appear dull.

    2. Touching Your Hair Constantly

    Hands transfer oils to your hair and scalp.

    3. Tight Hairstyles Every Day

    Repeated tension can stress the hairline.

    4. Applying Conditioner to Roots

    Conditioner should primarily be applied to mid-lengths and ends.

    5. Washing Hair Too Frequently

    Overwashing can cause the scalp to produce even more oil.

    How to Prevent Greasy Hair Between Washes

    Follow These Habits

    • Wash pillowcases regularly
    • Clean brushes weekly
    • Avoid excessive heat styling
    • Use lightweight hair products
    • Drink plenty of water
    • Maintain a balanced diet

    These small changes can help extend the life of your hairstyle and reduce oil buildup.

    Featured Snippet: What Is the Best Hairstyle to Hide Greasy Hair?

    The best hairstyle to hide greasy hair is a messy bun because it conceals oily roots, creates volume, takes less than two minutes to style, and works for almost every hair type. Other excellent options include a sleek low bun, high ponytail, Dutch braids, and claw clip twists.

    Frequently Asked Questions

    What hairstyle hides greasy hair best?

    A messy bun is widely considered the best hairstyle for greasy hair because it disguises oily roots while looking stylish and intentional.

    Is greasy hair easier to style?

    Yes. Natural oils provide grip and texture, making many updos, braids, and buns easier to create and maintain.

    Can I use dry shampoo every day?

    It’s best to use dry shampoo occasionally rather than daily to avoid product buildup and scalp irritation.

    How long can I go without washing my hair?

    This varies by hair type, but many people comfortably go 2–4 days between washes using proper styling techniques.

    Do braids help hide oily hair?

    Absolutely. Braids distribute hair evenly and conceal oily roots while adding texture and style.


    Conclusion

    Greasy hair doesn’t have to ruin your day.

    With these 10 quick and easy hairstyles to hide greasy hair, you can transform oily roots into stylish, confidence-boosting looks in just minutes. From messy buns and sleek ponytails to Dutch braids and claw clip twists, there are plenty of options that work with your hair rather than against it.

    The next time you’re tempted to wash your hair simply because it looks oily, try one of these hairstyles first. You may discover that your best hair day happens on day two or three.

    Which hairstyle are you excited to try first? Save this guide, share it with friends, and keep it handy for every busy morning or unexpected bad hair day.

  • 10 Creative Cut and Craft Ideas

    10 Creative Cut and Craft Ideas

    In a world dominated by digital screens, there is something incredibly satisfying about working with your hands. Crafting isn’t just a great way to pass the time; it is a therapeutic activity that reduces stress, boosts brain productivity, and allows you to create personalized decor or gifts.

    Whether you are a seasoned crafter looking for fresh inspiration or a beginner picking up a pair of scissors for the first time, these 10 unique “cut and craft” ideas will help you unlock your inner artist. Grab your cutting mats, scissors, and glue—let’s get crafting!

    1. Intricate Papercut Silhouette Art

    Papercutting is an ancient art form that requires minimal supplies but yields breathtaking results. By cutting away negative space from a single sheet of paper, you can create stunning silhouettes of landscapes, animals, or portraits.

    • Materials Needed: Black cardstock, a sharp precision craft knife, a cutting mat, and a bright background paper.
    • How-to Tip: Always start cutting from the smallest, most intricate details in the center and work your way outward. This keeps the paper structurally sound while you handle it.

    2. Upscaled Cardboard Geometric Wall Panels

    Don’t throw away your delivery boxes! You can transform standard corrugated cardboard into modern, 3D geometric wall art that looks like high-end boutique decor.

    • Materials Needed: Cardboard boxes, a utility knife, a ruler, hot glue, and textured metallic paint.
    • How-to Tip: Cut matching geometric shapes (like triangles or hexagons), layer them on top of each other using small cardboard spacers to create depth, and spray paint them in matte black, gold, or terracotta.

    3. Pressed Flower and Leaf Layered Bookmarks

    Bring a piece of nature indoors with beautiful, transparent bookmarks. This craft combines the gentle art of foraging with simple cutting and laminating techniques.

    • Materials Needed: Dried pressed flowers, clear contact paper or laminating sheets, scissors, a hole punch, and a ribbon.
    • How-to Tip: Arrange your dried flora on one side of the sticky contact paper, seal it with the second sheet, press firmly to remove air bubbles, and carefully cut out your desired bookmark shapes.

    4. Repurposed Denim Patchwork Tote Bags

    If you have old jeans that no longer fit or are too worn out to donate, turn them into a stylish, durable tote bag. Denim is incredibly sturdy and perfect for upcycling projects.

    • Materials Needed: Old denim jeans, fabric scissors, fabric glue or a sewing kit, and pins.
    • How-to Tip: Cut the denim into uniform squares or rectangles. Arrange them in an eye-catching patchwork pattern before joining them together to form the front and back panels of your new bag.

    5. Shadow Box Paper Dioramas

    Create a miniature, multi-layered world inside a picture frame. By cutting distinct foreground, midground, and background layers, you build a beautiful 3D illusion.

    • Materials Needed: A deep shadow box frame, white cardstock, foam spacer tape, and small LED fairy lights.
    • How-to Tip: Cut out layers depicting a scene—like a forest with deer or a cozy city skyline. Use foam tape between each layer to separate them, and hide fairy lights at the back to make the entire scene glow.

    6. Felt Succulent and Floral Arrangements

    Real plants can be tricky to keep alive, but felt succulents look gorgeous forever. Felt is a forgiving material to cut because it doesn’t fray at the edges.

    • Materials Needed: Craft felt sheets (in shades of green, pink, and cream), sharp fabric scissors, hot glue, and a small ceramic pot.
    • How-to Tip: Cut teardrop-shaped pieces of felt in graduating sizes. Roll the smallest piece tightly to form the center bud, then glue the larger petals around it, overlapping them slightly until a plump succulent forms.

    7. Pop-Up Architectural Greeting Cards

    Elevate your gift-giving with a handmade card that leaps to life when opened. Pop-up cards rely on precise parallel cuts and strategic folding.

    • Materials Needed: Two contrasting colors of heavy-weight paper, a craft knife, and a scoring tool.
    • How-to Tip: Draw your design on the inner card. Make horizontal cuts for the steps or structures, then gently use a scoring tool to invert the folds so they push forward when the card opens.

    8. Vinyl Decal Mug Customization

    Personalized mugs make fantastic gifts. Using adhesive vinyl sheets, you can cut out custom quotes, minimalist shapes, or intricate monogram letters to completely revamp plain ceramic ware.

    • Materials Needed: Plain ceramic mugs, permanent adhesive vinyl sheets, a craft knife or cutting plotter, and transfer tape.
    • How-to Tip: Clean the mug thoroughly with rubbing alcohol before applying your cut vinyl. This removes oily fingerprints and ensures the adhesive bonds perfectly to the ceramic.

    9. Mosaic Coasters from Broken Ceramics

    Turn shattered plates, tiles, or old CDs into beautiful, reflective drink coasters. This craft uses a “cut and piece” method to form intricate patterns out of fragments.

    • Materials Needed: Plain wooden coaster blanks, mosaic nippers (or heavy-duty cutters), old colorful plates, mosaic grout, and glue.
    • How-to Tip: Carefully cut your ceramic pieces into small, irregular shards. Arrange them like a puzzle on the wooden base, glue them down, let them dry, and fill the gaps with grout for a smooth finish.

    10. Woven Paper Basketry

    You can create functional, lovely storage baskets using nothing but strips of colored construction paper or old magazine pages.

    • Materials Needed: Heavy construction paper, scissors, double-sided tape, and paper clips.
    • How-to Tip: Cut the paper into long, uniform strips about one inch wide. Fold each strip in half lengthwise to give it extra strength, then use a classic under-over weaving technique to build the base and walls of your basket.

    Crafter’s Safety Note: Always use a self-healing cutting mat to protect your furniture, and keep your fingers clear of the cutting path when working with precision knives or heavy utility cutters.

  • 10 Trendy Spring Outfit Ideas for Women

    Spring is finally here, bringing warmer weather, blooming flowers, and the perfect opportunity to refresh your wardrobe. After months of layering heavy coats and sweaters, many women struggle with finding outfits that feel stylish, comfortable, and suitable for unpredictable spring temperatures.

    The good news? Creating fashionable spring looks doesn’t require an entirely new wardrobe. With the right outfit combinations, colors, and styling techniques, you can effortlessly embrace the season while staying comfortable and confident.

    In this guide, you’ll discover 10 trendy spring outfit ideas for women that are versatile, practical, and fashion-forward. Whether you’re heading to brunch, work, a weekend getaway, or simply enjoying a sunny afternoon, these outfit inspirations will help you look your best throughout the season.

    Why Spring Fashion Matters

    Spring fashion is all about balance. The season often brings fluctuating temperatures, making layering an essential styling strategy.

    Benefits of a well-planned spring wardrobe include:

    • Greater outfit versatility
    • Easier morning styling decisions
    • Improved comfort throughout the day
    • A fresh and modern appearance
    • Better use of existing wardrobe pieces

    By incorporating trendy spring essentials, you can maximize style while minimizing wardrobe stress.

    Spring Outfit Comparison Table

    Outfit IdeaStyling DifficultyMaintenanceBest Occasion
    Floral Midi DressEasyLowBrunch, Dates
    Blazer and JeansEasyLowOffice, Casual Meetings
    Monochrome Neutral LookMediumLowEveryday Chic
    Denim Jacket LayeringEasyVery LowWeekend Outings
    Wide-Leg TrousersMediumMediumWork, Events
    Matching Co-Ord SetEasyLowTravel, Lunch Dates
    Knit Top and SkirtMediumMediumSemi-Formal Gatherings
    White Shirt and ShortsEasyLowCasual Days
    Lightweight Trench OutfitMediumLowTransitional Weather
    Pastel Power DressingMediumMediumOffice, Special Events

    1. Floral Midi Dress with White Sneakers

    Description

    Nothing says spring quite like floral prints. A floral midi dress paired with clean white sneakers creates the perfect blend of feminine elegance and casual comfort.

    Soft floral patterns instantly capture the essence of spring while remaining timeless and versatile.

    Best For

    • Women of all ages
    • Casual outings
    • Brunch dates
    • Weekend shopping trips

    Styling Tips

    • Choose pastel floral prints for a softer look.
    • Add a denim jacket for cooler mornings.
    • Wear minimal jewelry for a fresh appearance.

    Benefits

    • Comfortable all-day wear
    • Easy to style
    • Suitable for multiple occasions
    • Creates an effortlessly chic look

    2. Oversized Blazer with Straight-Leg Jeans

    Description

    The oversized blazer trend continues to dominate spring fashion. Pairing a structured blazer with straight-leg jeans creates a polished yet relaxed outfit.

    This combination works exceptionally well for transitional weather.

    Best For

    • Working professionals
    • Business casual environments
    • Coffee meetings

    Styling Tips

    • Roll up blazer sleeves slightly.
    • Choose neutral colors like beige or cream.
    • Add loafers or ankle boots.

    Benefits

    • Professional appearance
    • Highly versatile
    • Easy layering option
    • Comfortable and modern

    3. Monochrome Neutral Outfit

    Description

    Neutral monochrome outfits remain one of the biggest spring fashion trends. Wearing shades of beige, ivory, cream, or taupe creates an elegant and expensive-looking aesthetic.

    Best For

    • Minimalist fashion lovers
    • Everyday wear
    • Travel outfits

    Styling Tips

    • Mix different textures.
    • Add gold accessories.
    • Include a statement handbag.

    Benefits

    • Timeless style
    • Easy outfit coordination
    • Sophisticated appearance
    • Works for nearly any occasion

    4. Denim Jacket with a Maxi Dress

    Description

    A classic denim jacket layered over a flowy maxi dress perfectly balances comfort and style.

    This look combines casual and feminine elements while providing practical layering for changing temperatures.

    Best For

    • Weekend outings
    • Outdoor events
    • Spring vacations

    Styling Tips

    • Choose a cropped denim jacket.
    • Pair with white sneakers or sandals.
    • Add oversized sunglasses.

    Benefits

    • Comfortable layering
    • Flattering silhouette
    • Highly versatile
    • Great for unpredictable weather

    5. Wide-Leg Trousers with a Fitted Top

    Description

    Wide-leg trousers offer elegance, comfort, and sophistication. Pairing them with a fitted top creates a balanced silhouette that feels modern and stylish.

    Best For

    • Office environments
    • Formal lunches
    • Fashion-forward women

    Styling Tips

    • Tuck in your top.
    • Wear pointed-toe shoes.
    • Choose pastel shades for spring.

    Benefits

    • Lengthens the appearance of legs
    • Comfortable fit
    • Stylish and professional
    • On-trend silhouette

    6. Matching Co-Ord Set

    Description

    Co-ord sets continue to dominate women’s fashion because they make getting dressed incredibly easy while looking polished.

    Matching tops and bottoms create a coordinated appearance with minimal effort.

    Best For

    • Travel
    • Casual gatherings
    • Weekend brunches

    Styling Tips

    • Add layered necklaces.
    • Choose floral or pastel patterns.
    • Pair with trendy sneakers.

    Benefits

    • Quick outfit solution
    • Stylish appearance
    • Easy to accessorize
    • Comfortable for all-day wear

    7. Lightweight Knit Top with Satin Skirt

    Description

    Combining textures is one of the easiest ways to elevate spring fashion. A lightweight knit top paired with a satin midi skirt creates a sophisticated yet comfortable outfit.

    Best For

    • Dinner dates
    • Semi-formal occasions
    • Fashion enthusiasts

    Styling Tips

    • Half-tuck the knit top.
    • Add delicate jewelry.
    • Wear neutral-toned heels.

    Benefits

    • Elegant appearance
    • Comfortable movement
    • Versatile styling options
    • Perfect seasonal transition look

    8. White Button-Down Shirt with Tailored Shorts

    Description

    A crisp white button-down shirt paired with tailored shorts creates a clean and refined spring outfit.

    This combination feels effortlessly stylish while remaining practical.

    Best For

    • Warm spring days
    • Casual office settings
    • City outings

    Styling Tips

    • Roll up sleeves casually.
    • Add a woven belt.
    • Choose loafers or sandals.

    Benefits

    • Classic timeless style
    • Breathable and comfortable
    • Easy to customize
    • Highly versatile

    9. Lightweight Trench Coat with Basics

    Description

    A lightweight trench coat remains one of the smartest investments for spring fashion.

    Layering it over a simple t-shirt and jeans instantly upgrades your look.

    Best For

    • Transitional weather
    • Daily wear
    • Travel

    Styling Tips

    • Stick to neutral trench colors.
    • Add structured accessories.
    • Wear clean white sneakers.

    Benefits

    • Weather protection
    • Timeless elegance
    • Easy layering
    • Sophisticated finish

    10. Pastel Power Dressing

    Description

    Pastel shades dominate spring runways every year. Think lavender, mint green, baby blue, blush pink, and butter yellow.

    A pastel blazer set or coordinated outfit creates a bold yet feminine statement.

    Best For

    • Office wear
    • Special occasions
    • Fashion-forward styling

    Styling Tips

    • Pair with nude accessories.
    • Keep makeup fresh and natural.
    • Use one dominant pastel shade.

    Benefits

    • Seasonal relevance
    • Eye-catching style
    • Feminine sophistication
    • Modern appearance

    Expert Styling Tips for Spring Fashion

    Fashion experts recommend focusing on versatility rather than quantity.

    Pro Tips

    1. Invest in quality basics.
    2. Layer strategically.
    3. Choose breathable fabrics.
    4. Incorporate seasonal colors.
    5. Prioritize comfort alongside style.
    6. Mix casual and dressy elements.
    7. Keep accessories minimal but intentional.

    Spring Wardrobe Essentials Checklist

    Every woman should consider having these spring staples:

    • White sneakers
    • Denim jacket
    • Lightweight trench coat
    • Floral dress
    • Neutral blazer
    • Wide-leg trousers
    • White button-down shirt
    • Midi skirt
    • Crossbody bag
    • Lightweight knitwear

    These essentials can be mixed and matched to create dozens of fashionable spring outfits.

    Common Spring Fashion Mistakes to Avoid

    Even stylish outfits can miss the mark when certain mistakes occur.

    Avoid These Errors

    1. Wearing Heavy Winter Fabrics

    Spring calls for lighter, breathable materials.

    2. Ignoring Layering

    Weather can change quickly throughout the day.

    3. Overaccessorizing

    Keep accessories balanced and intentional.

    4. Choosing the Wrong Footwear

    Select practical shoes suitable for walking and varying temperatures.

    5. Following Trends Blindly

    Wear trends that complement your body type and personal style.

    How to Build a Versatile Spring Capsule Wardrobe

    A capsule wardrobe simplifies styling while maximizing outfit options.

    Recommended Formula

    • 3 jackets
    • 5 tops
    • 3 dresses
    • 3 bottoms
    • 2 pairs of shoes
    • 2 handbags

    This simple structure allows countless outfit combinations while reducing clutter.

    Frequently Asked Questions

    What colors are trending for spring outfits in 2026?

    Popular spring colors include lavender, butter yellow, blush pink, mint green, baby blue, and soft neutrals.

    How can I dress stylishly during unpredictable spring weather?

    Layer lightweight pieces such as denim jackets, blazers, and trench coats that can easily be removed throughout the day.

    What shoes work best with spring outfits?

    White sneakers, loafers, ballet flats, ankle boots, and strappy sandals are excellent choices.

    Are floral prints still fashionable?

    Yes. Floral prints remain a timeless spring staple and continue to appear in seasonal fashion collections.

    What is the most versatile spring outfit?

    An oversized blazer paired with straight-leg jeans and white sneakers offers exceptional versatility for various occasions.


    Final Thoughts

    Spring is the perfect season to refresh your style and experiment with new fashion combinations. These 10 trendy spring outfit ideas for women offer a balance of comfort, elegance, and practicality while helping you embrace current fashion trends with confidence.

    Start by incorporating one or two of these outfit ideas into your wardrobe and gradually build a collection of versatile spring essentials. Small changes can make a significant difference in your overall style.

    Which spring outfit idea is your favorite? Share your go-to spring fashion look and inspire others to refresh their seasonal wardrobe today.

    A stylish woman wearing a floral midi dress with delicate pastel flowers, white sneakers, blooming cherry blossom park background, golden spring sunlight, natural outdoor setting, full body fashion photography, eye-level angle, high quality, ultra realistic, 4k, sharp focus

    A confident woman wearing an oversized beige blazer with straight-leg blue jeans, modern city street background, soft spring daylight, editorial fashion shoot, full body view, luxury fashion magazine style, high quality, ultra realistic, 4k, sharp focus

    A fashionable woman dressed in a monochrome neutral beige outfit, elegant minimalist aesthetic, luxury urban environment, clean architectural background, natural spring lighting, sophisticated fashion photography, full body angle, high quality, ultra realistic, 4k, sharp focus

    A stylish woman wearing a blue denim jacket over a flowing floral maxi dress, outdoor garden setting with colorful flowers, bright spring sunshine, candid walking pose, lifestyle fashion photography, high quality, ultra realistic, 4k, sharp focus

    A modern woman wearing wide-leg pastel trousers with a fitted top, elegant city plaza background, contemporary fashion editorial style, soft daylight, full body portrait, high quality, ultra realistic, 4k, sharp focus

    A chic woman wearing a matching pastel co-ord set, trendy cafe terrace background, spring flowers surrounding the scene, modern street style photography, dynamic pose, high quality, ultra realistic, 4k, sharp focus

    A sophisticated woman wearing a lightweight knit sweater with a satin midi skirt, upscale outdoor restaurant setting, romantic spring atmosphere, natural lighting, fashion magazine shoot, high quality, ultra realistic, 4k, sharp focus

    A stylish woman wearing a crisp white button-down shirt with tailored shorts, sunny European-style street background, spring travel aesthetic, relaxed luxury fashion photography, high quality, ultra realistic, 4k, sharp focus

    A fashionable woman wearing a lightweight beige trench coat over casual basics, city sidewalk during spring, elegant movement, luxury street style editorial photography, natural daylight, high quality, ultra realistic, 4k, sharp focus

    A confident woman wearing a pastel lavender power suit, modern office building background, sophisticated business fashion aesthetic, soft spring lighting, professional fashion photography, full body composition, high quality, ultra realistic, 4k, sharp focus